Home › Forum › Ask A Member › Painting/lettering knobs
- This topic has 19 replies, 14 voices, and was last updated 7 years, 1 month ago by
 The Boat House.
-
AuthorPosts
-
January 23, 2017 at 2:22 am #6170
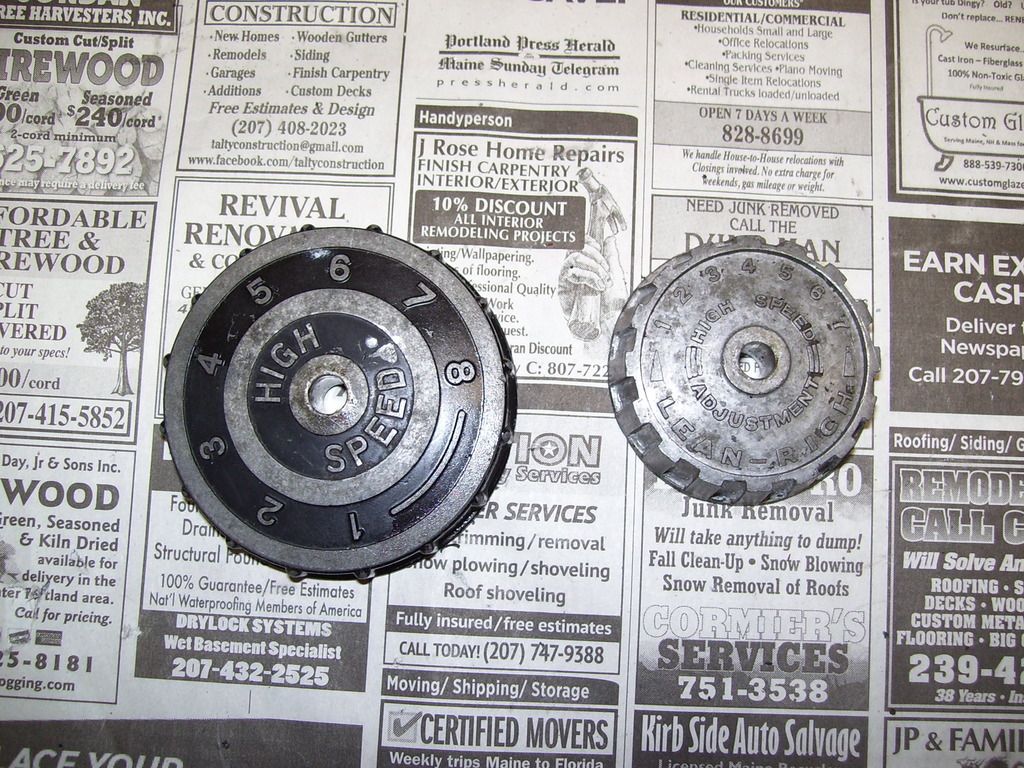
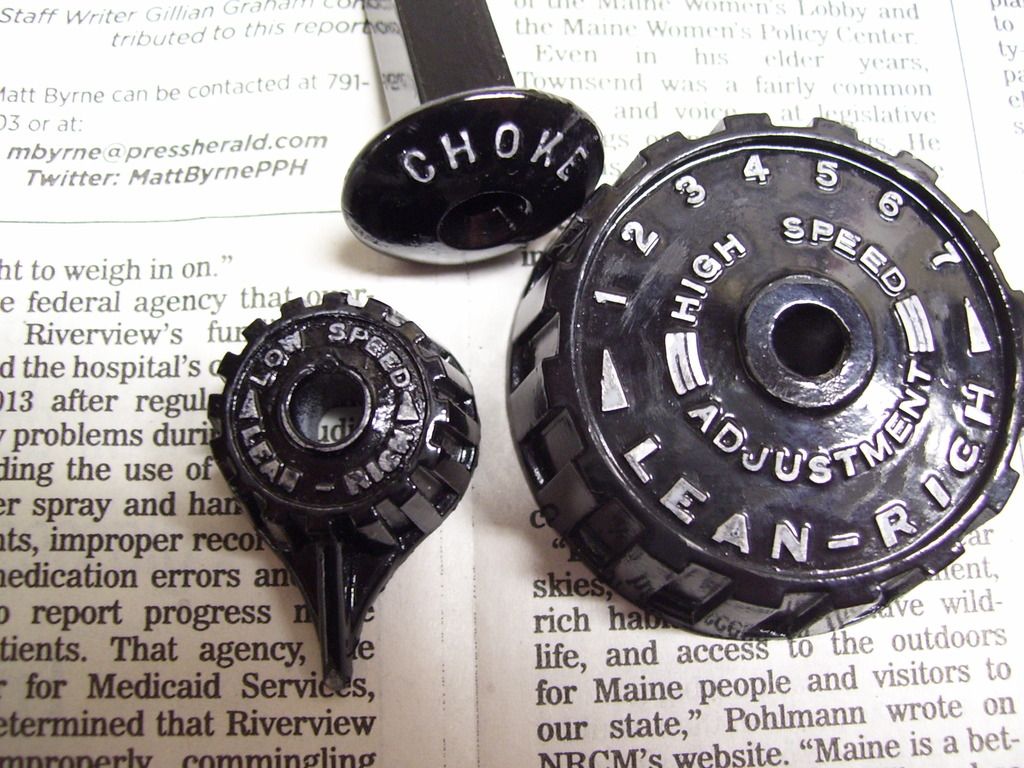
Does anyone know how to paint the Evinrude knob on the right so that trim and lettering stands out similar to the Johnson knob on the left?
Thank you.January 23, 2017 at 2:26 am #51532Very very very thin paint. Drip it with an eye dropper or pipette. Do it slowly so that you don’t get all of it covered at once, I’d play with putting it on an angle or something so that it found it’s level on one portion of the knob, let that dry till you get tacky, then rotate it and do it again.
Additionally, you could also paint it, then wipe it off with a cloth with some sort of solvent on it.
January 23, 2017 at 2:29 am #51533I am guessing you want the natural metal highlights ??
from a sign painters approach, I would spray paint the whole knob
with Rust-Oleum automotive primer, then gloss black. 2 or 3 light coats of each.
wait 24 hours – then glue some wet-n-dry 320 grit sandpaper to a small flat board (1"x4"x1/4")
and gently sand off the paint on the raised elements under running water.
Glue 600 grit to the other side of the board to poilish it up to shiny aluminum letters.
you will be surprised at how easy it is – – – then do your other knobs to match.
of course preparation is the key to any good paint job: clean, degrease, vinegar etch and paint.
I have some 1/2" MDO plywood sign material that I glue a full sheet of 320 grit paper to one side
and 600 grit to the other side….. after rolling it down smooth and solid, I run it through the
table saw to make different sizes of sanding boards. cheap and very effective.
1.5" wide x 1/4" aluminum flat bar cut to the desired length is the best.
if you need some round sanding blocks, glue the sandpaper to pieces of PVC pipe of different diameters.
another trick is to use 2" square aluminum tubing – then you can have 4 grits on one block.
when the paper wears out, just glue another sheet on top of it. (3M spray glue).
Here are some of my sanding blocks.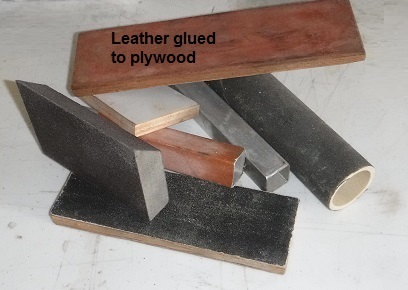
if you mess up – repeat the process.
if you want black background with gloss white letters, I would suggest a paint pen.
available at wal-mart, staples, jo-ann fabrics, most office and craft stores.
they come in fine, medium, large and bold tips. Oil based paint in a pen.
.
January 23, 2017 at 2:49 am #51534Yes, I want the metal highlights. I have primer/top coat/wet-n-dry so will go with that. Thank you Johnny and Mr. Asa.
January 23, 2017 at 6:08 am #51542Charlie,
Lets see it when you finish if you don’t mind. I have a few I might try.
January 23, 2017 at 1:58 pm #51555you want to make it look good. mount a bolt in the center then put it in a drill. spin it with the drill while using the sand paper.
January 23, 2017 at 2:33 pm #51559Ken Hall has NOS knobs listed on E-Bay right now with perfect lettering, and very reasonable.
January 23, 2017 at 2:42 pm #51561Prime n paint first…then use a block and 400 grit paper to lighly sand the raised areas. On those knobs I try to go in the direction of the circle to give a nice bright…brushed look. You could proceed through various fine grits to get a smoother…shinier finish though.
Greg
March 9, 2017 at 3:43 am #54034Well, here is the result. First try and I will go with that for now. Lesson learned is the wet/dry must be firmly glued to the block. Otherwise it is easy to scratch the background. Also the small low relief letters are most difficult.
Thank you Johnny in Fl.
 March 9, 2017 at 6:50 pm #54049
Charlie,
Those look great!
-
AuthorPosts


- You must be logged in to reply to this topic.