Home › Forum › Ask A Member › Johnson JW11 Carb Rebuild Kit
- This topic has 7 replies, 5 voices, and was last updated 7 years, 1 month ago by
david-bartlett.
-
AuthorPosts
-
March 4, 2017 at 10:24 pm #6459
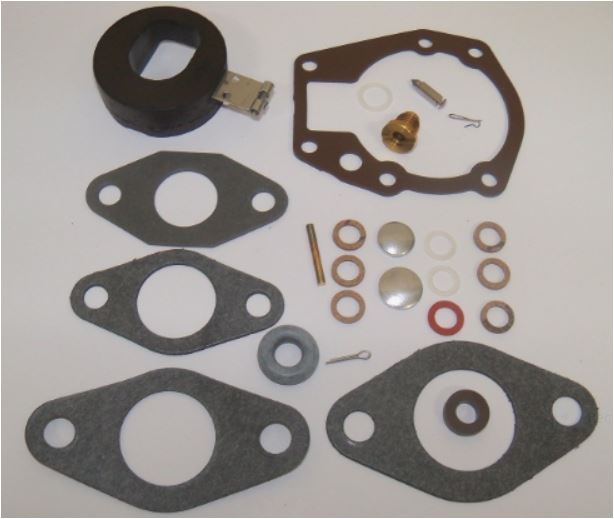
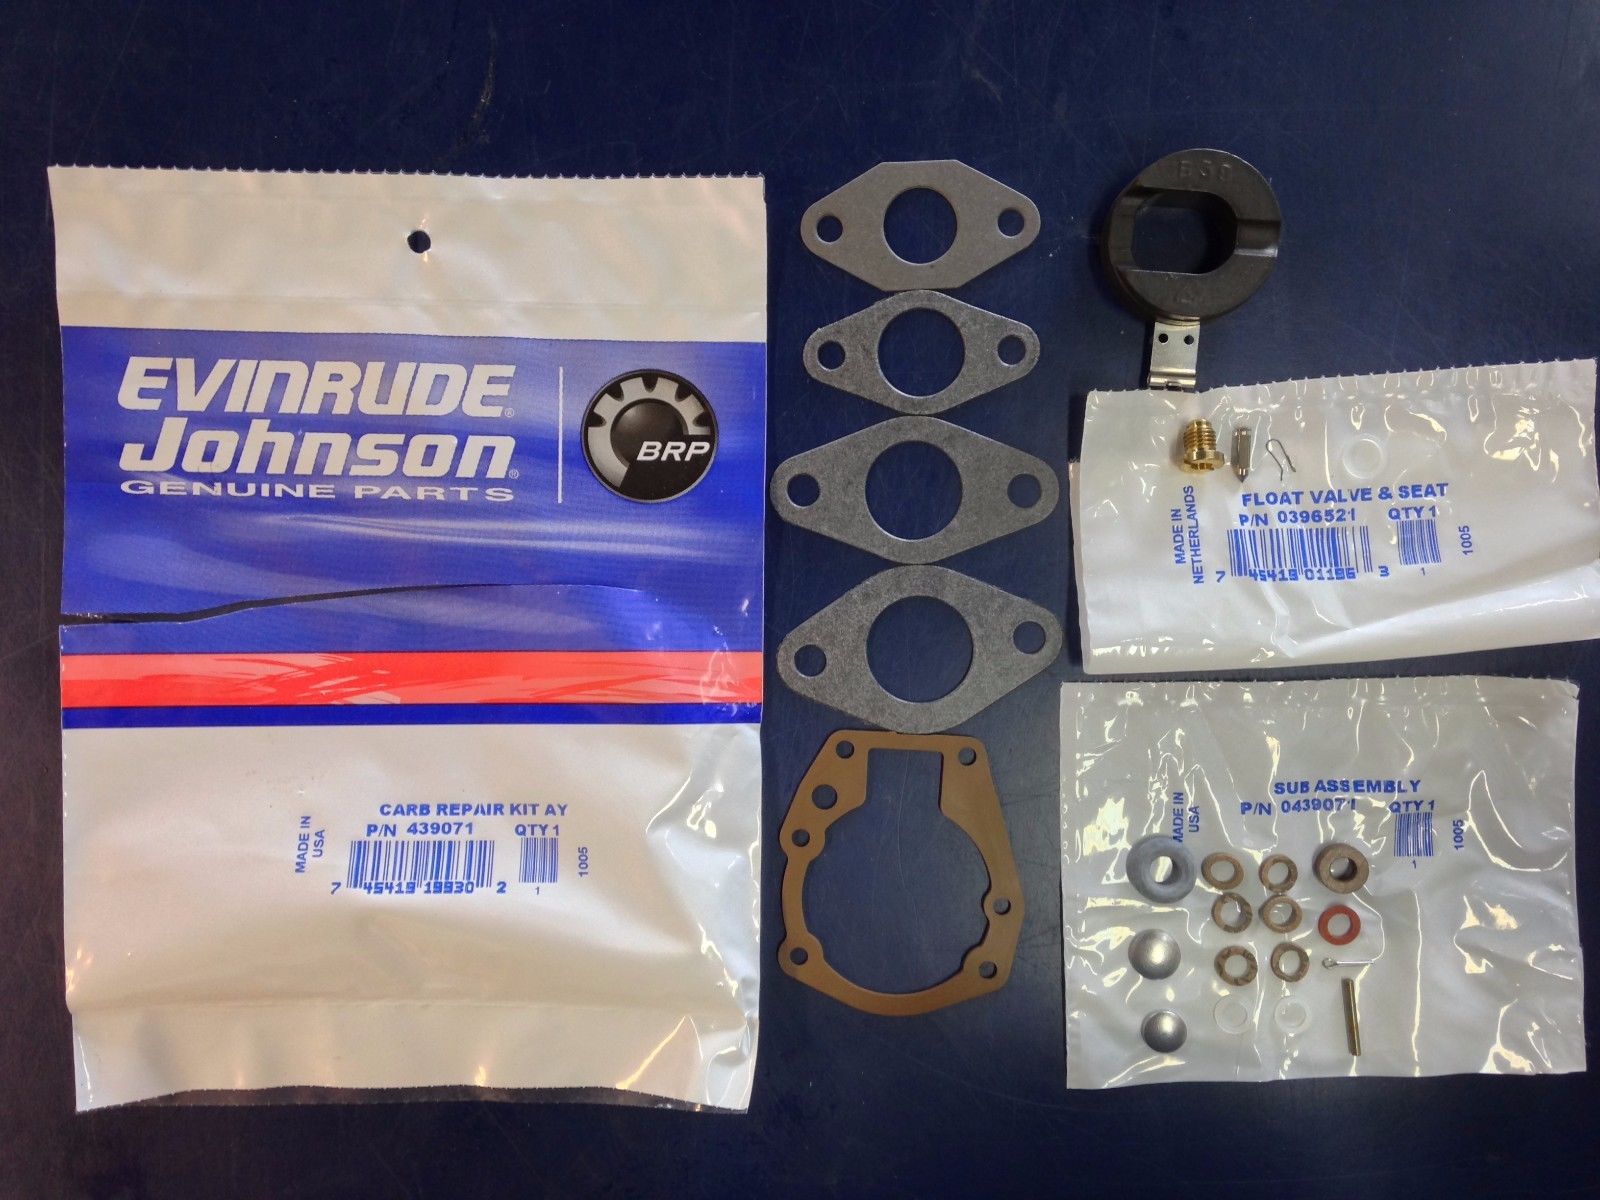
I recently purchased an OEM carb repair kit for my old 1955 3hp Johnson, JW11. To the best of my knowledge the carb has never been rebuilt on this motor since I received it new as a Christmas present when I was young. The packing and gaskets had all pretty much deteriorated or disintegrated. The repair kit includes sub assembly P/N 0439071 with an assortment of small parts. I am having trouble identifying some of these. I think I can recognize the 4 leather/fiber washers as the packing material for the high and low speed needles. I am guessing the two nylon washers go between the packing and the packing nuts. That leaves me with one small red (fiber?) washer, one thick leather washer and a thick rubber washer that looks like a donut. One of these should be the "boss gasket" that sits around the bottom of the high speed nozzle and forms the seal between the carburetor body and the float chamber. I’m guessing that the boss gasket is the thick leather one. I am also guessing the red washer is used with the float valve assembly and the donut is used with some other version of a JW carb. Can someone out there help with identifying these parts so that I use the right gaskets in the right places?
March 4, 2017 at 11:36 pm #53822I’d say your guesses are right on.
March 5, 2017 at 2:59 am #53835You got it mostly right except the float valve will have a clear washer in its package and the red washer is for the bowl drain plug used on later model carbs. Your carb will have the high speed needle installed instead. I think t’s debatable whether to use the clear washers or not on the packing as they weren’t used until the 70’s? The gland nuts are machined slightly different on applications using the clear washer. I never could figure out what the large O ring was for. Probably for something too new for me.
Attachments:
 March 5, 2017 at 6:01 pm #53884
Thanks guys, now I can start reassembly with more confidence that I can get my old buddy running smoothly again. I brought the motor to a local marine repair shop last summer and they charged me $275 to pull the carb and magneto off and tell me that it was beyond repair because there was no way to find repair parts for a motor that old. Thanks to the Internet, I found it rather easy to come up with a new high speed needle, new points, condensers and coils, and a carb rebuild kit…plus parts lists and a repair manual. I’ve never repaired any outboard before….new or old…. and found it a lot of fun. Last summer I finished the restoration of the 12 ft 1930’s molded mahogany plywood skiff that I used the motor on when I was young. I could get the Johnson started, but it clearly had problems after more than a half century of storage. This summer maybe I can use the pair on Nantucket Sound once again. But I think I”ll stay a lot closer to the shore than I did as a kid!
March 5, 2017 at 9:27 pm #53890Great motors that run very well when all is right.
While you are at it make sure the fuel filter in the tank is clean, otherwise it may run good when the tank is full but run poorly as the fuel level drops in the tank.
Good luck and enjoy your motor. I have one just like it.
March 22, 2017 at 2:26 am #54690david, you had a good point. the filter wasn’t very dirty near the top….especially considering how much gas/oil mix I ran through it a half century ago…but down near the bottom it was really gunk and varnish galore.
March 22, 2017 at 4:00 am #54694http://www.outboard-boat-motor-repair.c … une-UP.htm
Joining AOMCI has priviledges 🙂
March 22, 2017 at 4:32 am #54695quote duane:david, you had a good point. the filter wasn’t very dirty near the top….especially considering how much gas/oil mix I ran through it a half century ago…but down near the bottom it was really gunk and varnish galore.I have had good luck cleaning the sintered brass filters by soaking in Simple Green diluted 50% with water for a couple days. DO NOT use carb cleaner as it can dissolve whatever holds it all together. If it is a screen type, I usually make new ones with some brass screen from the hardware store and solder it to the original base,
-
AuthorPosts
- You must be logged in to reply to this topic.