Home › Forum › Ask A Member › Opposed Twin Coil swap….TG and others…
- This topic has 17 replies, 11 voices, and was last updated 9 years, 8 months ago by
 thumper.
-
AuthorPosts
-
March 11, 2015 at 12:47 am #896
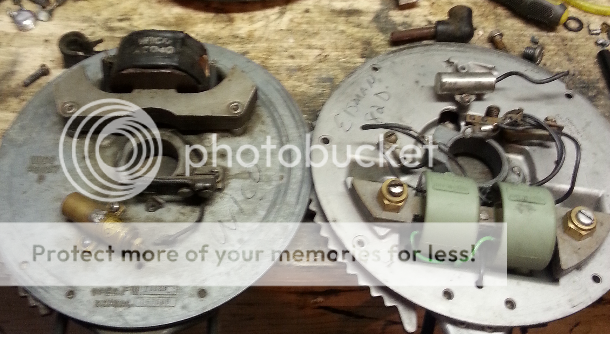
I was prepared to post his on the "other" forum one night when I realized like all others that the dam board got whacked. So hats off to the Webmaster for getting us our communication tool back up and running. Ok I think TG was the one that started this thread on the other board and I wished to give more info on what I have successfully completed previously. Some photos were published by Jim Moffatt once in the April 2008 Outboarder, and again in the October 2010. I with Jim’s guidance installed 2 50’s OMC coils in my Eisemann model 82D mag as seen on the right. The mag on the left is the Wico Mag.. notice how little space available to install 2 coils on that one.. I have ideas but my evil genius quota is spent for the day… I hate when work uses all my special powers 🙂 Oh well this opens up more conversations on this topic which has been well received.
Ok here are the process photos for what I did when converting the Eisemann mag over to OMC coils.
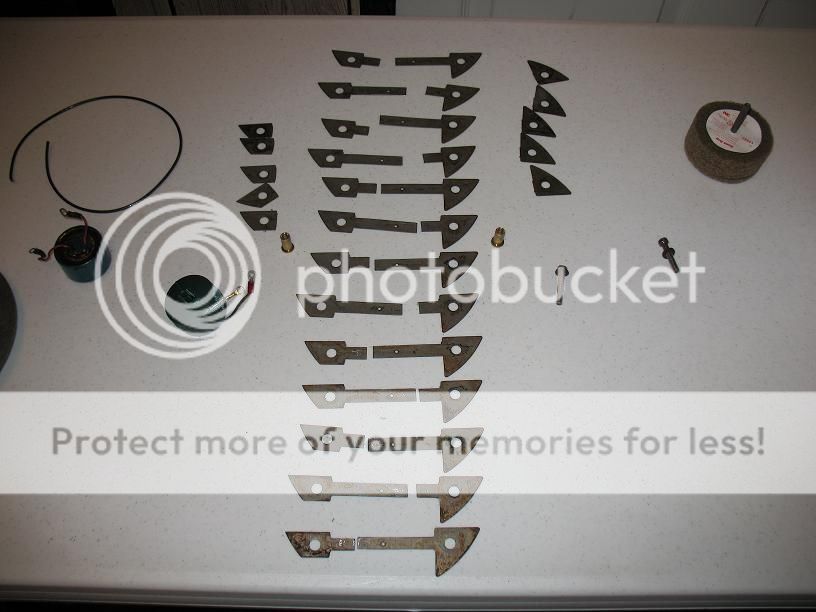
Here in this photo you will see the laminations after I removed all the old primary and secondary wire, That took a bit of time, I was surprised how much was actually there. Notice the lam’s are rounded, I guess that made it easier to wind the wire that way.
Make special note here, notice just below the "e" in the word bend, you will see a hole. It is absolutely critical that that hole be placed into the laminations BEFORE you cut separate or disassemble these laminations. That hole was in my laminations already so I did not need to add it, but if you DON’T have one, MAKE ONE there. I placed the core in my mill vise and machined the core to .01 under the core opening in the OMC coils. You will find that you now have more plates than will fit in the OMC coils, Fear not my good friends, this is no big deal as we only need enough plates to fill the OMC core opening and that is it. I found that 13 plates made for a good snug fit. So I kept the 13 bottom plates, out of 18 total plates. I then placed the laminations in order starting with the top plate and labeled it #1.. genius huh, LOL, then continued to the last which I labeled 13. At this point is where Jim Moffatt offered some very good advice. He suggested I cut the laminations alternating from side to side so the seems were not all on top of each other effectively creating a sandwich of laminations…flipping brilliant. So I marked each one so that the cut would be hidden inside of each coil. See photo below…
Notice the pcs on each side of my 13 plates…… see them, ignore them you won’t need them, it is how I did mine but realized they were not needed, but only after I put it all together.
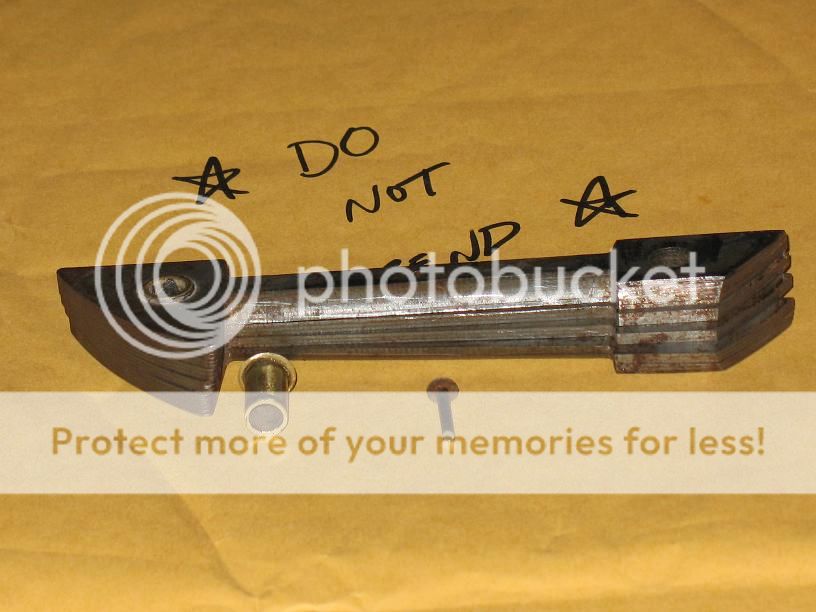
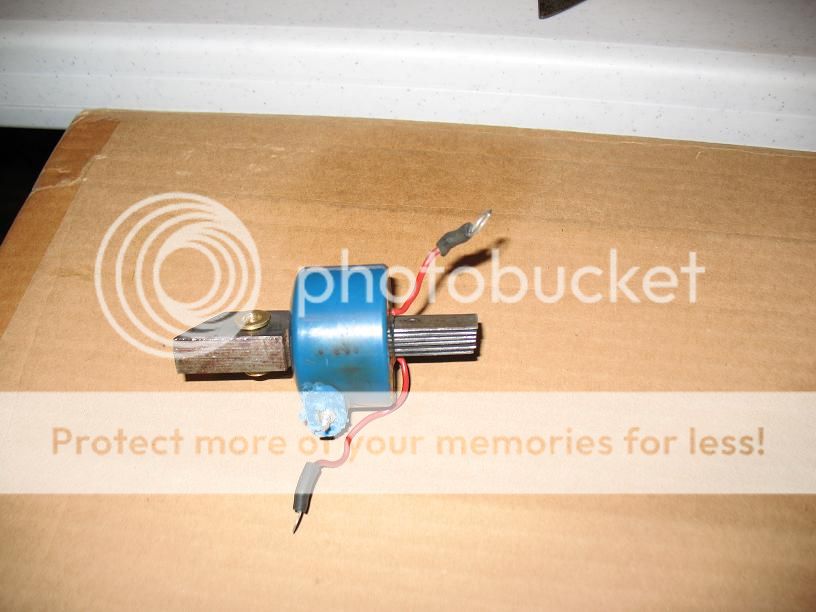
Next I needed to replace the rivets that were originally used to hold the laminations together. See the following photo for my interpretation of rivets. Hmmm looks like crap and they are too tall, LOL Ok here is what you do Make a hollow rivet so that you can use a machine screw to hold down the unit when finished, I will remake the rivets on mine and add an oil sling protector to ensure the oil the passed thru the upper main bearing does NOT get on the points… See my hack rivets below:
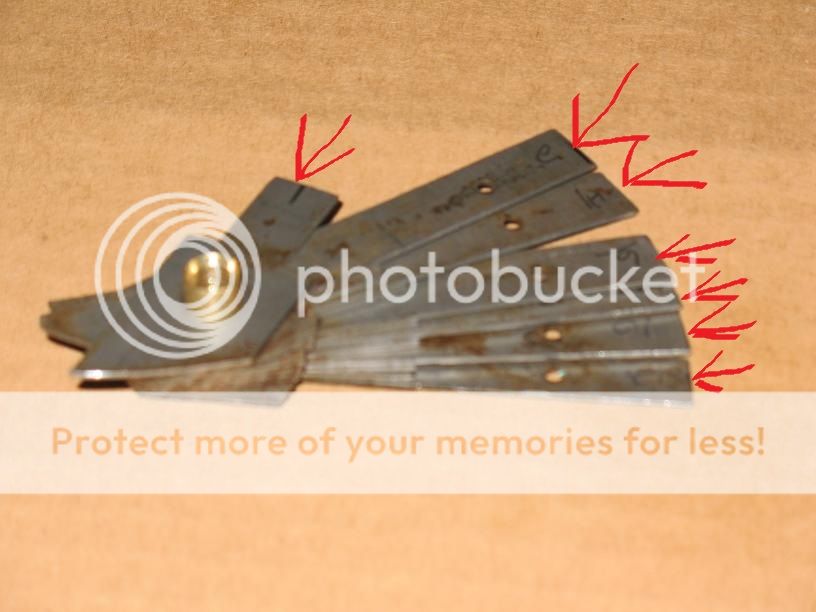
More words of advice, slightly ever so slightly buff the edge marked with the red arrows, on both the upper side and the lower side of the odd and even plates. See photo below:
Next, I placed the even numbered plates on one of my "rivets" and the odd numbered one on the other rivet, now comes the fun inserting then in to the coils.. See photo below, but note, BOTH coils MUST face same direction, some hocus pocus BS that Jim tried to explain, I did not argue I just did it, would recommend you follow 🙂 Haha See photo below:
Now once you have got BOTH side inserted into each coil, you need merely to "slide" the blade interlocking them, now be mindful of which one is on top of which one. When installed properly you will be able to slide the 2 halves together and the little hole you HAD to drill in the beginning or was already there should line up… yeah NOW is when it is important, and it Makes absolutely dam sure the WIDTH of the coil is the same. See it IS important, LOL…
See photo below:
See the pin in between the 2 coils, you can find a rivet, but I would recommend a machine screw, a little Loctite on the nut, removable of course and you have done it.
Understand a few simple rules…:
1. If the space is available pretty much any smaller universal coil will work, and the caveat to that is, if you use the 50’s OMC coils, use ONE 50’s OMC condenser. If you find some other coil that fits, GET the correct and matching condenser for THAT coil, and all will be well.
2. Both coils must be facing the same direction, in other words the "potting" on both coils must be on the same side. the direction the High tension lead points is not relevant.
I really hope this helps those that want to do this. And I hope I have not offended anyone..
Thanks and good night, any and all questions will be answered as promptly and professionally,LOL…LOL…I said professionally.
Ok I will give it my best shot.
Regards
Richard White
M.O.B. Chapter Presidenthttp://www.richardsoutboardtools.com
classicomctools@gmail.comMarch 11, 2015 at 2:31 am #11774Richard,
Great pics and explanation. Thank you.
March 11, 2015 at 2:38 am #11776Nice work. I admire what you’ve done! 😎
Just a thought, but could you use ‘sex bolts’ which are used in joinery instead of making up rivets? They are two piece, male and female, and just screw together.
March 11, 2015 at 2:42 am #11777Thanks Richard. I didn’t have the heart to ask for this info again not knowing how you were feeling. Hope all is well! Thanks for putting it on the new site. I managed to register, but changed my name by accident, so now it is t2stroke, previously BigBird! I don’t know if all this name changing is good, but hey we will get to know each other again!
Dan in TN
March 11, 2015 at 2:47 am #11778quote t2stroke:Thanks Richard. I didn’t have the heart to ask for this info again not knowing how you were feeling. Hope all is well! Thanks for putting it on the new site. I managed to register, but changed my name by accident, so now it is t2stroke, previously BigBird! I don’t know if all this name changing is good, but hey we will get to know each other again!Dan in TN
Dan, just go back and edit your profile!
March 11, 2015 at 10:59 am #11795quote Mumbles:Nice work. I admire what you’ve done! 😎Just a thought, but could you use ‘sex bolts’ which are used in joinery instead of making up rivets? They are two piece, male and female, and just screw together.
The base is already threaded so I just made hollow tubes/"rivets"..
http://www.richardsoutboardtools.com
classicomctools@gmail.comMarch 11, 2015 at 1:37 pm #11807I replied to this post last night, but I don’t see it. Is there a delay
or message approval in the system?
Anyway, Great write-up Richard!
Just one question…… "Why not shine up the laminations?",
instead of just lightly buffing the ends?
Thanks, TGPrepare to be boarded!
March 11, 2015 at 3:08 pm #11815quote Buccaneer:I replied to this post last night, but I don’t see it. Is there a delay
or message approval in the system?
Anyway, Great write-up Richard!
Just one question…… “Why not shine up the laminations?”,
instead of just lightly buffing the ends?
Thanks, TGThe buffing of the ends is to allow them to "mesh" easier when putting the 2 halves together. My thought was that if I said clean them off one might interpret that as remove all residue, which might remove the coating on the metal. Does that matter??? I don’t know, but to me laminated metal is the base metal laminated between coatings of some sort. I was trying to avoid removing that coating.
http://www.richardsoutboardtools.com
classicomctools@gmail.comMarch 11, 2015 at 4:32 pm #11821Richard, I tried searching for "magneto laminations material", etc., to see
what coatings or special properties the metal is made of, but only
came up with a bunch of engineering gobbly goop!Prepare to be boarded!
March 11, 2015 at 4:44 pm #11823What sort of engineering gobbly goop? We have some smart folks here, might be able to figure it out
-
AuthorPosts
- You must be logged in to reply to this topic.


