Home › Forum › Ask A Member › 1930 Elto Senior Speedster Lower Unit
- This topic has 20 replies, 7 voices, and was last updated 5 years, 4 months ago by
 The Boat House.
-
AuthorPosts
-
December 4, 2018 at 12:59 pm #158644
I started taking apart the lower unit on the subject motor.
Finally got the bronze thrust assembly out of the
gear case, but now I’m not able to pull the driveshaft
out and remove the drive gear. The gear is keyed
on the drive shaft. The gear will slide on the shaft
about 3/16″ and stop dead. I see no snap rings
or set screws that could be stopping it.
I tried gently prying up on the driveshaft via
the water pump impeller, but don’t want to break that.
Any ideas what may be keeping the drive shaft from sliding
out of the gear?
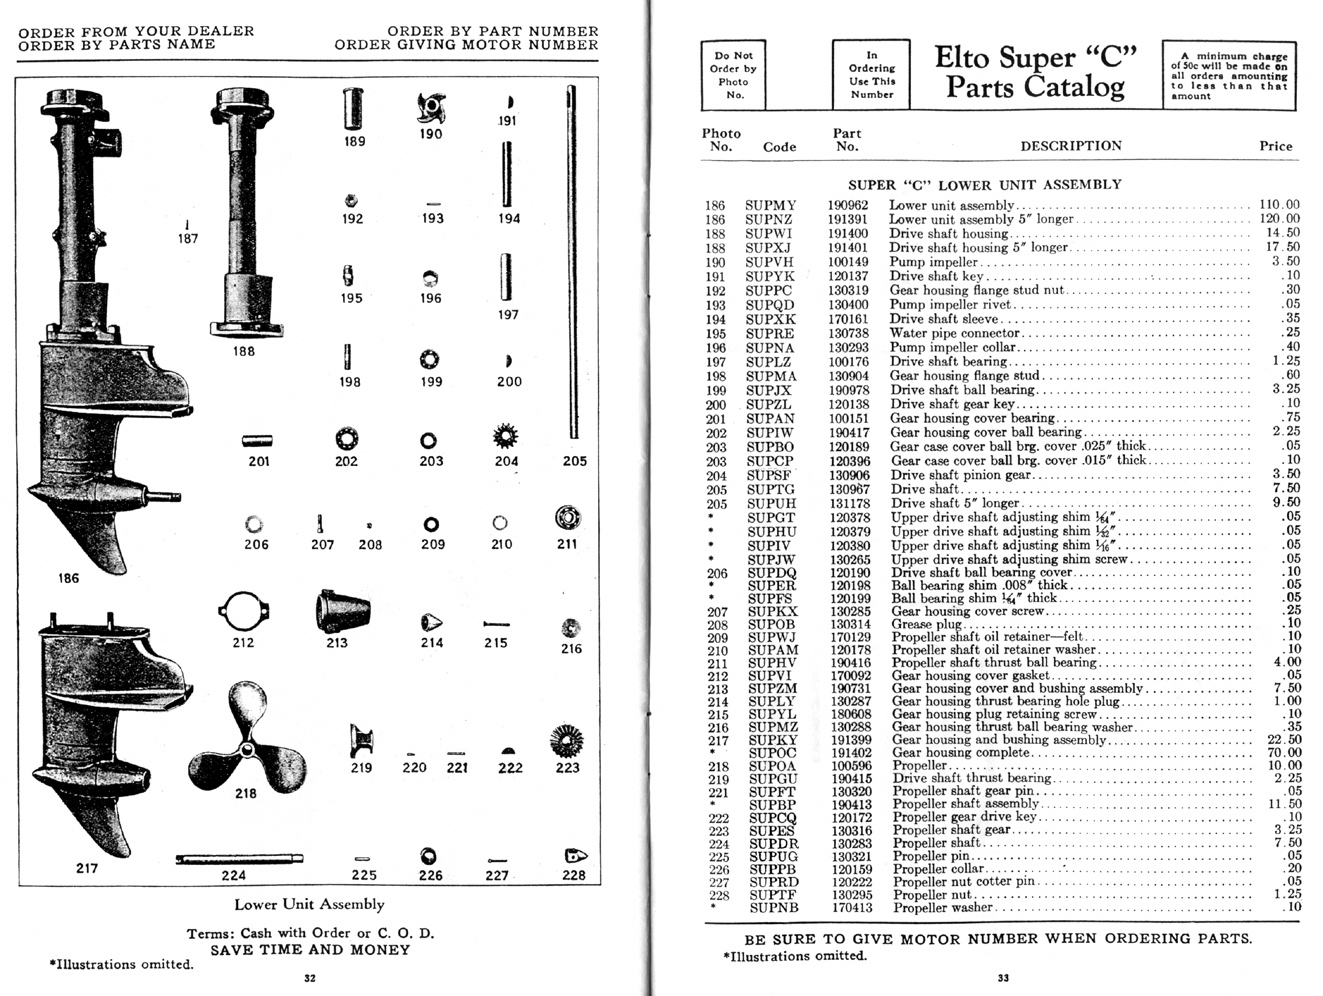
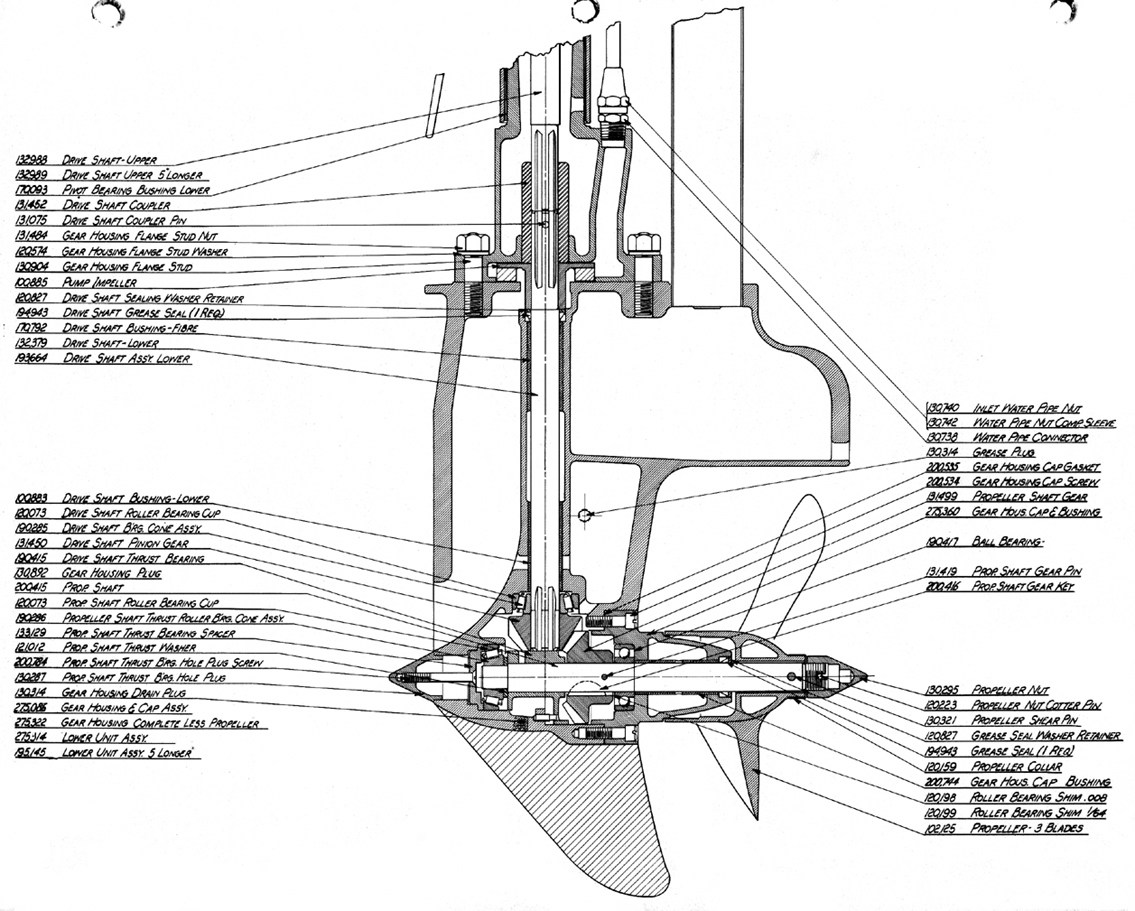
I see nothing on the parts diagram to give me any clues.Warning Will Rogers…… I was going to post photos of
the parts at issue, but I no longer see a way to do so.
What’s up with that?Prepare to be boarded!
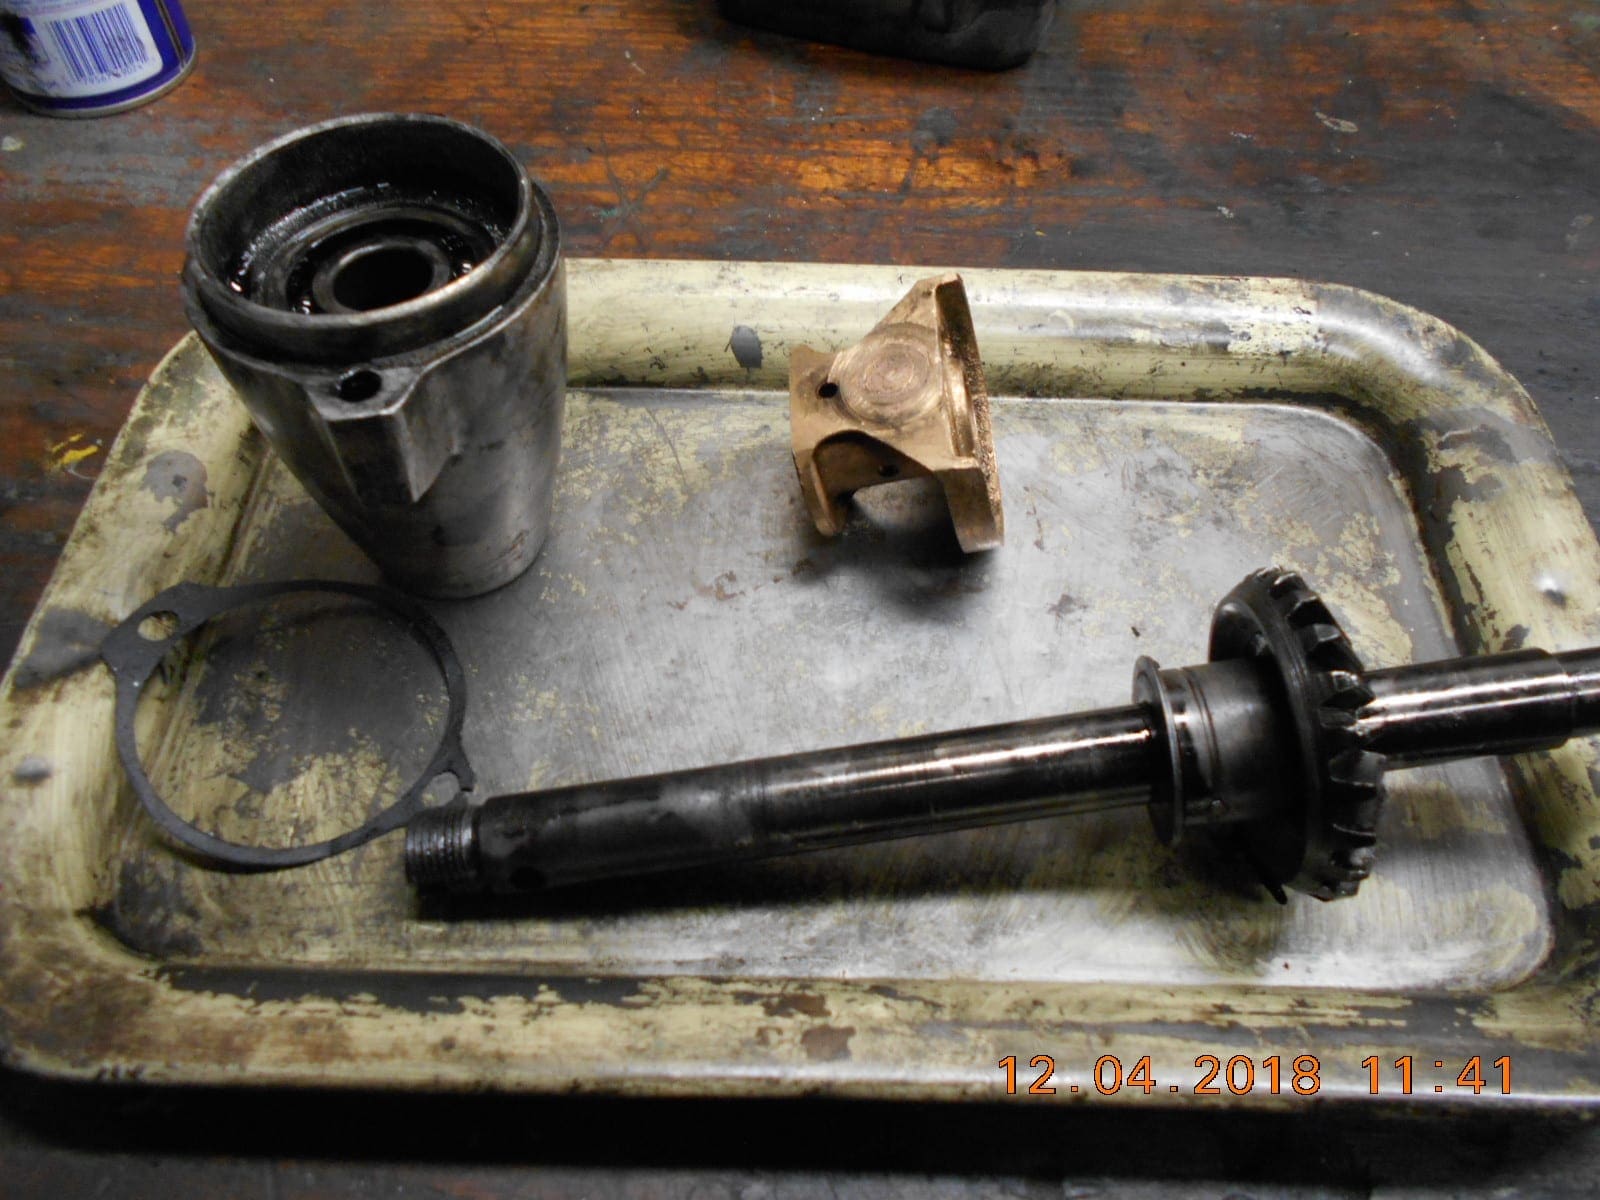
December 4, 2018 at 5:47 pm #158658Finally got the drive shaft gear out of the gear case,
after the “proverbial blonde moment” passed.
I didn’t think the gear would have clearance to
pull off the driveshaft while in the case, but it did.
The driveshaft would not pull out of the case
with the gear on, because the key under the
gear hitting the drive shaft bearing. Duh.
I was surprised to see that the gear case
was fully jeweled with three ball bearings.
Two of the bearings sound / feel good, but
unsure about the prop shaft forward – thrust
bearing. Sounds a little funny, but it may just
be rubbing on the thrust adjuster….. if’s that’s
what I’m seeing forward of the bearing.
There’s a nose cone on the gear case, which
would be nice to get off in order to tap the
ball bearing out of the case.
Not sure how it’s installed, but it’s conical,
and I can’t even get a pliers on it. Tried
taping from the inside with a brass punch,
but not sure what I’m doing. There’s a beveled,
flush screw head, presumably to adjust the thrust,
but it doesn’t budge.
Maybe I’m losing my mind, but now I see the
“Select File” link.
Thanks.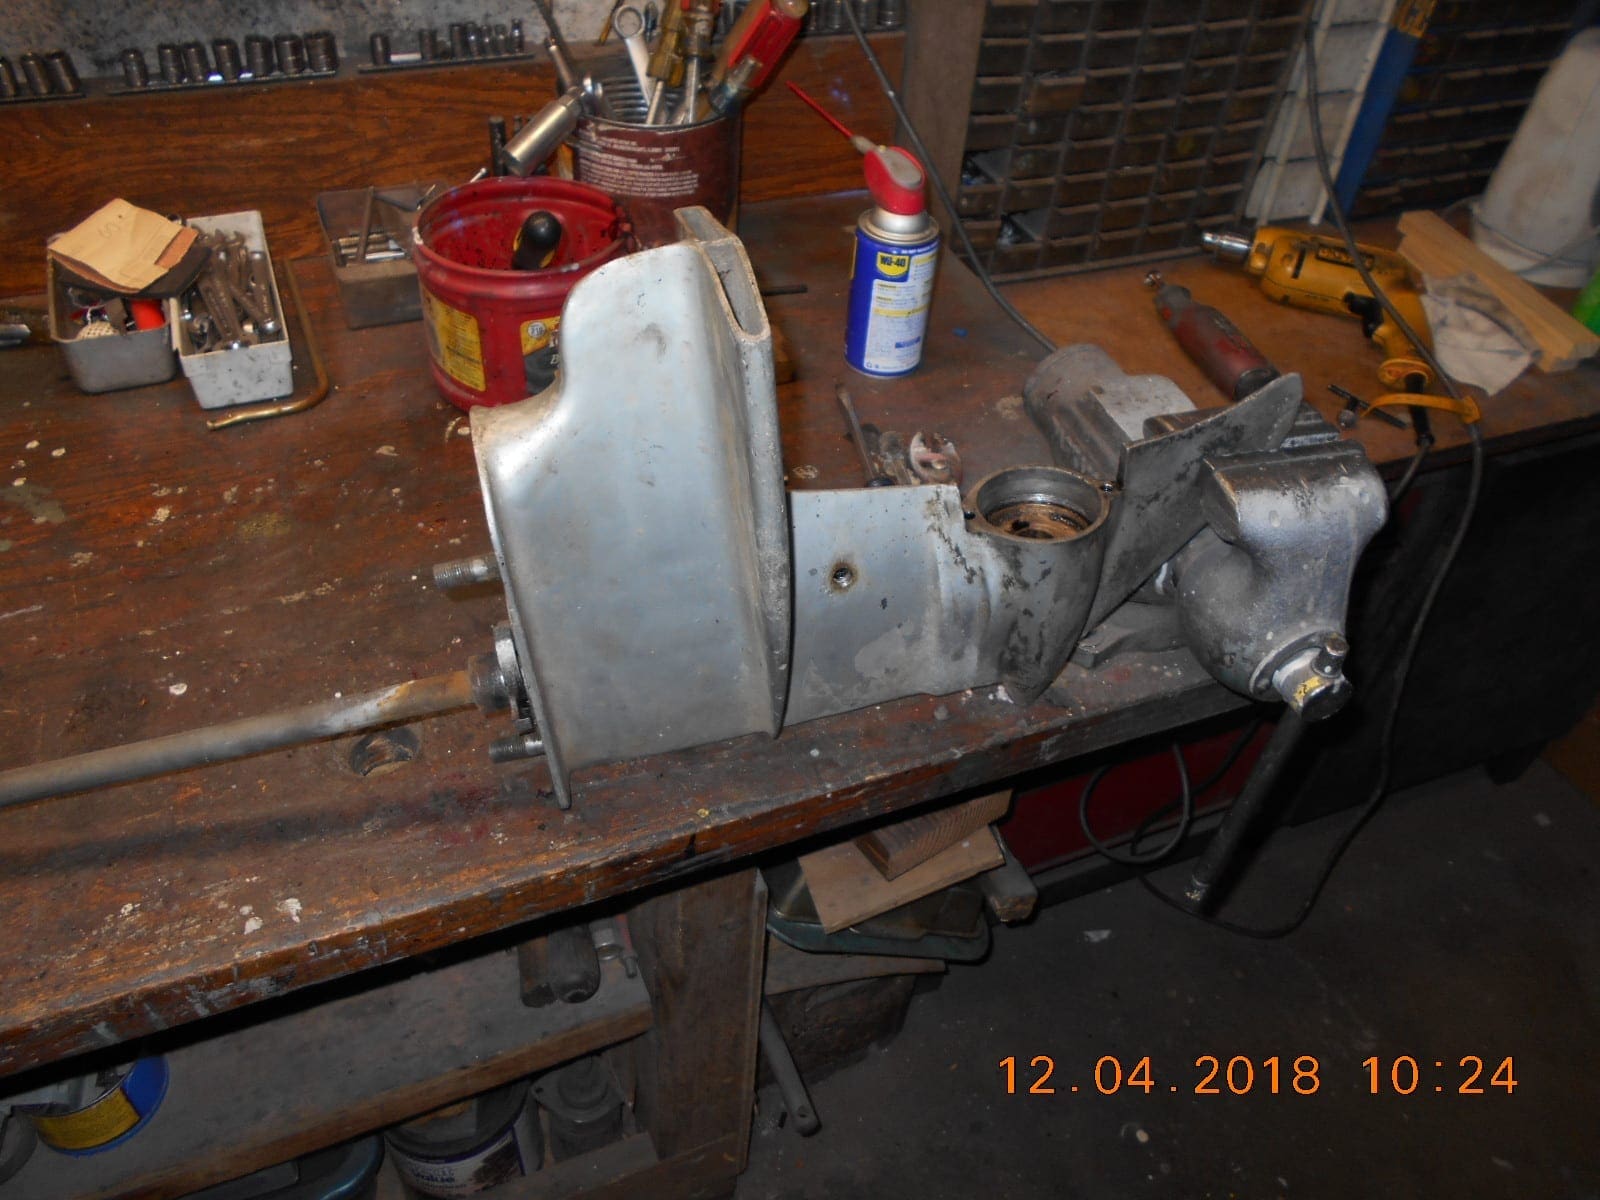

Prepare to be boarded!
December 4, 2018 at 6:51 pm #158671The aluminum nose cone is not pressed it, in has one slotted screw that holds it in place from the inside. Heating the outside of the cone may allow it to come loose easier. …… and lefty-loosy, eh.
If you’re not using soft jaws in your vise to hold the skeg, consider using pieces of 2 X 4 to avoid leaving unwanted impressions on the skeg.
Hope this helps.
Best,
PM T2December 4, 2018 at 8:18 pm #158684Thanks for the tip on getting the nose cone off.
If that screw is to hold the cone on, how is the
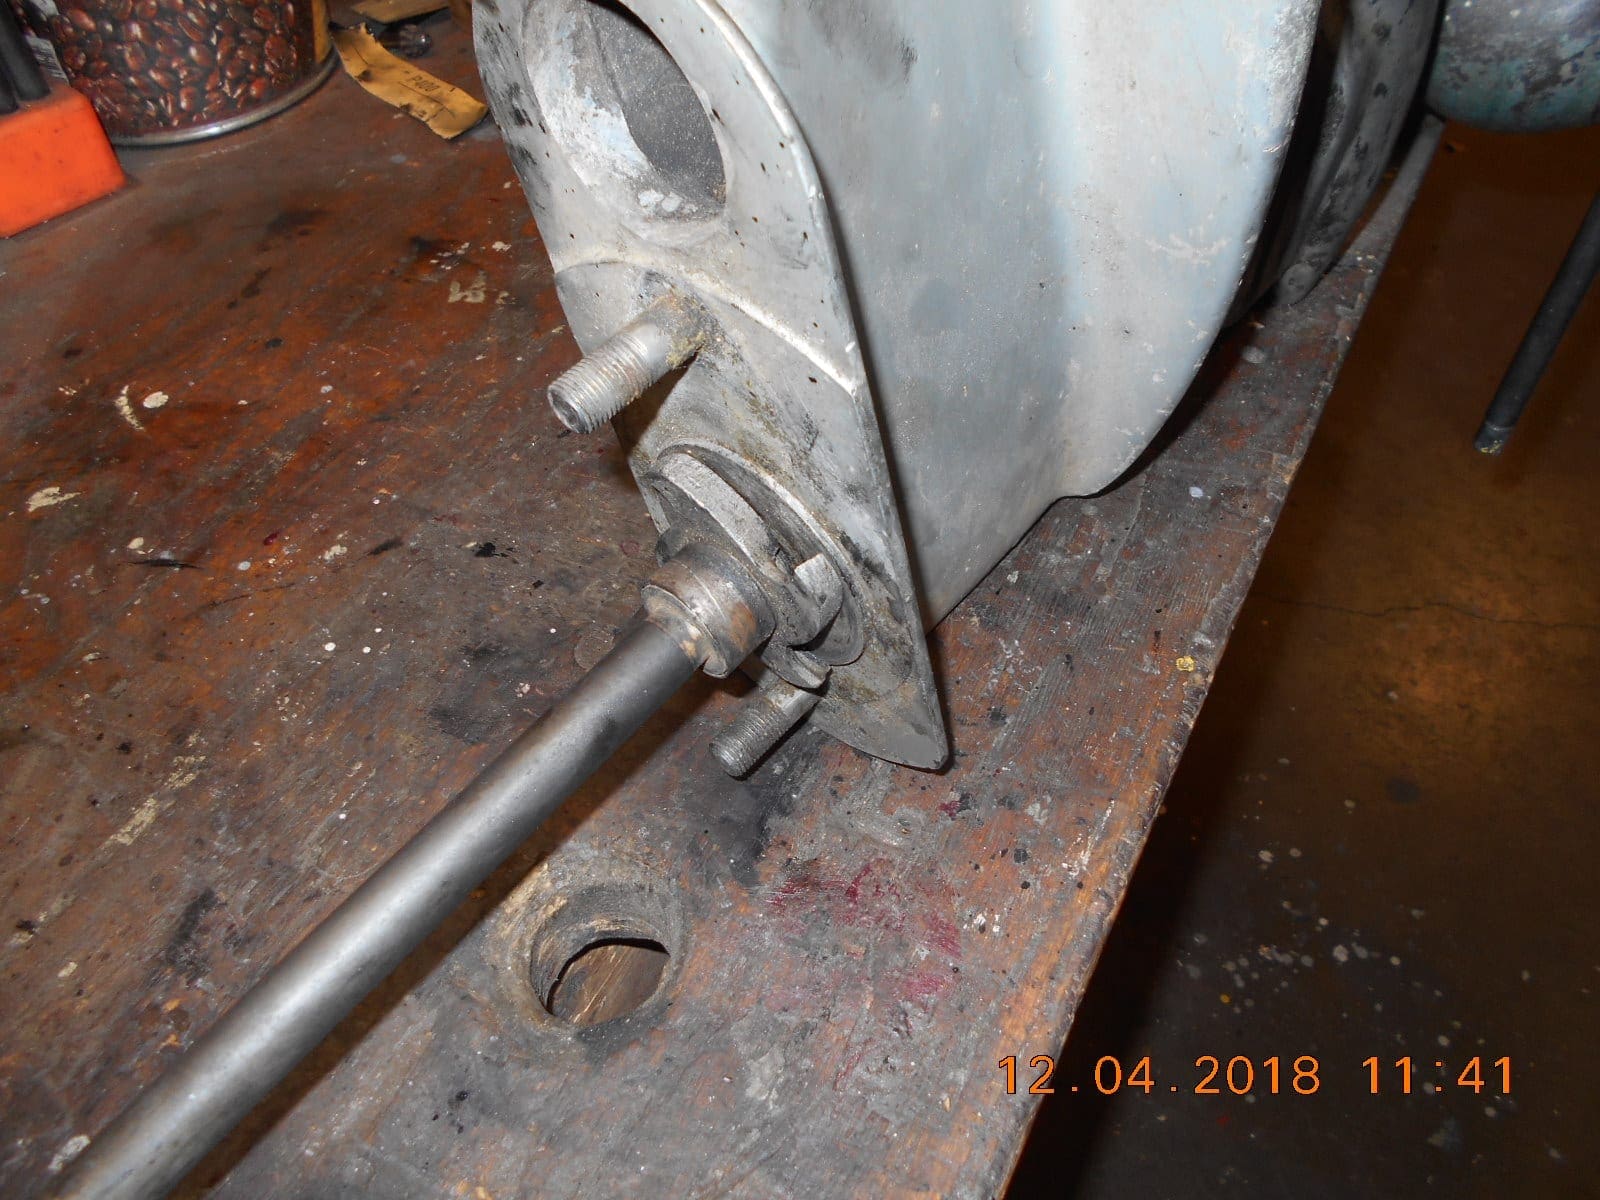
gear mesh set? Shims?Skeg was not clamped in the vice, just sitting
loose so I could take the photos.
I use wood shims when I want to do clamping……
don’t need any added antiquing to an 88
year old outboard!Prepare to be boarded!
-
This reply was modified 5 years, 4 months ago by
 Buccaneer.
December 5, 2018 at 12:22 am #158698That Elto pattern lower unit was used for over ten years – a really great design.

 December 5, 2018 at 8:00 am #158713
Garry, glad to hear the gear box design was a “good” one.
Thanks for the diagrams.Would I find anything in an Evinrude repair manual
on setting up the gear lash, pulling bearings, etc.,
on this L.U.?
Thanks.Prepare to be boarded!
December 5, 2018 at 12:55 pm #158743The heat on the nose cone did the trick getting the screw loose that attached the cone.
Then was able to tap out the double row ball bearing with a brass punch.
After cleaning it, I think it’s in good shape considering it’s age.Still have the outboard propshaft bearing I’d like to get out of the conical housing, (part list # 213)
but have not figured out the way to do it yet. There’s no gap for an inside puller
to grab on, and no way to tap it out from the end that I can tell.
Any clues on that one?The aluminum nose cone is not pressed it, in has one slotted screw that holds it in place from the inside. Heating the outside of the cone may allow it to come loose easier. …… and lefty-loosy, eh.
PM T2
Prepare to be boarded!
December 5, 2018 at 7:25 pm #158768
-
This reply was modified 3 years, 2 months ago by The Boat House.
December 5, 2018 at 8:41 pm #158783Knocking the gear case on a block of wood
should get the bearing out. If you happen to
live where the temp. gets down to the teens or
lower leave the gear case outside over night
and see if it will pop out in the morning. Option
two is the freezer. Good luck with that one.
Tubs, I tried slapping the cartridge (with the bearing inside) down
on the workbench several times, but no go.
It’s suppose to get down to 3 degrees tonight, so guessing 20 deg.
in the garage tomorrow morning. Will interrogate it some more in the morning,
and if that doesn’t work, I can throw it in the deep freeze!Prepare to be boarded!
December 5, 2018 at 10:00 pm #158785I’ll assume that you’re talking about removing the outer race for the tapered roller bearing that is a slip fit on the propshaft.
My usual trick is to exploit the differences between heat and cold as Tubs suggests. I go as far as to buy some dry ice and use it to chill the interior parts whilst fanning the exterior with a propane torch, then “forcefully applying” the bearing housing against a wood slab (thought it better than saying “slamming”).
If the non-destructive method doesn’t remove the race, then you’ll have to use a destructive method (grind through the race so that it can collapse inward and relieve the tension of the press fit.)
Before you do that, ask yourself some questions;
1) How badly is the outer race pitted? (because it will be) Degree of surface damage may tell you if replacement is warranted, or if its good enough to “get by”
2) How does the inner race seem to fit with the outer race WRT smoothness of operation, looseness/tightness, etc? If it fits OK, and rolls OK, and isn’t rough or sloppy, maybe it ain’t really broke, so do you really need to fix it?
2) How much is this motor going to be run?
4) if the bearing was good enough to run the motor the last time it was used, are you willing to bet she’s got at least one good run left in her as-is but with a good cleaning and lube session used to help it live a bit longer?
5) Did you notice I asked #2 twice and skipped #3?FWIW I’ve worked on a few of these lower units, usually on Sr Speedsters or Super C’s; and the roller bearings were usually the least of my worries. Propshafts and bushings usually need replacing, while the roller or ball bearings are normally salvageable with being washed out and repacked with the appropriate grease. Just my $0.02
I was gonna upload some pixels, but I guess my files are all too big. Blah™
Hope this helps.
Best,
PM T2 -
This reply was modified 5 years, 4 months ago by
-
AuthorPosts
- You must be logged in to reply to this topic.