Home › Forum › Ask A Member › 1930 Lockwood Chief Revival
- This topic has 37 replies, 11 voices, and was last updated 7 years, 2 months ago by
lyks2tinkr.
-
AuthorPosts
-
April 22, 2018 at 11:21 pm #74534
Cool. I hope you get it running. I’m not ready to start on mine.
Wayne
Upper Canada Chapteruccaomci.com
April 22, 2018 at 11:29 pm #74535Yes I would like to have it running by Belwood.
I was wondering why the previous owner had the tank drain plug taped to the tiller arm. Now I know, stripped!
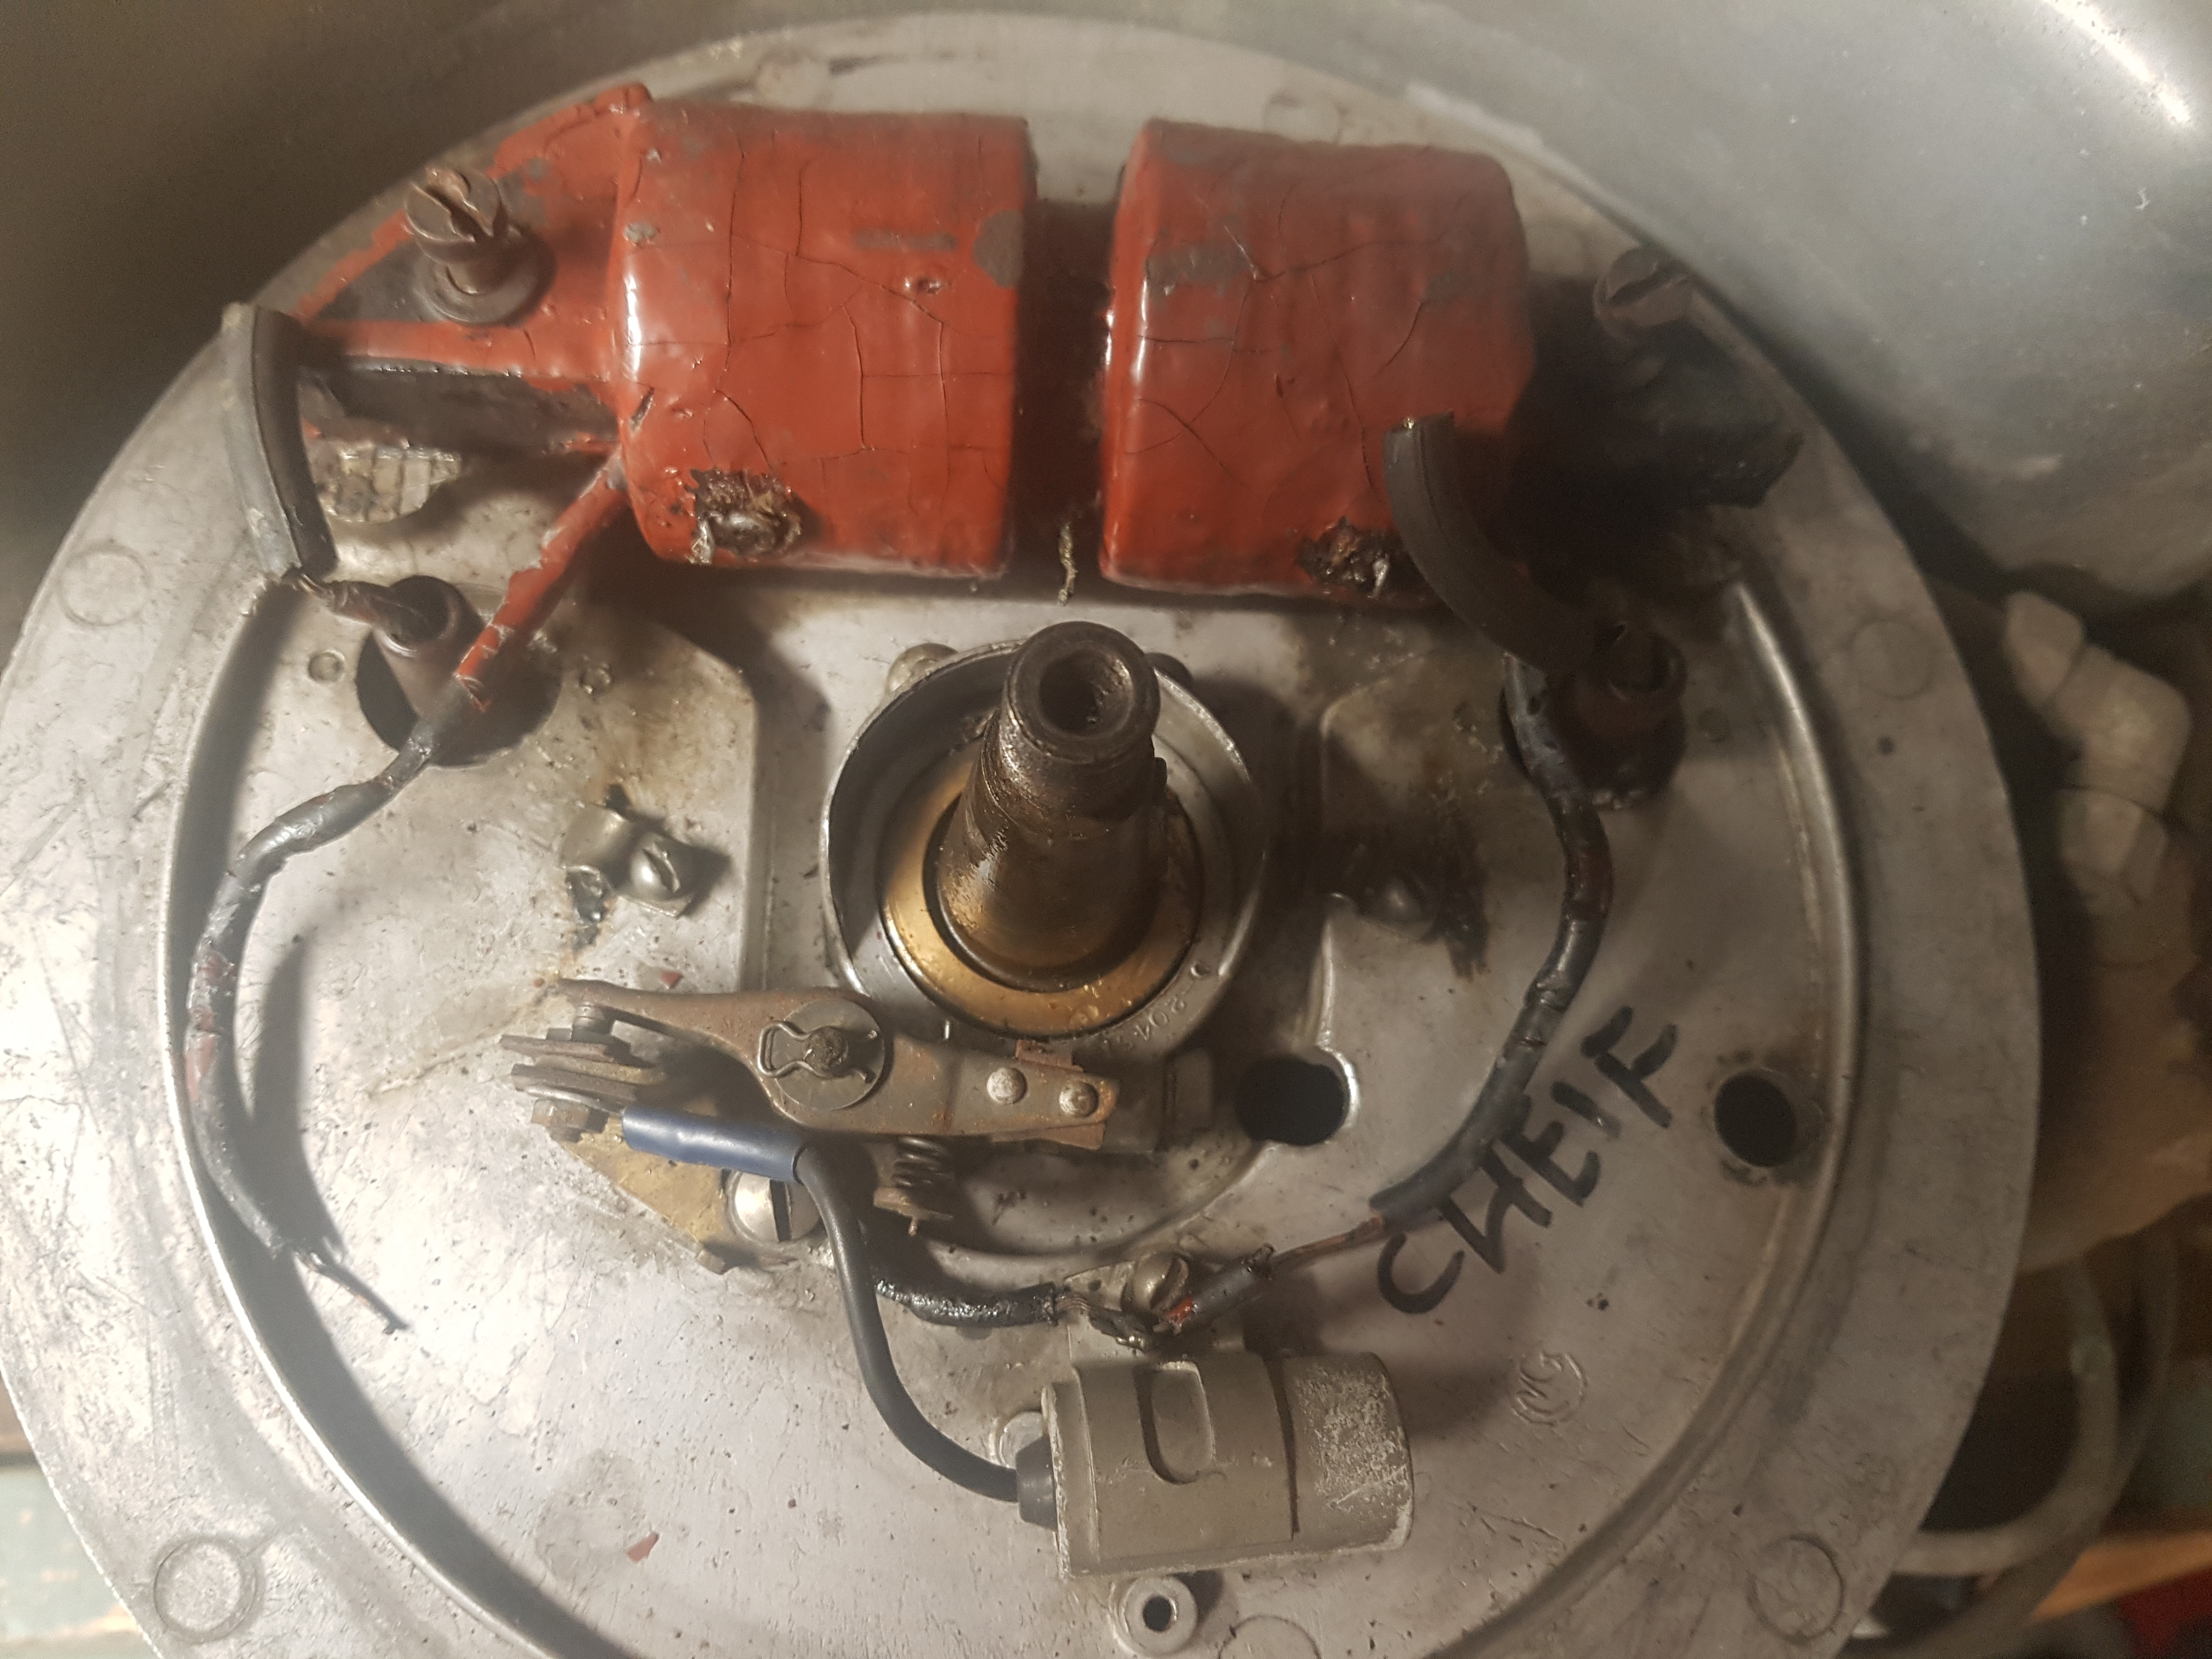
April 22, 2018 at 11:58 pm #74537Ignition needs more work than I was expecting. I have a spare mag plate (shown) which seems to be in a little better condition.
Attachments:
 April 23, 2018 at 12:01 am #74538
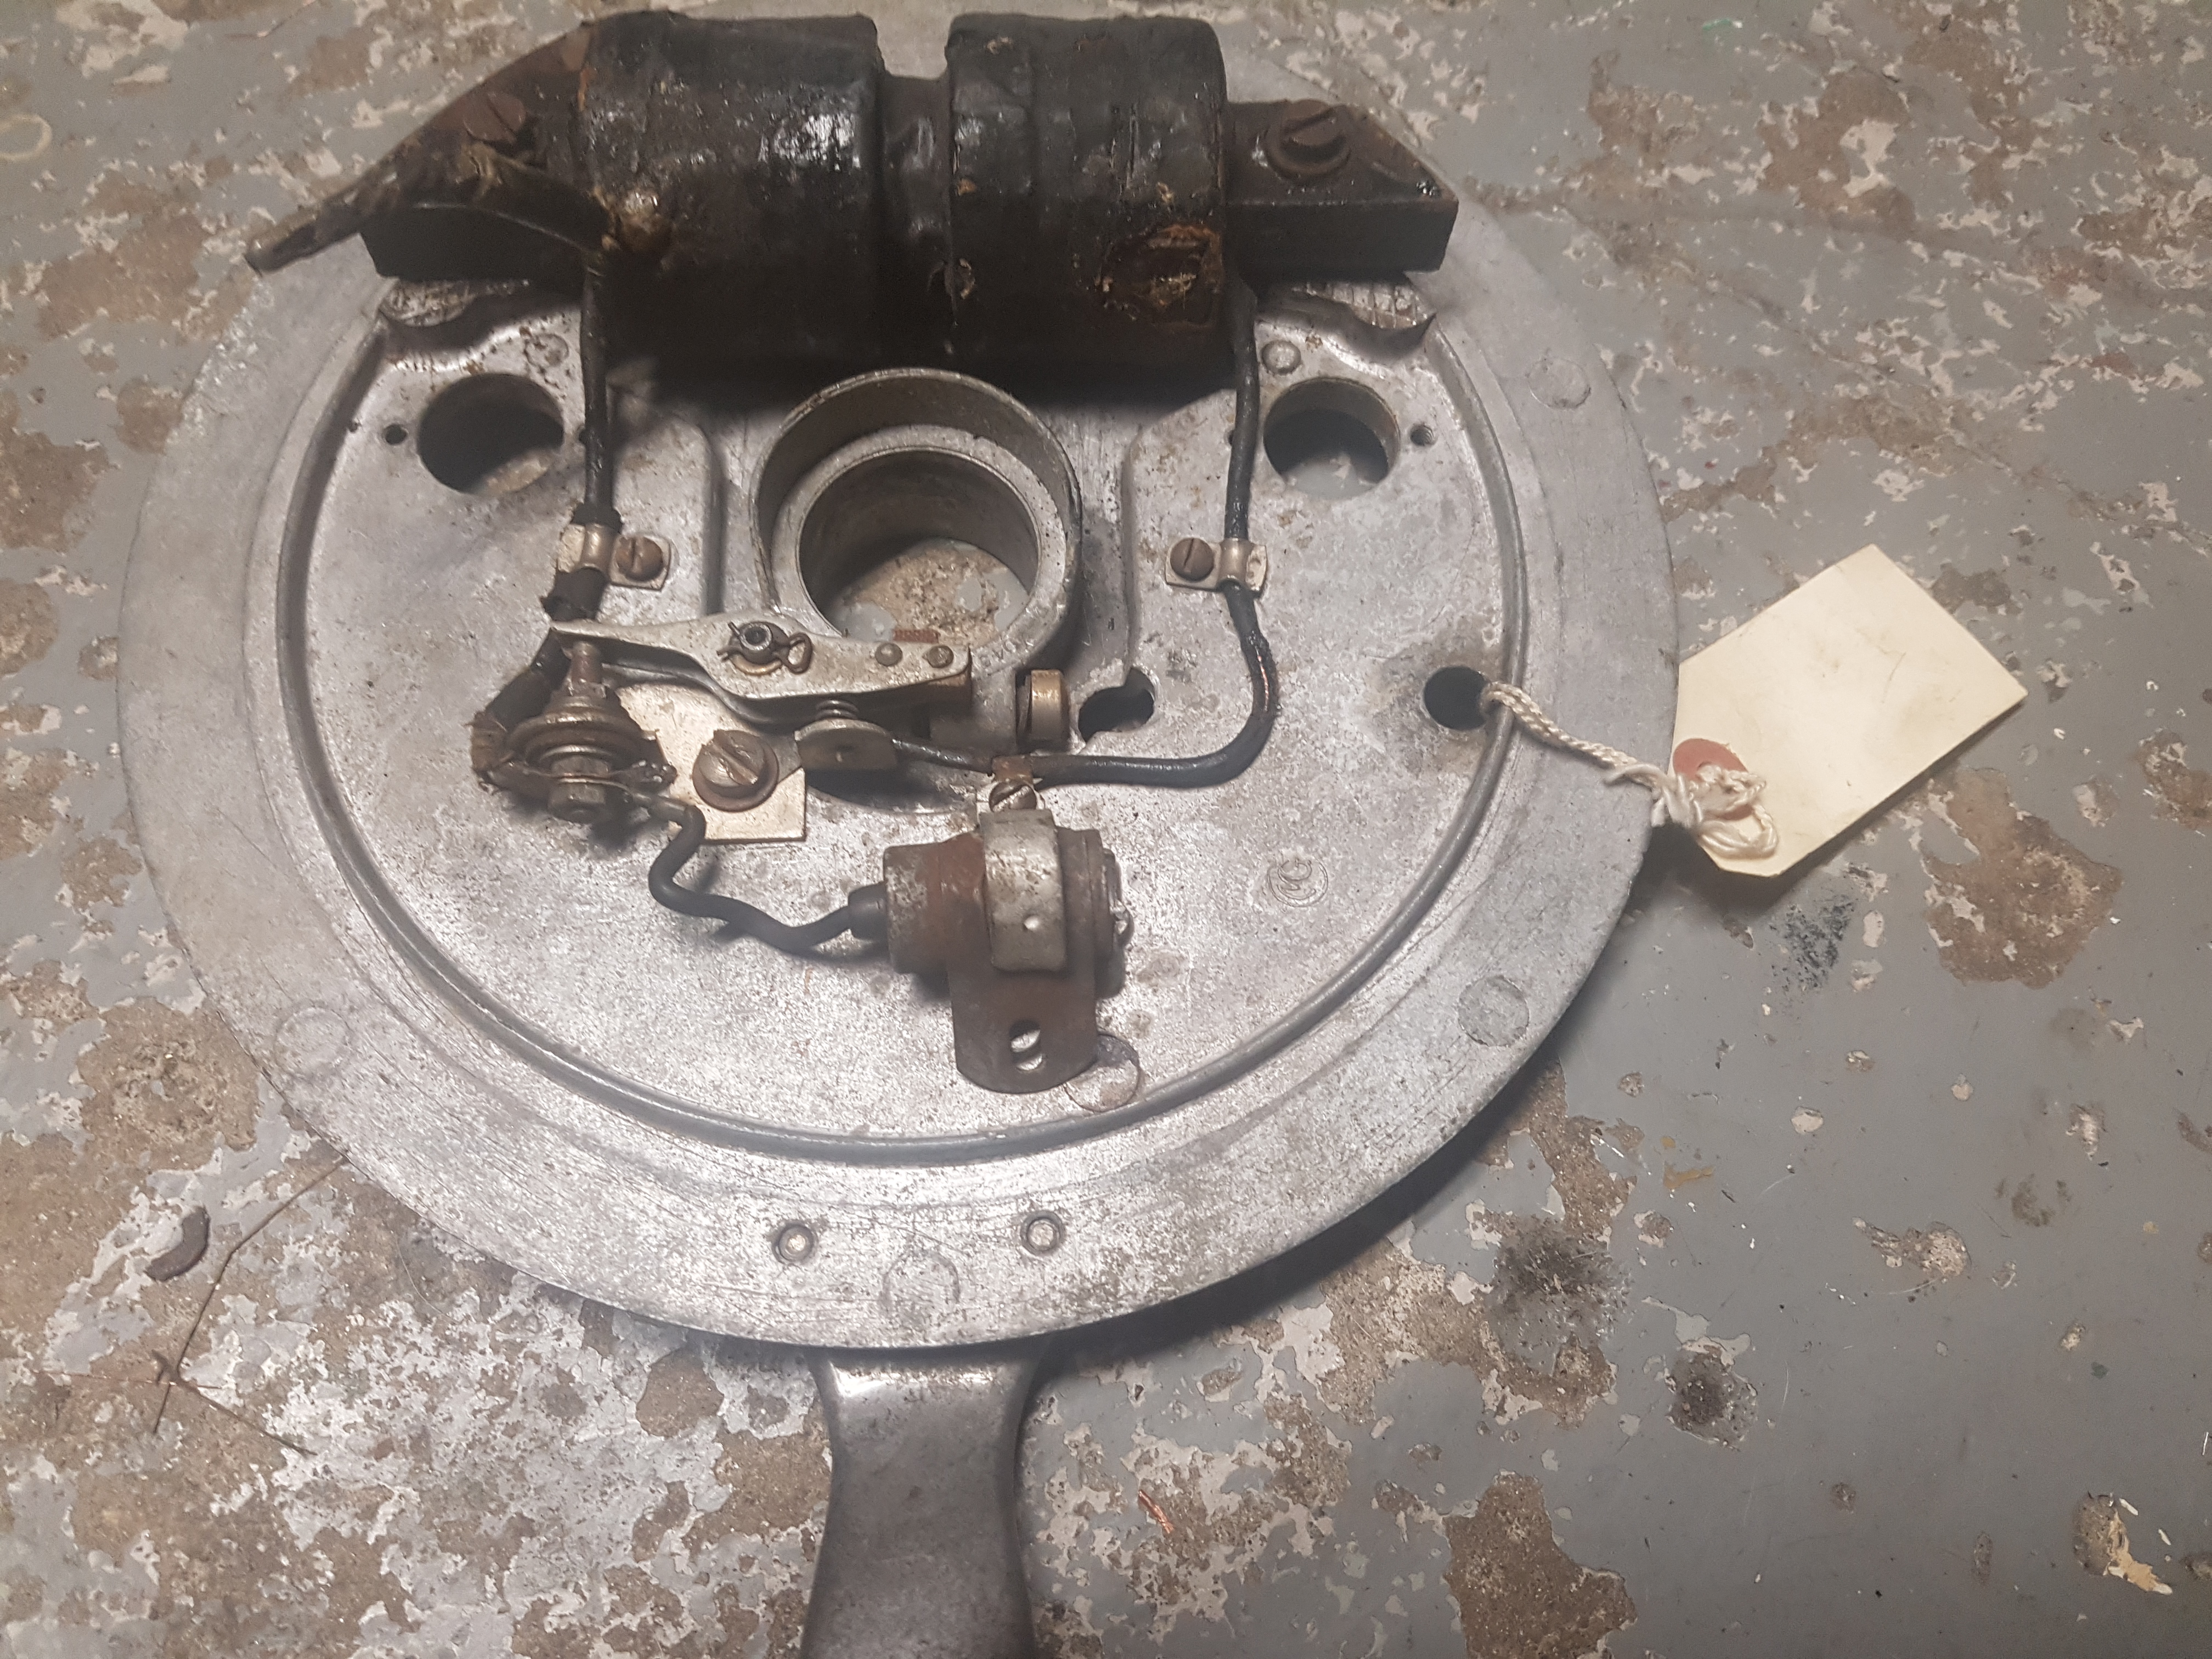
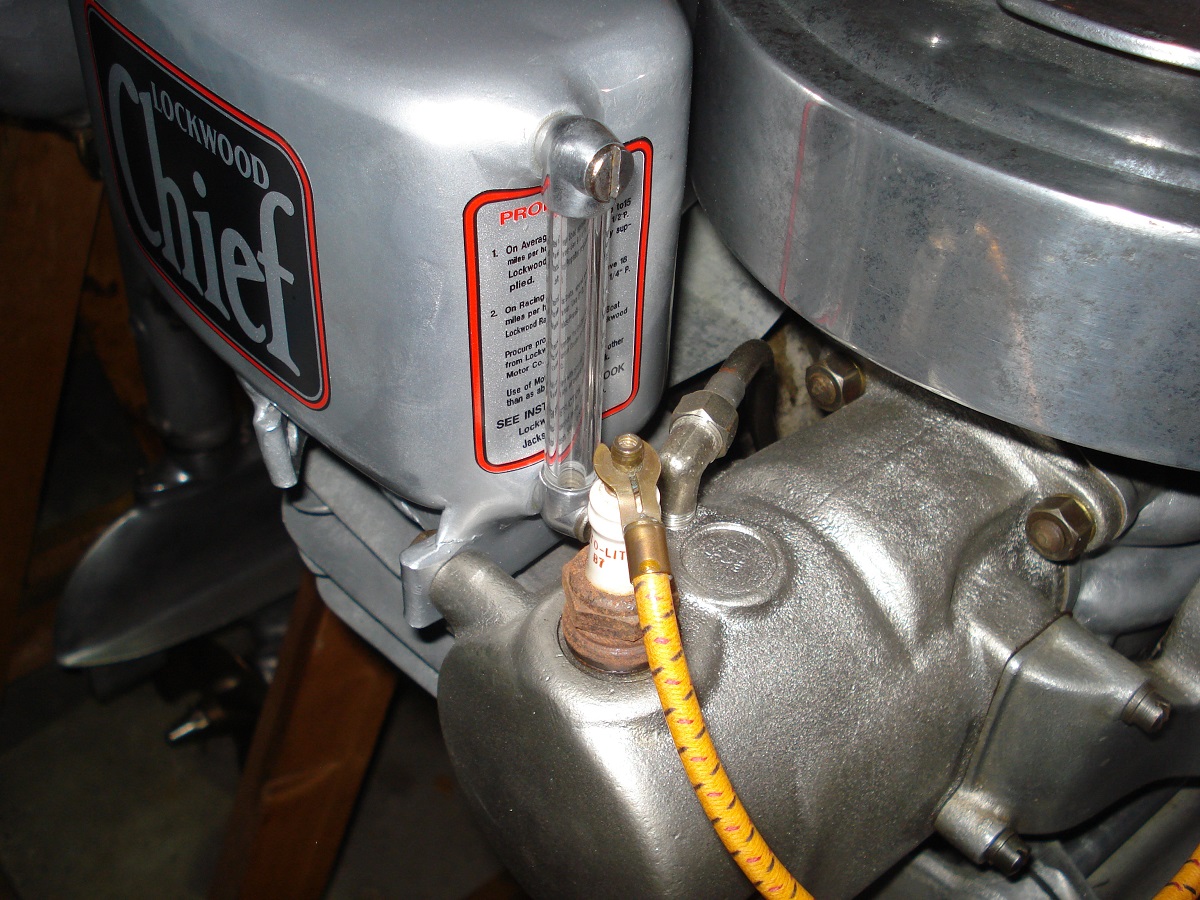
Few more Pictures for those that have not had one. What am I pointing at in the one picture?
The gearcase seems simple enough to service. Ill drop that tonight anyways to see what I can find. Looks like just the 2 standard screws and the water lines off to drop it?
Attachments:

 April 23, 2018 at 12:16 am #74539quote Chris_P:What am I pointing at in the one picture?
Ground wire connector for kill button?
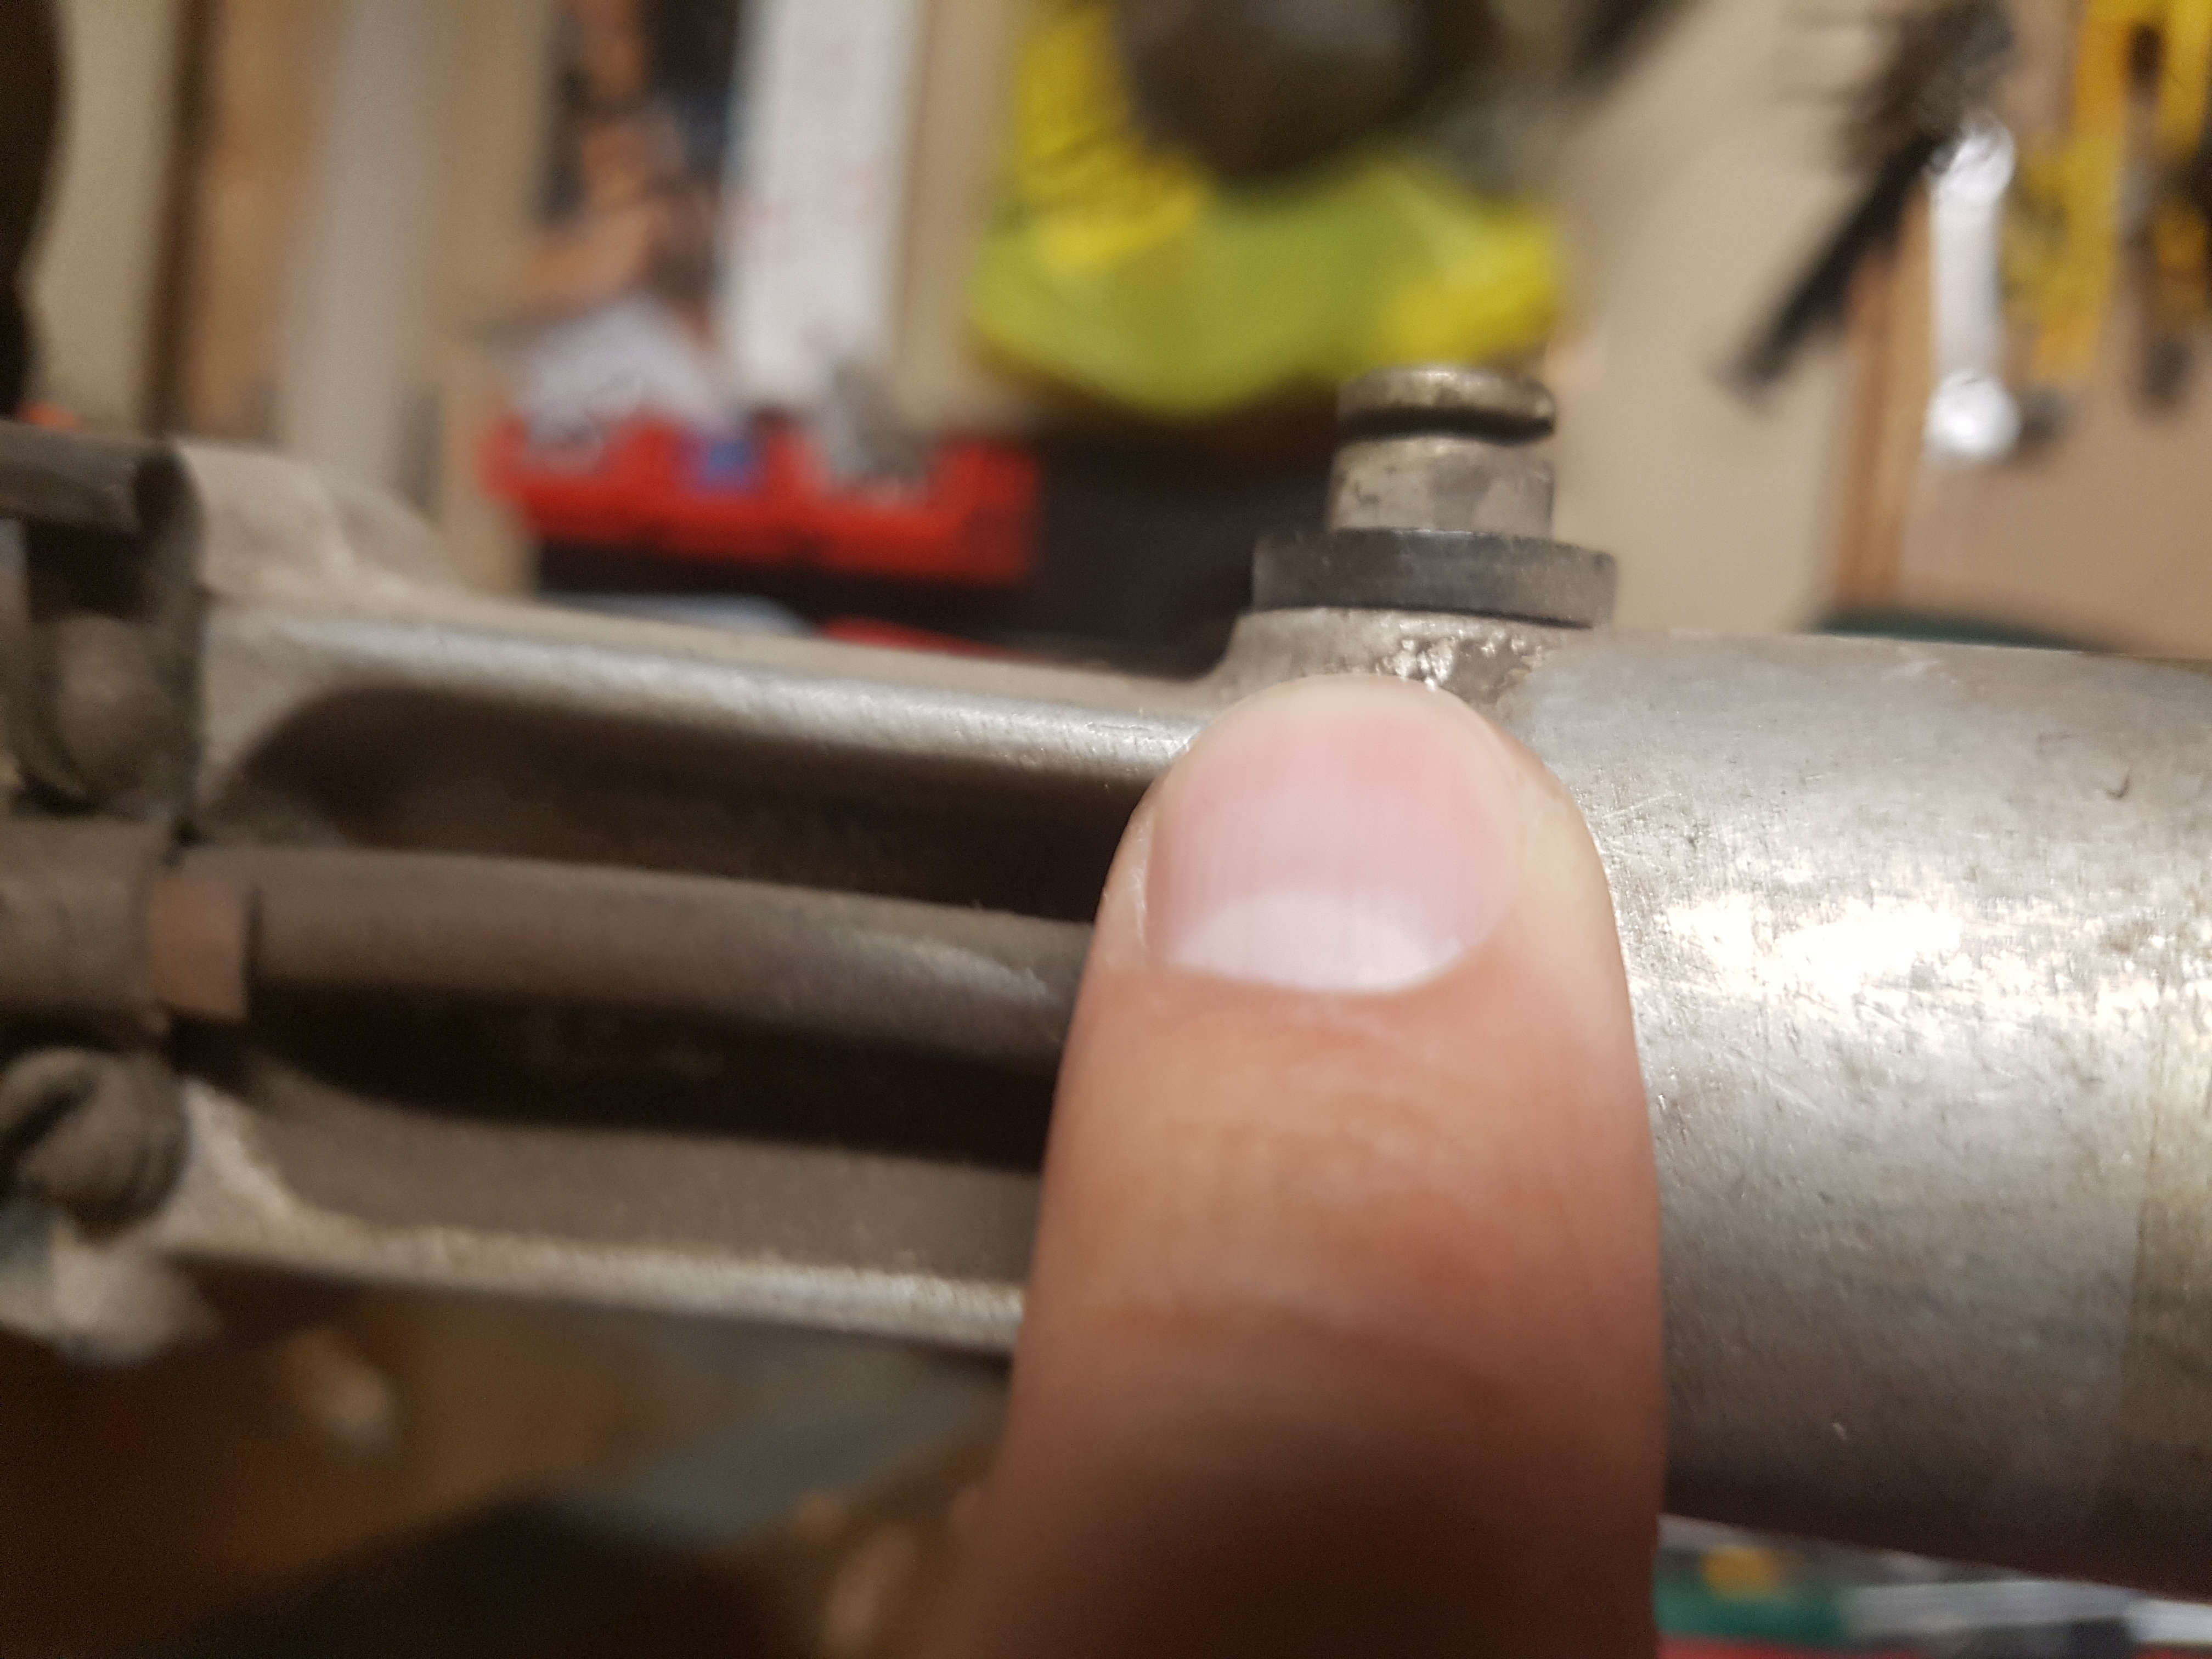
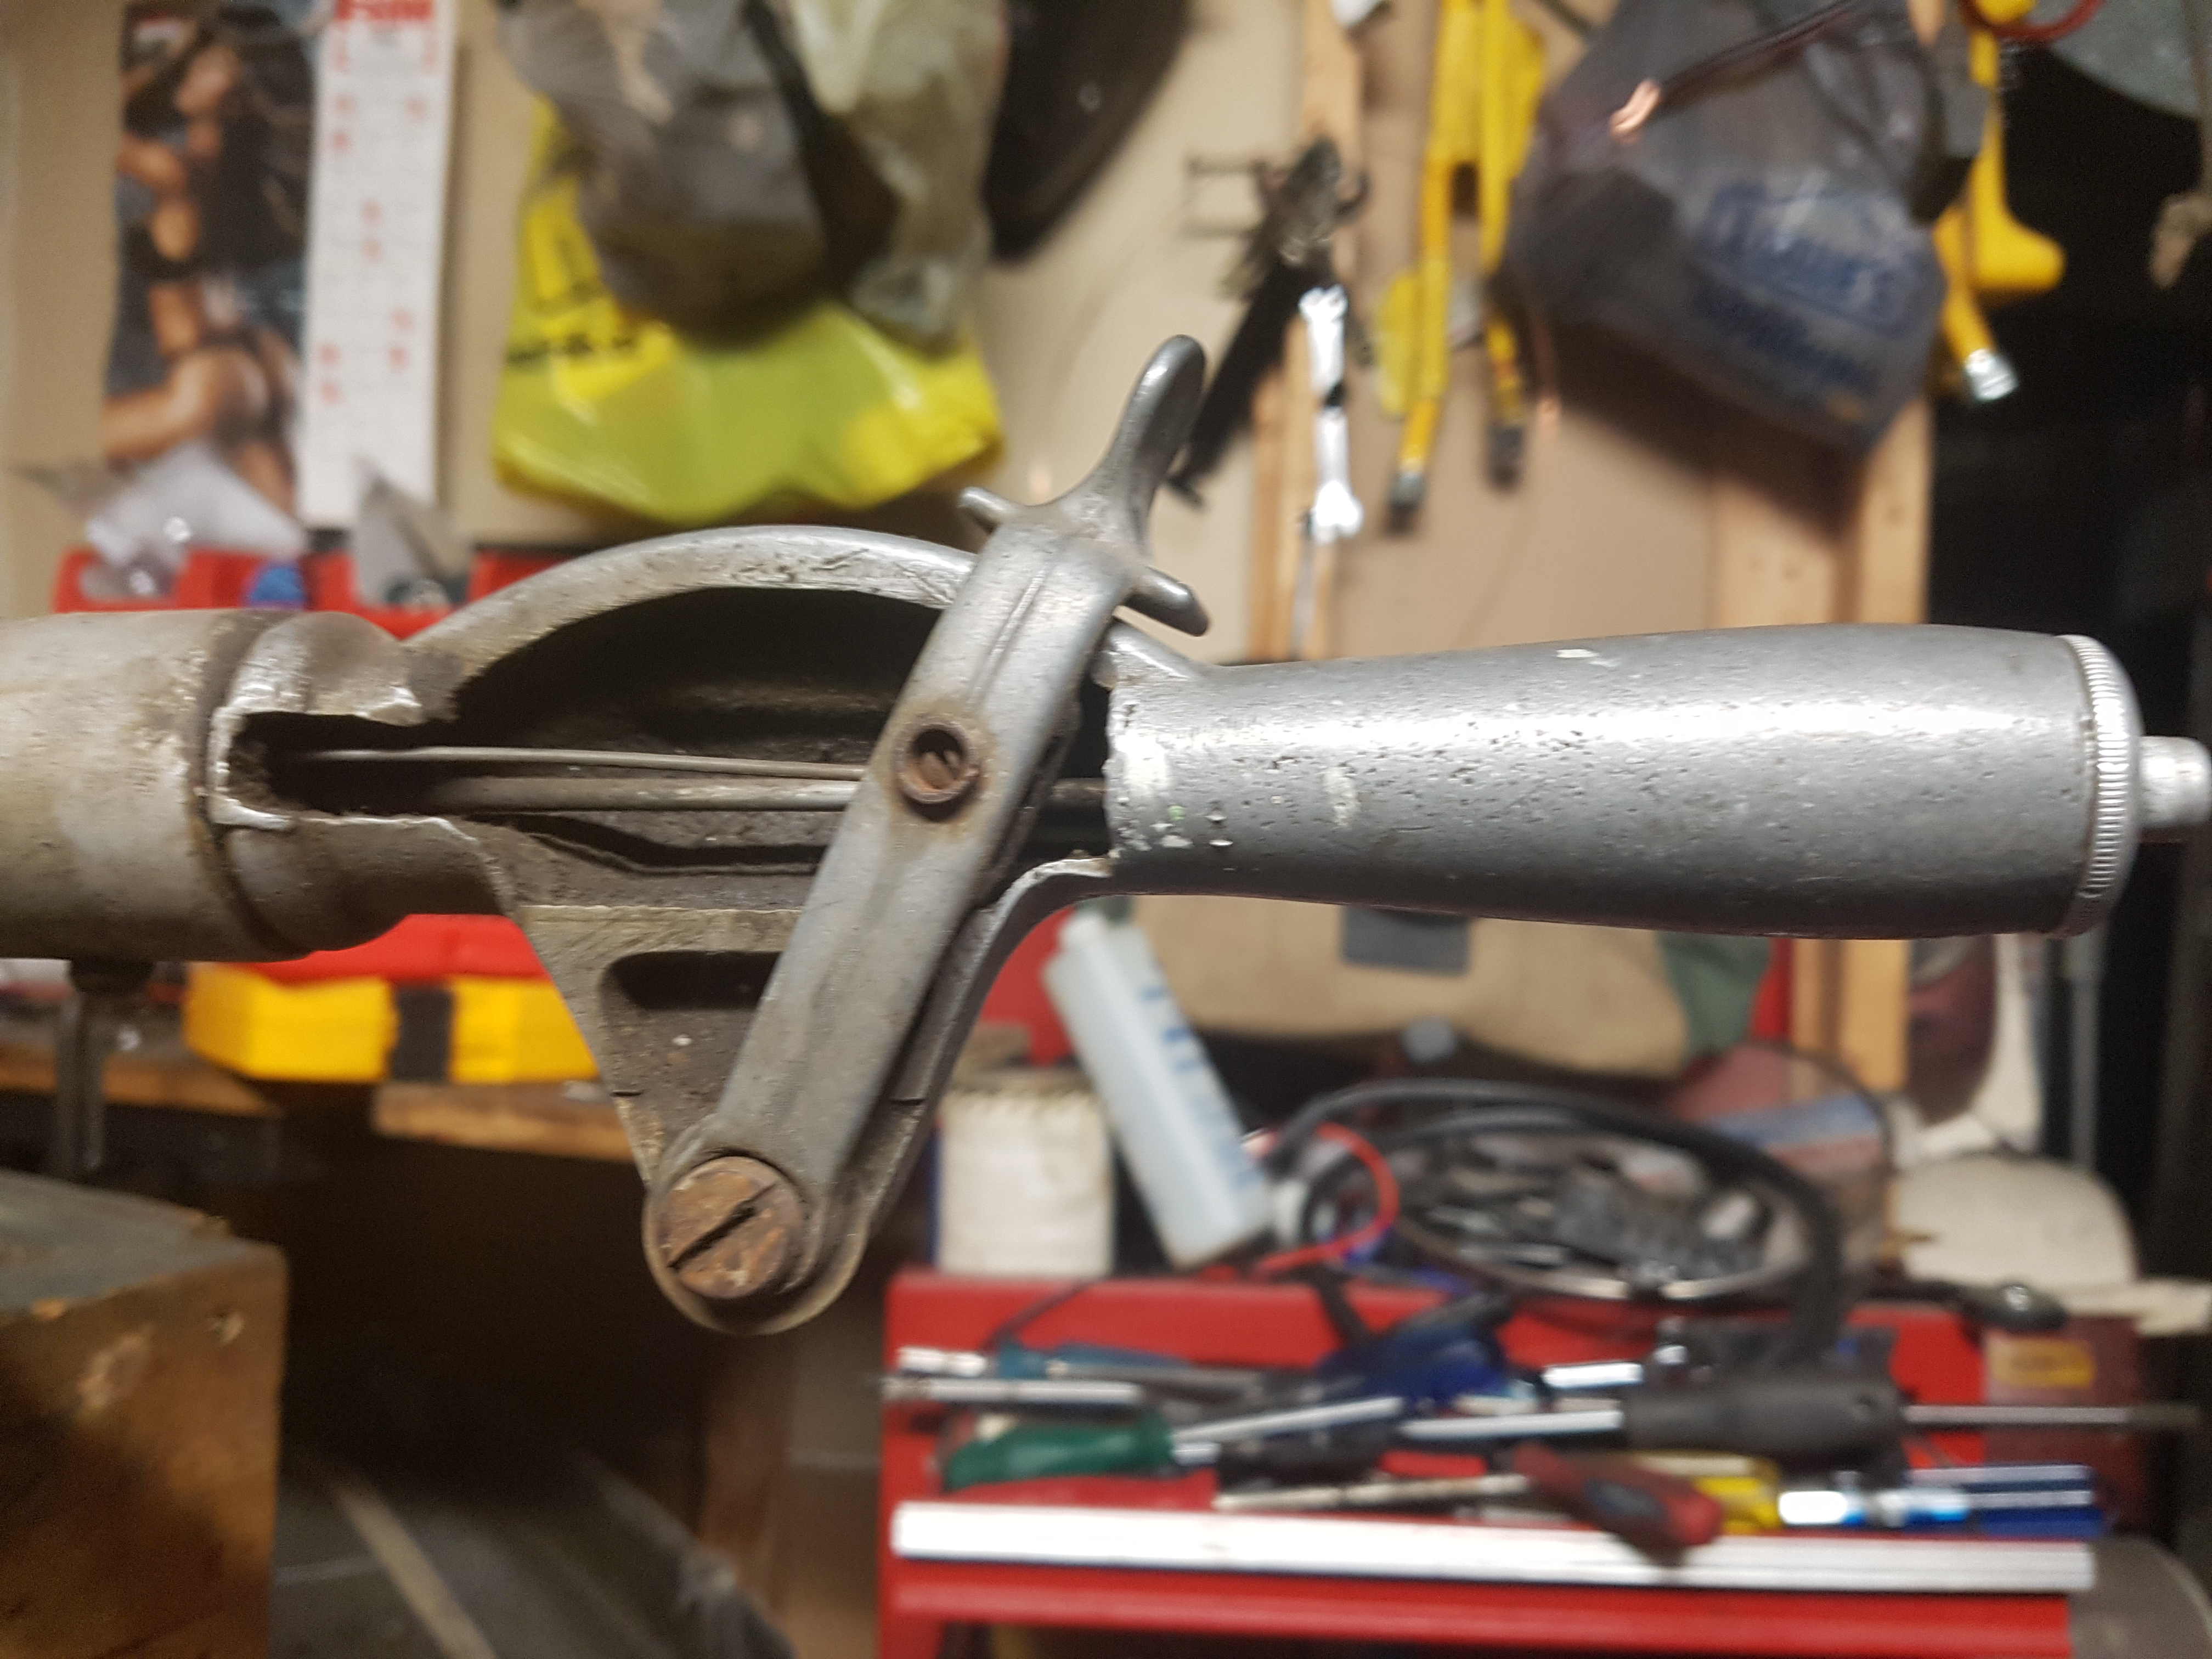
April 23, 2018 at 12:47 am #74543Bill has it right, you’re pointing at the stud for the ignition ground button on the end of the tiller handle. You need a wire to go from there up to the magneto plate and get attached to where it can ground out the ignition when you push the button in.
TO drop the lower unit – yes, two screws – there’s the one screw that tightens a clamping collar, the other one screws in from the front and is basically a locking screw to keep the lower unit alignment straight, the undo the water lines (use two wrenches, one on the compression nut, the other on the fitting… if you don’t use two wrenches, you will be sorry!)
Spark plug leads are actually easy to change on these, they have Bakelite tower thingys on the mag plate. You take the high tension lead out of the tower, and you’ll see a small screw down at the bottom inside the Bakelite piece. Take that screw out, and the spark plug leads easily pull out from the underside of the Bakelite part. Strip the insulation from the end of a new spark plug lead, insert it into the bottom port on the Bakelite part, and re-install the screw. easy peasy, no soldering for the spark plug leads.
The high tension leads coming from the coil and inserting into the Bakelite tower thing – well, those are another story…..
Hope this helps.
Best,
PM T2He's livin' in his own private Idaho..... I hope to go out quietly in my sleep, like my grand-dad did..... and not screaming, like the passengers in his car...
April 23, 2018 at 12:50 am #74544quote Chris_P:Yes I would like to have it running by Belwood.I was wondering why the previous owner had the tank drain plug taped to the tiller arm. Now I know, stripped!
Check to see if its the threads on the plug that are stripped, or if its the tank. Normally its the plug, but have a gander anyway.
I’ll work on f***ing up a replacement plug for your motor and bring it to Belwood, you supply the gasket.
PM T2
He's livin' in his own private Idaho..... I hope to go out quietly in my sleep, like my grand-dad did..... and not screaming, like the passengers in his car...
April 23, 2018 at 12:58 am #74546Thanks for the help Chris.
Have to fly out to Alabama for a few days, the test tank will have to wail until I return.
April 24, 2018 at 1:41 pm #74645The sight glass o.d. I believe is 7/16ths and I have not been able to find cast acrylic in 7/16ths. I used 1/2" cast acrylic on mine. Cast acrylic can be threaded in a lathe. Unlike the sight glass on the Johnson’s which are blunt ends, the Lockwood glass is threaded.The trick is to machine the threads so when screwing on the ends they line up together when tightened and are exact in overall length. You also want the threads to be snug on the o.d., so be careful when you cut. Since the Lockwood is 7/16ths you have to cut the end down and then thread. I threaded one end for snug fit, marked the other end, then cut threads so the other end would line up. A bit tricky. I suggest blue locktight for sealing purposes.
George
Attachments:
 April 25, 2018 at 12:08 pm #74726
Oh, a second comment……Put a rubber boot over that terminal for the kill wire found on the steering handle,—it’ll light your fire if you touch it while the engine is running, as in the process of closing the exhaust cutout..
George
-
AuthorPosts
- You must be logged in to reply to this topic.