Home › Forum › Ask A Member › 1955 Johnson 5.5 HP CD-12
- This topic has 21 replies, 7 voices, and was last updated 5 years, 7 months ago by
Don.
-
AuthorPosts
-
July 22, 2020 at 5:10 am #209410
Hello, I am looking for videos/posts about how to rebuild a Johnson 5.5 HP from 1955. I purchased all of the rebuild kits and just need to follow step by step instructions to rebuild the motor. I also want to sandblast the metal covers and repaint the covers as well as put a new set of retro labels on it so that it basically looks and runs like it did the day it left the factory. Last year when I bought it, I began the rebuild process but I cannot find the links to the instructions and posts I was following at the time. I have taken the starter cord off, the magneto, the flywheel, the ignition parts, and about a week ago I began rebuilding the carburetor.
One problem I have currently is that I have been able to disassemble most of the carburetor with the exception of the spring-loaded flow controls and their springs and the arms that control their movement. I won’t be taking them apart. The problem I have is that I cannot get the brass seat to come out that sits behind the float hinge. This thing will not budge and I don’t want to break it or anything around it. If you have a suggestion to get it to turn so that I can take it out, I would appreciate the advice. It appears to be all the way in with no more counterclockwise adjustment if that is supposed to be that way. I have tried my best to get it to turn counterclockwise to take it out and I just can’t get it to budge. I thought about using an acetylene torch to heat up the surrounding metal but I don’t want to damage the metal in any way by using high heat.
Another problem I see is the holes that hold the pin that the float pivots on are broken. They do not form a full circle for the pin holding the float to go through. Instead, both holes are open. The one on the left is open at the top position facing the direction of the other half of the carburetor bowl. The other hole is open downward in the direction of the float as it hangs down. It may be that the carburetor is designed that way. It seems odd that the holes would be broken in two different directions, maybe not, but I have never worked on this carburetor before so I don’t know if this is broken or not. I also do not have another carburetor so I have to make do with this one and have to use what I have.If you can help me with these things it would be very much appreciated. Thanks,
Harmattan1
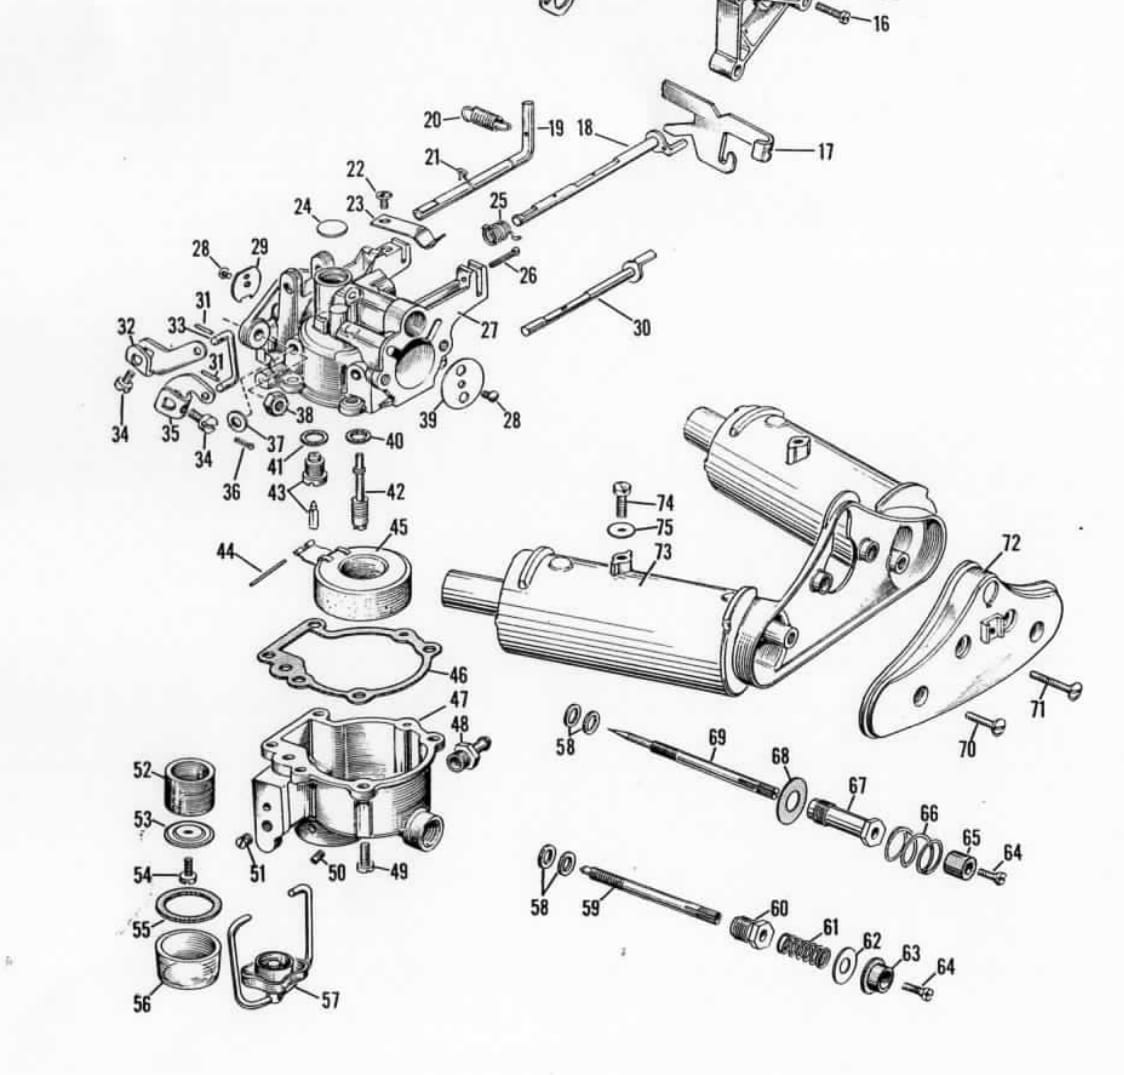
July 22, 2020 at 7:50 am #209411Not sure the diagram will help.
“Spring Loaded Flow Controls”……….Not sure if you’re talking about the high and low carb adjustment needles.?
If the carb is gunked up with old tar like gas, the needles can bind up. I would heat with a hair blow dryer
on high heat for a while and try to loosen the needles. Have you removed the packing nuts from the needles first?As long as the float arms aren’t corroded, bent, etc., and will perform their function, it should be okay.
Not sure where you’re at, but if you’re near a local chapter, perhaps you can get some hands on help.
Prepare to be boarded!
July 22, 2020 at 9:45 am #209421OK, sounds like you are going to need another carburetor, at least the upper body. There is nothing you can do to repair the carb body casting if the ears for the float pin are broken….So, the stuck inlet needle seat is an issue you won’t have to worry about. But, you are correct about the throttle/choke shafts, you should not attempt to pull the choke or throttle butterflies of of the shafts…There is no need to do this anyway. A good soaking or ultrasonic cleaning will take care of any corrosion/dried grease.
So tell us everything you plan to do with this engine.
Usually, these engines need the following:
Ignition plate rebuild- new wires, coils, points and condensers
Clean and rebuild carb, replace fuel/air hoses
Remove powerhead, then remove gearcase….Drain and inspect gear lube to determine whether or not it needs to be resealed….Inspect impeller housing and SS plate, replace impeller…
If the gearcase has water in it, or the lube is milky, you will need to pressure test to determine exactly what is leaking. Once the leak area is determined, then the gearcase can be pulled apart. Once apart, it is best to replace both shaft seals, shift rod oring, prop shaft bushing oring, and upper bushing/seal cover gasket. You will need to inspect the seal surfaces on the shafts also. Once the unit is back together, you will need to pressure test to ensure it is sealed properly….Even the slightest leak is unacceptable.
So, post pictures of the parts you have and intend to install. Let us know if you plan to actually rebuild the powerhead, like I say, this is usually not necessary, but pulling the head to have a look inside is a good idea. Did you do a compression test before began?
There are just too many details to post here, but we will try to get you a link to a decent service manual…
I will let someone else advise about repainting, I have zero talent in that area….July 23, 2020 at 2:49 am #209515Bucaneer, thanks for the diagram. Funny thing is, the diagram does not show the inside of the inside of the upper half of the carb where the inlet needle seat is located and the float is attached. Either way, I was able to get everything apart but the inlet needle seat that sits behind the float. I was able to get both the other needles out along with the seals that go in there as well. I may have to get that half of the carb body because the ears for the float pin are slightly broken. One is open towards the float in this direction –> and the other is open in this direction ^ .. When I opened it up it looked like the pin was in good position and the old float did move back and forth. I am hoping that I wont have to replace it and will check by putting in the new pin with the new float and see if it will hold. If not I will need to get at least half of a new carb.
Fleetwin,
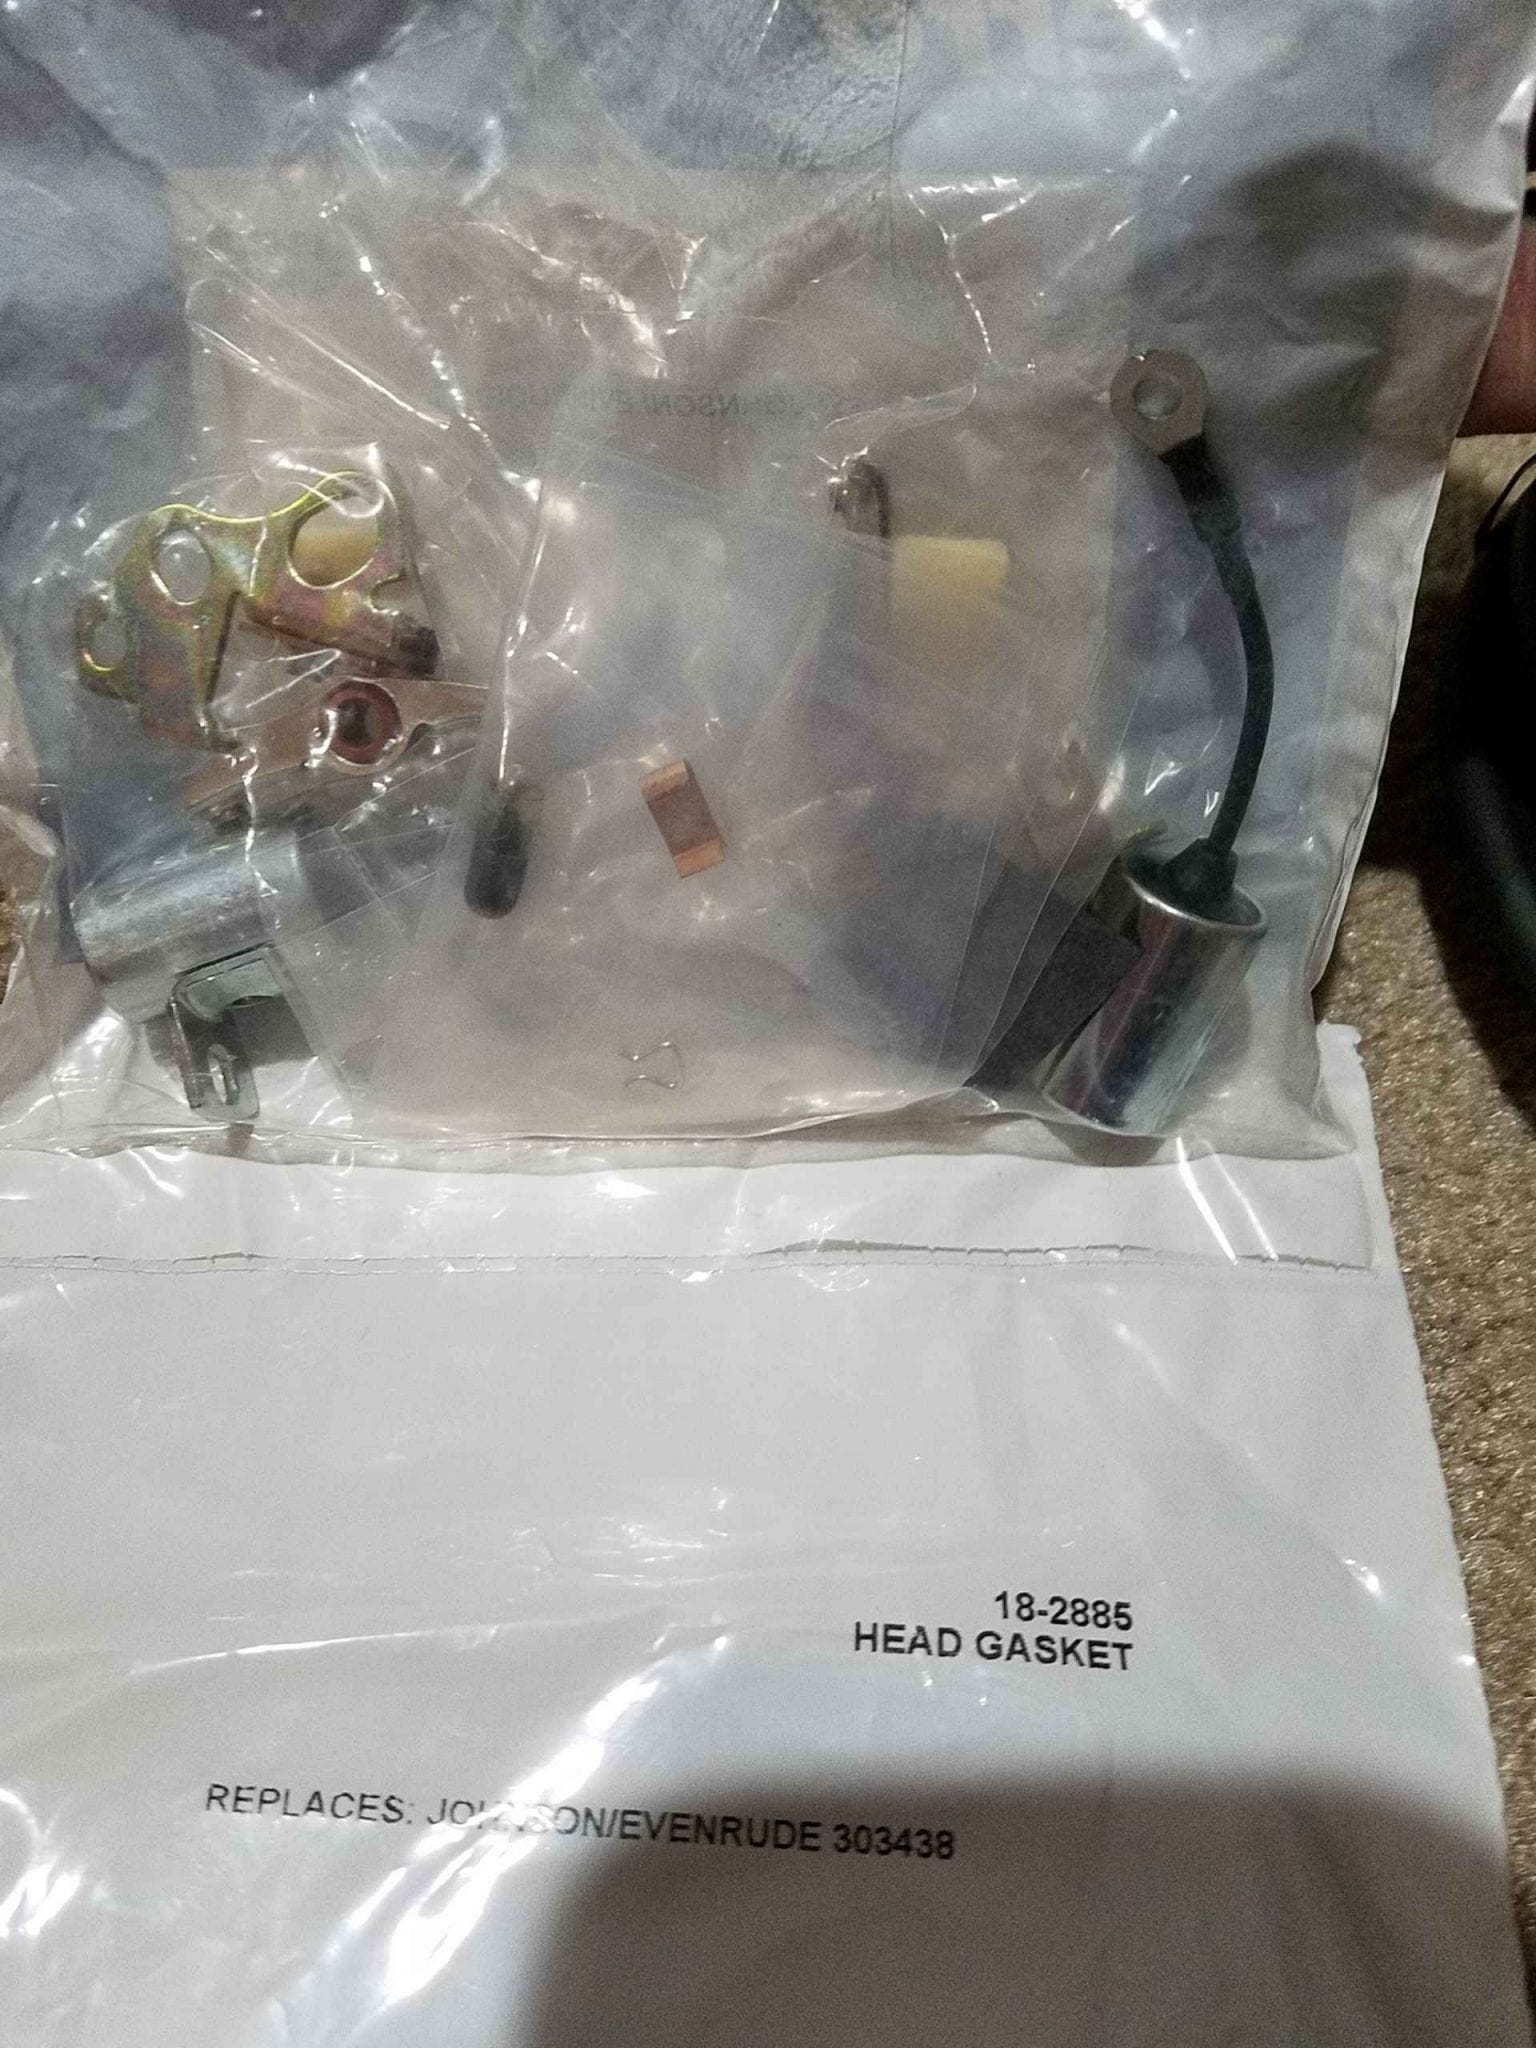
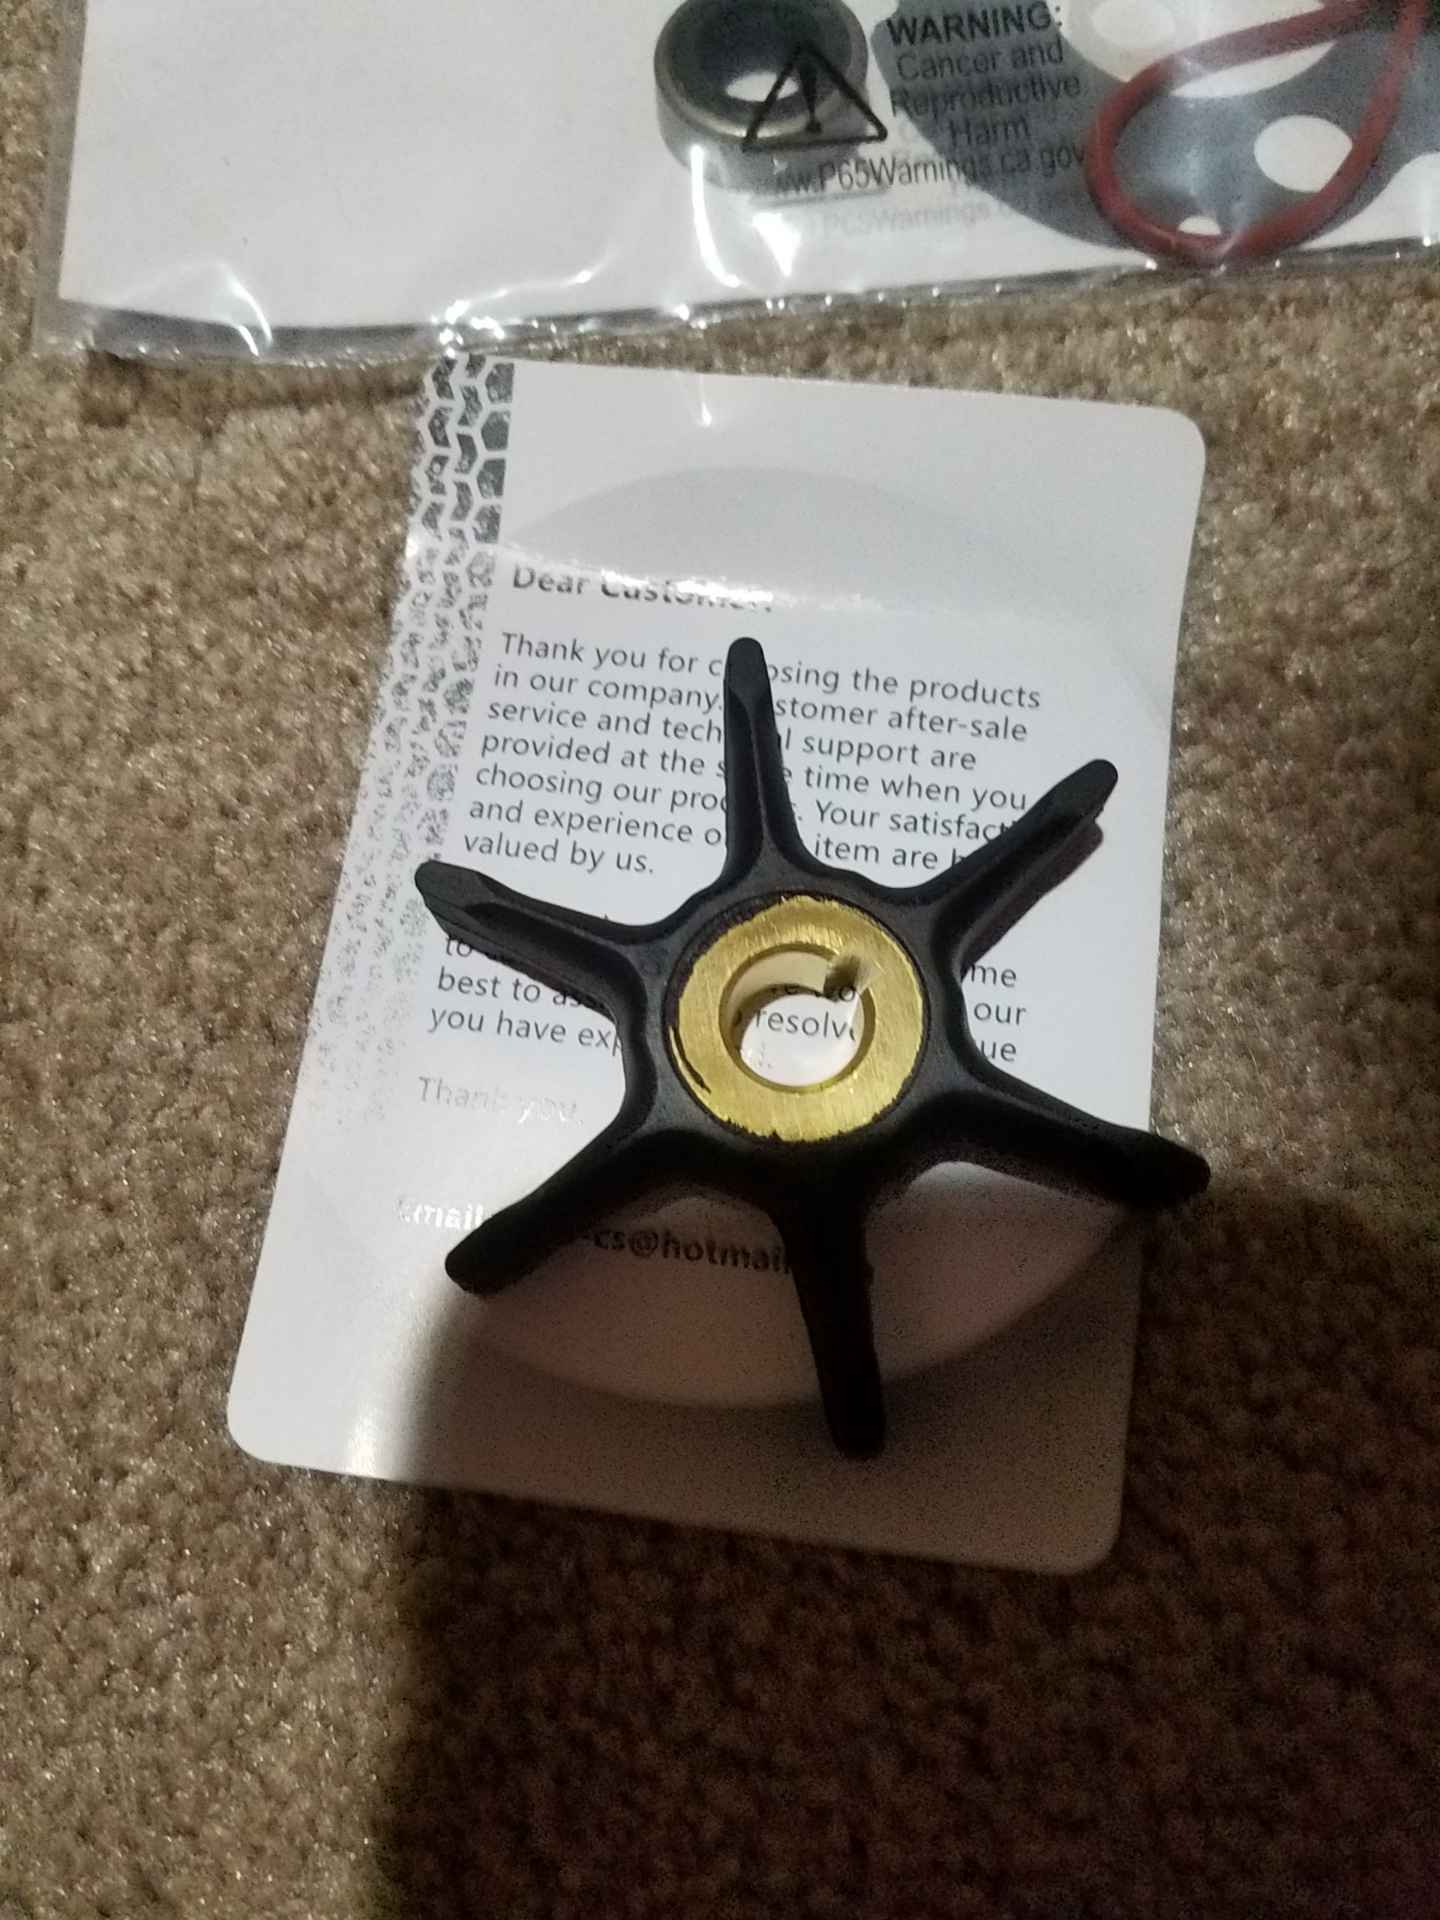
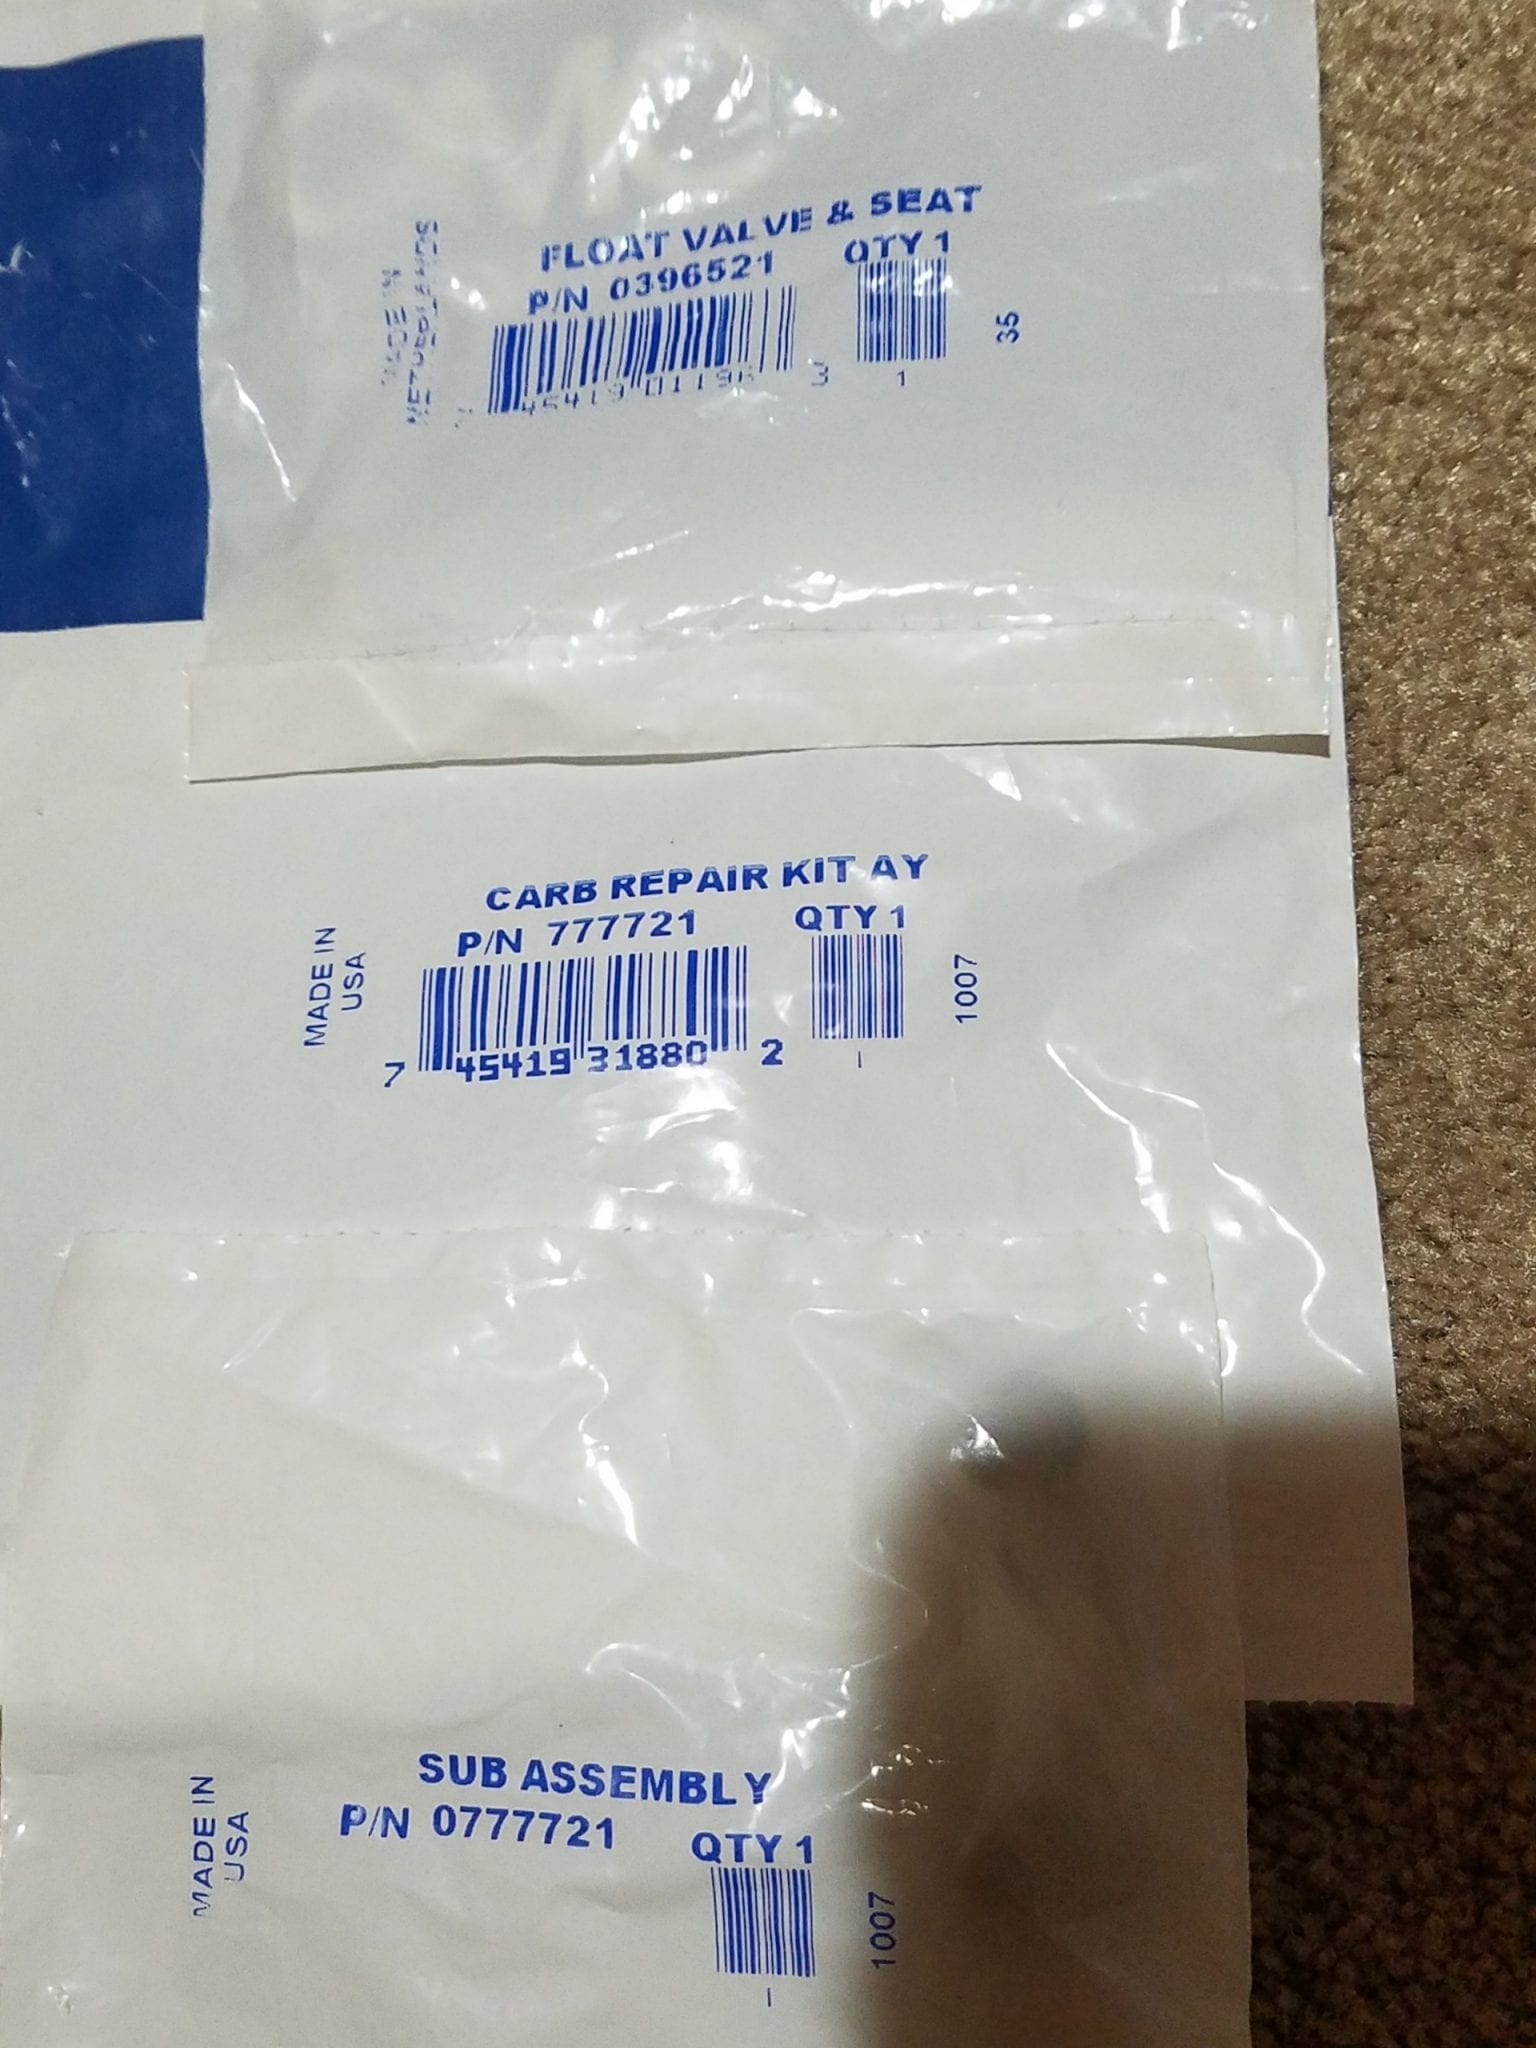
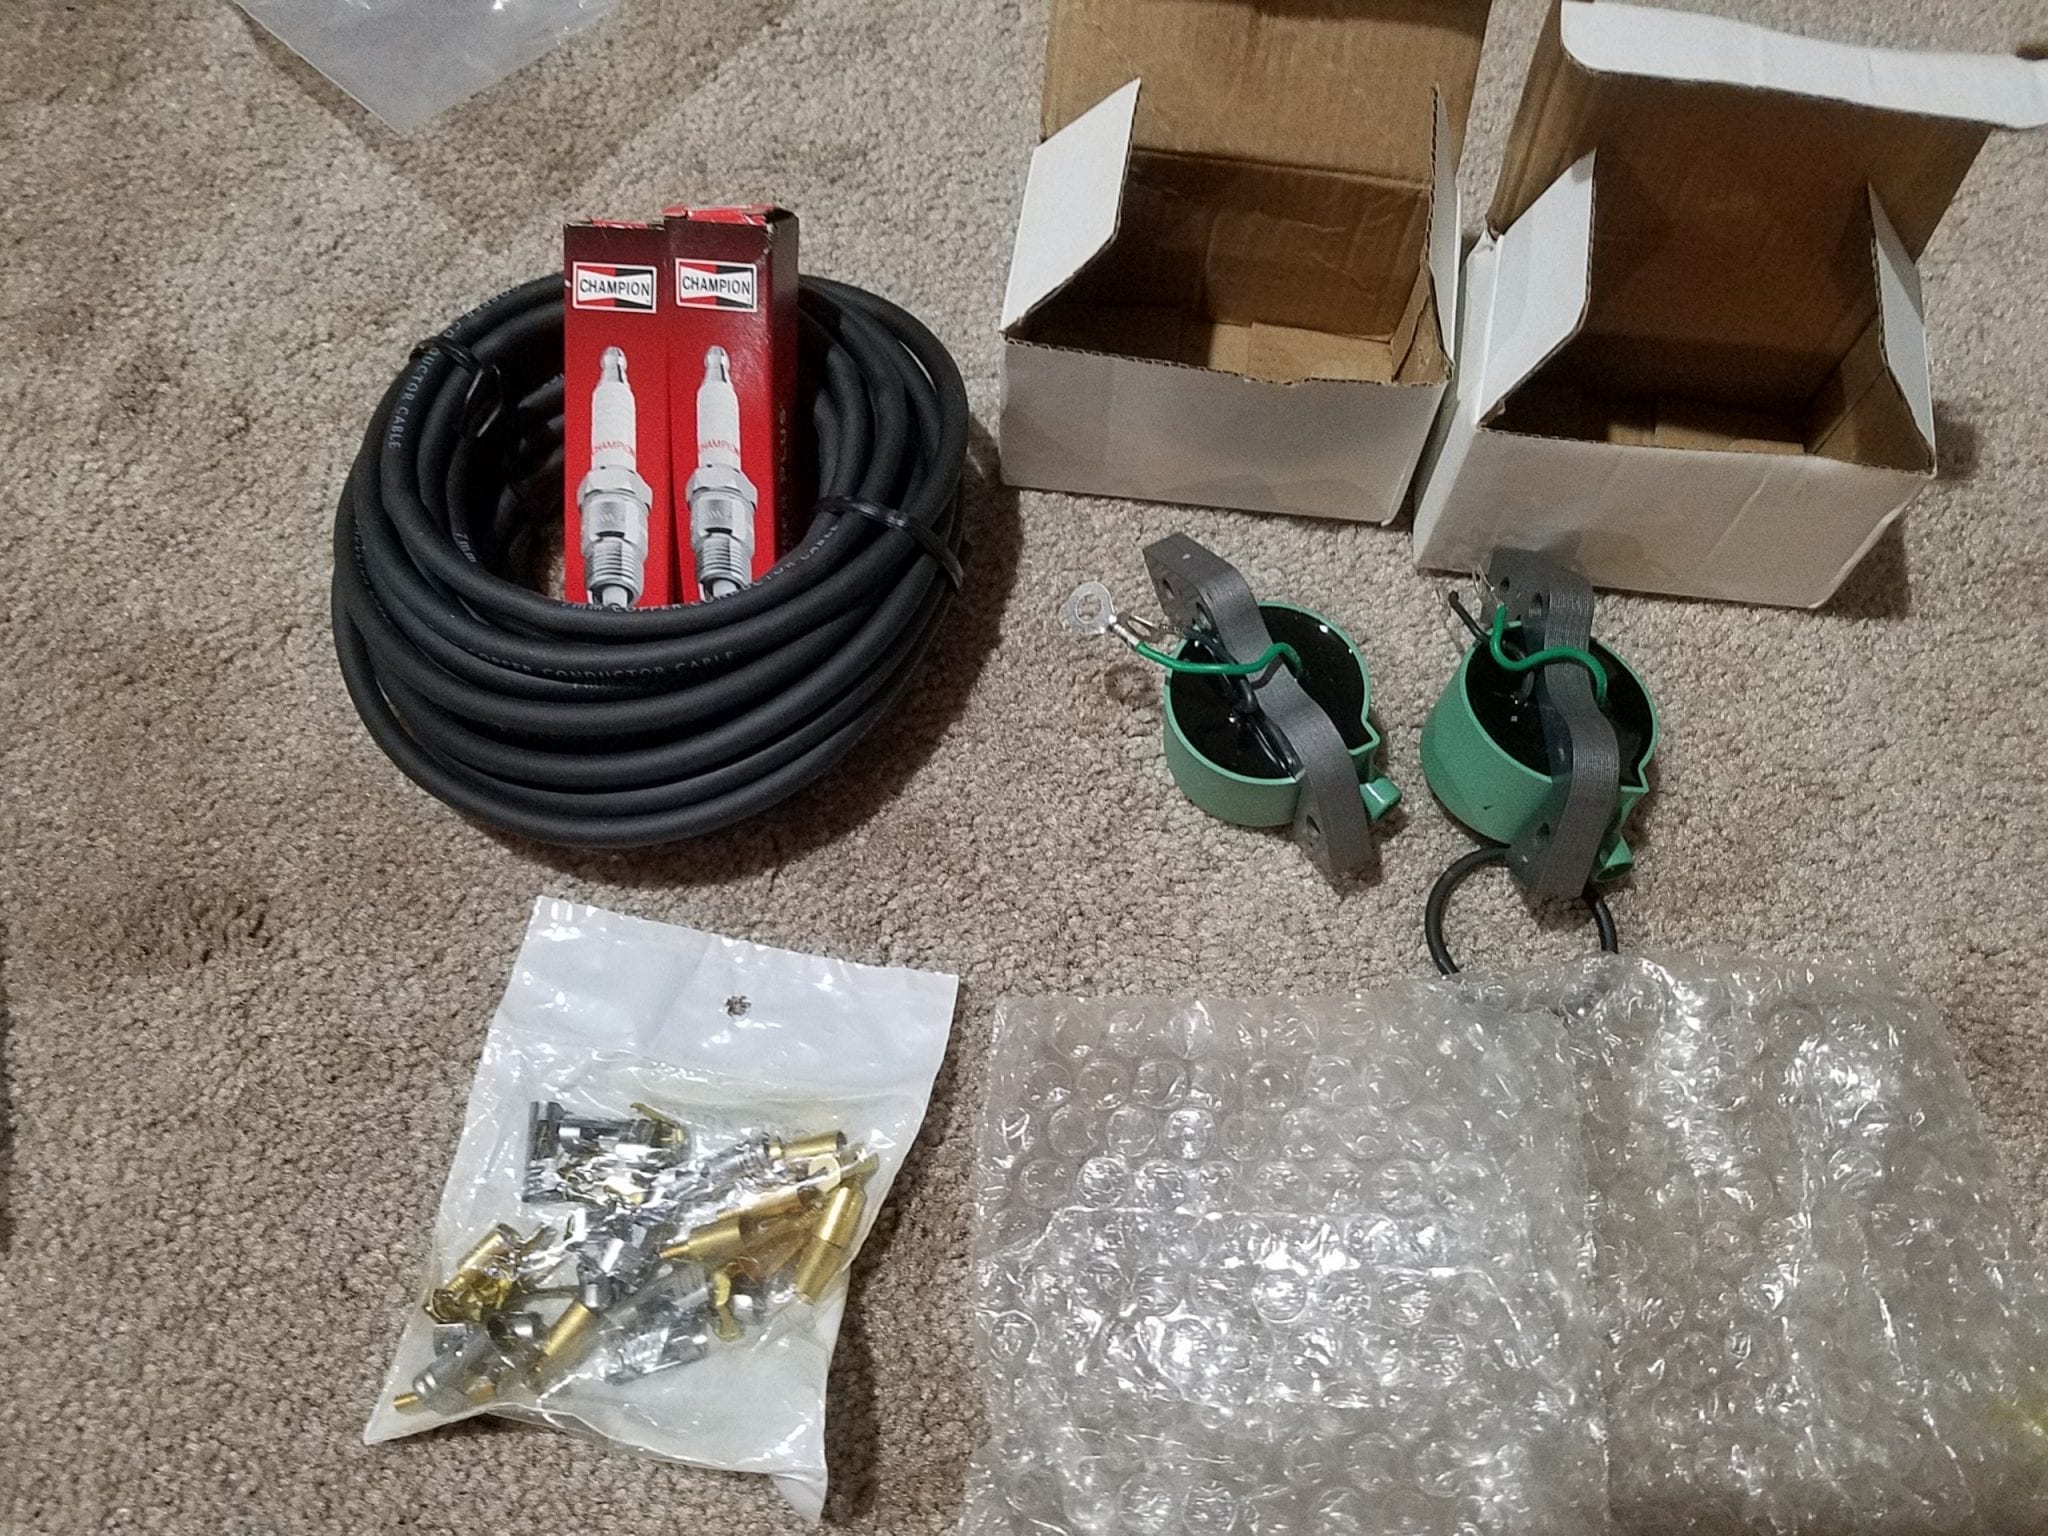
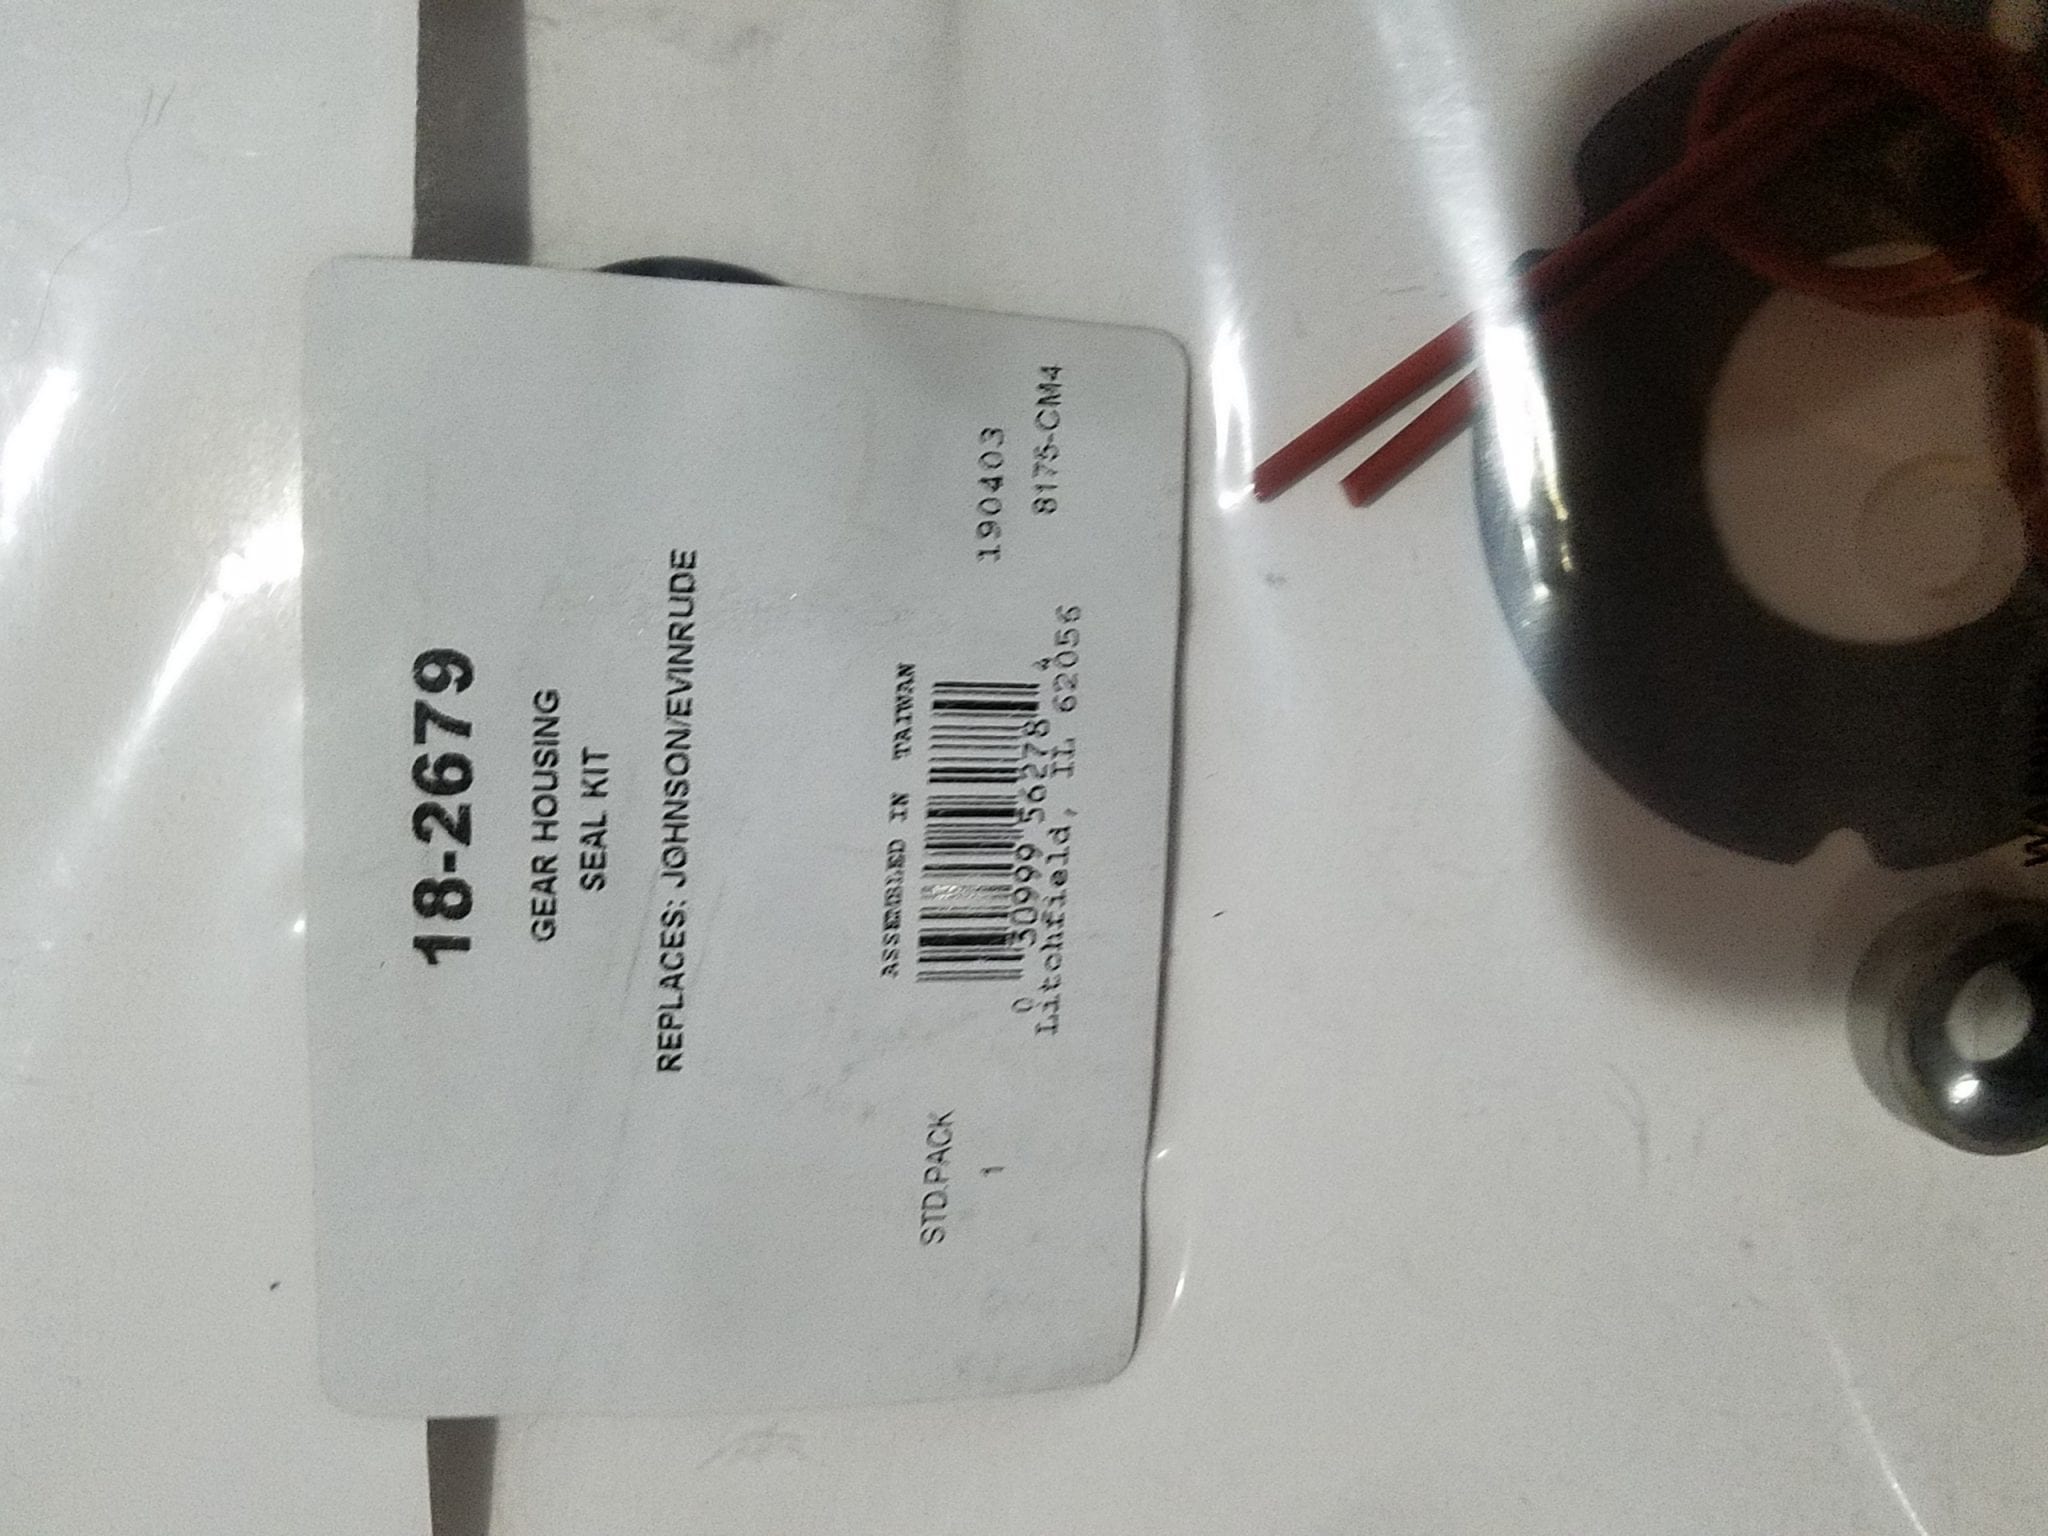
I have attached pics of the parts kits I have to use to rebuild still. The first pic shows the new solenoids, spark plug wires, spark plugs, and plug wire attachments. The second pic shows the tune up kit(condensor, points, etc) and the Head gaskets. The third pic shows the impeller and gear housing seal kit. The last pic shows the Carb repair kit with float valve and set and the sub assembly. I have a carb bowl gasket coming and I will also be buying the new fuel lines. I dont know if I have everything to address each item you listed but I have at least most of it for sure.
I did do a compression test before I even started this whole thing. The test showed an even compression on each side at a reasonable reading. It think I would like to check to see if the rings on the pistons need to be changed/replaced. I am not sure if I should do anything else to the cylinders/cylinder walls.
One problem I have is that I cannot seem to get the motor to swing up on its axis. I cant get the locking mechanism to loosen enough to swing the engine up to get under and loosen the power head screws. It looks like there is some kind of adjustable rod that sits behind the main drive shaft housing and it doesnt push down far enough to release the locking stud the sits in the slots. I am either missing something in the process very simple or I will have to go about it another way to get at the inner workings of that area.
If I am missing some repair parts that are not shown in the pics provided, please let me know what I still need. I plan on doing a complete overhaul where possible with the exception of possibly a few items not needed. Thanks in advance for all you help.Harmattan1
-
This reply was modified 5 years, 8 months ago by
 Mumbles.
July 23, 2020 at 2:52 am #209519Could not get all the pics in the post here are a couple more

-
This reply was modified 5 years, 8 months ago by Mumbles.
July 23, 2020 at 2:53 am #209521Could not get all the pics in the post here are a couple more
Harmattan1
July 23, 2020 at 7:56 am #209527OK, looks like you have everything you will need most likely. I didn’t see the new plug terminals: 581027, but you have plenty of plug wire for sure. What brand of impeller is that? I recommend using the OEM impeller, too many reports of poor pump performance with the aftermarket impellers.
You may not need the gearcase seal kit, have you drained the gear lube? Please do not remove that small phillips screw in the skeg, the shift linkage will fall apart inside…
Normal gear lube will probably appear dark/black in color which is normal for the older lubes that were used back then…
Milky colored gear lube means trouble
Any signs of raw water draining from the gearcase spells trouble also
Perhaps I have misunderstood the condition you describe on your carb body. You make it sound like the hinge pin holes for the float are either cracked or actually broken…Once again, there is no way to reliably repair this, you will need to find a used carb or upper body, there are plenty of these around… Post a picture of the carb body if you think I have misunderstood what you described.
Finally, I don’t recommend pulling that powerhead apart…There is no need to if compression numbers were even. These engines usually never got enough hours on them to be worn out…The powerheads were only damaged by overheat, lack of correct fuel/oil mix, or water/rust.
Finally, those 55 models had kind of an automatic lock that held the engine down in reverse…The engine should tilt up in forward or reverse gear. There is a little latch that catches on the tilt angle rod on the bottom of the stern brackets…It will be easy to see if you just tip the engine upside down on the floor. You will be able to pop the lock off the tilt rod with a screwdriver… Once the powerhead and gearcase are off, you can get back to this to see why it doesn’t work… The only other thing I can think of is that the transom bracket tilting bolt is too tight. Try loosening the nut on the top right side of the transom bracket. This is a friction fit that is tightened enough so the engine will stay tilted up…July 23, 2020 at 2:27 pm #209559I bought the impeller along with the rest of the items on Amazon with the exception of a CD I bought that has the Johnson Factory manuals for all the outboards from 1922-1964. Lot of info there. I do have a whole bag of connectors to make new plug wires for sure. I checked the listing for the impeller order and it says…….Water Pump Impeller for Johnson Evinrude BRP OMC and it lists all the HP motors it can be used for. I have not checked the gear lube yet. I have only taken off the pull start, magneto wheel, the round base plate and the ignition components there, the cylinder head cover, carb manifold cover and the carburetor. I have not done any work below that yet. I was following a post by another member who rebuilt one of these motors. I started last year late spring when I first bought it but had to put it aside for other things until now. I was following his progression along the way.
As far as anything in the gear case, the upper power unit, and any water leaking, I have not done any work in those areas. I will say, I have seen NO leaking whatsoever, eithe water or oil, of any kind. I dont know the history of this motor, where it has been and how long it has been since last run. I did go a compression test when I first got it and even though I got an even reading, I thought it was a bit on the low side. Not so much that the motor would be worthless, I think there is still life there, but I was wondering if the rings on the cylinder might need replacement, etc. I saw no rust when I opened the cylinder cover in the pistons but there appears to be some dark coloring, probably some carbon or some dirt from sitting. Either way, I am providing a link where you can see pics of the carb showing the broken eyelets the float pin sits in. Obviously that is a problem and it llooks like I will have to get at least that half of another carb. The rest of the carb looks to be in good shape. I also took some pics of the cylinders, the top unit as well as some of the lower units. Not the best pics but you can probably get an idea. Again, no leakage since I have owned it but dont know when it was last run. If you know the best place to look for a replacement carb, let me know and I will go there. ThanksHere is the link to the set of pics………….. https://imgur.com/a/i2NMQ0q
Tom
July 23, 2020 at 8:02 pm #209648OK, well that carb body has had in, no good, no way to save it…Finding another carb should be easy and not expensive.
Like I said, I don’t recommend using those aftermarket impellers, but that is up to you…
Looks like you pulled off the intake manifold, so you may want to pull the reeds off to inspect and have a look at the crank/rods, then replace the intake gaskets..Don’t mix them up, the inner gasket is different from the outer gasket…Install the gaskets dry, no sealer of any kind.
These engines don’t have alot of compression, do you remember what the readings were? Somewhere between 70-85PSI is normal for these engines. I can’t tell much about the cylinder condition from your pictures, but you may want to soak the cylinders with engine tuner just in case the rings are a little stuck. Again, I do not recommend pulling this powerhead apart unless you find evidence of damage on the cylinder walls such as aluminum scuffing on the walls or deep scores. I would use a little fine emery to clean up the glaze on the walls, this will help the rings seal. Yes, this is a primitive procedure, but we are not working on an aircraft or rocket engine here. Rough up the walls a bit, then clean out the residue with carb cleaner and recoat the cylinders with two stroke oil. Doing this might help get a better look at cylinder condition also.
You will need a new head gasket, you will want to check the surfaces to ensure they are flat, you may have to resurface the cylinder head mating surfaces if it is warped. You will want to clean out with block threads with a tap, and the bolts with a wire wheel before reinstalling the head. Coat both sides of the new head gasket and head bolt threads with OMC gasket sealer. The powerhead does not appear to have been overheated by the look of the paint.
Just because nothing is leaking out of the gearcase does not mean it doesn’t have a leak…Remove both of those large fill/drain screws from the gearcase and let it drain into a clean pan. Look for signs of water and report back…You will need to remove that powerhead from the exhaust housing in order to remove the gearcase and service the water pump. The shift linkage connects directly underneath the powerhead.
Take some time to review your manual’s procedures for the work you intend to do…Get back to us when you have more questions…
PS- Your pictures show the gear shift in the reverse position…The tilt lock is engaged in reverse so you won’t be able to tilt it up…Try shifting into forward gear, perhaps that is all that is preventing you from being able to tilt the engine up…-
This reply was modified 5 years, 8 months ago by
July 24, 2020 at 1:21 am #209679The compression was 75-80 when I did my readings. I did a couple reads and that was what I was getting. As far as the impeller, how can I determine if this is an aftermarket one or OMC? When I looked at the PO order at Amazon, it referenced OMC on the listing so I thought it was the right one. As far as the carb, where would I get another one? Best source?.
As far as the cylinders, i believe I did put some seafoam in both and turned the engine by hand to work it into the cylinders and just let it sit a few days before doing anything further. I think the instruction to do that was in the post I was following when I first started last spring.
When I looked at the cylinder walls, they appear smooth with no scoring that I could see. I will double check them again using the procedure you suggested.
I will open the screws and let the gear case drain tomorrow and see what the fluid looks like.
I do have the new head gasket and will review the manual before I do anything. I will get back in touch as soon as I find out more and take more steps. First thing I have to do is locate a replacement carb. If you have a suggestion to find one, let me know and I will look there first.Thanks so much for all your info and suggestions. One day this thing will be as good as new. Cant wait..
-
This reply was modified 5 years, 8 months ago by
-
AuthorPosts
- You must be logged in to reply to this topic.