Home › Forum › Ask A Member › 1956 Buccaneer 3hp water pump rotor
- This topic has 42 replies, 10 voices, and was last updated 2 years, 11 months ago by
 tinkerman.
-
AuthorPosts
-
February 15, 2022 at 10:47 pm #254716
I’m trying to get a very sentimental outboard going, granddad’s ’56 Gale Buccaneer 3hp model 3D13B. I’ve completely replaced ignition with new BRP parts (had original cracked coil), rebuilt the carb (full of dirt daubers) and it is still very hard to start. Couldn’t get it to fire at all until I gave it a little starter fluid (I know, I know its bad for them but with a 16:1 oil mix and about 50 pulls of nothing…). Anyway it seemed to run okay for the two minutes or so I let it run (not pumping any water). Restarted instantly if shut down and then pulled again. I’m wondering if the problem is my not understanding the primer type carb. Followed instructions on the motor, but if I try to prime a second time, gas overflows the float bowl. I had it on a sawhorse and read elsewhere that the problem might be I have the engine tilted with the carb throat a little down so the prime gas didn’t run into the engine? Other ideas for impossible cold starting (it won’t even pop)?
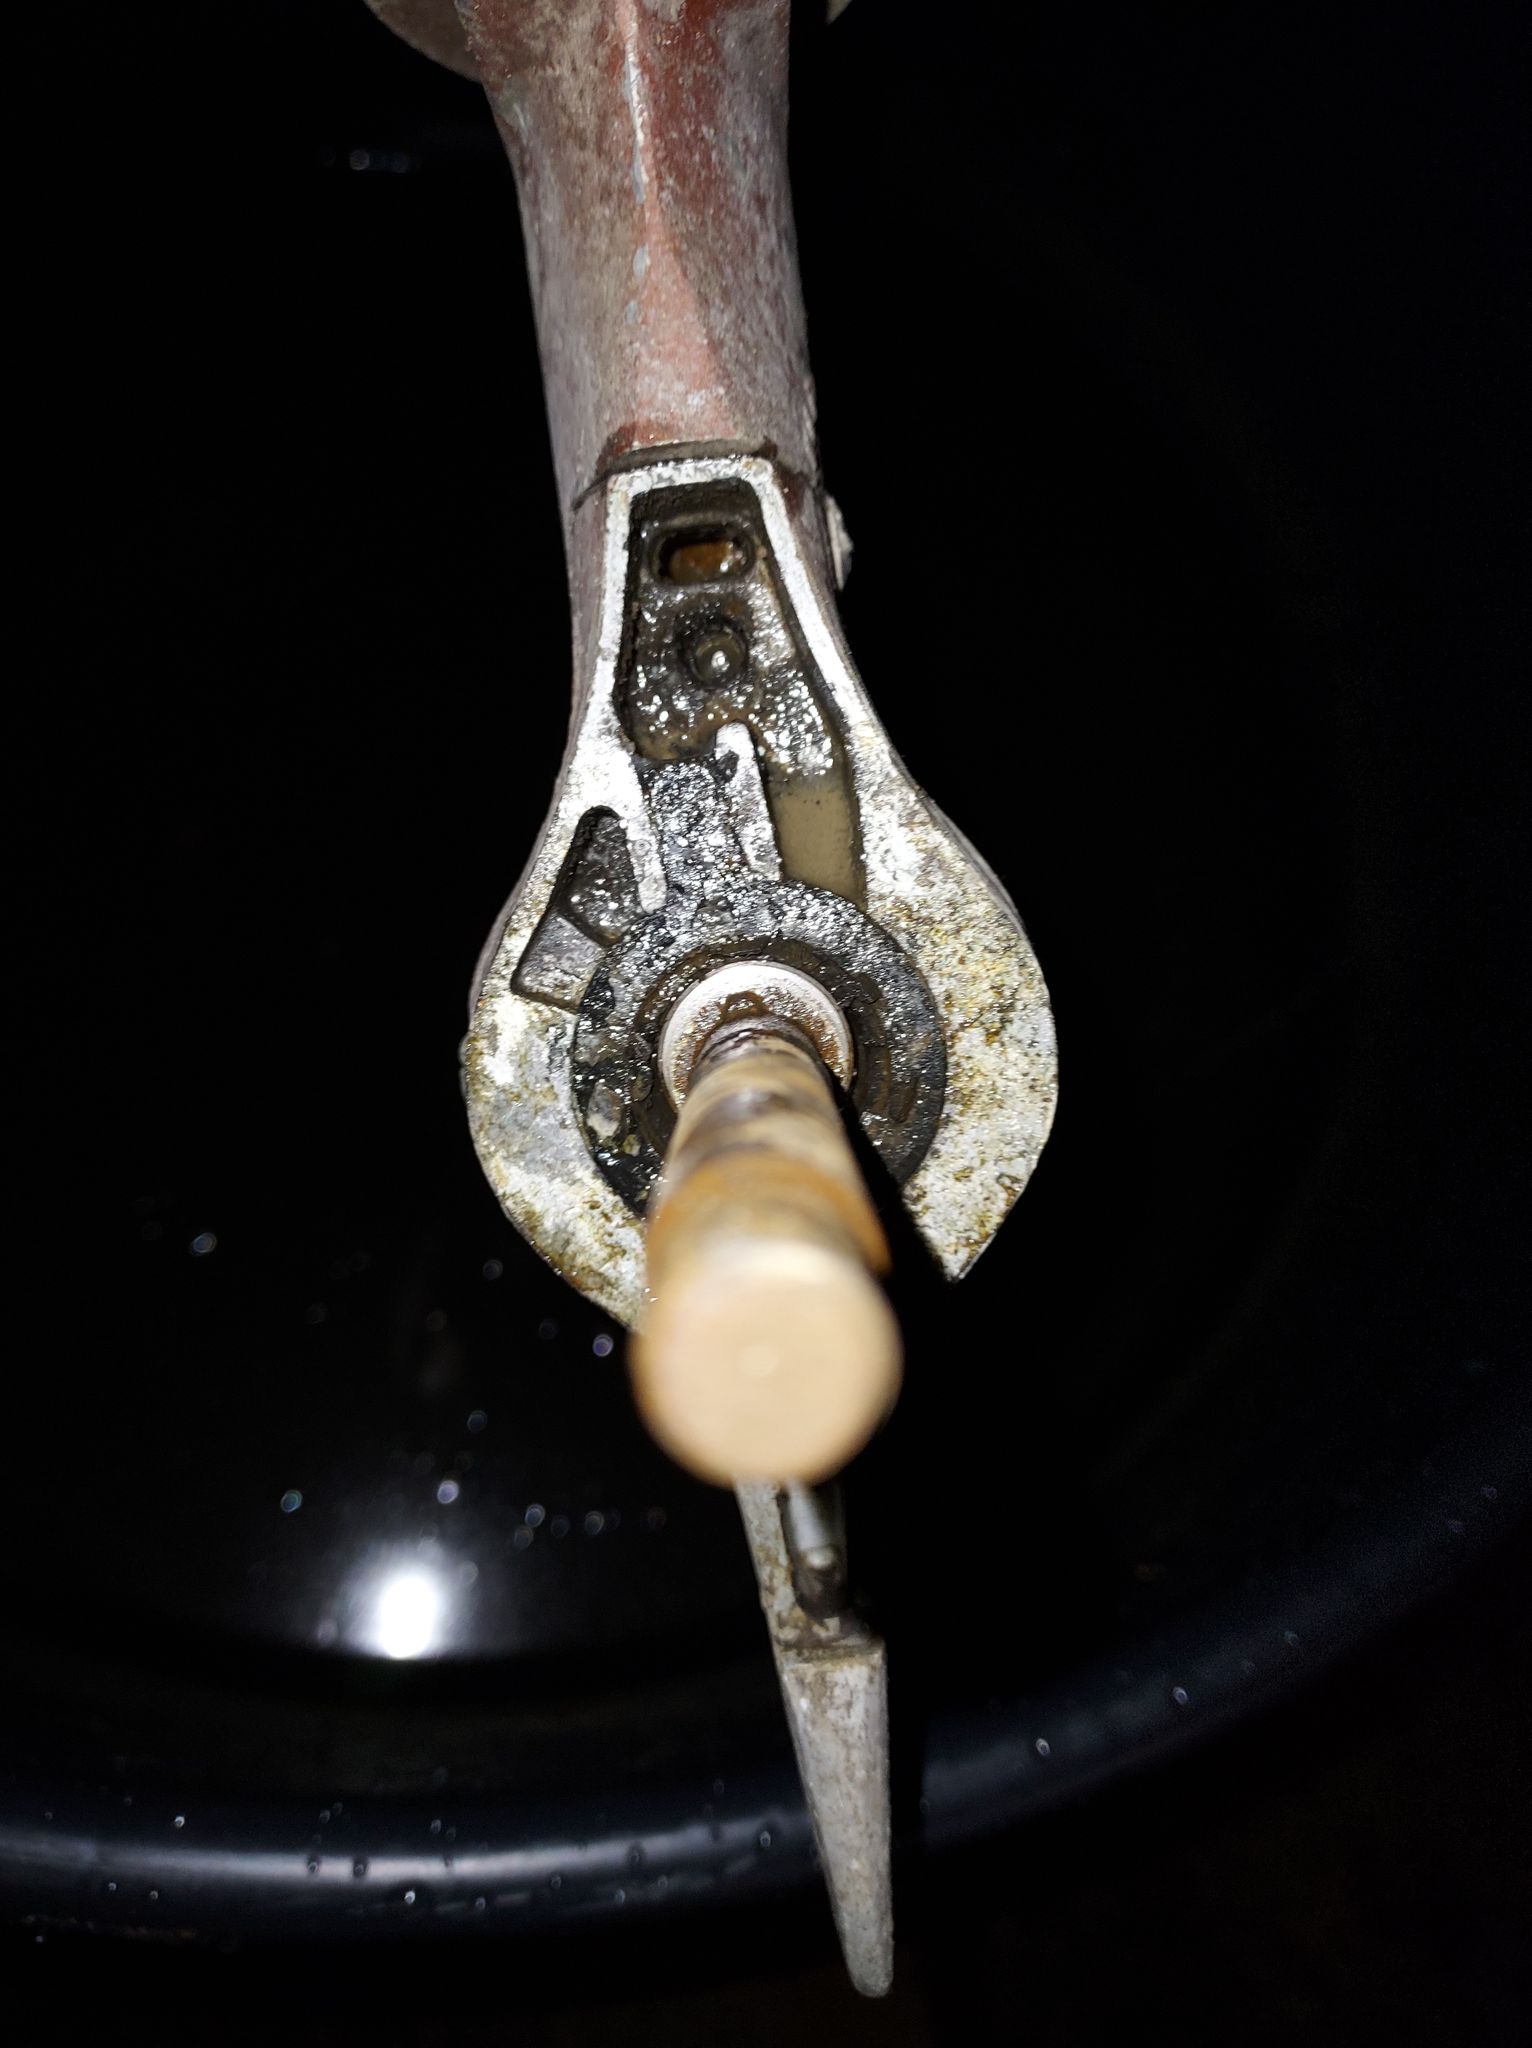
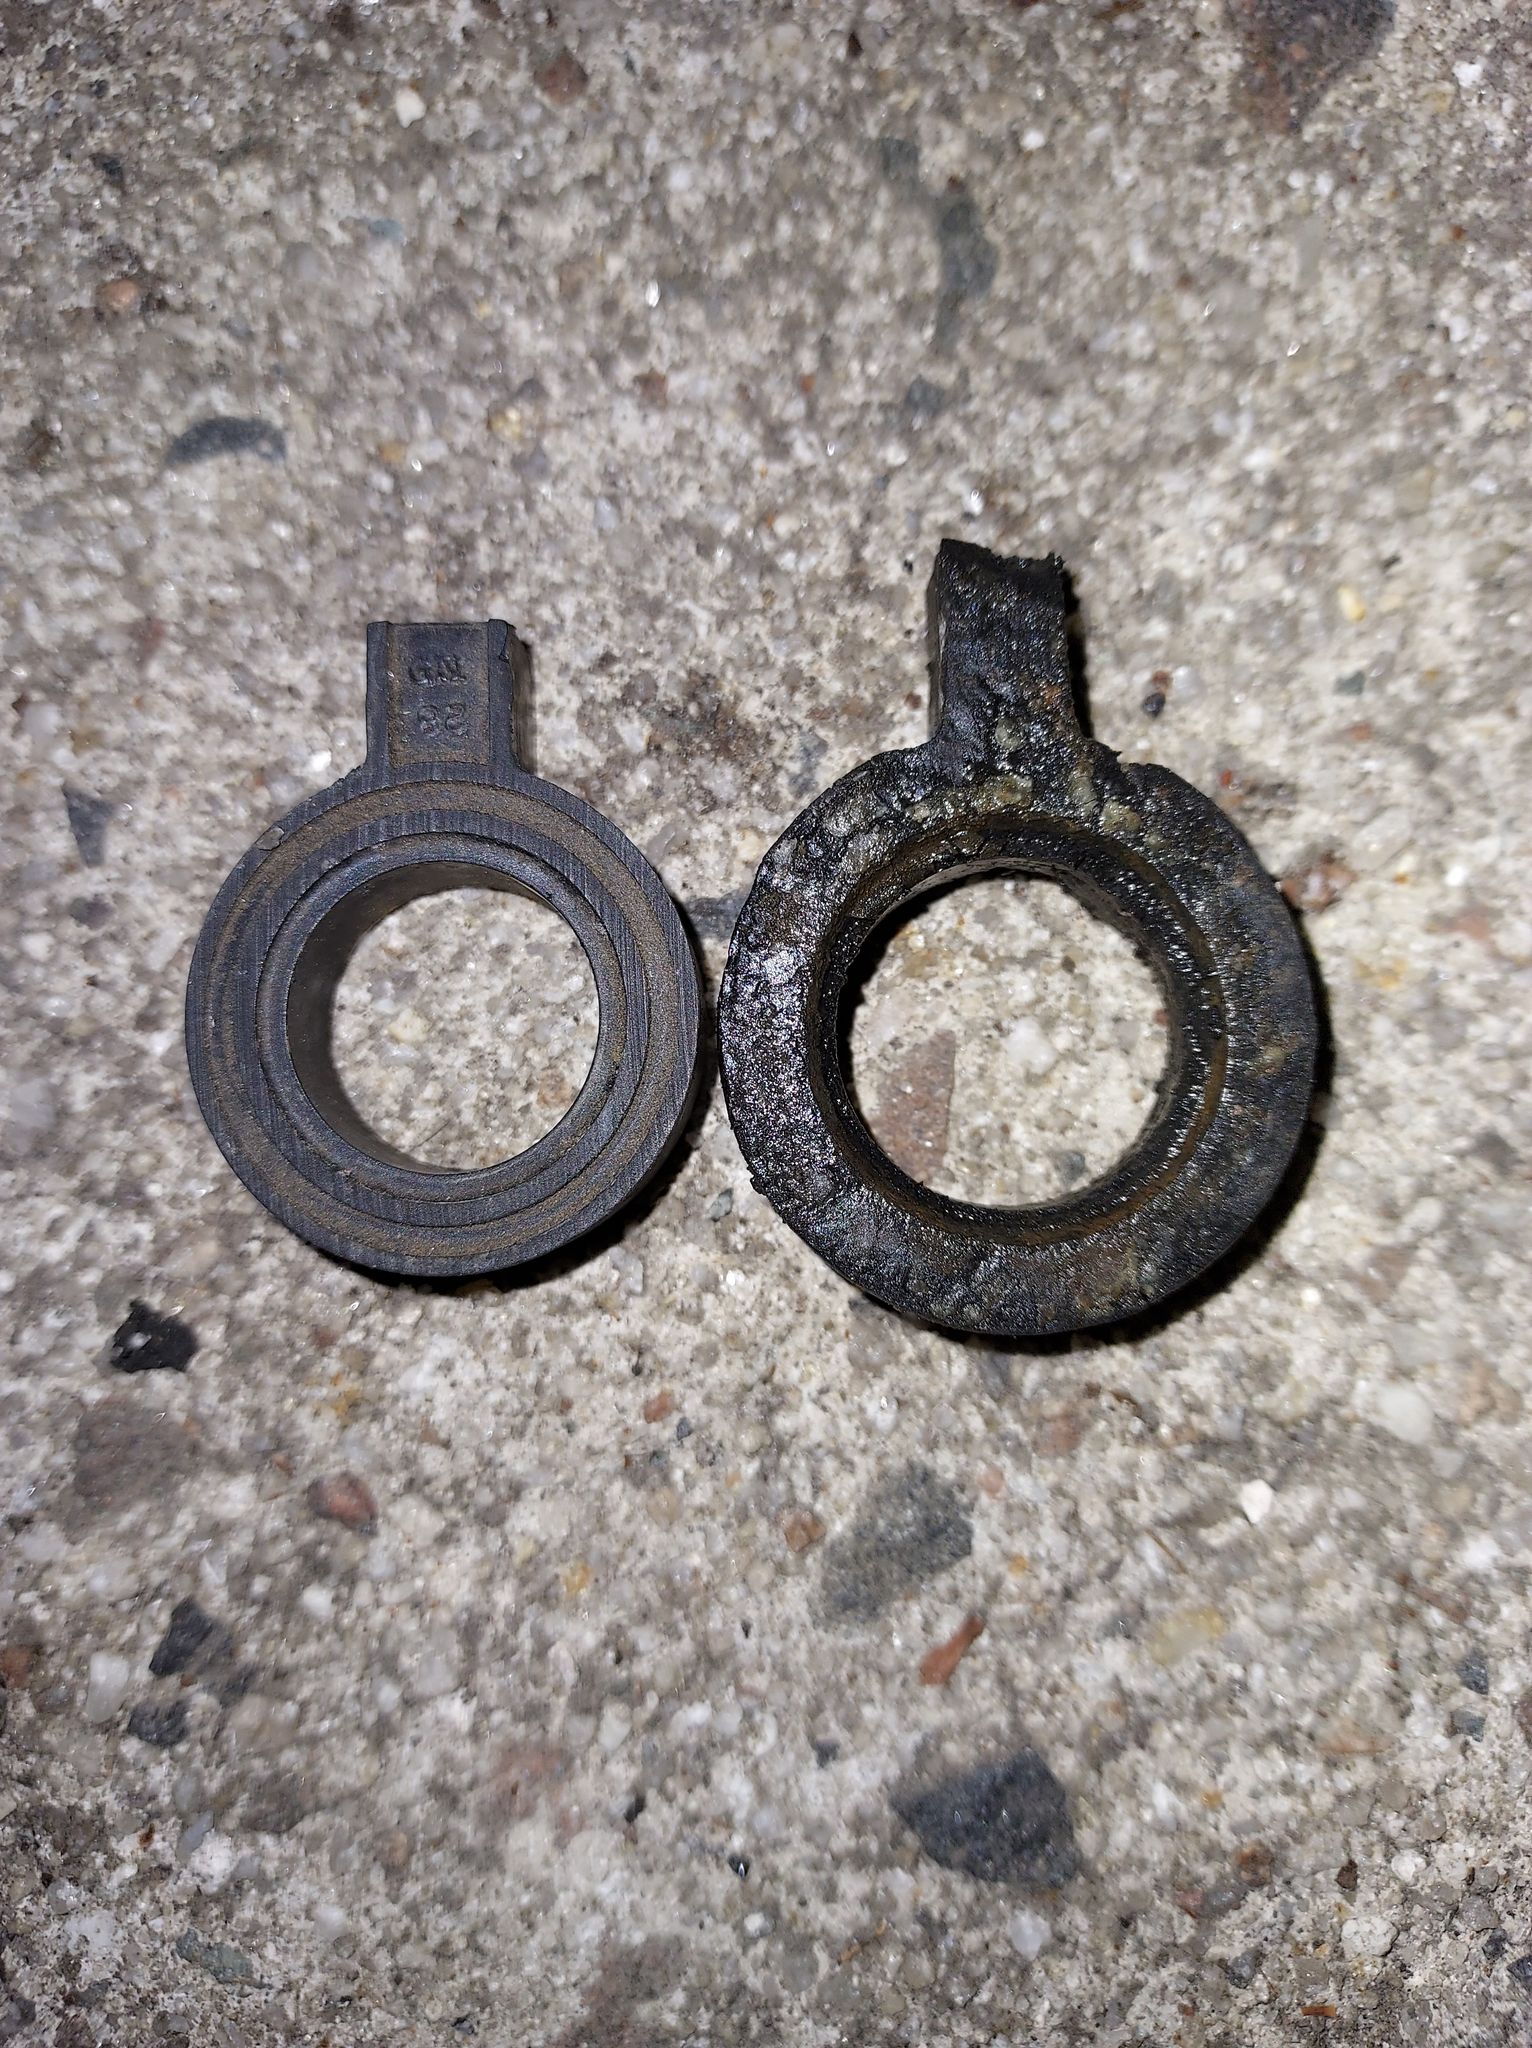
Anyway, main question: I have no waterflow. I bought an NOS (new old stock) 550683 rotor on ebay several months ago, but when I compare it to the old rotor it doesn’t look or fit as I expect, did I buy the wrong part? The old rotor is much larger, which I assume is due to grease swelling. The tab on the NOS rotor would have to be really wedged into the slot to fit. Is this right or should the tab be able to move? Also I’ve read where someone mentioned that a member was making new rotors, can someone tell me how to contact them? I’d much rather have a new rotor, this NOS one is very stiff.
Finally, when I spray water with a hose into the oval opening that I think is the outlet from the pump, no water comes out the exhaust or the slits on the leg. I’m guessing more dirt daubers have clogged the water path somewhere, maybe by going up the exhaust? Any good ideas on cleaning out the water passages without completely dismantling the engine?
-
This topic was modified 3 years, 2 months ago by
 Mumbles.
February 16, 2022 at 3:42 am #254724You pretty much answered most of your own questions.
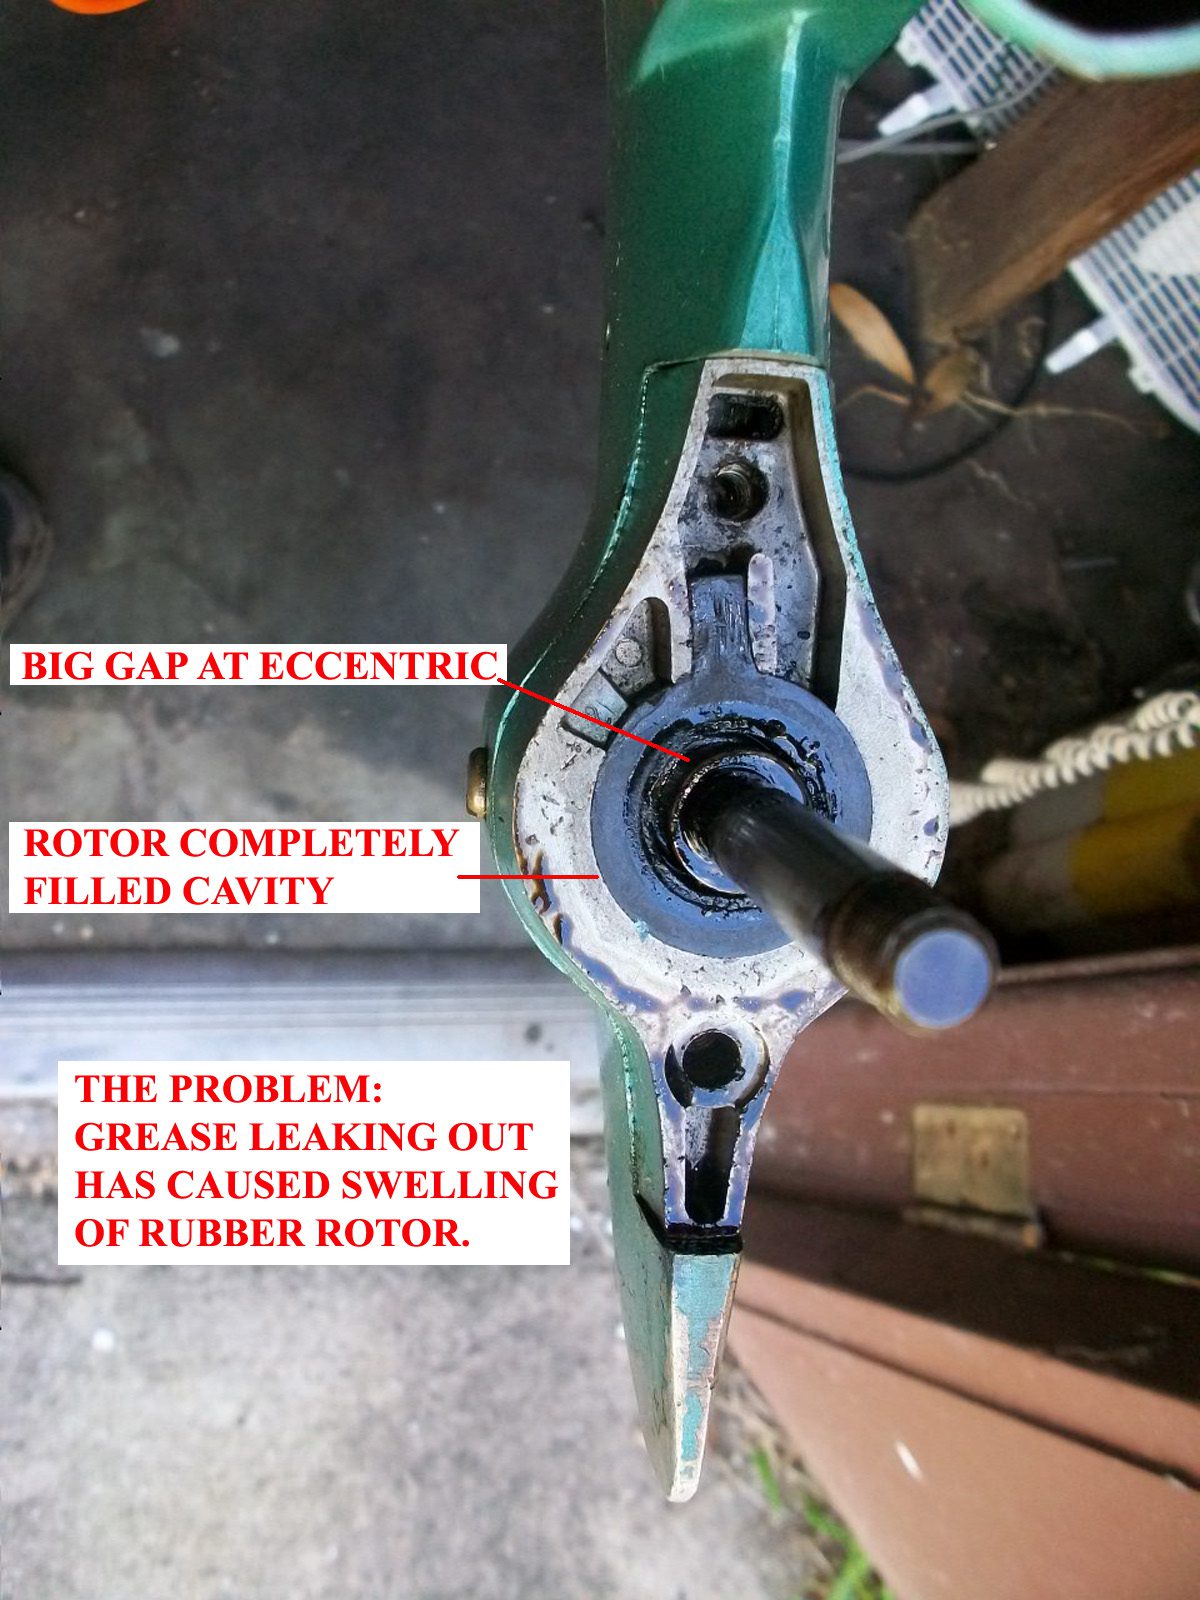
The guy making the pump rotors is Brian Wilcox. Call 810-794-7685 before 8 pm est please. Or email Baron0418@att.net. please note the b must be a capital. Your diagnosis is correct, the old one is swollen up from grease, as expected. They all have a grease seal problem. I have a fix for that which I can post if you’re interested. Water discharge is not directly connected to the slots, but merely blows out of them when running.
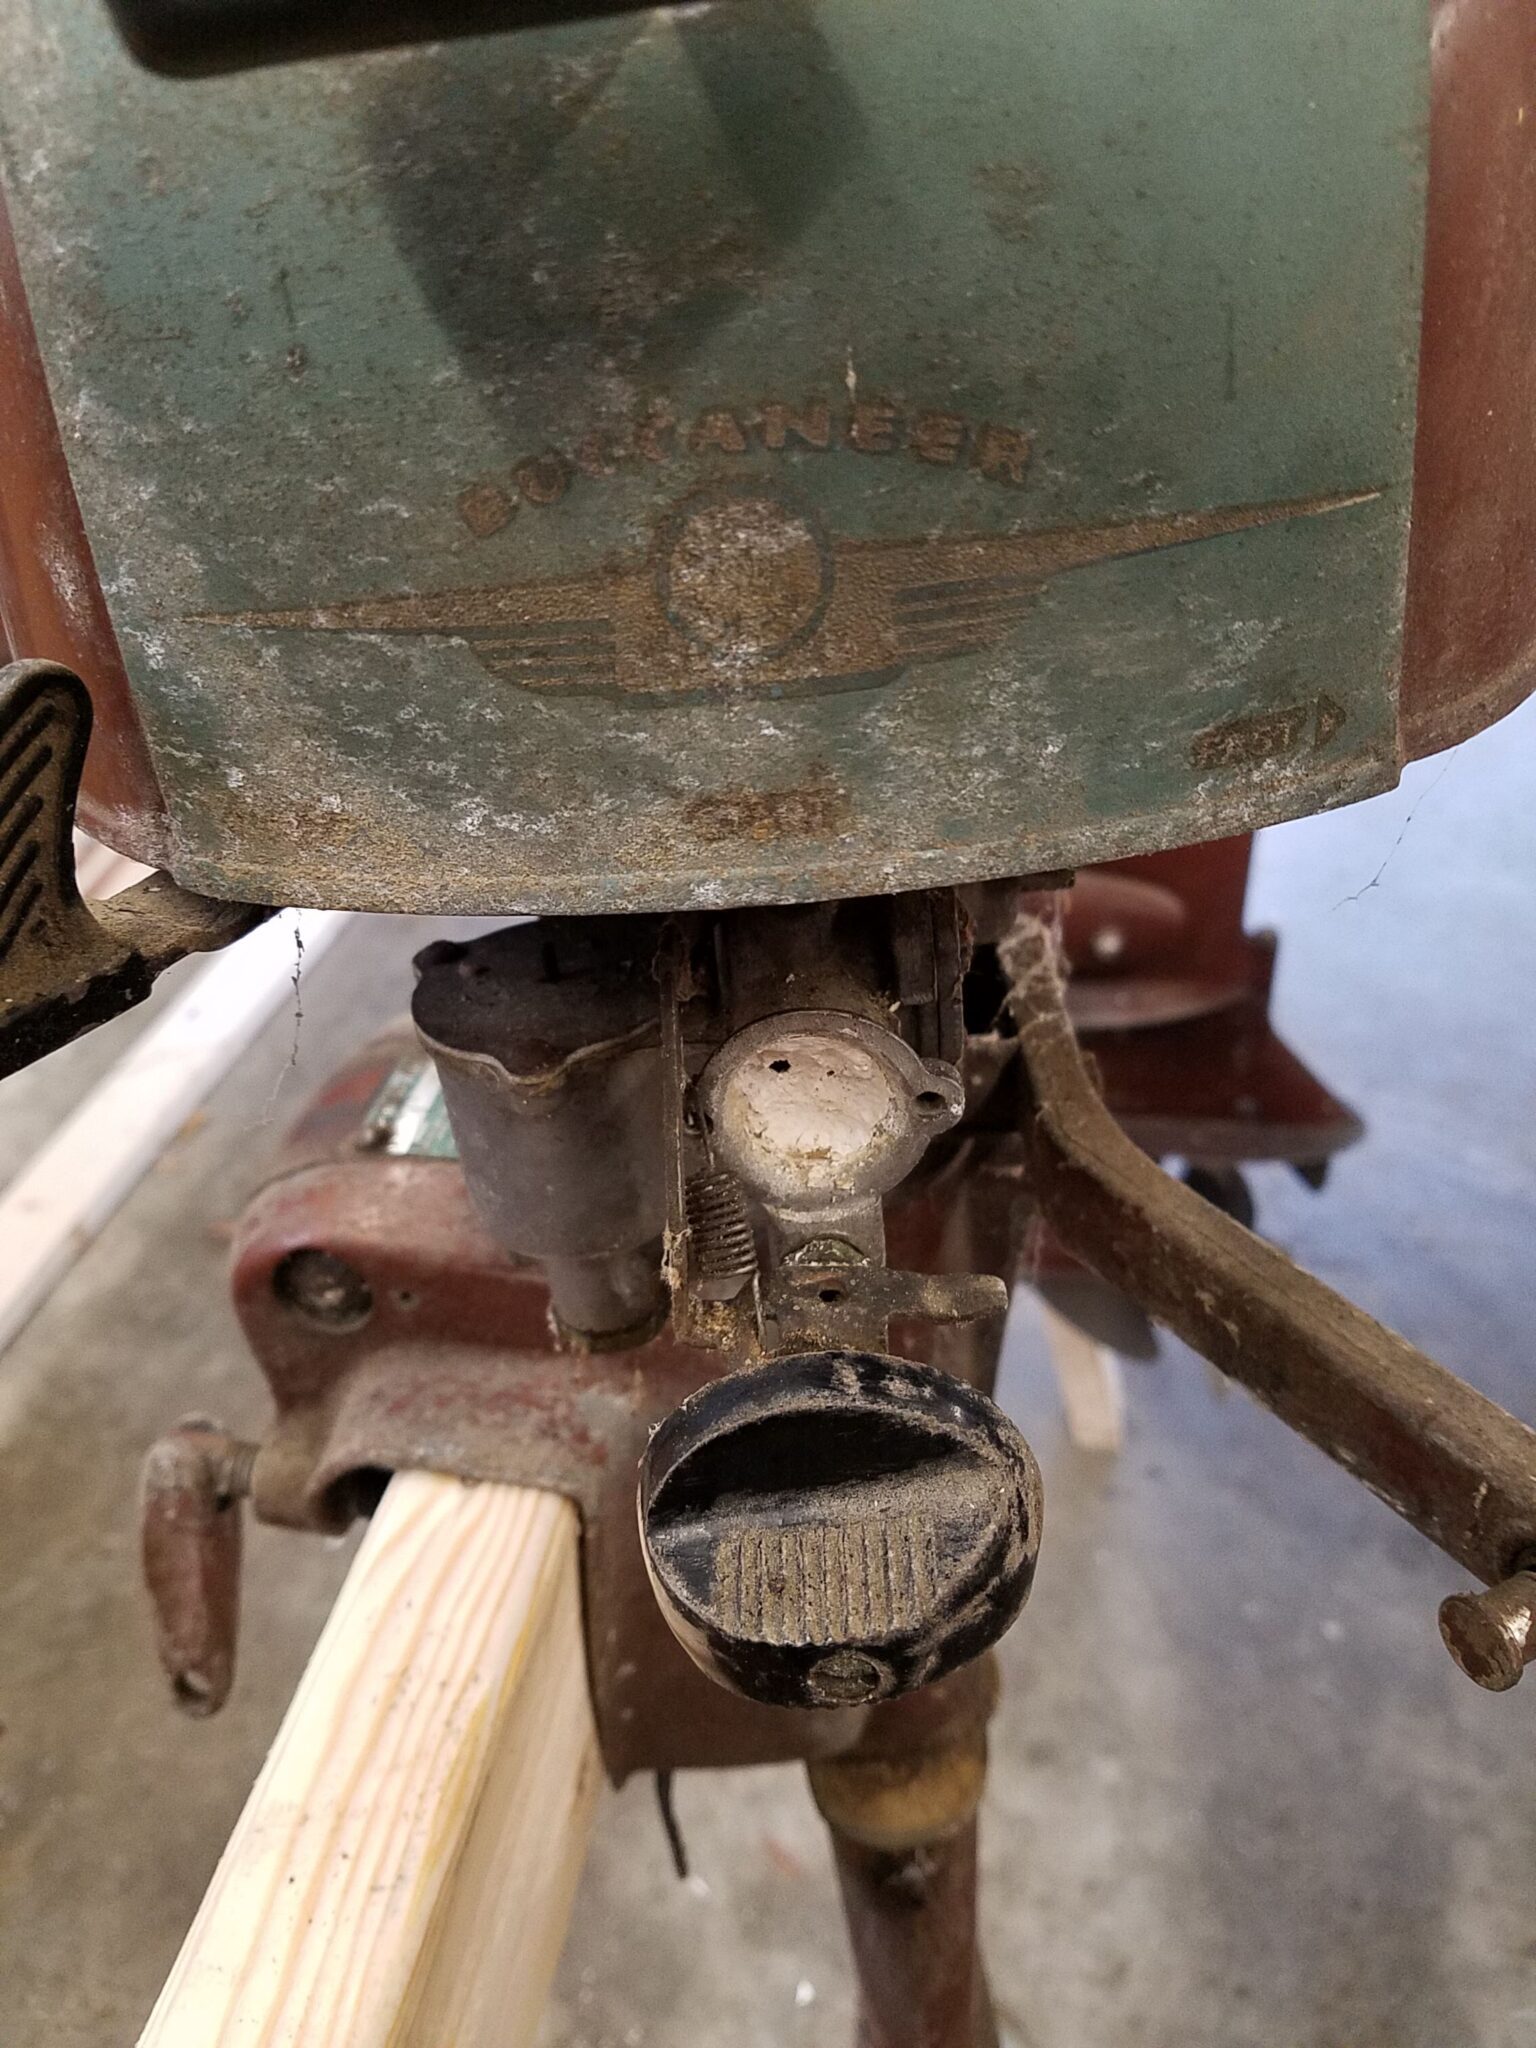
Starting instructions say hold the primer 10 seconds, then release it and start it. I use a slightly different approach. I hold the primer till the bowl starts to overflow, then release it to the richest knob setting without engaging the primer feature. Start motor and adjust knob to best HS running position. Then remove knob and reposition on the needle so it points straight up. Experience shows that will be roughly 3/8 turn open from closed, and of course further open while priming. Yes, it helps a lot to have it somewhere near level, or even tilted slightly back.
Have fun with your project. Warning, they can be addictive. I think I have somewhere around a dozen of them. Lost count.
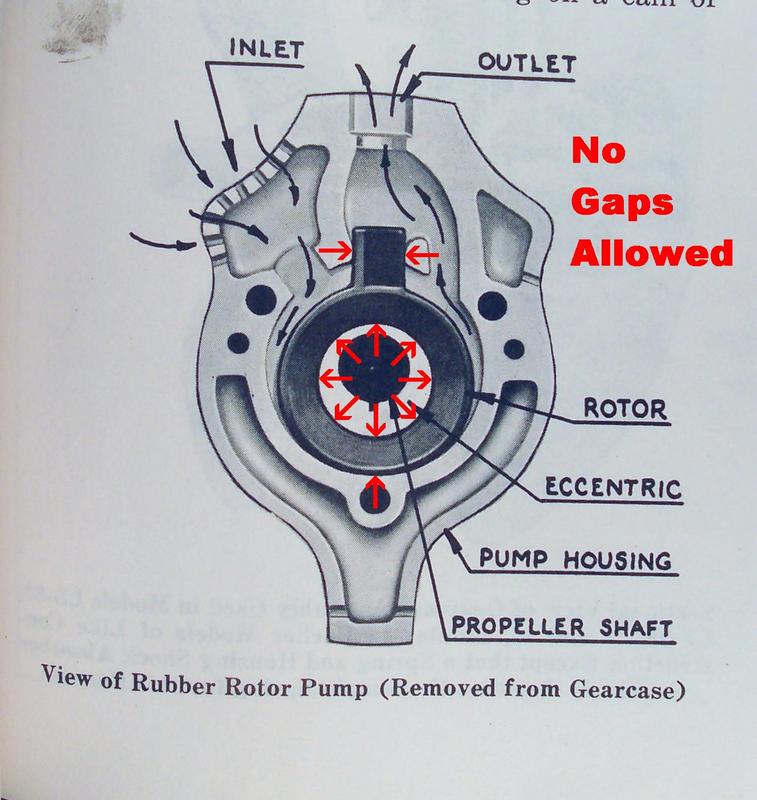
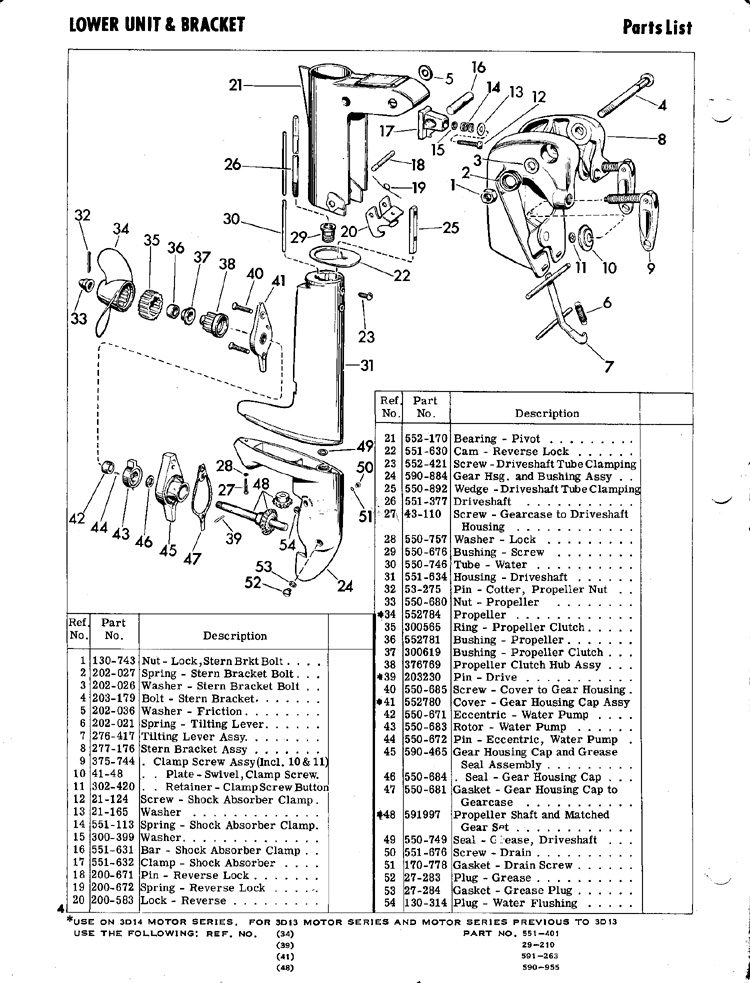
February 16, 2022 at 3:49 pm #254745This diagram explains the rotor type pump pretty well. I like to think of it as a kind of “rotational squeegee”. The elliptical on the inside of the circle spins and squeezes the water between the outside of the circle and the housing in a rotational manner, until it reaches the top, where the piston pushes the water up and into the cooling tube.
The piston, what you referred to as “the tab”, should make contact within it’s channel, but if it fits too tight, that part of the rotor will break off. Don’t ask me how I know. The solution is to lightly sand down the sides of the piston, and test fit it so that it just makes contact.
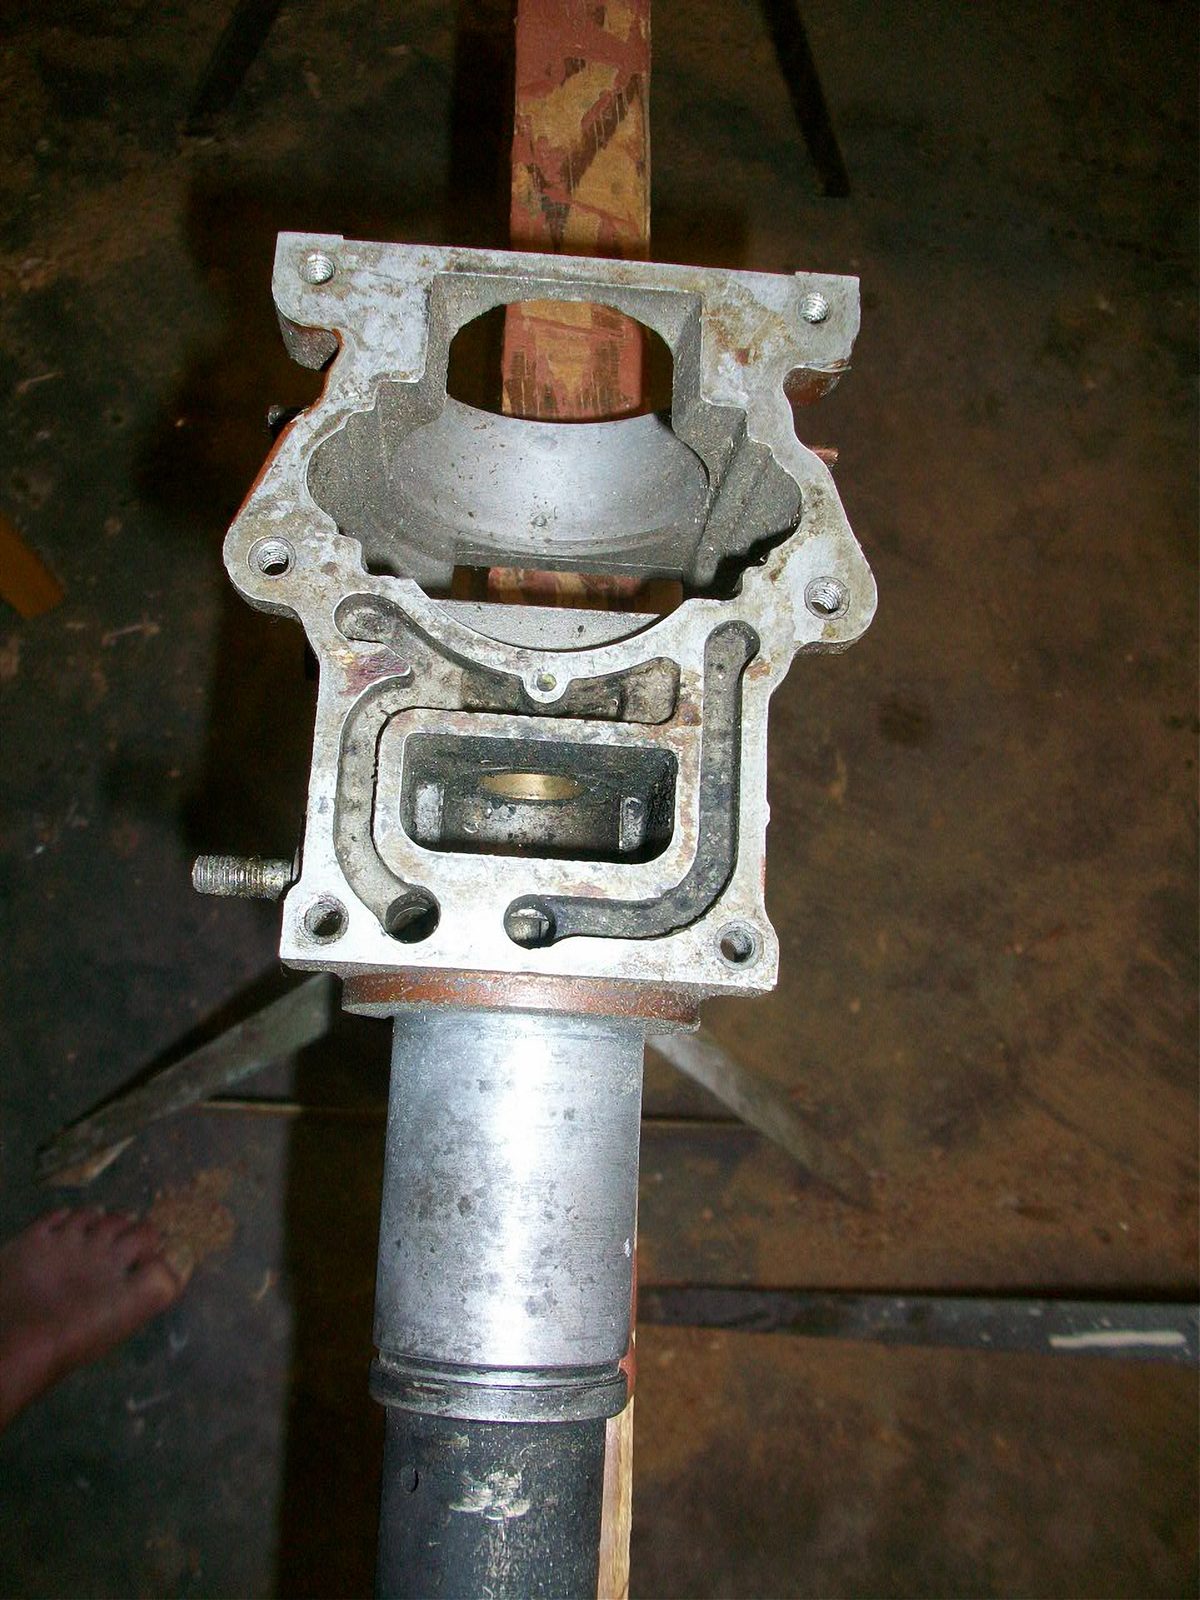
To clean out the cooling system, you’re going to have to remove the powerhead. Once it’s off you can shoot compressed air both up and down the supply tube. Running a long piece of wire up and down the tube will help with any serious clogs. Before replacing the powerhead, but after the rotor is assembled, put a drill on the driveshaft, submerge the gearcase in a barrel of water, and crank the driveshaft clockwise with the drill. This will verify that everything under the powerhead is working, and a good supply of water is making it up to the top of the tube. The powerhead cooling passages also need to be cleared with compressed air.
February 16, 2022 at 4:00 pm #254749Removing the powerhead to clean out the cooling system is not the simplest thing to do. Limited mostly to removing the cylinder from the crankcase. Fortunately, it is rarely necessary unless it has had a life in salt water.
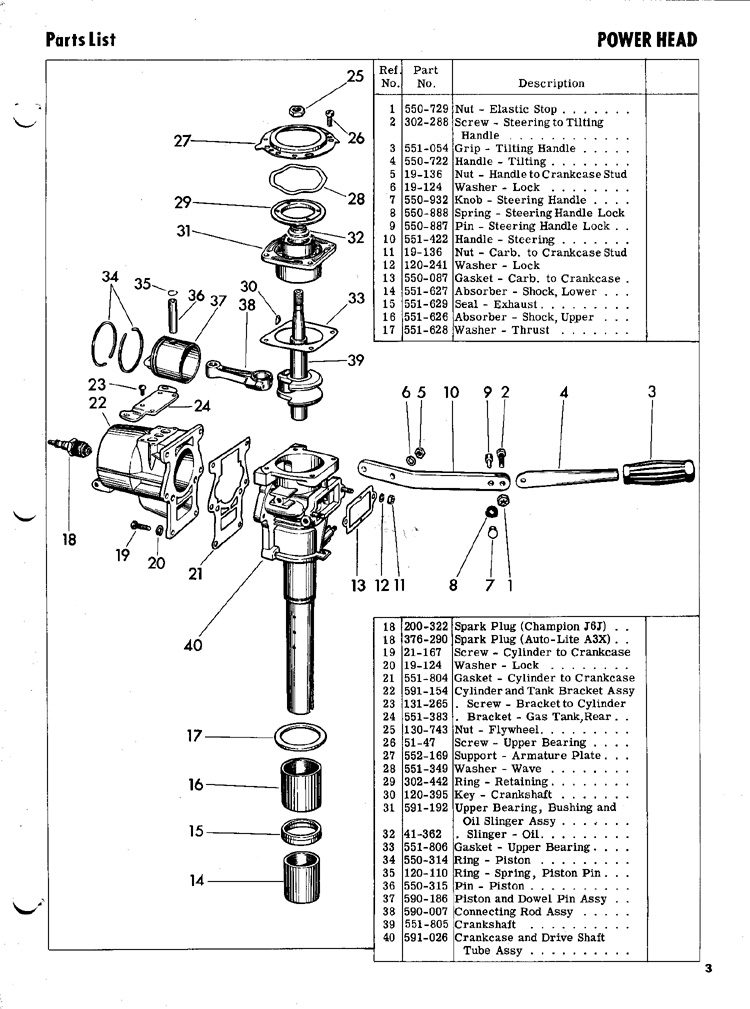
February 16, 2022 at 6:51 pm #254756I assume I should I get some water coming out the exhaust leg when spraying into the outlet? I get no water coming out anywhere except a few drips out of the swivel joint between the lower unit leg and transom bracket. Not sure if dirt daubers are a thing in your area, but they are a real pest here. They completely filled the carb throat and there were more inside the prop blocking the water holes in it, and then even more just inside the exhaust opening. I’m guessing that unless there is a baffle or screen in the exhaust, they went straight up the leg and clogged where the water returns to the exhaust leg. I had hoped cranking it would cause the exhaust to blast out any more that were in the leg, but that doesn’t fix the water passages. Maybe I can pull off the leg and look up inside the tube on the bottom of part 40 in the diagram frankr posted? How do I pull the leg off? Is there any source for the #21 gasket (551804) if I have to split the case? A quick google search didn’t show anything.
-
This reply was modified 3 years, 1 month ago by
free1986.
February 16, 2022 at 8:19 pm #254758Why don’t you try putting water into the flush plug #54? Lower leg housing #31 is removed by loosening upper bolt #23 and removing lower one. Twist and pull.
I’ve been making my own gaskets. If you should find a NOS gasket it’ll probably be shrunken and dried out as a mummy.
I’ll charge up my camera battery and take a couple more relevant pictures in the morning.
Yeah, we got dirt daubers.
February 17, 2022 at 8:06 am #254774I sit corrected on the powerhead removal. Follow Frank’s advice. If dried mud is clogging things up, then water should soften up the clog(s). Maybe you could get some water into the flush plug, let it sit for a while, and then apply compressed air with the water still in the tube. The water pressurized with air has worked for me in the past when powerhead removal was not the best option.
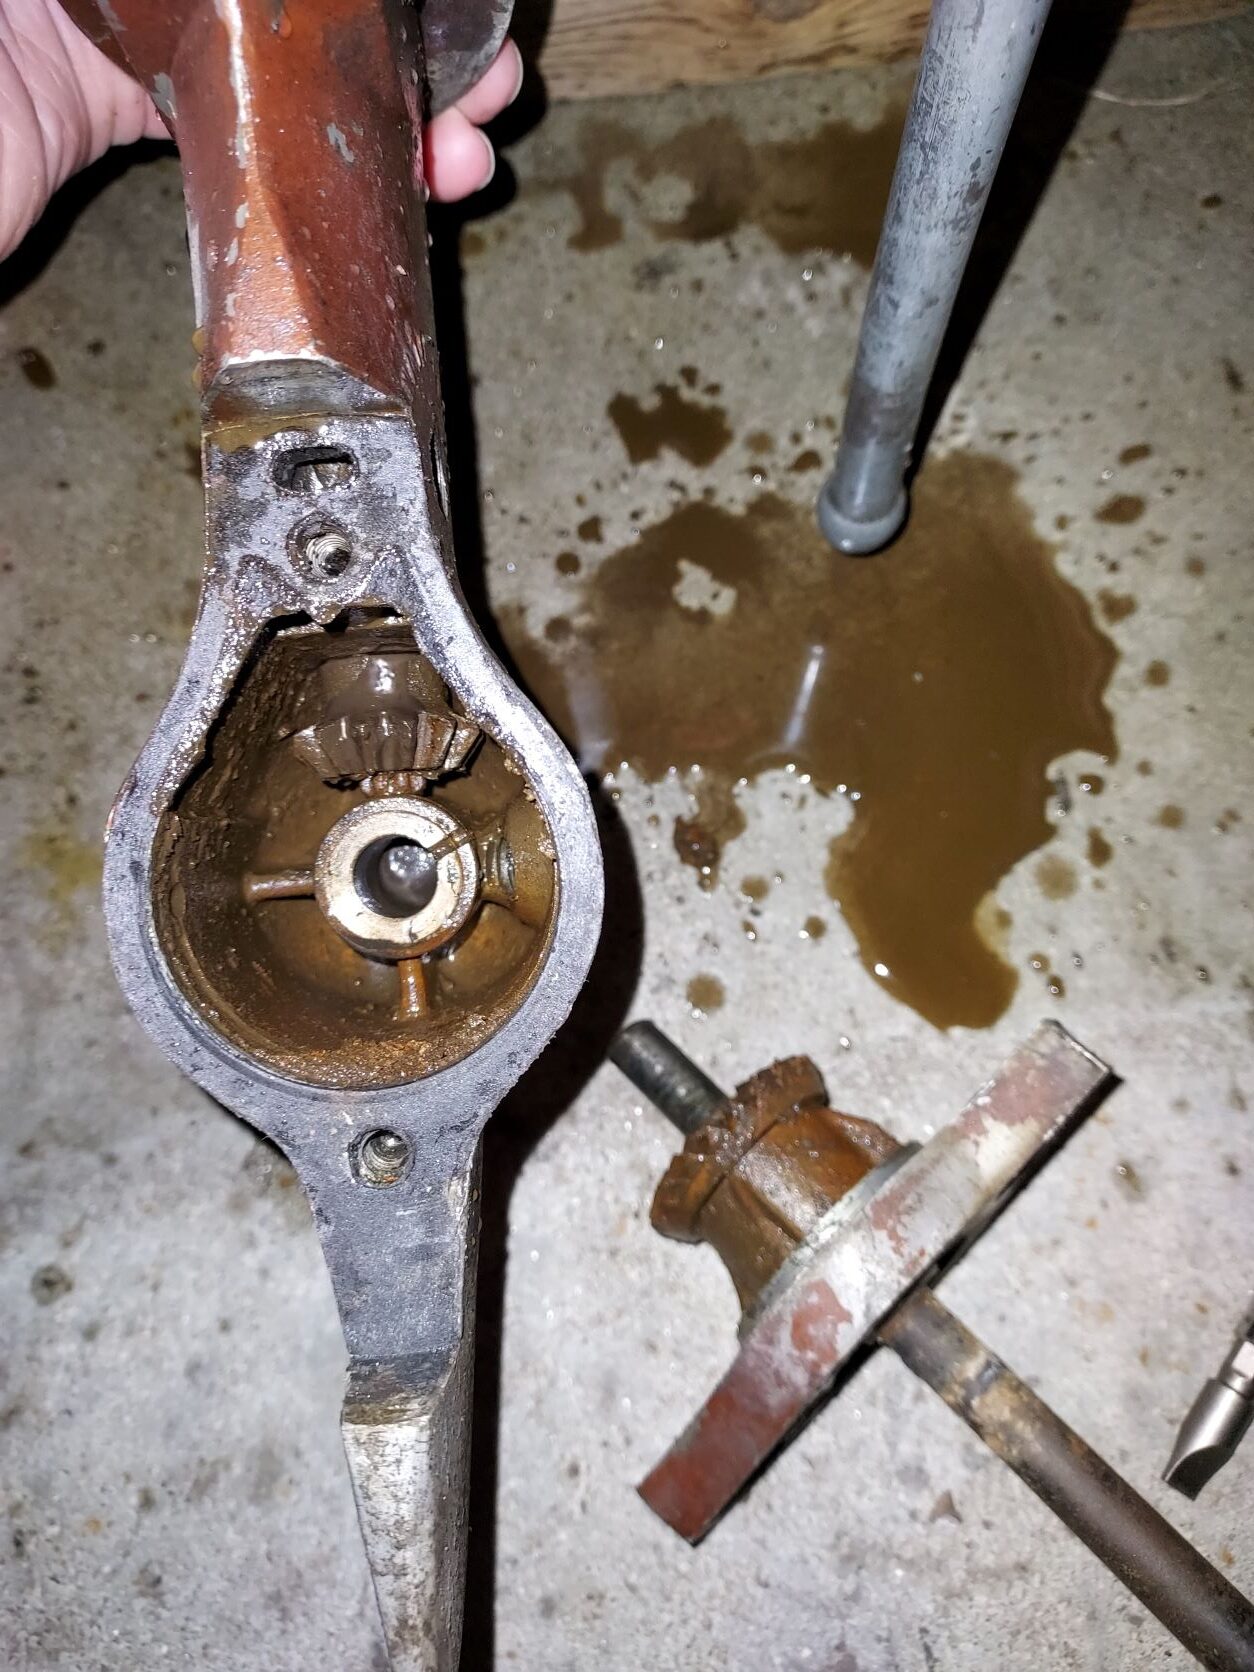
February 17, 2022 at 11:43 am #254787February 17, 2022 at 11:44 pm #254809I pulled the lower leg housing off tonight. #54 screw was thoroughly stuck and the head already damaged long ago. I was able to remove it and the grease plug finally after soaking in penetrant and clamping the leg housing in a vise so that I could really hold the screwdriver down. Blew compressed air and sprayed water through the water passages in the lower leg and into the water inlet slot on the side of the #40 tube. Not sure if I just wasn’t holding the hose properly before, but at any rate I was able to get good waterflow through such that it came out the exhaust. I’m now waiting on my new rotor from Brian Wilcox.
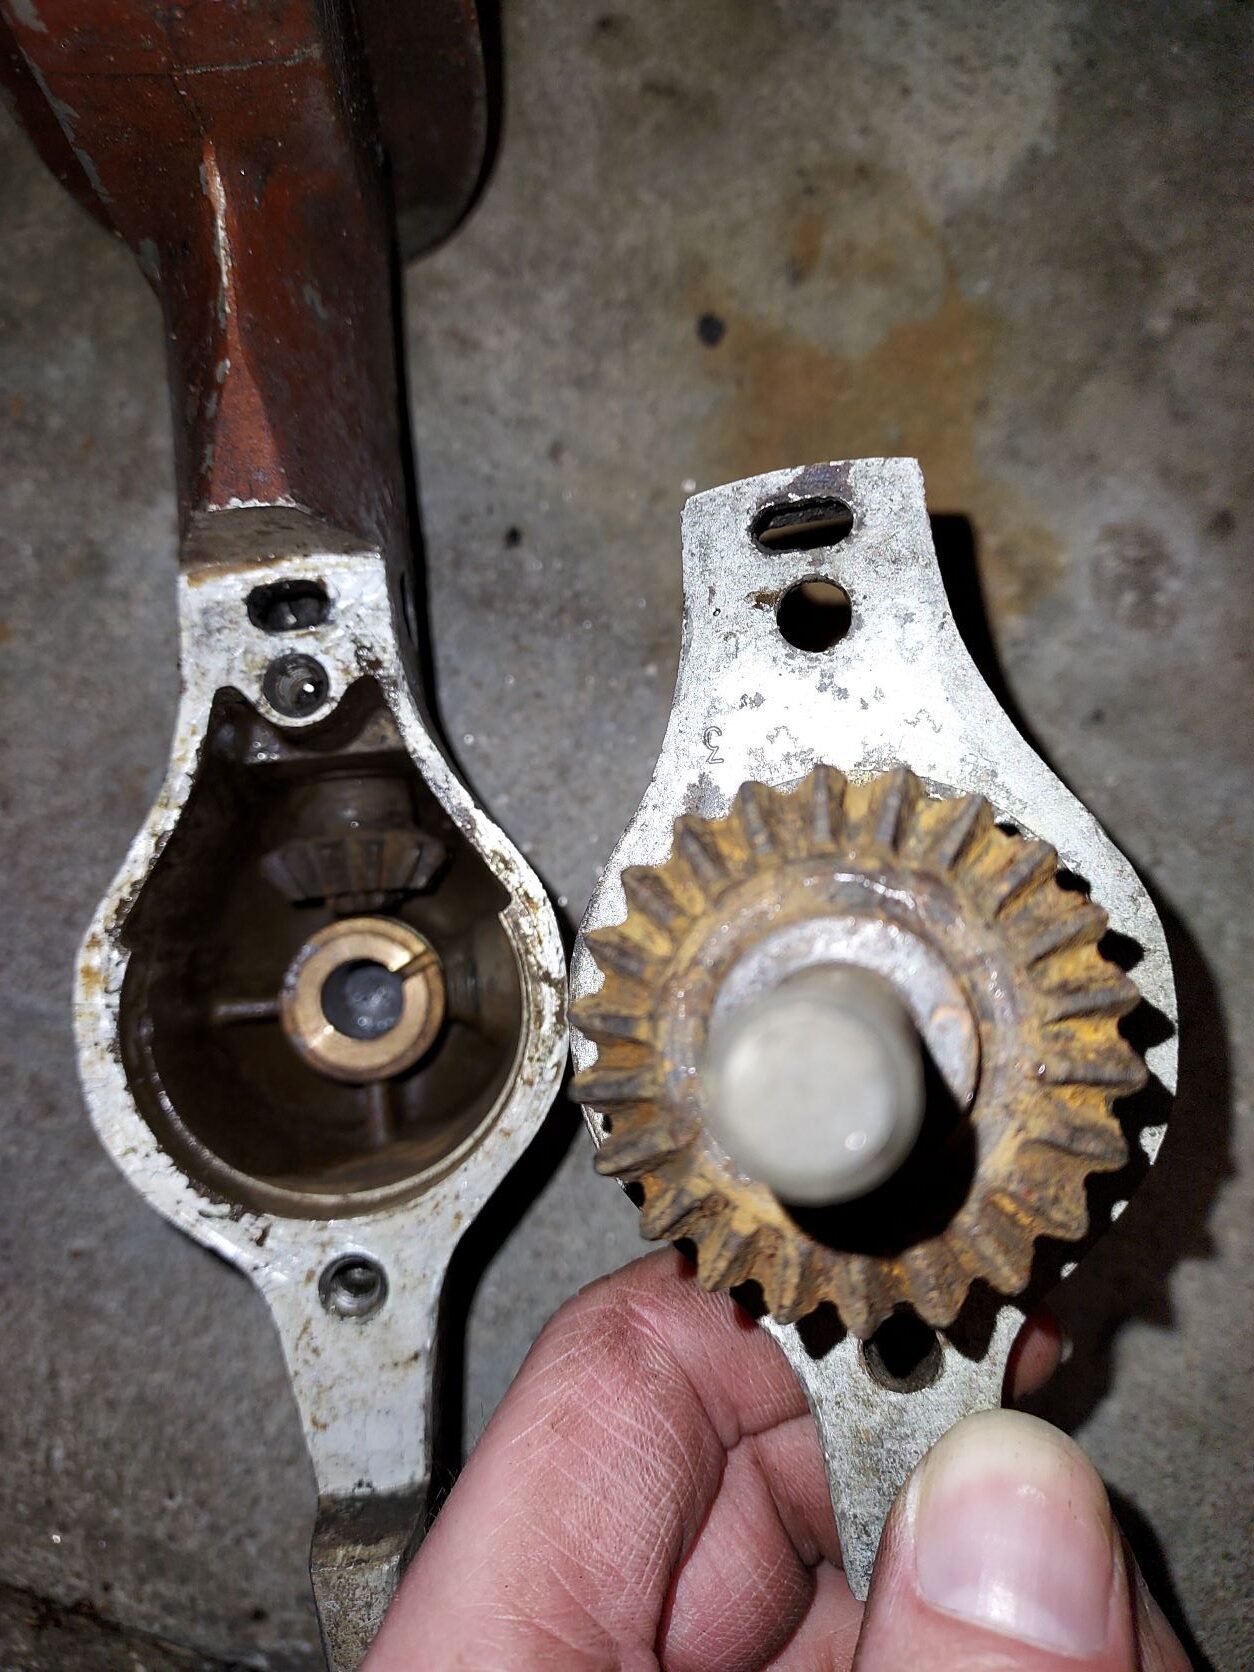
Next problem: I opened up the gearcase and it only contained a small amount of rusty water. Cleaned everything off with gasoline and while it doesn’t look great I think it will be functional? I’m not really planning to use this motor heavily, mostly just so my dad could see it run again. Anyway, there is a small bit of side to side play in the propshaft bushing but quite a bit in the driveshaft bushing. I think I can rock the powerhead end of the driveshaft more than 1/4″ side to side. Is that normal with the leg loose and prop gear out? Hard to see how this thing could keep grease in well.
How full do you fill it with grease? What’s the process? (How do you know when its full?) I have a new tube of John Deere Cornhead grease and a grease gun.
-
This reply was modified 3 years, 1 month ago by
free1986.
February 18, 2022 at 9:05 am #254813That looks typical. Those motors had lousy grease seals and were usually neglected. Owner’s manual said to drain off water and refill with fresh grease “periodically”, whatever periodically means. Back in those days it might mean every time you use it on some motors.
Anyhoo, clean it up and use it. It will run a long time with the wear if you keep it greased. I’d venture to say at least half of my motors had such wear, but they don’t know it.
There is another screw on the opposite side of the gearcase, just an ordinary screwdriver slot-type screw. That is the vent screw. Interestingly, the owner’s manual calls it a “drain” screw. Pump grease in the large fill plug hole till it comes out the “drain” screw. I do it with the motor on a stand and tilted up so the drain/vent screw is up, although the manual doesn’t specify that.
-
This topic was modified 3 years, 2 months ago by
-
AuthorPosts
- You must be logged in to reply to this topic.


