Home › Forum › Ask A Member › 1956 Oliver 5.5 hp “Re-do” ?
- This topic has 8 replies, 3 voices, and was last updated 2 years, 9 months ago by
 Bob Wight.
-
AuthorPosts
-
June 25, 2023 at 5:53 pm #277376
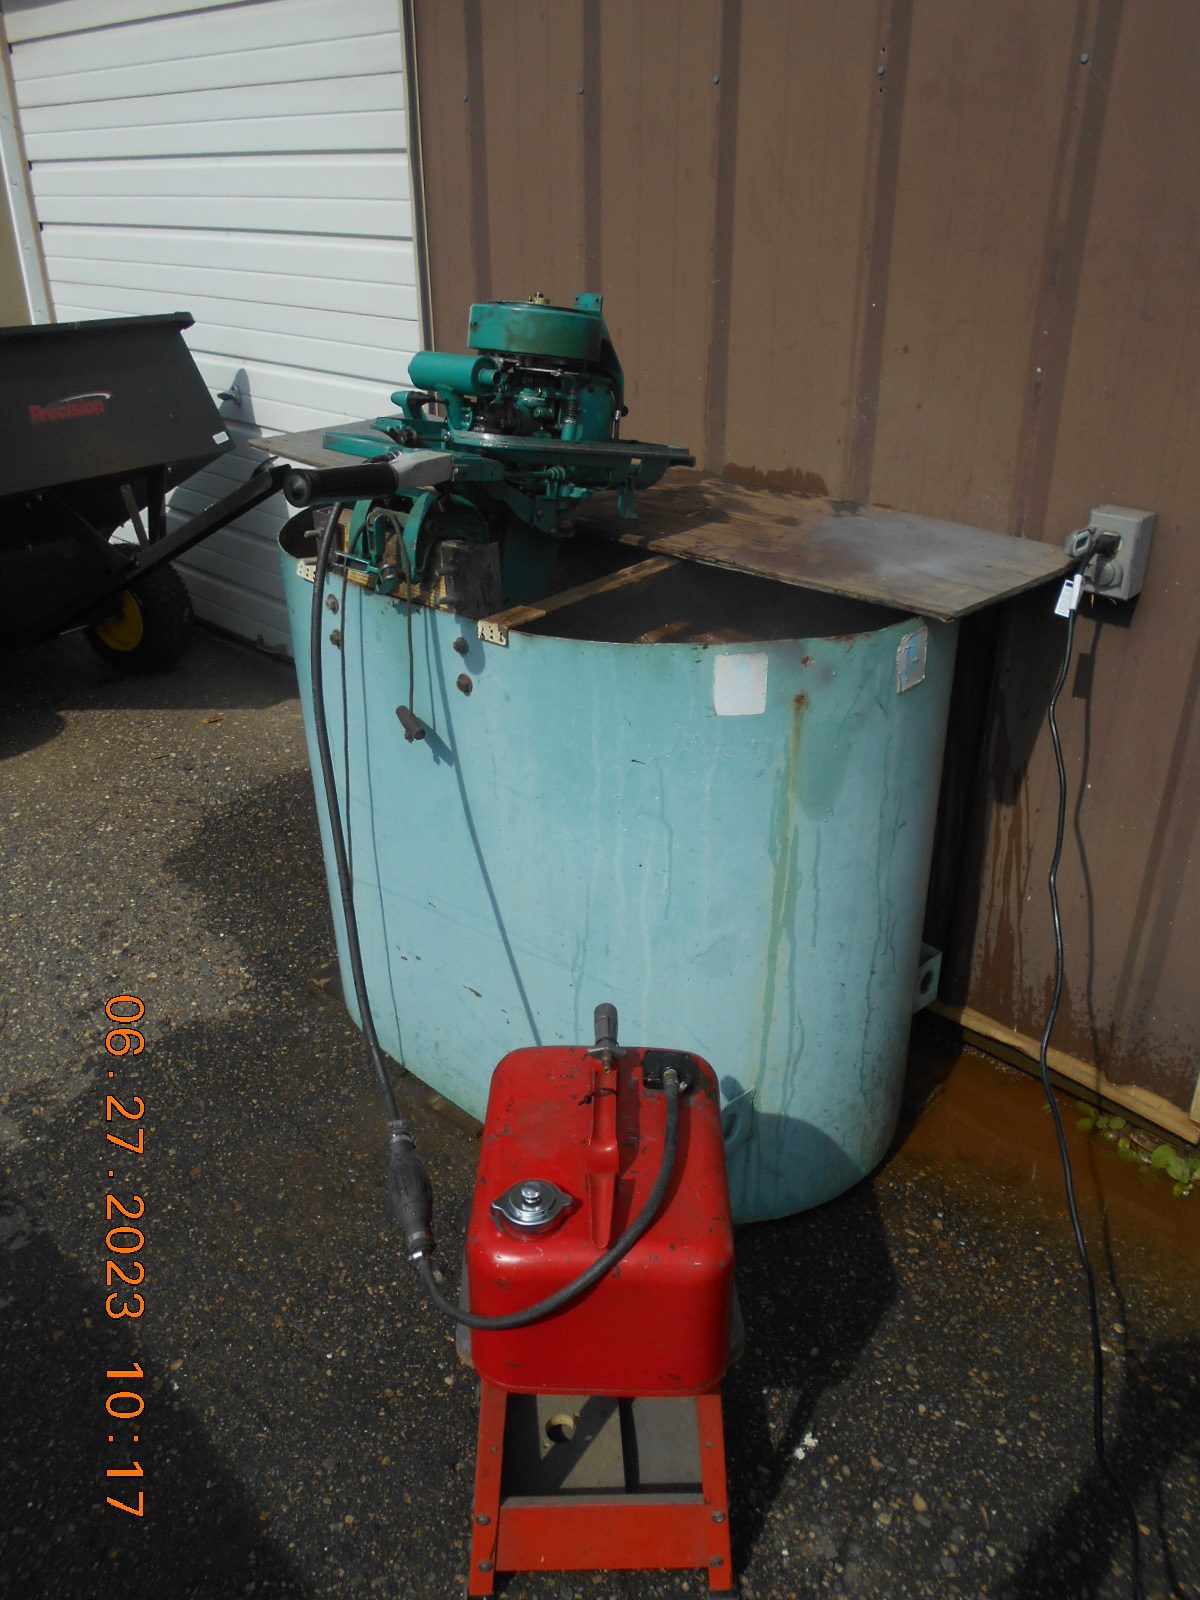
I worked on this one back in 2016, and believe I put a fair amount of
money into it with lower unit bearings, and perhaps new Scintilla coils.
I also worked on a similar powerhead (older 5 hp Chris Craft), so not
sure what I remember!At the time, the only way I could get his motor running was using
a gravity feed tank, as the fuel pump wasn’t pumping gas.
After a lot of money spent and time piddling around, I was
disheartened with it, and stuck it back on the rack.
Every time I walked by it in the last seven years, it irked me
being it was an “unsolved” mystery.Today, I took it back off the rack, and already thought of several things
to try but will have more questions if they don’t pan out.Run Video
https://youtu.be/AvF119_Sl7IIt seems to me that the compression on this motor may have been
on the low side, around 60 psi, but it seem to run fine on the
gravity tank.Not sure if I tried the gravity tank to either fuel pump
inlet, but in the video, the gravity tank is fed directly
to the carb.I “think” the replacement pump is a B&S version.
Does it matter how it’s “Clocked”?Before I tried the B&S pump, or gravity tank, I put a new
diaphragm in the original fuel pump, which did not pump either.After a recent incident on an air cooled outboard with
a “Sears type” hose connector (which is also on the Oliver),
I discovered the quick coupler connector was sucking air,
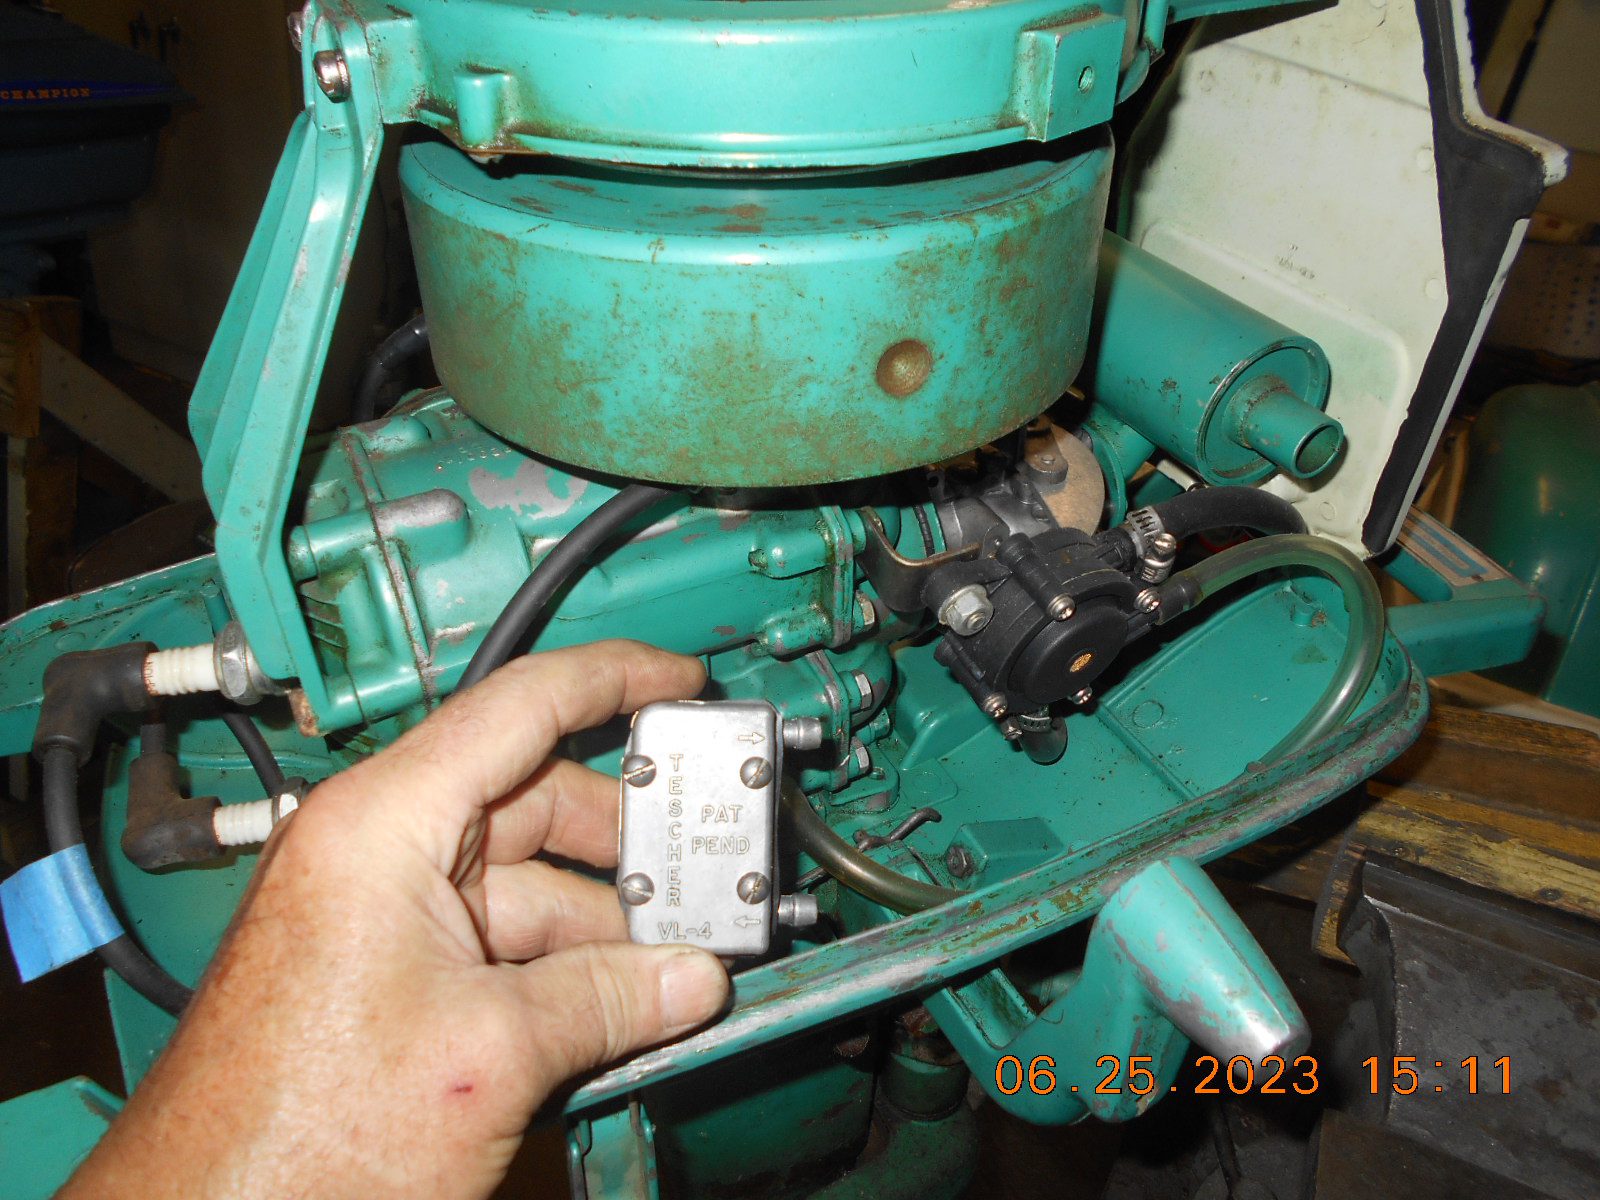
which I changed out, and then the fuel pump worked good.No notes or photos found, showing whether I replaced any crankshaft seals or not,
but today I notice that there’s an O-ring on the reed block
that’s all cracked up.Can crankcase pressure / vacuum be measured in any practical or informative way
at the crankcase port, using a automotive “fuel pump pressure / vacuum” gauge?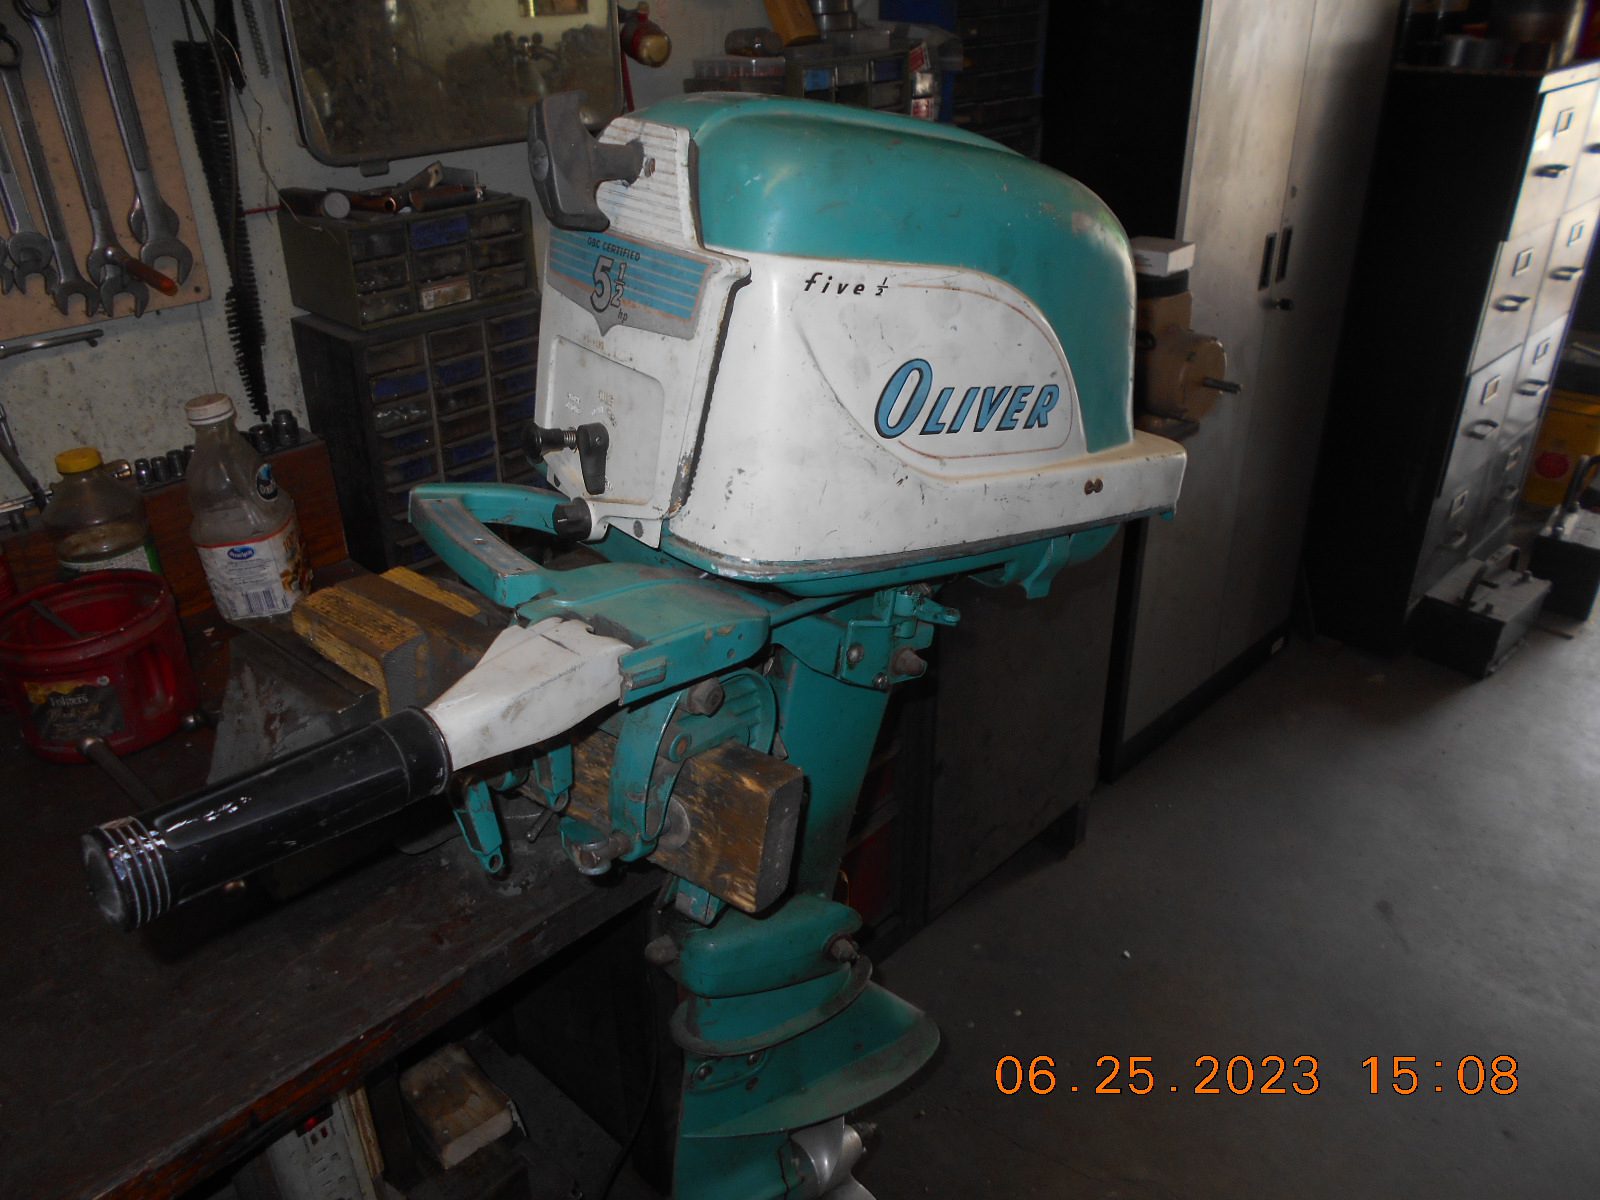
Prepare to be boarded!
June 26, 2023 at 8:02 pm #277448Before I removed the carb and reed valve block this morning, I put my
dad’s 60 year old automotive pressure / vacuum gauge on the crankcase pulse port,
and pulled the engine over. The gauge did oscillate both ways, but it was
hard to actually get any reading while the needle was bouncing around so fast……..
not that there would be any specs anyway……… but a good excuse to use pop’s
old gauge.
I then pulled the reed block off, removed the crusty old O-ring, and installed the biggest O-ring in my kit, which
I had to stretch a ways to get on. The reed block is held onto the block via the
carb studs, so I installed the carb and reed block. I didn’t tighten the carb nuts all
the way tight, as the O-ring appeared to be “squeezing out”.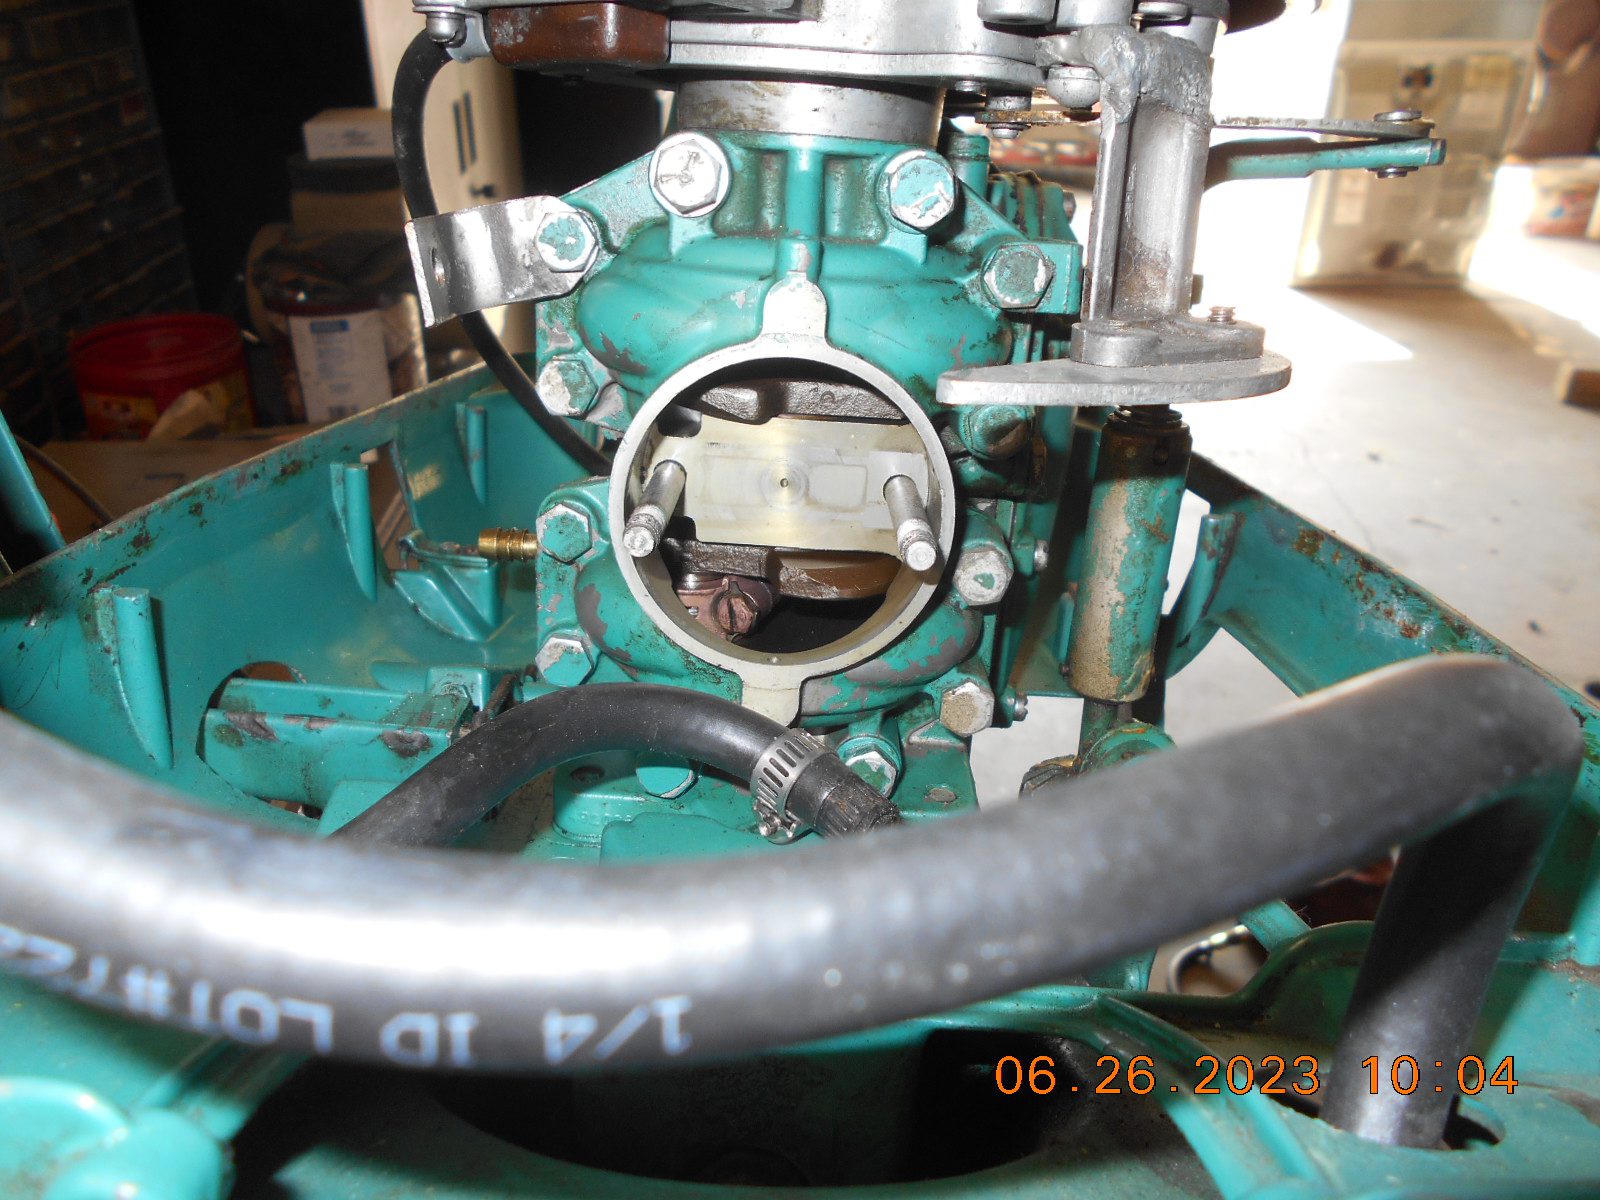
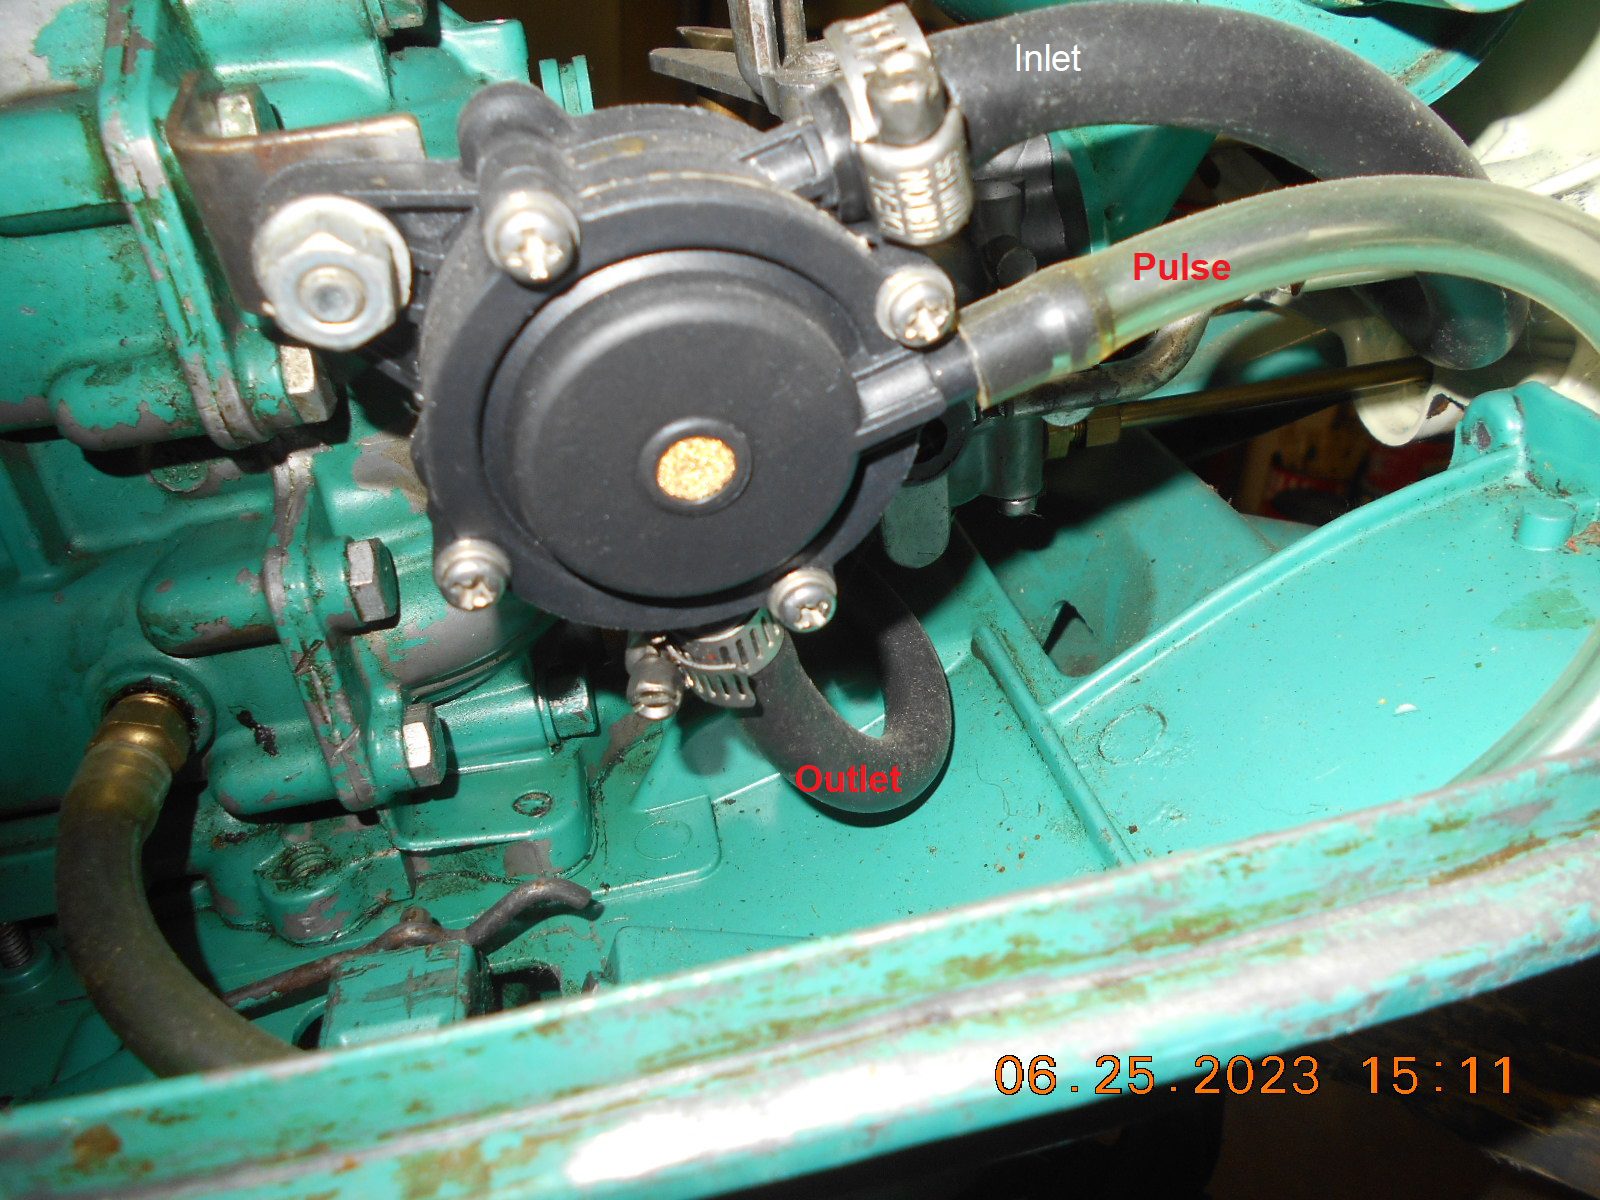
I rigged up the B&S fuel pump to suck out of a jar of mixed gas to see if it
would pump while spinning the motor over with the drill. It would
not pump a lick. 🙁
I then took off the pulse line, and held a finger over the pulse nipple
while cranking the motor over……. ZILCH for pulse!
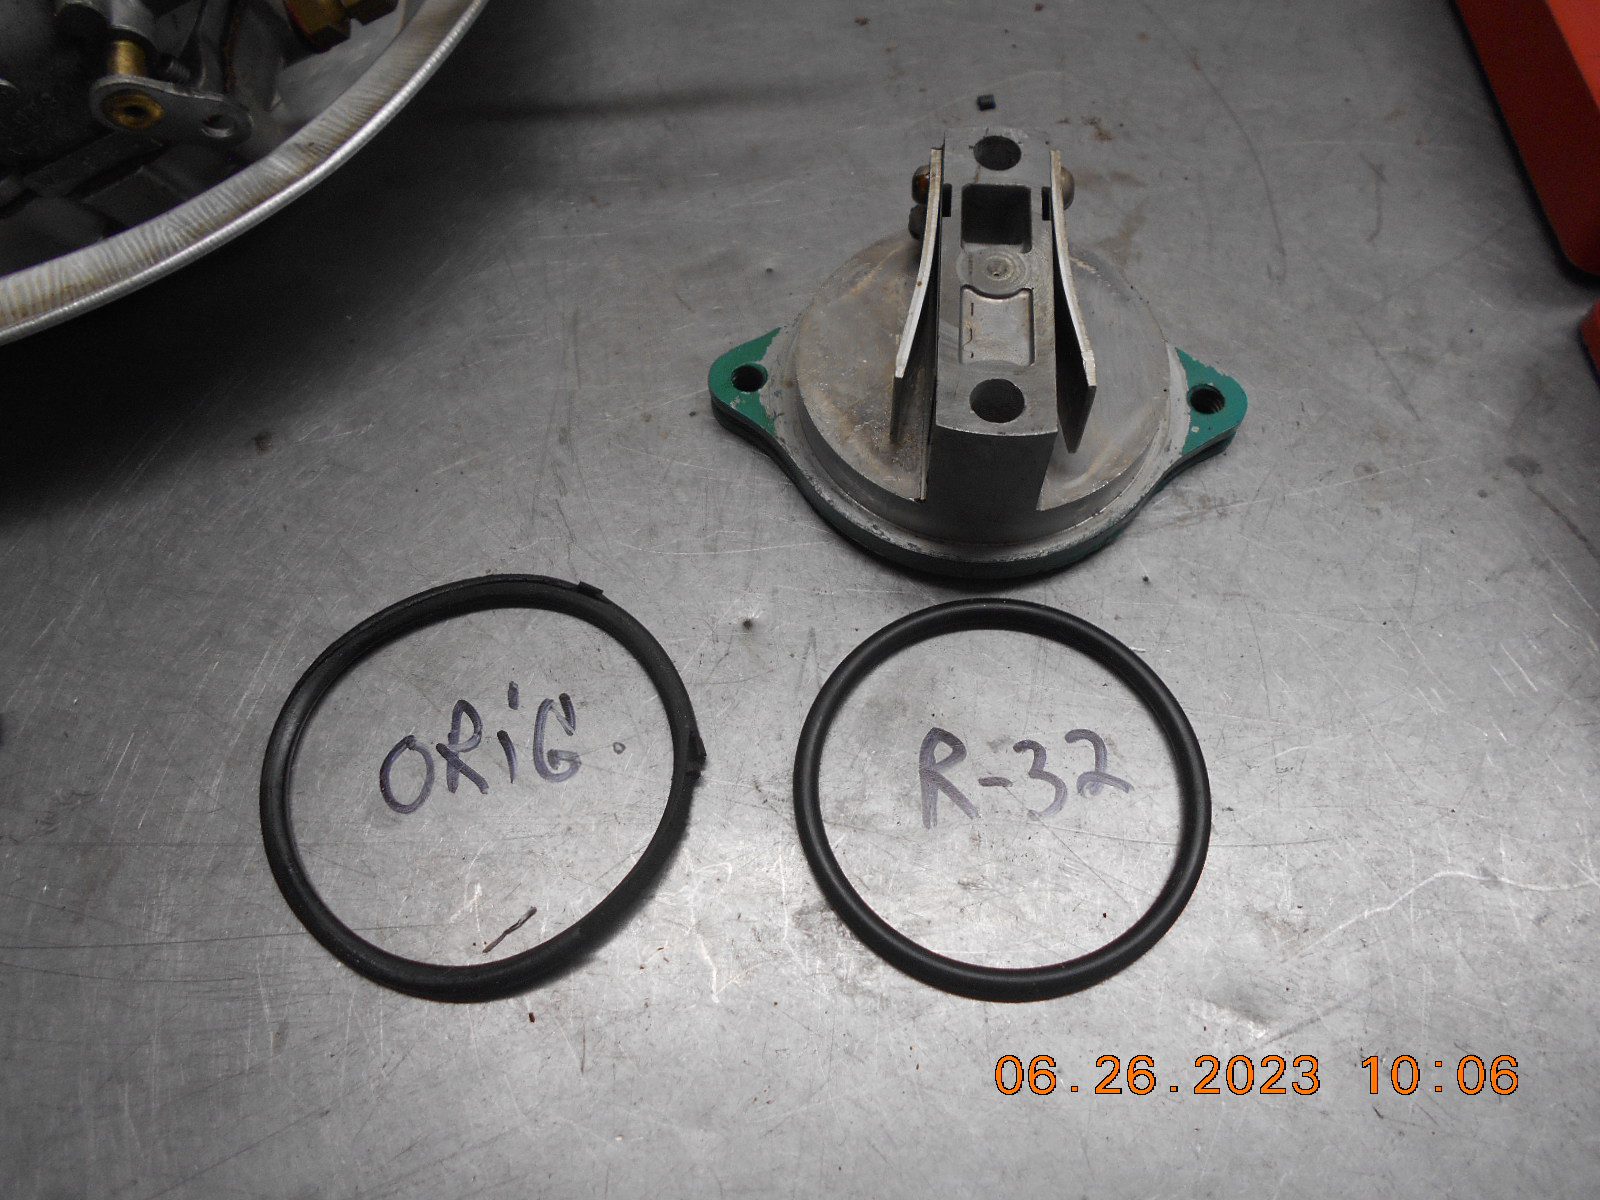
I had pulse before I took the reed block off, so I took the reed block off again
to examine. While the O-ring appeared to be sealing around the flange, the
inner body of the reed assembly was apparently suppose to be seating on a
mating “flat’ on the center main bearing area. It must not have been because
of not tightening the carb nuts all the way, for fear of squeezing out the O-ring.
Decided to put a “two size” smaller O-ring on, and went ahead and tightened
down the reed block until the nuts were tight. The O-ring is bulging some,
but appeared to be seating.
Would the original O-ring have been a “flat” O-ring?
I would think a flat one would be better suited.I rigged the jar of gas back up and tried the B&S pump again.
It pumps nicely now, and orientation of the pump didn’t seem
an issue. I think I’ll try out the original Oliver pump out tomorrow
to see what happens.
VIDEO ………
Prepare to be boarded!
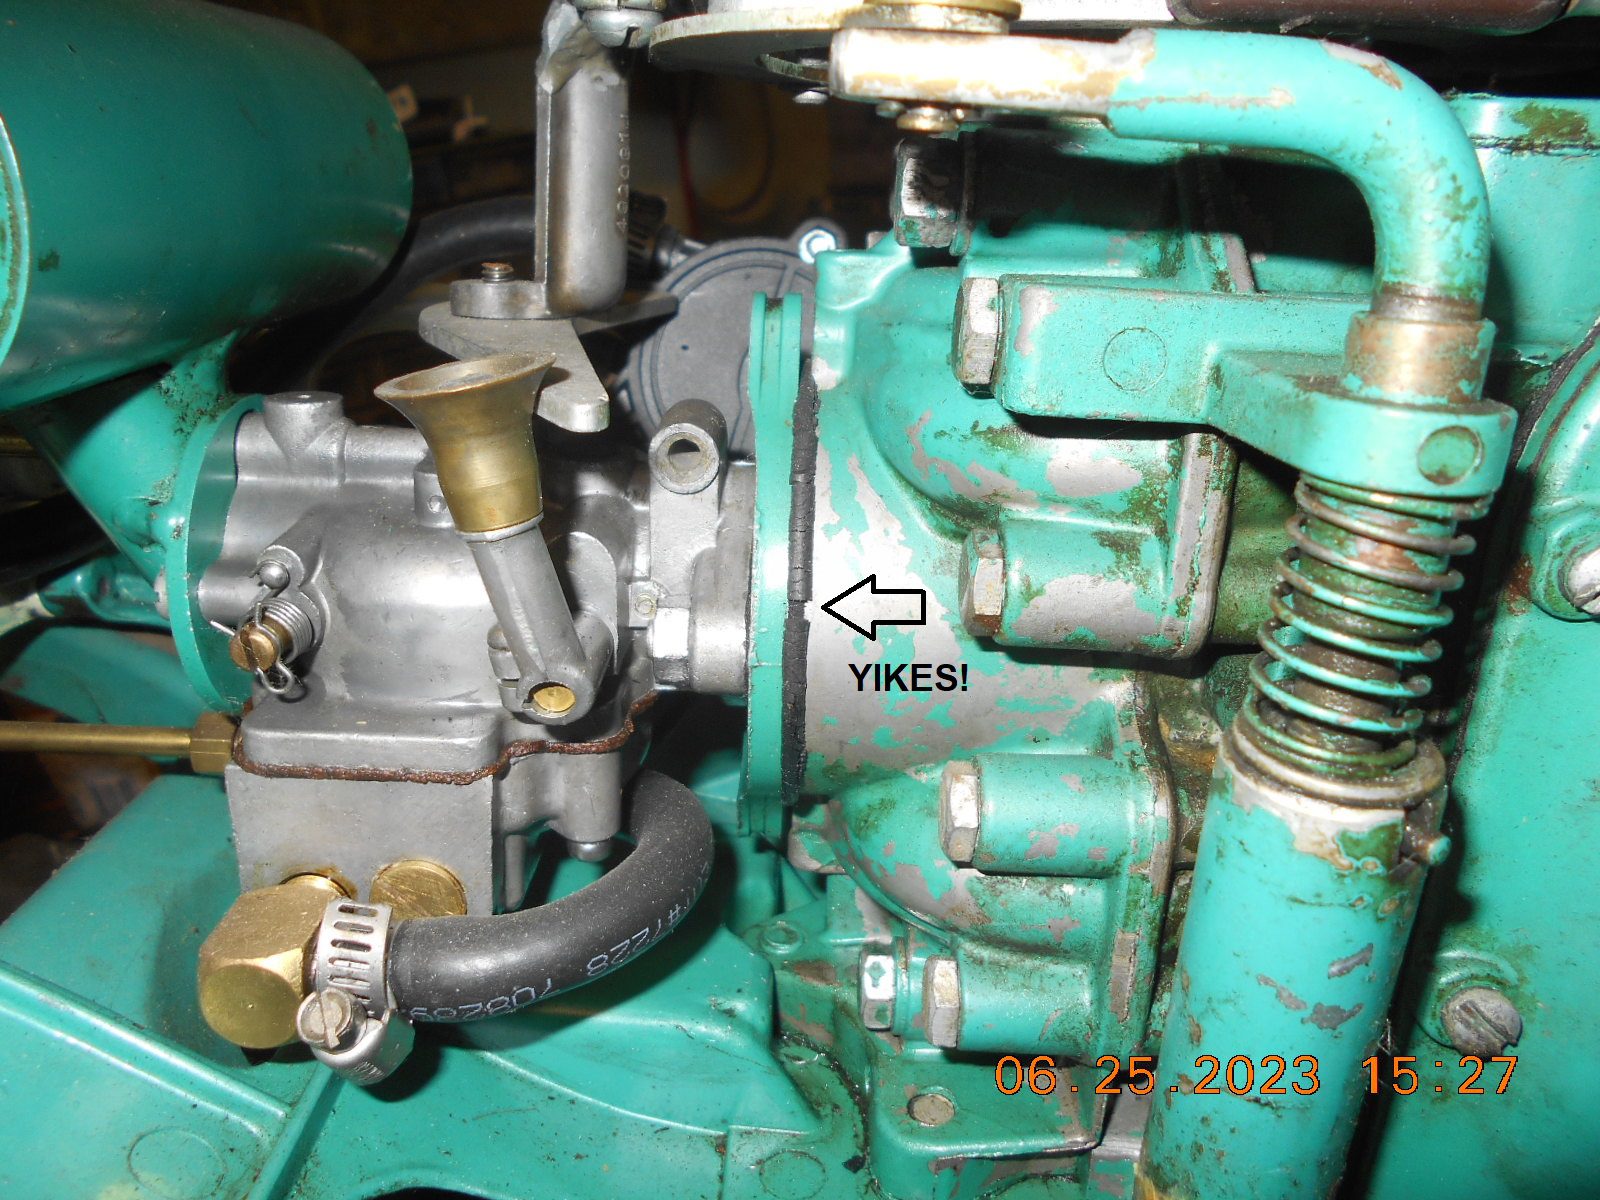
June 27, 2023 at 6:25 pm #277502Got a B&S pump working yesterday. It runs, but the low speed (air) needle has to be screwed in all the way to idle.
The fuel tank hose couple was suspicious of sucking air, but I ran it 20 minutes, fast idle, with the tank 30″ below
the pump, with no issues. Squirted WD-40 around the carb and reed flanges, and crankcase halves, while it was
running, and noticed no change in RPMS, hence the crankcase seems tight. Took the carb back off, and changed
out the tiny washer that the suction jet seats on, and changed out the welch plug in the top of the carb, in case it
was leaking, as it looked a little “rough”. The jet suction tube has a tiny hole in it, but It wasn’t plugged.
Hope to put the carb back on tomorrow and see if it helped, as I’m out of ideas!VIDEO
https://youtu.be/W1KVU4rhskAThe suction jet had a “gooey” rubber gasket under it. Not sure if that could have
been a problem, but I changed it out for a hard fiber washer.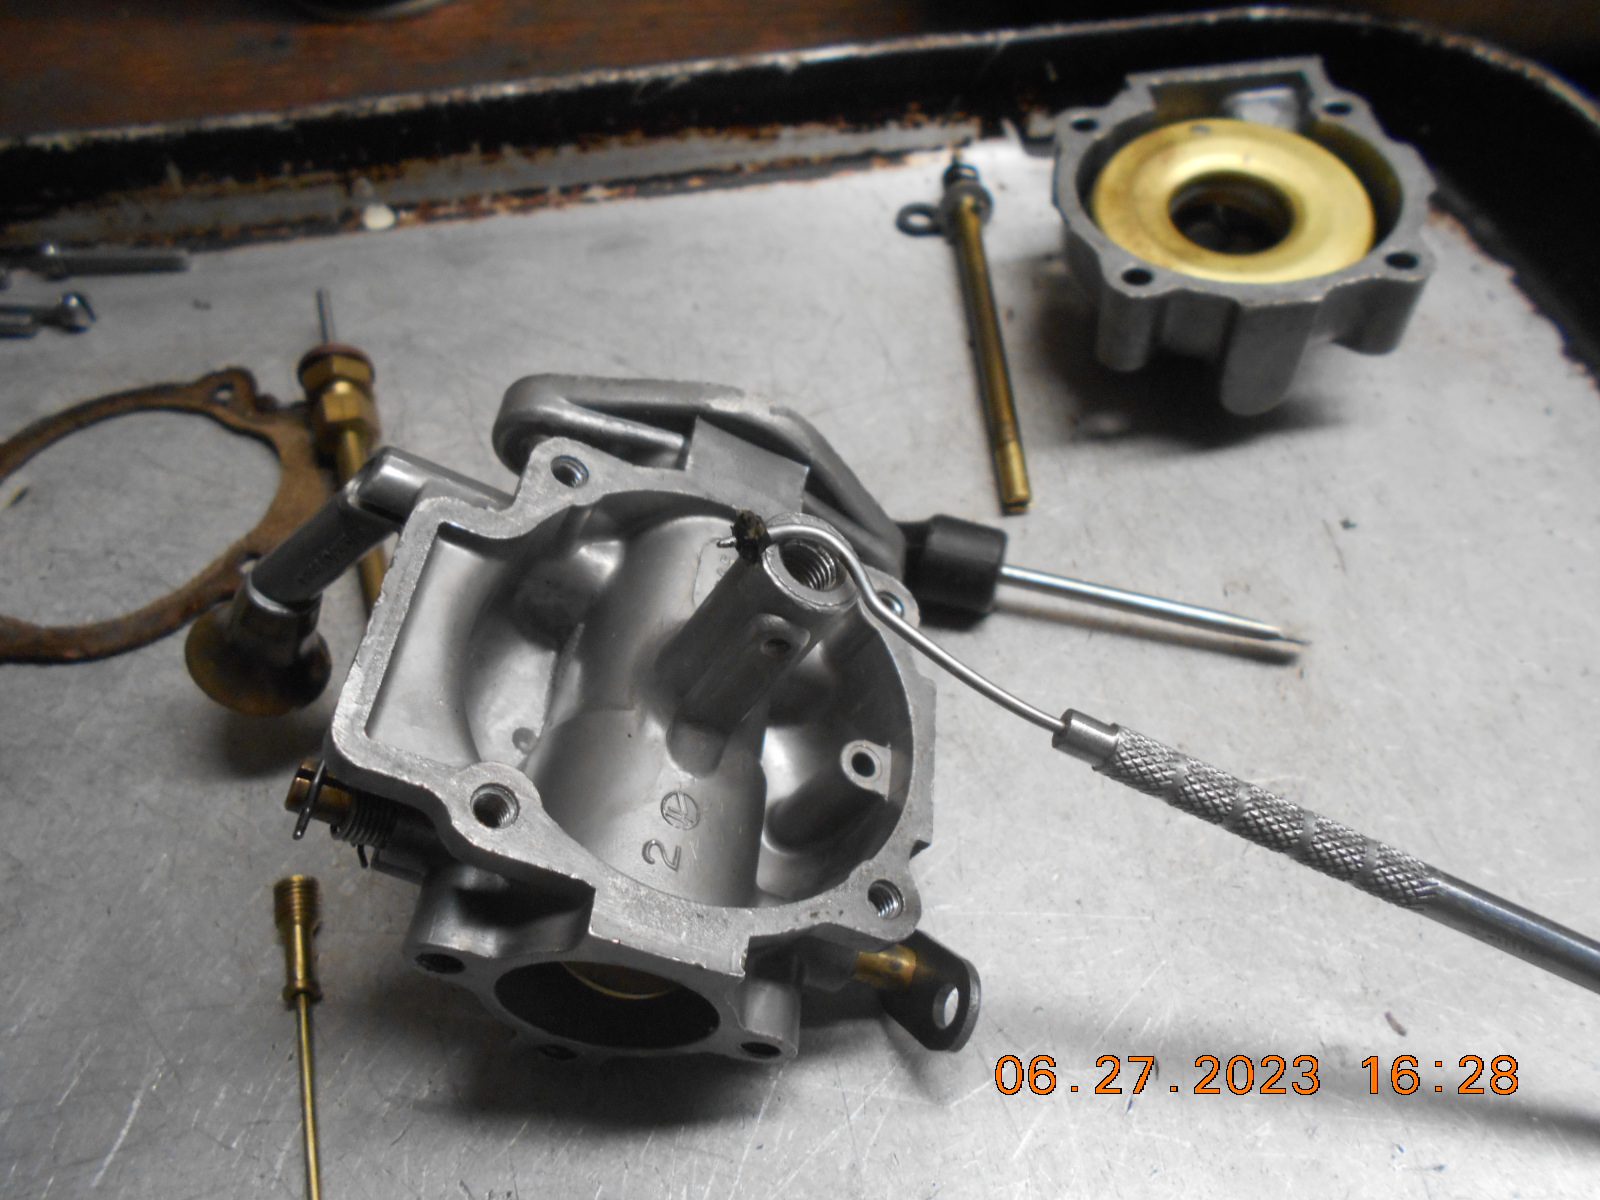
MD98A Tillotson……
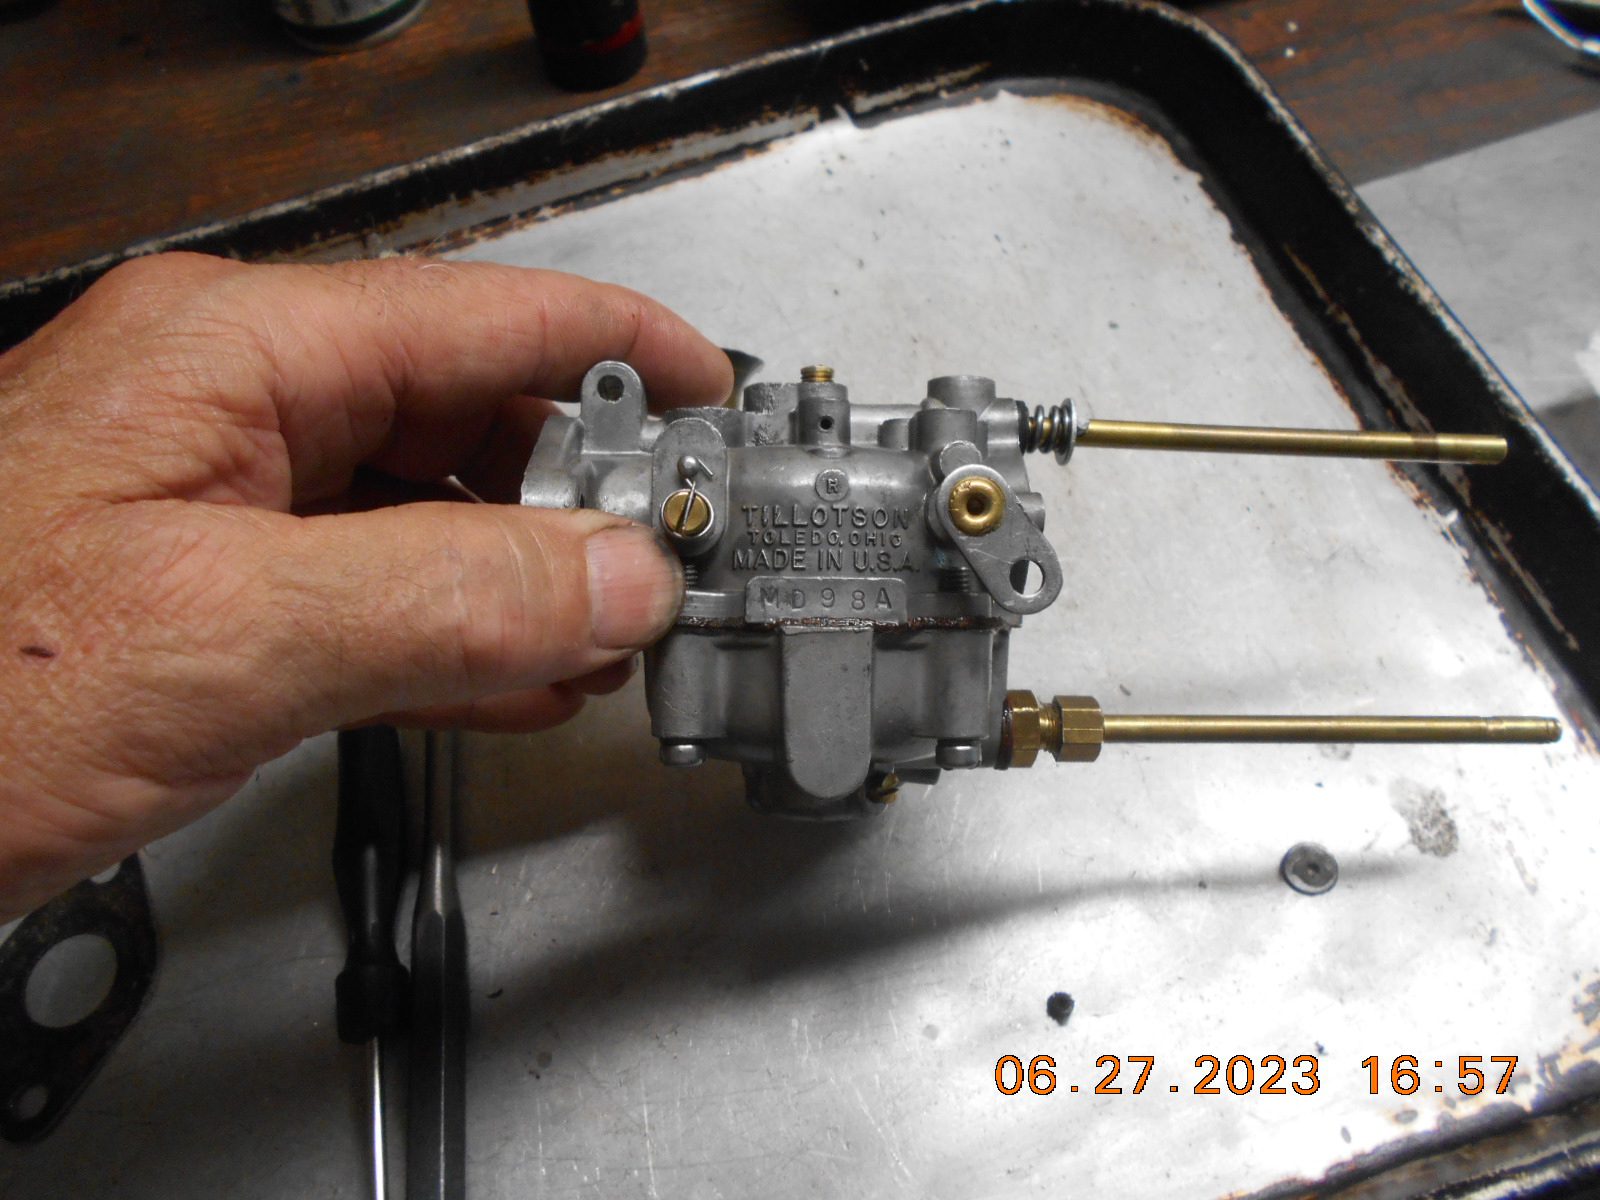
Fuel pump seem to work with no issues……
Neither hole was plugged under the Welch plug, but
the plug itself looked a little “iffy.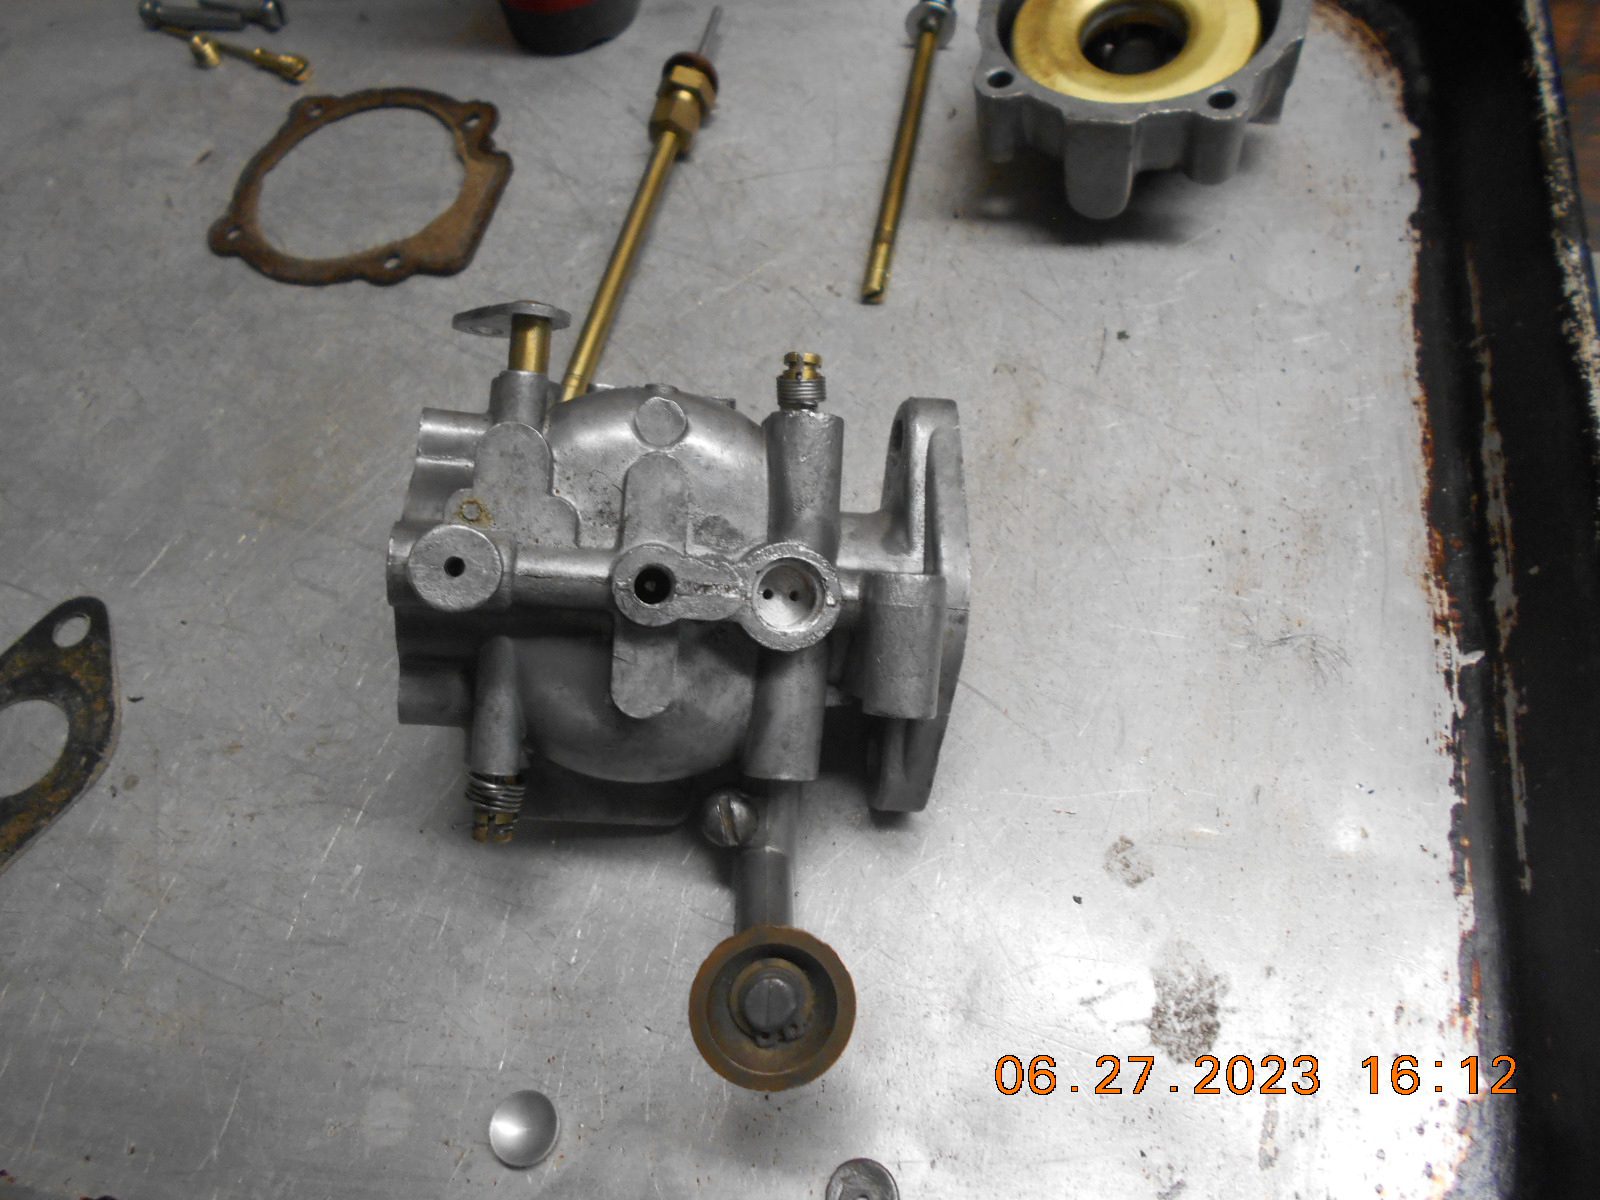
Prepare to be boarded!
June 27, 2023 at 8:06 pm #277510Yeah, that reed block was a learning experience for me the first time I worked on one. The o-ring does get somewhat mooshed out with the reed block seated all the way in.
June 27, 2023 at 10:28 pm #277513Yeah, that reed block was a learning experience for me the first time I worked on one. The o-ring does get somewhat mooshed out with the reed block seated all the way in.
Out of curiosity, I looked at McMaster Carr for “square” o-rings that
might work. There’s a couple that might be close, but I really wouldn’t
need fifty 2.250″ ID o-rings……… guess the round one is working anyway.Prepare to be boarded!
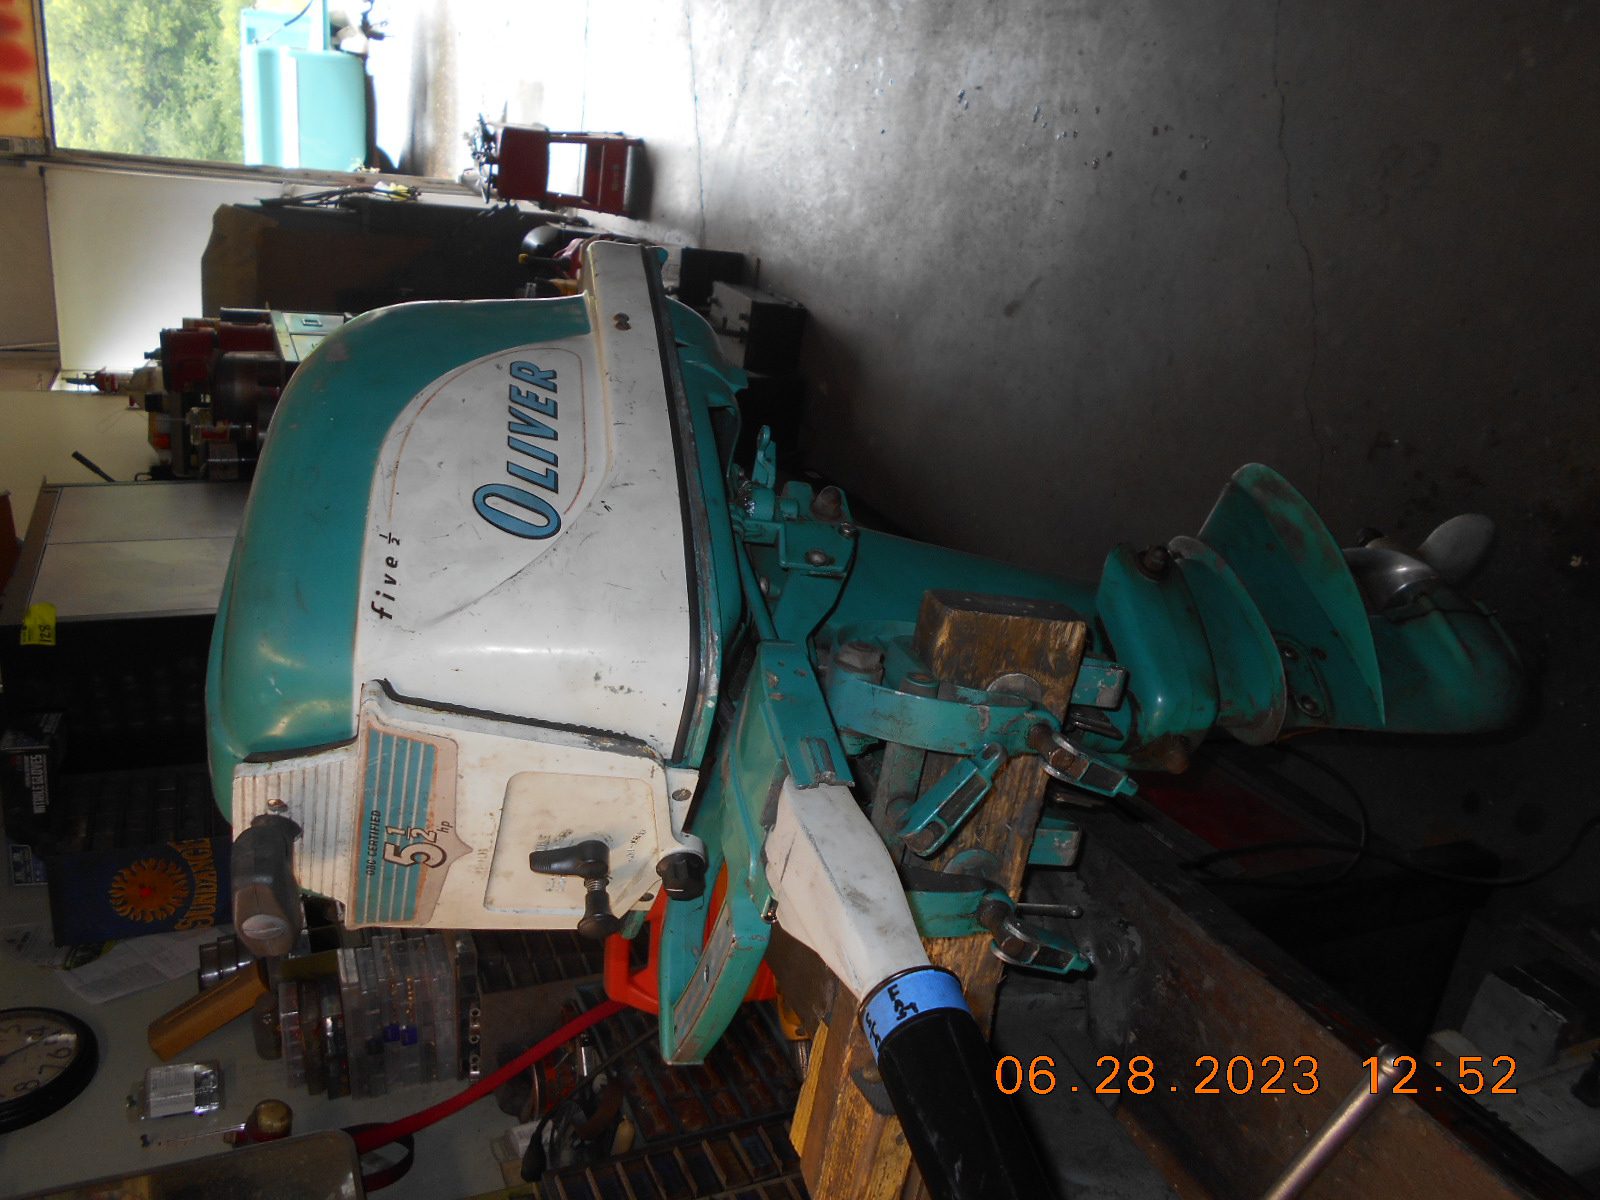
June 28, 2023 at 5:31 pm #277547Before I went through the carb again and fixed a few things, the motor would only idle
with the Low Speed air needle screwed in all the way “Rich”. Now is idles better,
and with the needle 1/2 turn out. Replaced the gasket under the suction tube jet, new
Welch plug, and straightened out the throttle plate. Started on first pull,
so I think it’s good to go. Lake test next, with the hood on!This motor only has 62 & 63 psi compression.
Anyone know what compression was “new” on these engines?BARREL TEST VIDEO, day II
https://youtu.be/_pjLwWrbsKoThis is the strangest rewind design I’ve seen regarding the “Dog”
engagement and retraction.
Not sure if the lightweight hair springs are installed correctly, but
that’s how I found them. The clips attached to the dogs, engage
in the brass plate, seem to do all the work anyway.
The rewind should be taken all apart, de-rusted, lubed, new rope
etc., but it’s working great, so I’ll see how I feel about it “after” a
boat ride.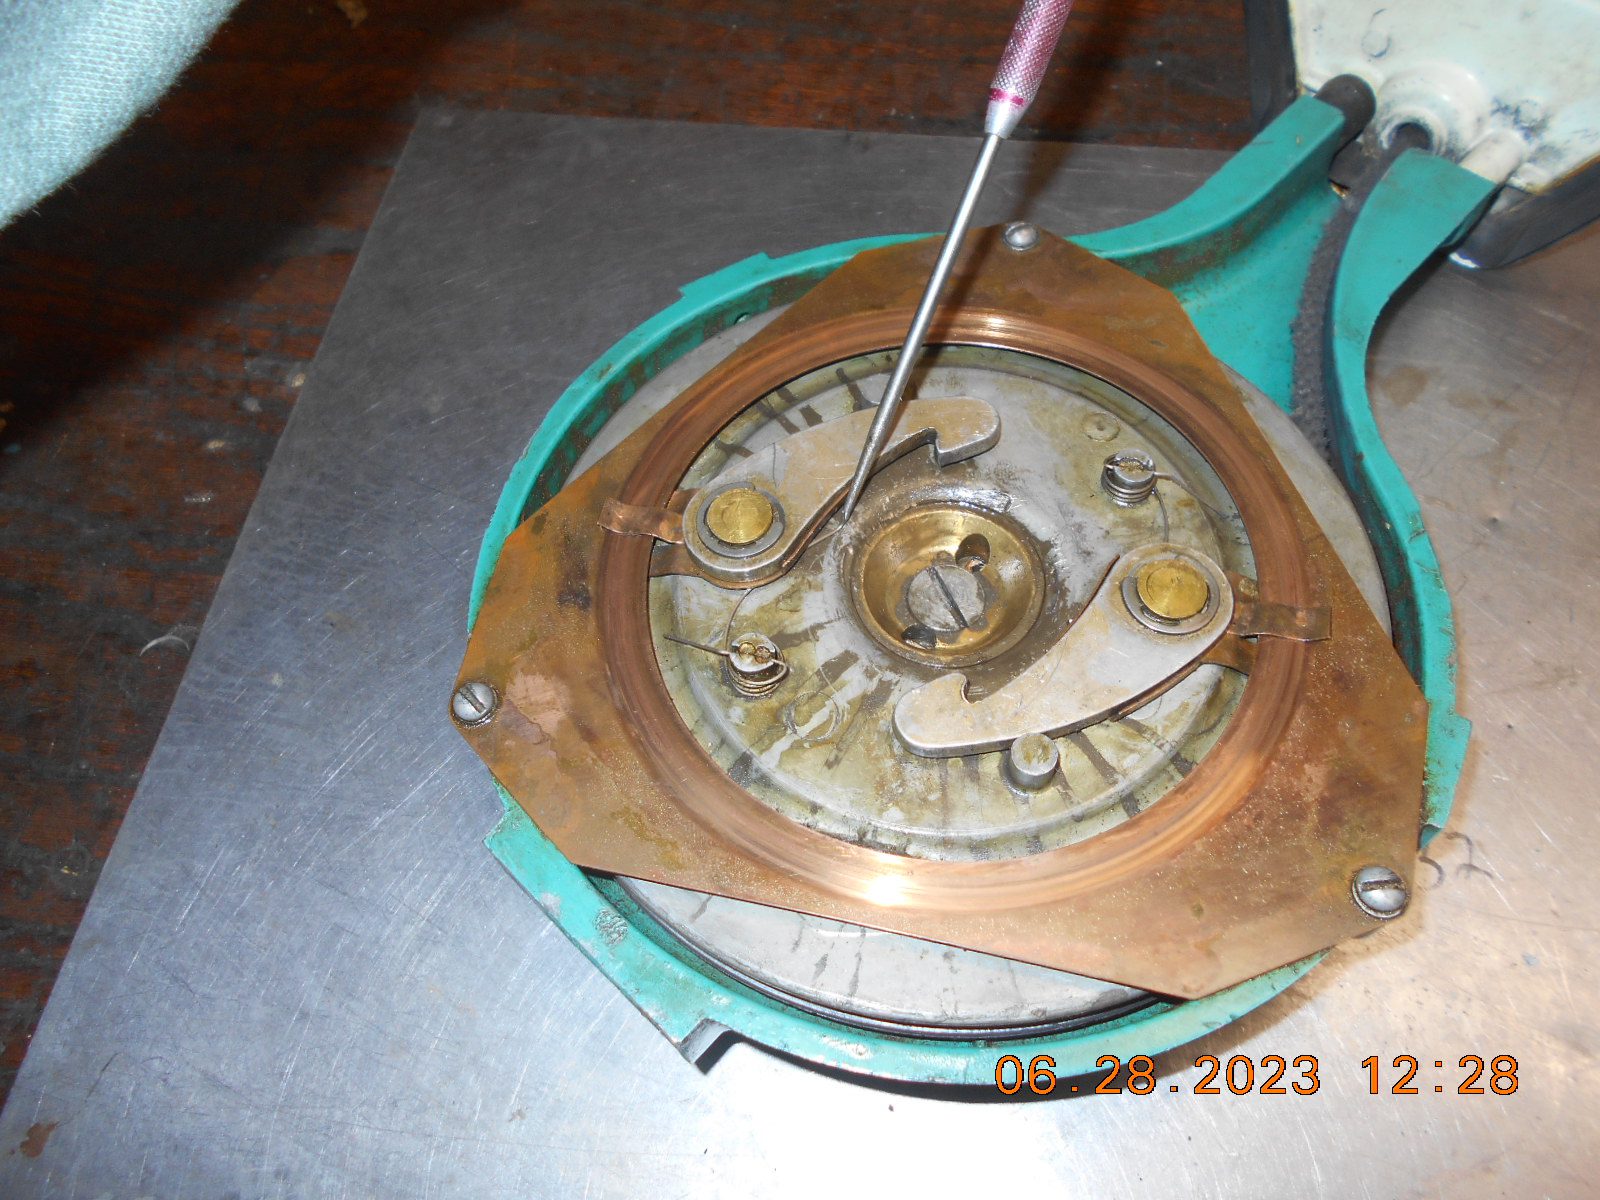
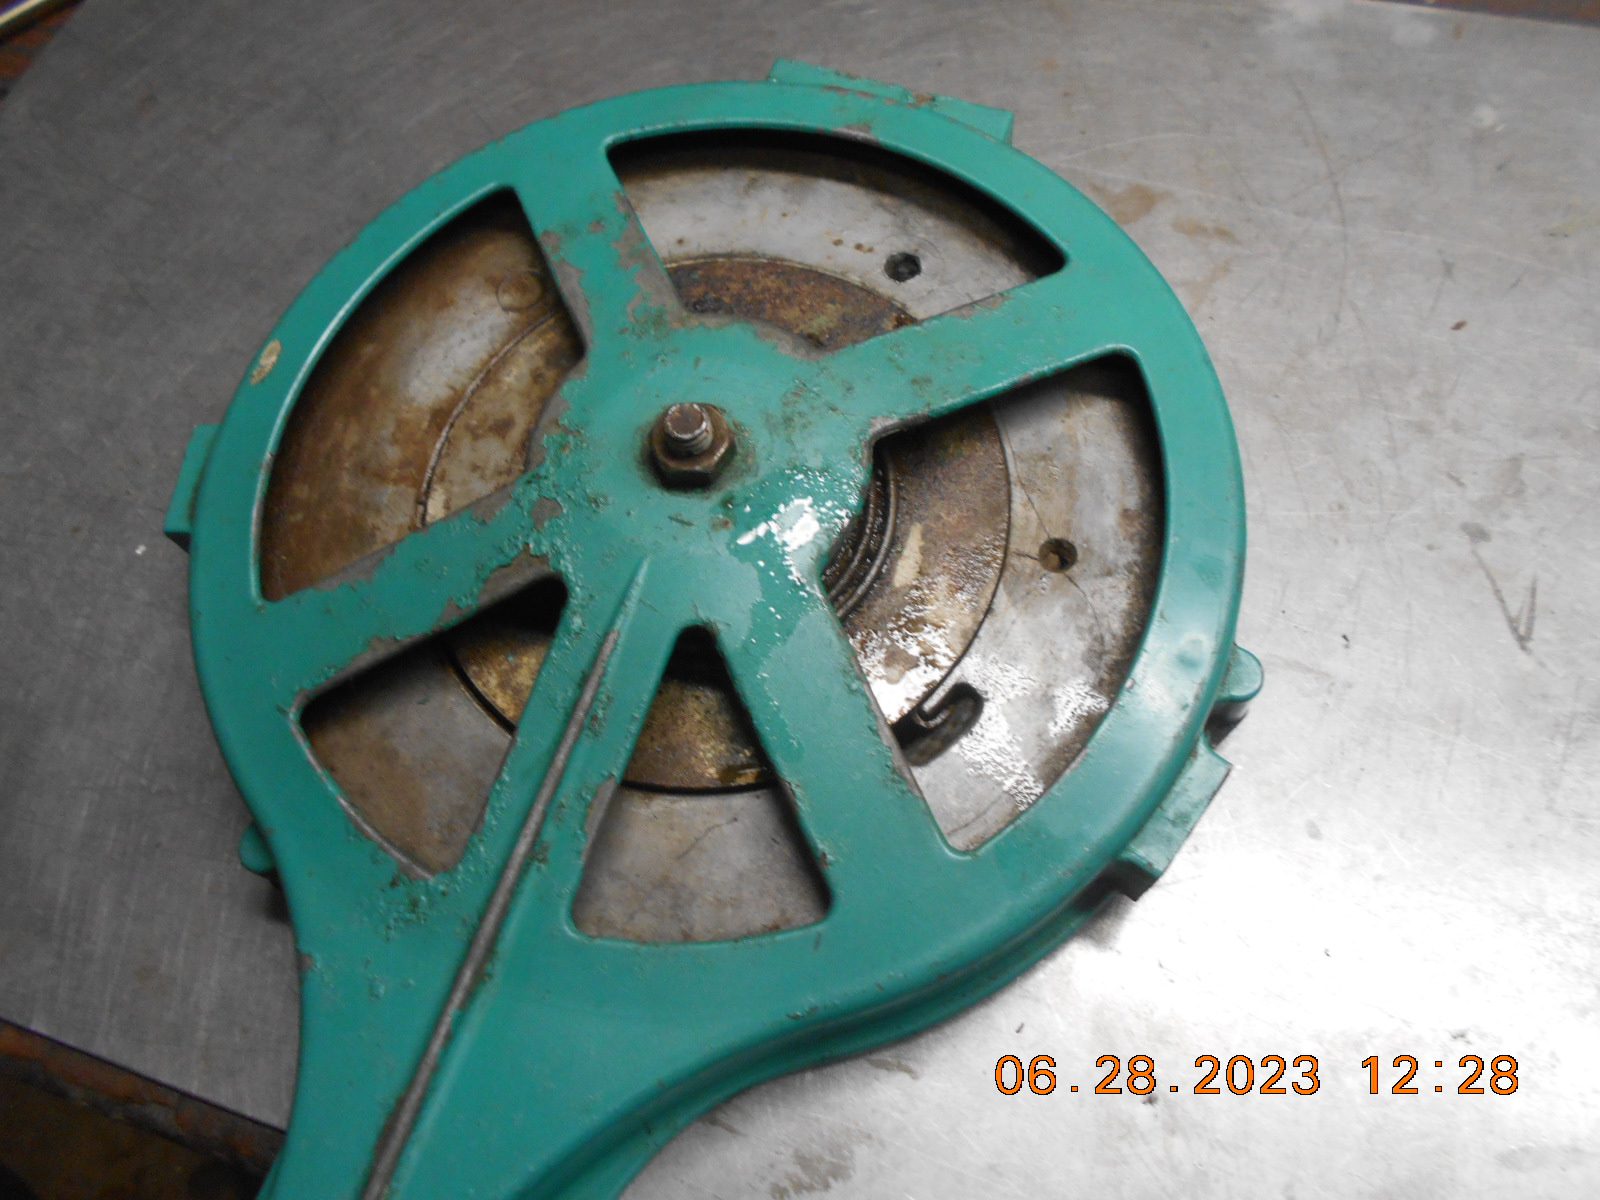
All back together, and it now has edge trim on the hood, and latches
down snug.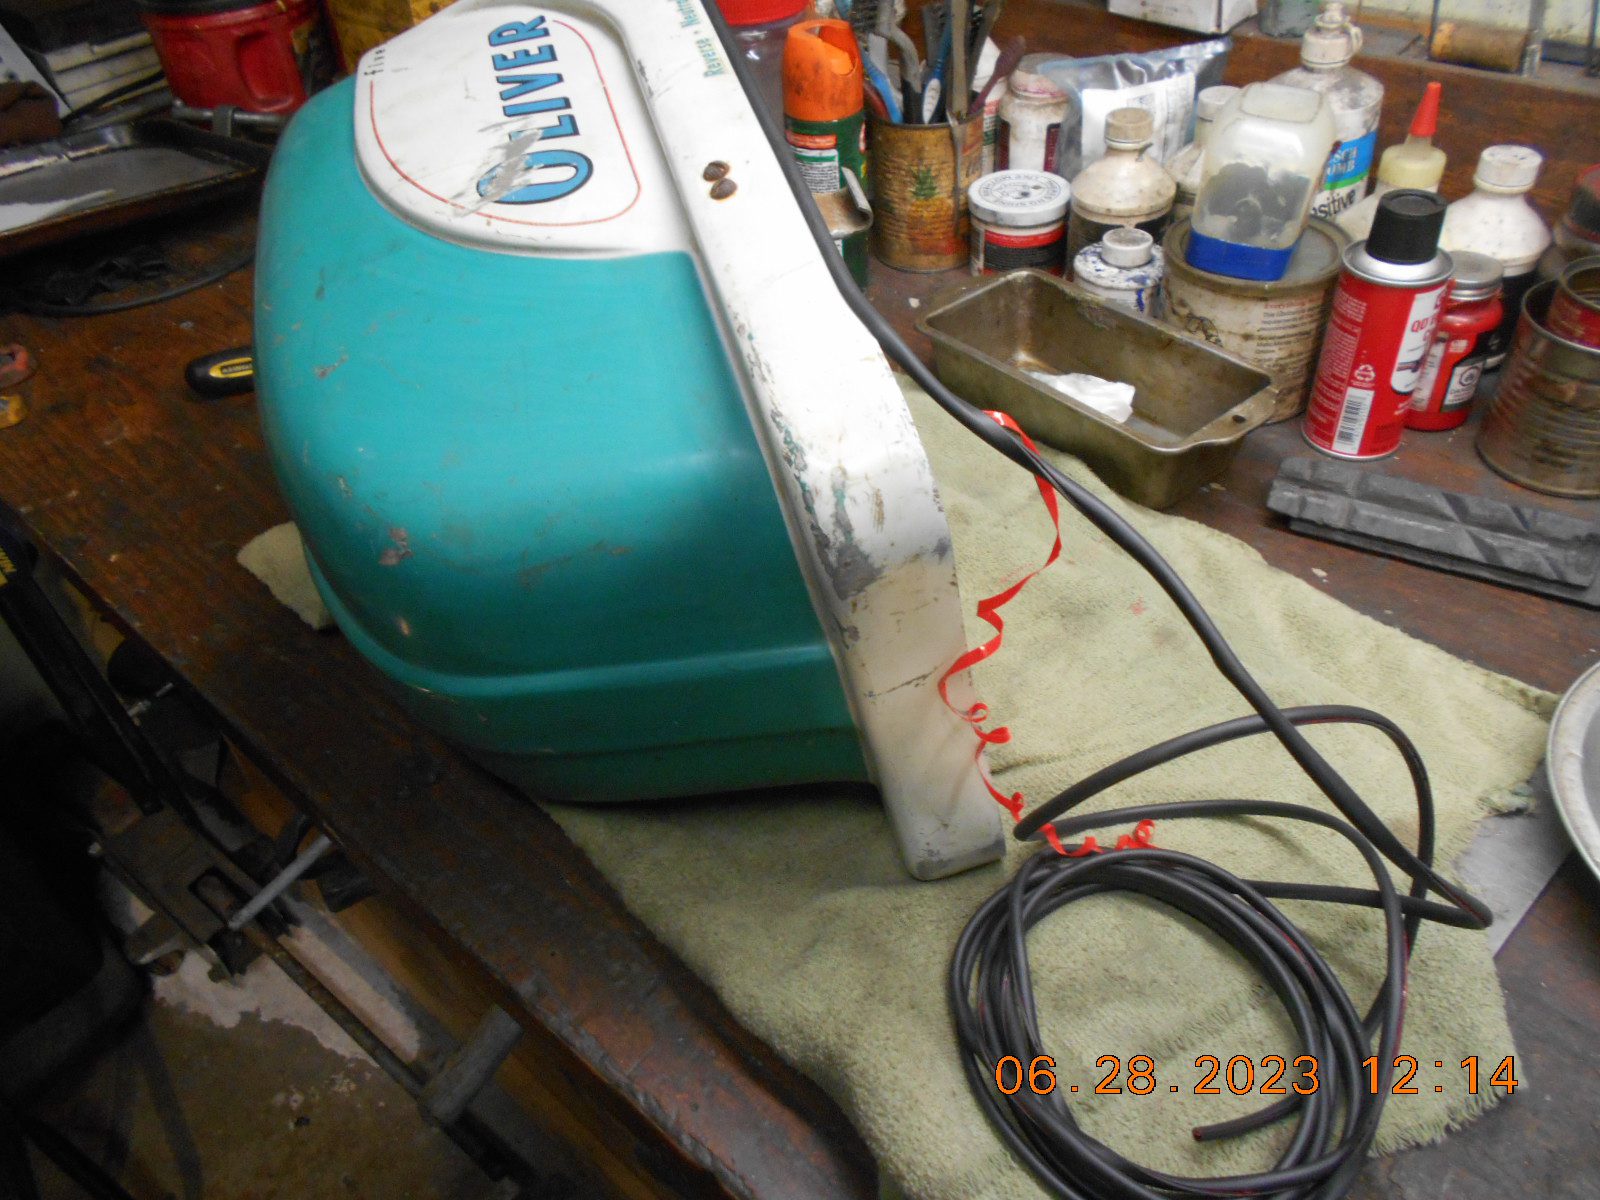
Prepare to be boarded!
June 28, 2023 at 6:20 pm #277553Nice job – runs real good now.
Bob
1937 Champion D2C Deluxe Lite Twin
1954 Johnson CD-11
1955 Johnson QD-16
1957 Evinrude Fastwin 18
1957 Evinrude 3022
1958 Johnson QD-19
1958 Johnson FD-12
1959 Johnson QD-20
1982 Evinrude 25hp“Every 20 minute job is only a broken bolt away from a 3-day project.”
"Every time you remove a broken or seized bolt an angel gets his wings."July 2, 2023 at 8:26 pm #277625Finally got the bugs out now after replacing the bad plug wire
that was arcing at full throttle. We ran it around for a half
hour with no issues.VIDEO……..
https://youtu.be/L8fuI86QiZQPrepare to be boarded!
July 2, 2023 at 9:46 pm #277627Glad to see it all worked out. Runs way more better.
Bob
1937 Champion D2C Deluxe Lite Twin
1954 Johnson CD-11
1955 Johnson QD-16
1957 Evinrude Fastwin 18
1957 Evinrude 3022
1958 Johnson QD-19
1958 Johnson FD-12
1959 Johnson QD-20
1982 Evinrude 25hp“Every 20 minute job is only a broken bolt away from a 3-day project.”
"Every time you remove a broken or seized bolt an angel gets his wings." -
AuthorPosts
- You must be logged in to reply to this topic.