Home › Forum › Ask A Member › 1960 Evinrude 5520 5.5 hp grommets
- This topic has 9 replies, 5 voices, and was last updated 9 years, 6 months ago by
fleetwin.
-
AuthorPosts
-
October 10, 2015 at 1:27 am #2736
Need to replace the upper water pump discharge tube grommet in
the "subject" engine. It’s up in the midsection about 9" from the
bottom. There’s not enough room to get one’s hand in there.
Removing the old one was easy, as there’s a hole through the
housing to push the tit in. I was able then grab the old grommet
with a long needle nose pliers.
When installing the bottom grommet in the pump housing,
I see that it’s a pretty tight fit, and see potential problems
in installing the upper grommet.
Thought I’d ask for your trade secrets before I mutilate the
new grommet 😮
Thanks, BuccaneerPrepare to be boarded!
October 10, 2015 at 2:37 am #25374Well, plenty of guys get it with some screw drivers and needle nose. I wanted to make a tool.
Grease it up well.
I made a tool for this out of a 12" or so threaded rod and a couple nuts. Put the nuts on about an inch down. They act as the stop for the grommet. Then I ground 2 sides of the rod flat, 180 degrees apart, on the bench grinder. This allows the "tits" to compress in somewhere, when they go up through the hole. If you don’t grind 2 flat spots in the rod, you will mangle the grommet. Then slide it up, use a small awl to work the "tit" into the hole in the exhaust housing, and you are done.
You could make a fancy one out of wood if you had a wood lathe, or a real nice one out of metal if you had an actual lathe, neither of which I have, so had to use the threaded rod.
October 10, 2015 at 12:52 pm #25377Chris, thanks for the reply and inspiration!
I had an old wood arrow shank in my hand
"thinking", but that’s are far as I got, lol.
You idea sounds "do-able"!Prepare to be boarded!
October 11, 2015 at 1:44 am #25390I made the rod and installed the upper grommet today.
Worked good. I used a 3/8" steel rod, turned down the
end until it fit loose in the bushing, ground down both
sides to make room for the tits to compress, then brazed
a washer on the rod to push the grommet in.
Grease up the hole and grommet a little, placed the grommet
on the rod and at the hole, a little at an angle. Used a long
screwdriver to start one side of the grommet in the hole,
then started the other side, pushed down, and ta-da.
Thanks for the idea!Prepare to be boarded!
October 11, 2015 at 11:43 am #25396Great!
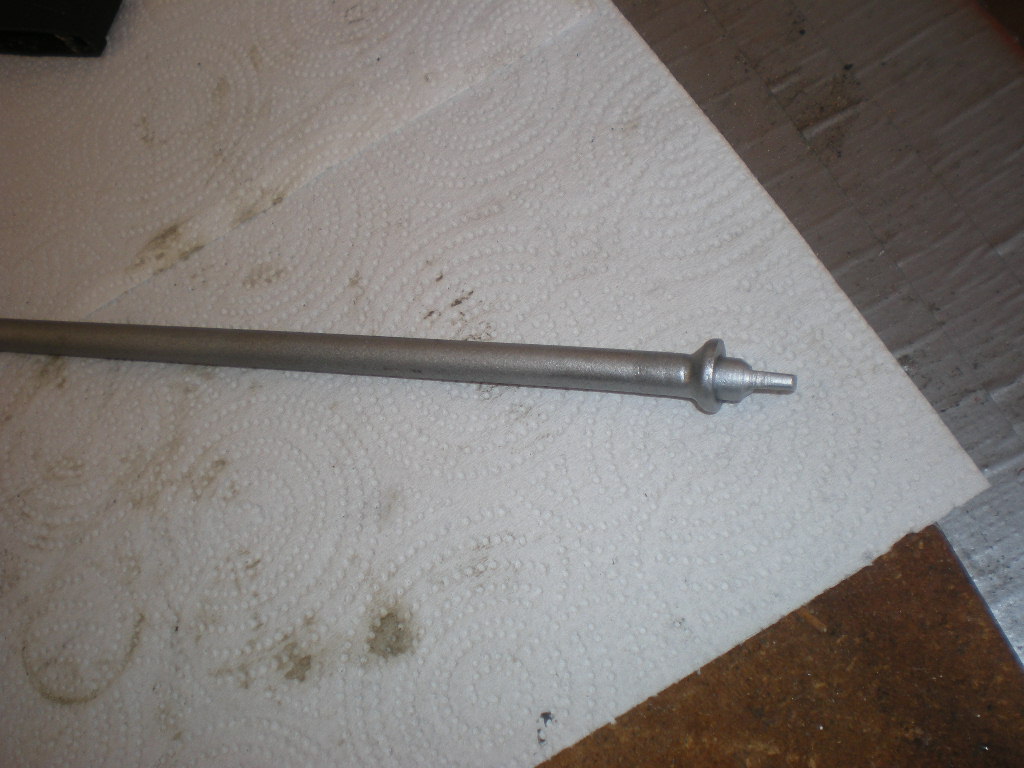
October 12, 2015 at 1:03 pm #25441The "un-official" 1960 5.5 hp Fisherman Grommet
installation tool……
Attachments:
Prepare to be boarded!
October 12, 2015 at 1:09 pm #25442Yours is a heck of a lot nicer than mine! But they work.
Trick now is to put it somewhere where you will remember next time you need it. Ive made about 3 of them, as I keep losing em!
October 13, 2015 at 7:29 am #25472There used to be an OMC special tool that looked very similar to the one you fabricated. I own one, but have never had to use it. Guess I’ll use it at some point in the future!
October 13, 2015 at 3:58 pm #25486I don’t know where mine went either, but it was at least 5 times more expensive than a threaded rod . . . 😀

 October 13, 2015 at 5:21 pm #25488
great job on that tool, looks just like the OMC tool!
-
AuthorPosts
- You must be logged in to reply to this topic.