Home › Forum › Ask A Member › Am I Running On Only 1 Cylinder? Opinions? ’49 Sea King
- This topic has 33 replies, 8 voices, and was last updated 2 years, 2 months ago by
John Gragg.
-
AuthorPosts
-
October 1, 2023 at 2:54 am #281153
Well, I got the motor running today, 4 separate times. I never ran it for more than 8 or 10 seconds, but it ran. I cant let it go too long, I’m not getting any water coming out the tiny tube under the powerhead that I assume is the pee-tell. (I point to it at the end of the video, is that where the water would exit?)
The more I looked at video of my ‘success’, the more I wondered if part of my trouble is because of running on only 1 hole instead of 2. What do you all think? It sounds strong, but that can be deceiving, yes?
Pulled both plugs, can’t really tell the difference between the two, both are brand new and only show a little fuel/oil mix on them.
I going to try the ‘pull a wire at a time’ thing tomorrow, but I have to be careful. How long do I have before I start getting too warm?
Video of it running. Please let me know what you think. Does it sound like both cylinders are firing?
https://youtube.com/shorts/YUfkKzPBXFI?si=4TZRbB2UJhaYhds0
Best Regards
John Gragg
RIverside, CAJust starting in the hobby, please be patient.
48 Sea King 5hp GG9014A. Sold
49 Sea King 5hp GG9014A
48 Johnson TD20. Sold
49 Johnson TD20. Sold
54 Johnson QD15. Sold
55 Johnson CD12. Sold
57 Johnson RJE-19M
57 Johnson RDE-19October 1, 2023 at 5:17 am #281154C’mon man!!!
There is so much wrong in that video you had better stop now before you electrocute
yourself and/or destroy your Sea King.
1.) Remove your prop while testing. You don’t need it on and you are blowing water all
over the place. All that splashing is a bad idea if you are using an ELECTRIC DRILL.
2.) Bolt your gas tank down or you make get a leak or damage the tank then BOOM.
3.) Put your flywheel on. Those parts zinging towards the camera are needed. Double
nut the flywheel if you are going to use the drill to start the motor.
4.) Keep the extension cord away from the tank and OUT OF THE WATER on the
driveway. Suspend it up out of danger if you must use it.
5.) Moving the throttle lever does nothing to tune the engine. The high speed needle does
that. Your throttle lever position should be at the 5 o’clock position when looking down
on your Sea King, from above, when starting.
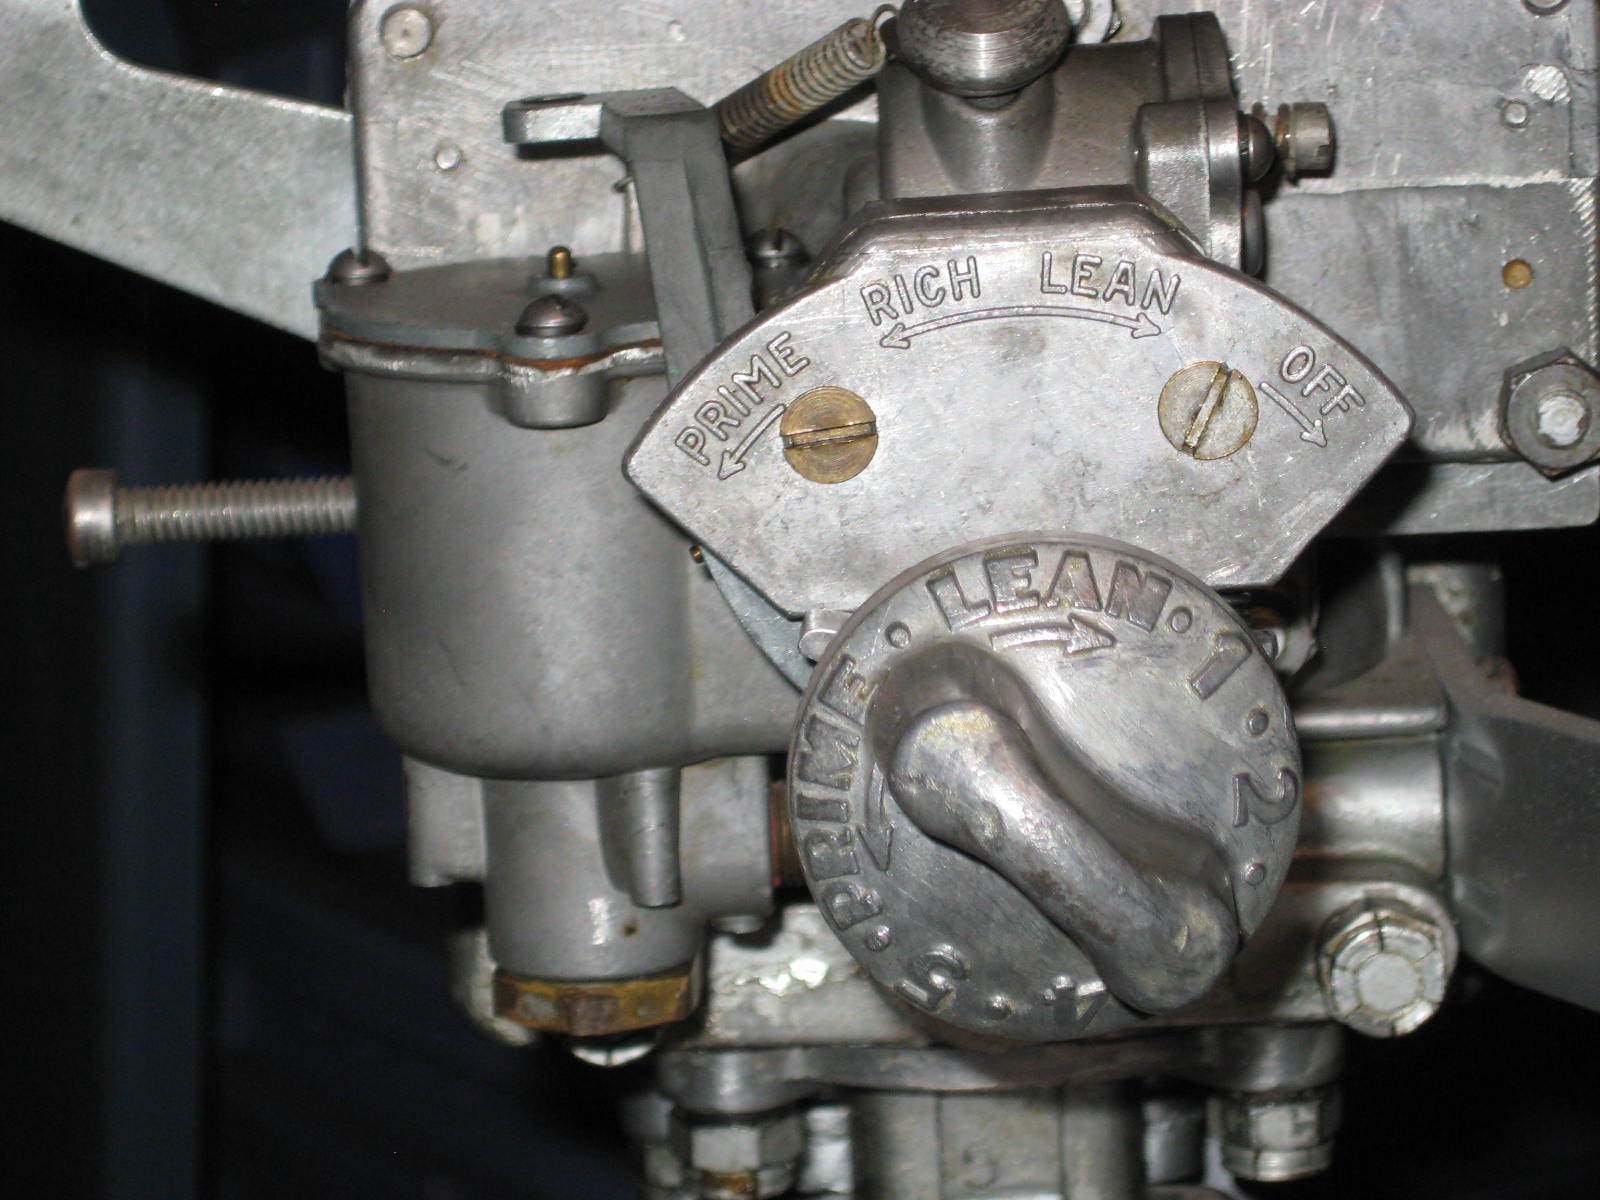
6.) Cold Start: Priming the engine is simple but there is a trick to it. The knob attached to the high
speed needle is used to act like a “choke”. Twist it CCW and MORE fuel is released. Twist it CW and
it LEANS the fuel mixture out. Before starting twist the knob CCW until it submerges the needle
into the carb bowl. Hold it for 10 seconds. Then release it. DO NOT MOVE IT BACK to your 3/4 to
1 turn from gently seated position. This assumes you know that position and set your knob arrow in
the up position(12 o’clock). This is just a “kinda good place to start” position for your high speed needle.
It will change. When you find the optimal HS needle position you will move the knob to the up position
but keep the needle fixed. There is a tiny set screw that holds the knob to the needle.
7.) Start the motor. Slowly move the mixture knob CW until the engine runs great. Go full throttle and adjust
as needed. This is your optimal setting. STOP. Move your knob so the arrow is up while the needle stays still.
8.) Restart the warm motor. Do not use the cold start procedure. Just set the throttle lever
to the 5 o’clock position and start the motor. Make any minute changes needed.
I added a picture of the placard which shows the starting procedure. Does your Sea King have one?
Did you read it? Memorize my picture if not. Now have fun.
Sea Kings Baby!!!
1 user thanked author for this post.
October 1, 2023 at 10:35 am #281158I am really surprised that it runs at all with the flywheel removed. The weight of the flywheel supplies the momentum needed to keep it rotating between compression strokes,
You better hope you don’t see any water coming out of that curved tube. That tube is the crankcase puddle drain. It drains off any excess fuel that may collect in the crankcase. Water in the crankcase would be a bad thing.
There is no telltale as such. Water pump working indicator is water droplets blowing out the exhaust relief slots or holes about half way down the backside if the leg.
1 user thanked author for this post.
October 1, 2023 at 12:42 pm #281164LOL, I watched again as I didn’t realize the flywheel was off the first time.
But now I even seen the little spring washer fly off the crankshaft……
I was getting a little dizzy watching the gas tank shake.
Sounds like the motor wasn’t near deep enough in the water.
Fun to watch, but the setup was a little “shaky” at best.
A dedicated test barrel is the way to go if you’re going to be working
on motors much.
Hard to tell if a cylinder was cutting out or not in that video.Prepare to be boarded!
1 user thanked author for this post.
October 1, 2023 at 2:31 pm #281168Wow! Much needed, and very direct, advice from dbkski for sure. Great comments on things I never even thought of (from everyone) thanks.
Dbkski/Frank. 1 cylinders or 2?
I agree, I’ve been messing with this motor so long I’m really anxious to determine running or not so I rushed it. To be 100% honest, I’m older than my years when it comes to where my brain is on some stuff. Flywheel, prop, are both examples. I don’t have experience with these motors, but common sense should tell me to do those few things for safety and ease of use.
The starting instructions on mine are not readable, so that input is exactly what I was looking for in another post about a week ago. So thanks for that.
The PO glued a plastic red knob to the hs screw so I’ve kinda been winging it with proper positioning. I had read the 1/2 to 3/4 turn thing already, and right in between is where mine starts. That said, I have what I think is the proper knob so once I get this right I will cut the old one (knob only) off the needle and attach the other. Yes, that one has a set screw with it.
Also, you probably can’t tell in the video, but I don’t even have the primer lever and actuator lever on the needle. I wanted to have room to adjust the hs needle, so I left it off. I will change that as well.
Flywheel and tank will be secured before starting next time.
Double nut…headed to Ace in 10 minutes.
I went to the lawnmower shop Friday and got new pull rope. Gonna clean up my recoil unit and install the rope. Hoping I can use the pull start soon!
Thank again!
Best Regards
John Gragg
RIverside, CAJust starting in the hobby, please be patient.
48 Sea King 5hp GG9014A. Sold
49 Sea King 5hp GG9014A
48 Johnson TD20. Sold
49 Johnson TD20. Sold
54 Johnson QD15. Sold
55 Johnson CD12. Sold
57 Johnson RJE-19M
57 Johnson RDE-19October 1, 2023 at 4:46 pm #281173If you want to make sure it’s running on both cylinders try starting it with one of the spark plug cap removed. If it starts that cylinder fires, try again with the only the other cap removed. If it won’t run with one of the caps removed then you know which plug isn’t firing
1 user thanked author for this post.
October 1, 2023 at 5:32 pm #281175If you want to make sure it’s running on both cylinders try starting it with one of the spark plug cap removed. If it starts that cylinder fires, try again with the only the other cap removed. If it won’t run with one of the caps removed then you know which plug isn’t firing
Yea, I’m going to do that today. Just got back from Ace Hdwr. I couldn’t do it in the beginning, since I had zero reliability in starting it. Now that I have that sorted, I can move forward.
Thanks,
Best Regards,
John Gragg
RIverside, CAJust starting in the hobby, please be patient.
48 Sea King 5hp GG9014A. Sold
49 Sea King 5hp GG9014A
48 Johnson TD20. Sold
49 Johnson TD20. Sold
54 Johnson QD15. Sold
55 Johnson CD12. Sold
57 Johnson RJE-19M
57 Johnson RDE-19October 2, 2023 at 4:02 am #281184Here is more info to help you get your Sea King running well.
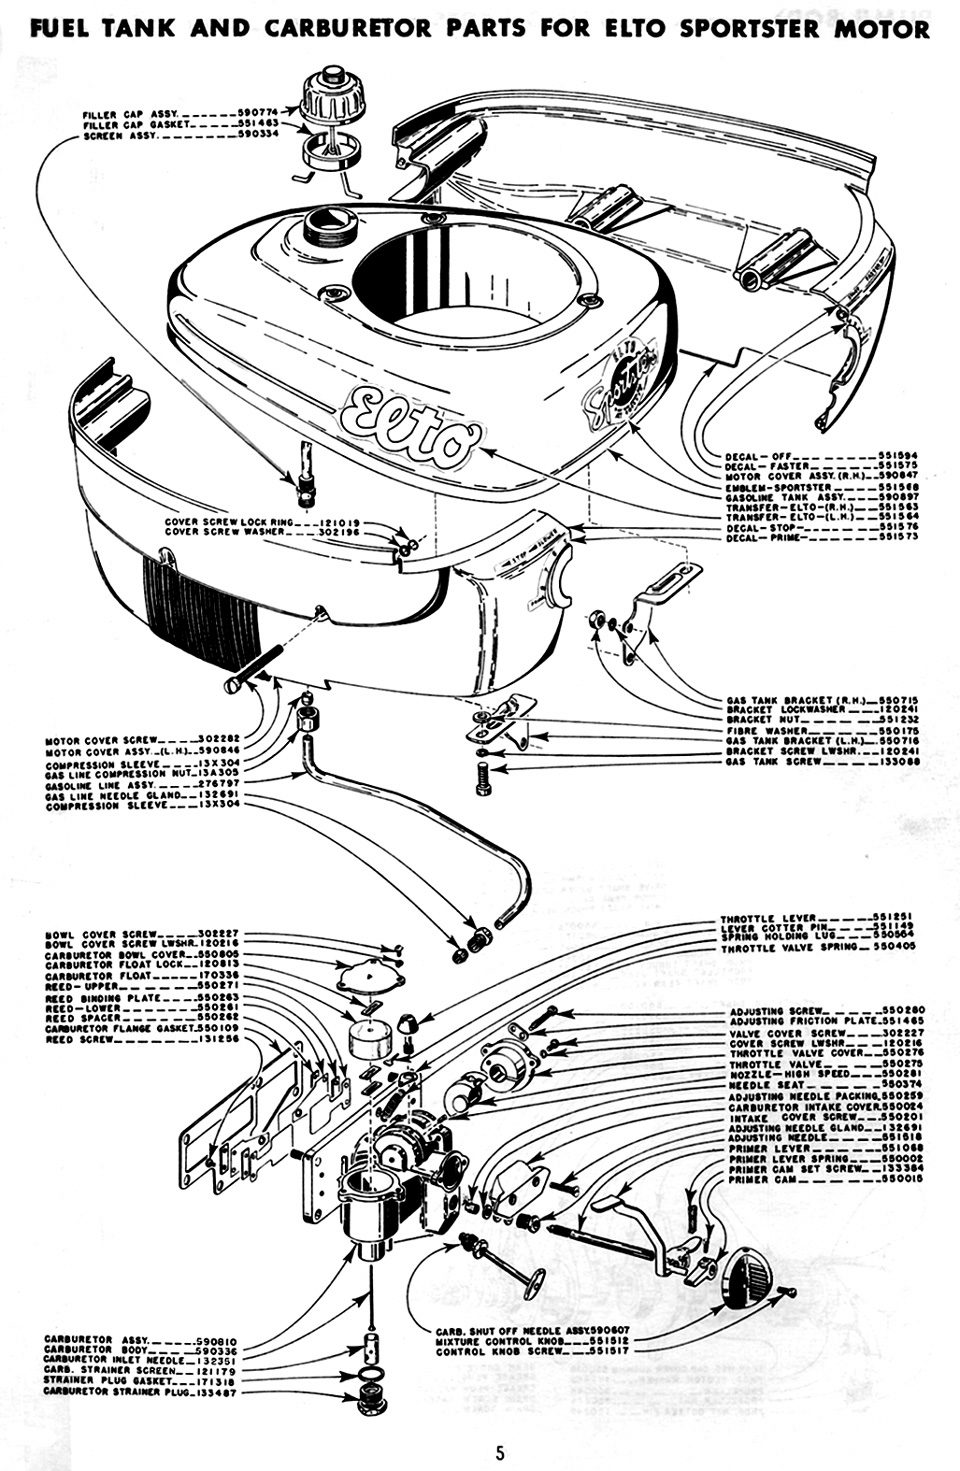
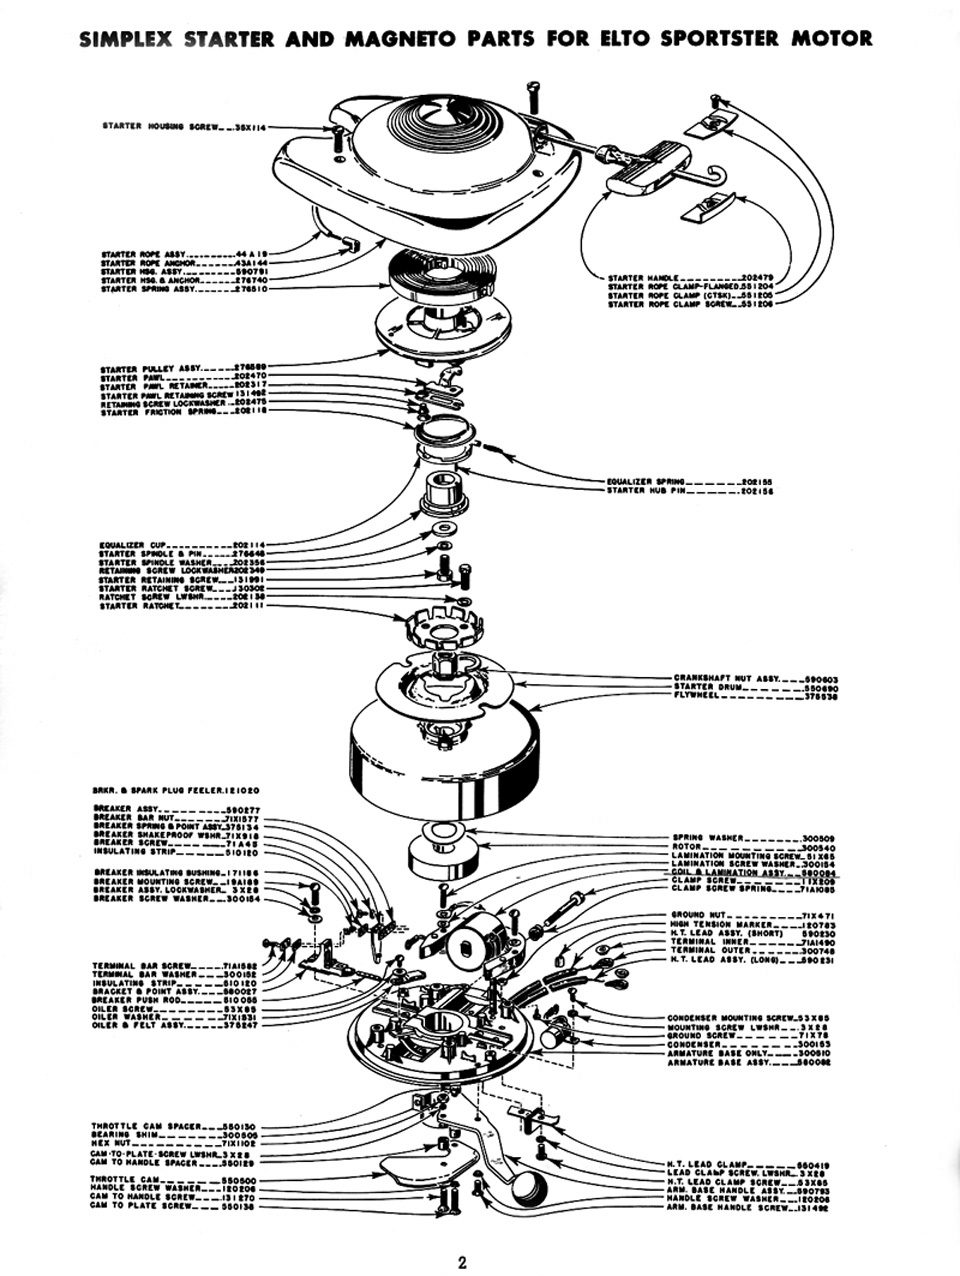
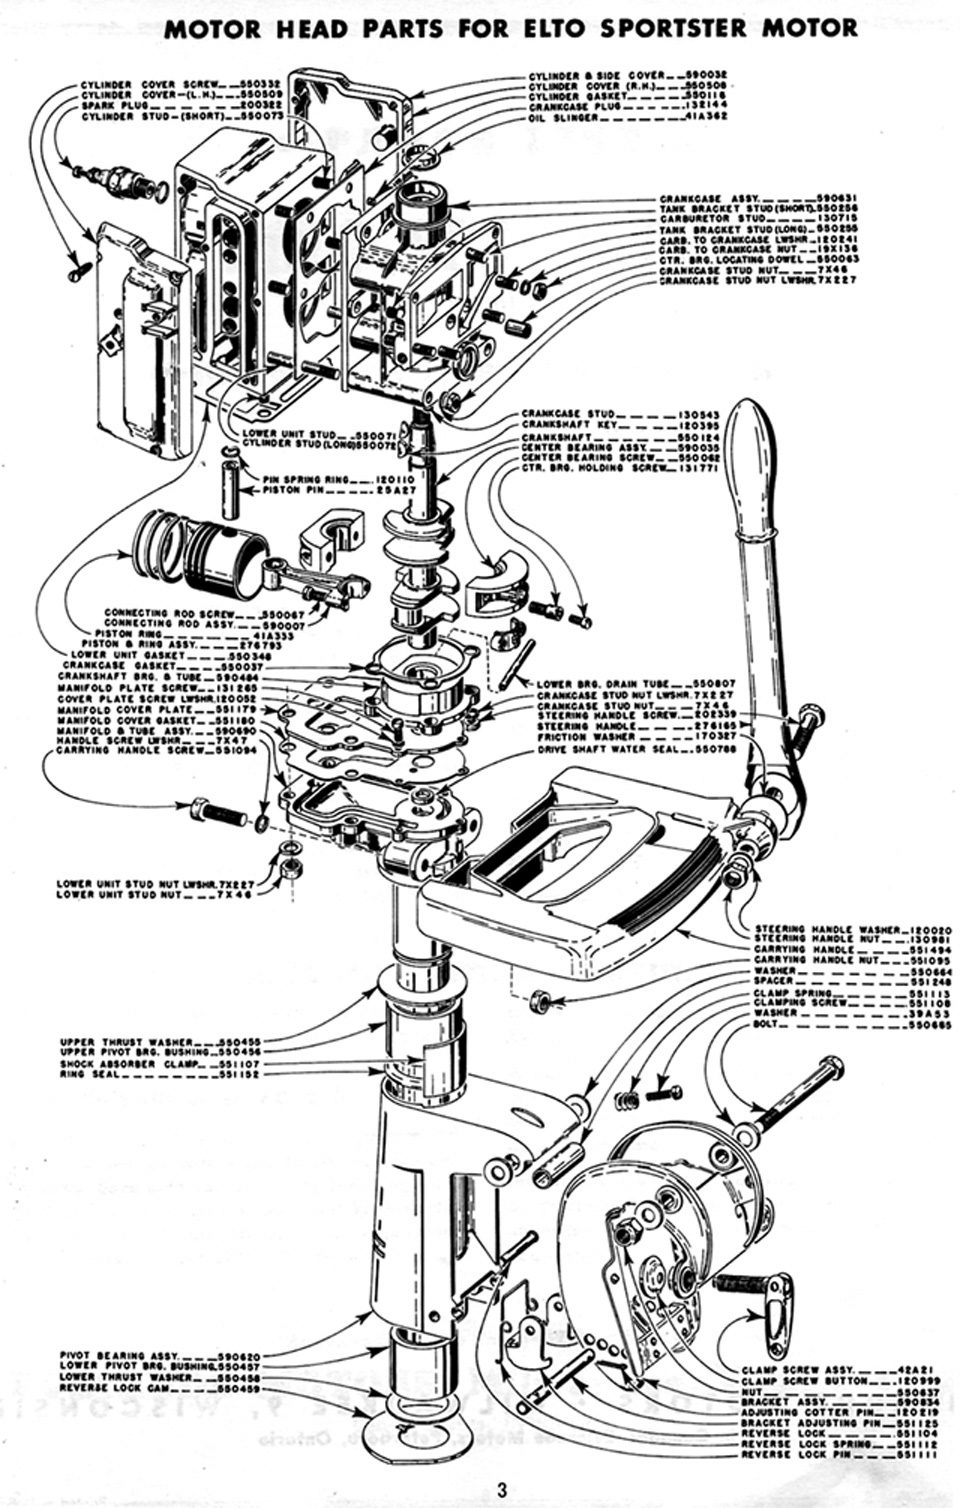
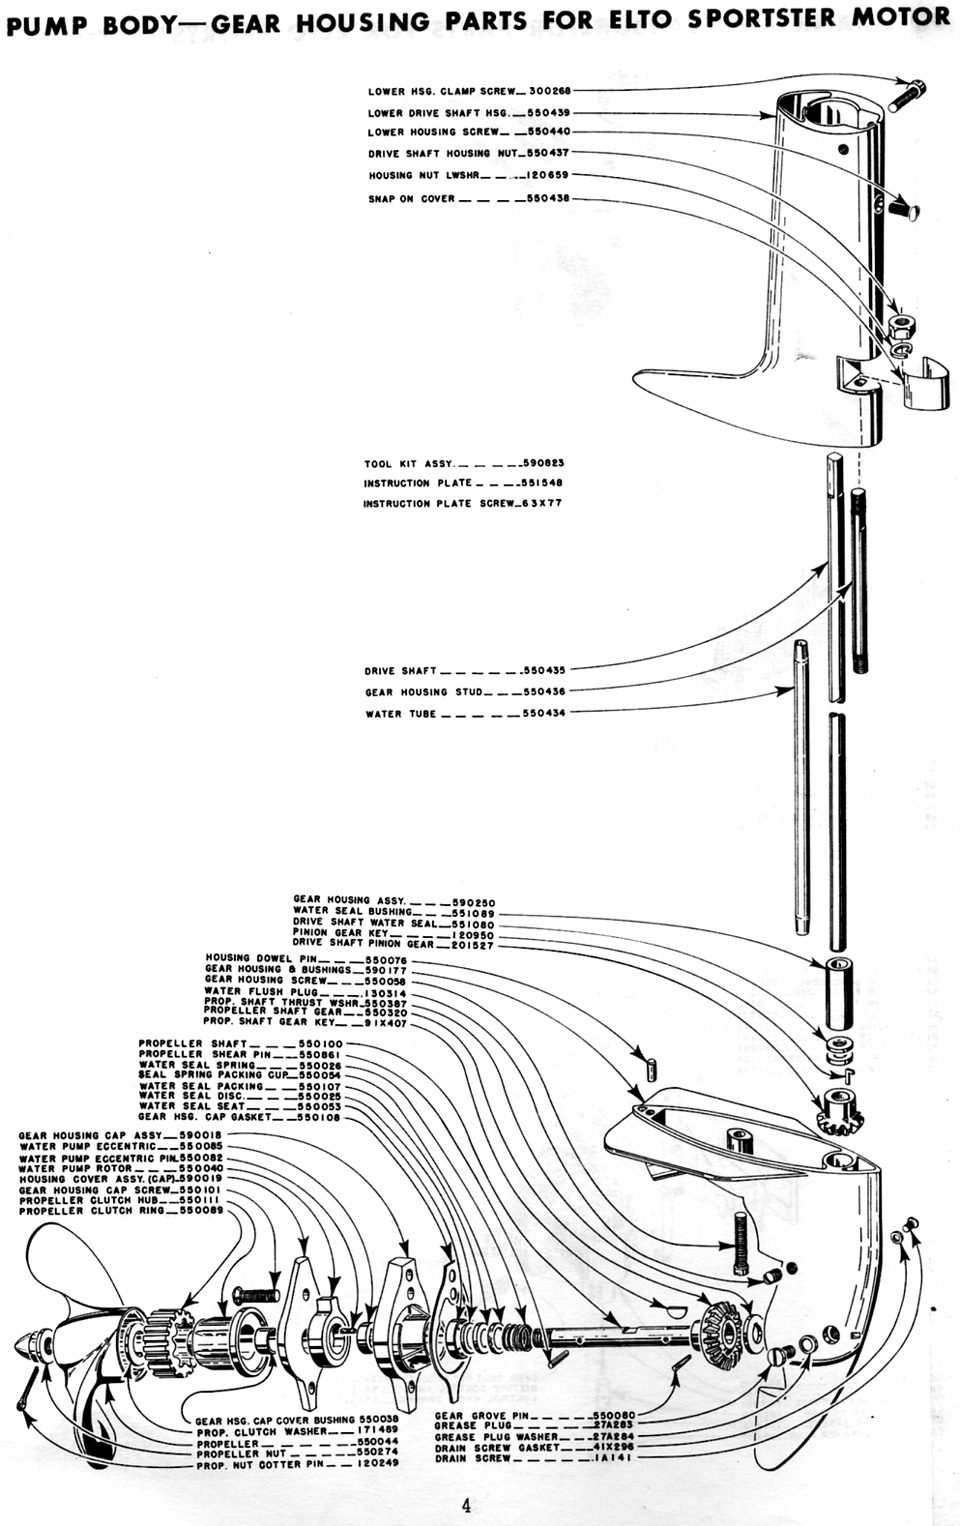
Here is a nice series of diagrams for you to STUDY. Print them out and keep them in your workshop.
Note to yourself where these parts are in the diagrams and on your motor:
Armature base handle assembly aka Throttle lever
Primer lever
Primer cam
Mixture control knob
Adjusting needle aka High speed needle
Sea Kings Baby!!!
October 2, 2023 at 4:21 am #281189Now that you have memorized these diagrams you are ready to proceed.
Cosmetic differences do not matter. Parts that you can leave off the motor when testing
in your bucket/can/tank are recoil, side cowls, and the prop. Everything else should be
properly attached and working. Here is an example of the proper relationships of the priming
system. I have no gas in my motor so you need to imagine the float needle is in the “up” position.
Sea Kings Baby!!!
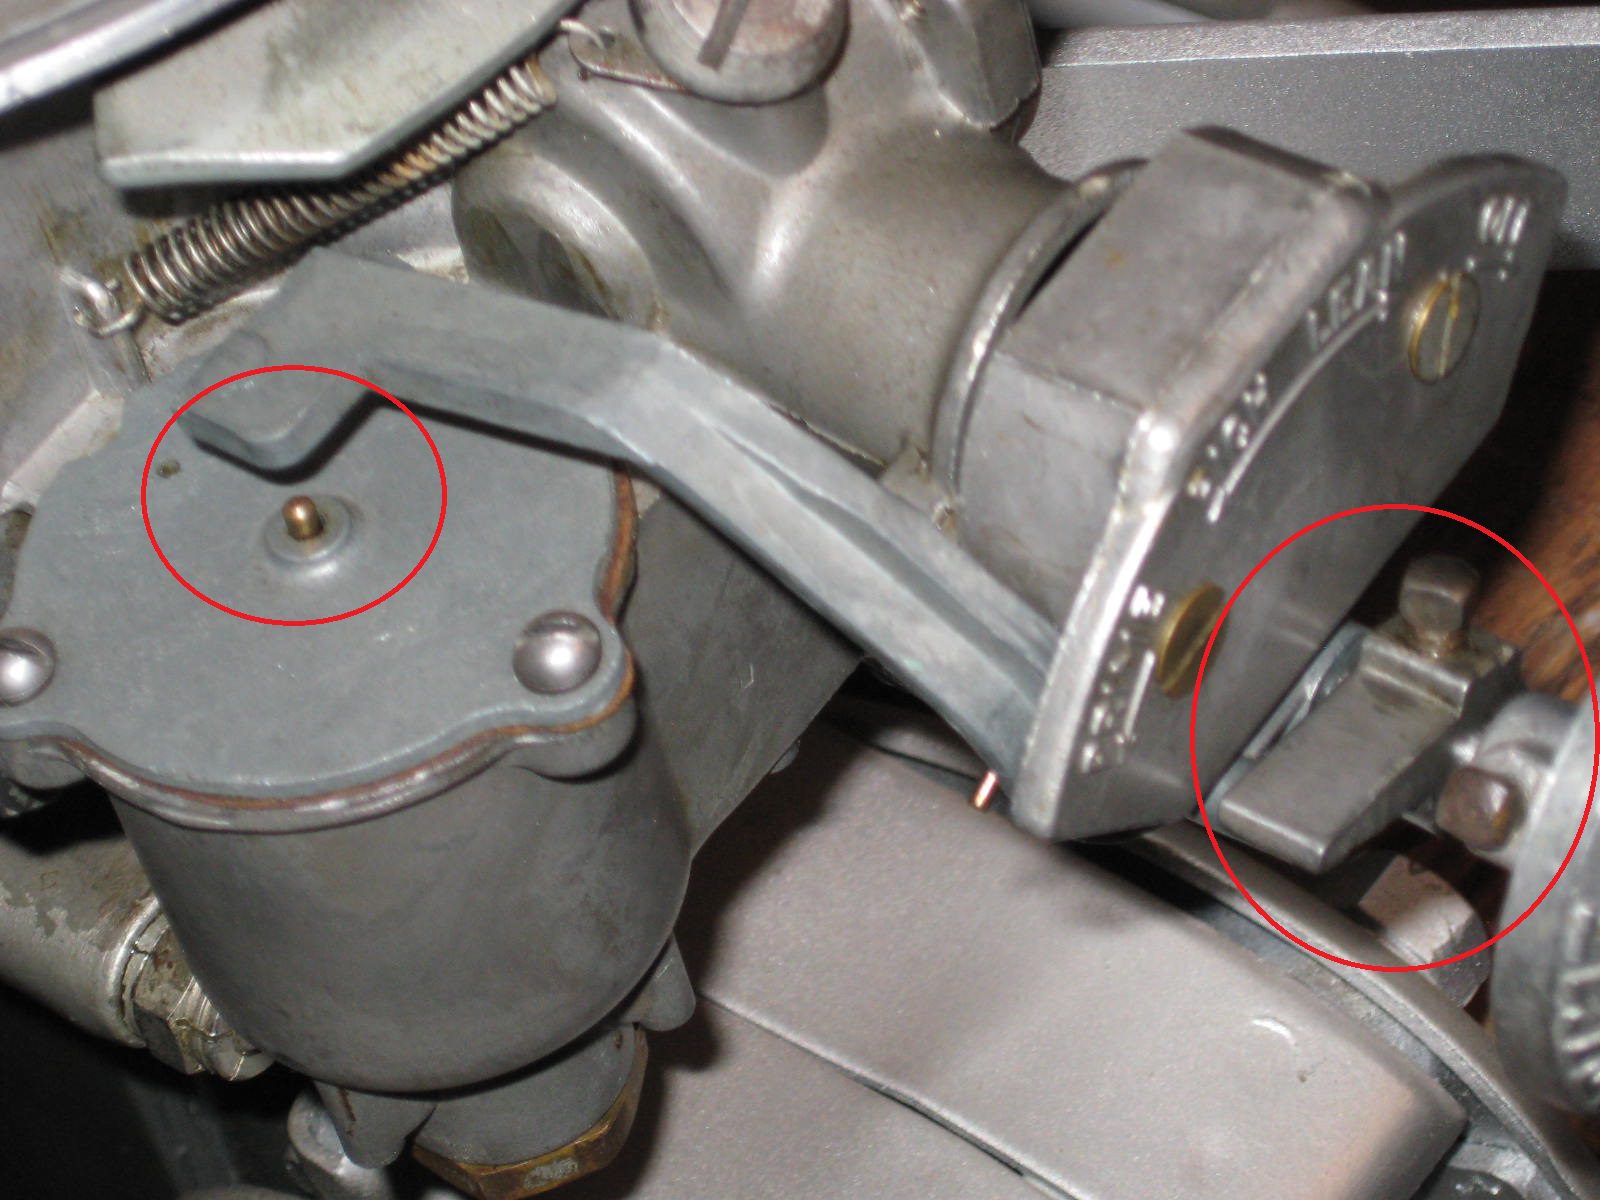
October 2, 2023 at 4:30 am #281191When you twist the mixture knob CCW it will move the adjusting needle, primer cam, primer lever,
and depress the float needle. It will take a bit of trial and error to get things in sync. The little set screws
allow for the adjustments. Now you twist your mixture knob CCW and count to 10. Now release it.
This is how your assembly should look when you are about to do a cold start.
Sea Kings Baby!!!
-
AuthorPosts
- You must be logged in to reply to this topic.


