Home › Forum › Ask A Member › Anodes on Evinrude 18 hp 1960
- This topic has 28 replies, 9 voices, and was last updated 2 years, 6 months ago by
 salnaes.
-
AuthorPosts
-
October 25, 2022 at 10:10 pm #268276
Sometimes I use Never-Seize on driveshaft splines into the power head.
Should be no problem with that, correct?Prepare to be boarded!
October 26, 2022 at 9:07 am #268278Thank you all for contribution to this discussion. I will follow Mumbles advice which seems to be confirmed by several of you. In addition I had a chat with a local mechanics here at my place yesterday who pointed out the fact that copper and aluminium is a bad combination. He strongly advice me not to use any sealer containing copper, since it will eat aluminium, as he said.
I have Permatex Form-A-Gasket Aviation 3 in my workshop, so I will use this on the threads on both the two main bearing center bolts and on the eight sidebolts. Since several of the sidebolts are unavailable for 1/2” socket mounted on my torque wrench, it will be impossible to torque those bolts to the torque specs, so I have to use only my own feeling with a regular wrench. I dont have a crow foot, and it’s not possible to obtain 3/8” – 1/2” in our European metric world.
On the crankcase flange I will use a thin layer of Loctite 518 anaerobic sealer. I will clean both flanges with aceton, and then use Loctite 7649 primer (spray can) on the flanges, let it air dry, and then apply a small bead on one of the flanges. I will avoid sealing the labyrinth grooves by the center bearing. I have tested the cover on the block, and it seems to fit perfectly without any gaps or movement. I might spread the sealer out on the flange surface with my finger. Some people put sealer on both flanges. I’m afraid of having to much sealer there, since it might squeeze inside the flange and possibly plug the labyrinth grooves and get into the crankcase where it shouldn’t be.
So I was thinking of just make a thin and even layer on one of the flanges. Finally the two tapered pins are installed through the cover. Correct me if I’m wrong, but the thin part of the pin goes down through the hole in the cover and further into the block, right? With the pins installed I seal the threads on the 10 bolts and fasten them in the same manner as fastening the cylinder head bolts. I torque down to spec for those bolts that’s possible to torque. The remaining bolts I torque with a regular wrench due to the problems I mentioned above.
Does this sound ok?
October 26, 2022 at 11:12 am #268286di you download yourself a copy of the Johnson service manul to service your oldy ??
Joining AOMCI has priviledges 🙂
October 26, 2022 at 1:37 pm #268291I bought Seloc 1956-70 Repair Manual which covers Johnson/Evinrude up to 40 hp 2-Stroke Models. I use this manual regularly as I work. But sometimes it does not give me a complete understanding on how to manage every task, although it’s a very good manual in general. Concerning the two tapered pins the instructions are a little uncertain to me, cause English is not my first language.
October 26, 2022 at 1:59 pm #268292The taper pins help to properly align the 2 halves of the crankcase. When reassembling the crankcase, insert the two taper pins and tap both of them into place before tightening the crankcase bolts. The smaller end of the taper pins are inserted from the front (carburetor) side of the case toward the back (cylinder) side of the case. If you have not already opened up the crankcase, you would do the opposite – drive the pins out from the back side toward the front.
Bob
1937 Champion D2C Deluxe Lite Twin
1954 Johnson CD-11
1955 Johnson QD-16
1957 Evinrude Fastwin 18
1958 Johnson QD-19
1958 Johnson FD-12
1959 Johnson QD-20“Every 20 minute job is only a broken bolt away from a 3-day project.”
"Every time you remove a broken or seized bolt an angel gets his wings."October 26, 2022 at 5:05 pm #268294Thank you Bob. You have now confirmed my assumption. I opened up the crankcase many months ago, but it took a very long time to get parts needed from the USA. Marineengine doesn’t sell to customers outside the USA / Canada, but finally I found out that many parts are the same in 1968, so that made it possible for me to order from Crowley Marine. Luckily I also found some retailers in Norway who had some of the parts I needed. Finally I did some purchases on ebay. After 6 months of investigation and work I managed to get all the parts I needed to perform a total overhaul of the complete outboard from 1960. The gearcase (Lower unit) and exhaust housing are ready and totally rebuilt and waiting for the Power Head to be mounted. The same goes for Carburetor, Ignition system, Steering Handle and Hand Starter. So right now I try to figure out everything i need to know before I assemble the Power Head. Cylinders are honed, new pistons and rings installed, connecting rods are ready installed on the crank shaft, so next move now is to mount the Crank Case Cover. Now I think I’m ready to do that.
Thanks for all advice and help.
October 27, 2022 at 9:14 am #268327go to MEMBERS ONLY tab top right select :
INNERSANCTUM
LIBRARY
FIND GARRY SPENCER’S DROP BOX
go down his list of PDF’s and pictures etc… find the RED JOHNSON SERVICE MANUAL
download and print locally double sided or have a local print shop print the file from a USB key … print double sided and spring bound with plastic cover sheets
Joining AOMCI has priviledges 🙂
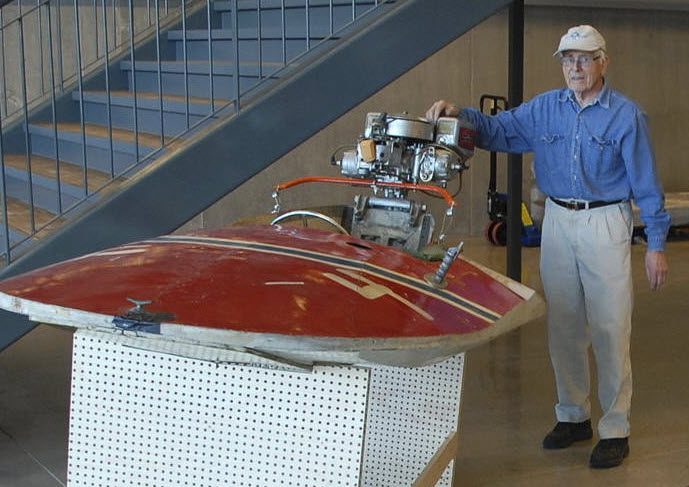
October 31, 2022 at 3:39 pm #268500Does anybody know what kind of outboard engine this is?
 October 31, 2022 at 3:42 pm #268501
Here’s a picture of the old engine. Anybody familiar with this? -
AuthorPosts
- You must be logged in to reply to this topic.