Home › Forum › Ask A Member › Condensers Testing
- This topic has 25 replies, 10 voices, and was last updated 8 years, 3 months ago by
cajuncook1.
-
AuthorPosts
-
January 8, 2017 at 1:13 pm #50618quote FrankR:Another thought: Can I guess that your motor has a Wico mag with the orange shellac coated coils? Short of physical destruction or roaches eating them, those things are extremely reliable. Be glad you have those, if indeed that is what you do have.
Hello Frank,
Thanks for your comments.Yep, that seems to be what I have. Although mine have a rubber boot covering them.
In testing the coils, I put an ohmmeter first on the primary winding to ground and got good continuity. I then measured the resistance from where the spark plug wires attached to ground; good continuity there as well. I also used another test where I took a D-cell battery and touched it to the primary winding. Doing that, I was able to get a good spark at the plug for each coil. As a result, I assumed the coils were good and moved on to other possibilities. See additional comments below…
January 8, 2017 at 1:18 pm #50619quote FrankR:I couldn’t help but notice the comment you made about the condenser not having enough voltage to fire a plug (or whatever you said about it). The condenser does not charge up to that kind of voltage.Ops, my mistake. I was aware how the condenser is used to reduce the spark across the points in an auto/distributor/rotor/points setup but thought it was different for a magneto. As a result of your post, I did a little digging and see its the same thing.
Thanks!January 8, 2017 at 1:36 pm #50620quote Wedgie:What kind of plug wire did you use?When I replaced the spark plug wires, I used copper conductor wires.
I also changed the plugs I found online where the Champion J11C plugs are recommended for this engine. When I went to the parts store, they didn’t have the J11C’s but had an Autolite replacement (#295). I’m not comfortable with that given my lag of spark.
So here’s my plan of attack…
1. I’m going to install the new condensers. What the hell, since I have it open, why install 66 year old parts when I have new ones 🙄
2. Clean, install and gap the points taking extra care to achieve a precise .020 setting and making sure all connections are solid..
3. Replace the Autolite plugs with the Champion J11C plugs.I’ll post the results.
Thanks to all for your posts.
January 8, 2017 at 3:10 pm #50624What were the resistance results of the coils secondary windings? Was it around 4 to 7k resistance?
Did you set the points at the high point if the cam? You can only set one set of points at a time, then you must turn the cranshaft 180 degrees to set the second set of points. What measured gap did you set the points to?
Did you use a spark gap checker to assess spark. Use the starter rope and pull the engine over with the spark gap tester in place to see if it will at least jump a 1/4 inch.
January 8, 2017 at 6:19 pm #50647quote cajuncook1:What were the resistance results of the coils secondary windings? Was it around 4 to 7k resistance?
Did you set the points at the high point if the cam? You can only set one set of points at a time, then you must turn the cranshaft 180 degrees to set the second set of points. What measured gap did you set the points to?
Did you use a spark gap checker to assess spark. Use the starter rope and pull the engine over with the spark gap tester in place to see if it will at least jump a 1/4 inch.
I just measured the resistance from the end of each spark plug cable to ground and got 5,00 ohms on each. As I understand it, that should be going through the secondary windings, yes?
I set the points to .020 as is the spec for this engine making sure I was at the high spot on the cam. Then rotating 180 degrees and did the same on the other points.
I replaced the flywheel and I inserted a plug into the end of the spark plug wire with a jumper grounding it to the engine. I then quickly rotated the flywheel using a socket wrench and got no spark on either plug. Just in case I wasn’t spinning it fast enough, I attached a pull rope and gave it pull – no spark. 😡
I popped the flywheel off again and did my little battery test where I touch the positive terminal of the battery to the top of the condenser and using a jumper wire, touch the negative side to ground. In each case, I get a nice spark at the plug. Again, as I understand it, that’s sending a small charge through the primary winding, yes?
At this point, I’m out of ideas.
January 8, 2017 at 6:40 pm #50653In the next day or two, i will pop off the flywheel off my 1951 Elgin 5hp and review the igniton on a video for a visual. Hopefully, that will help clear things up.
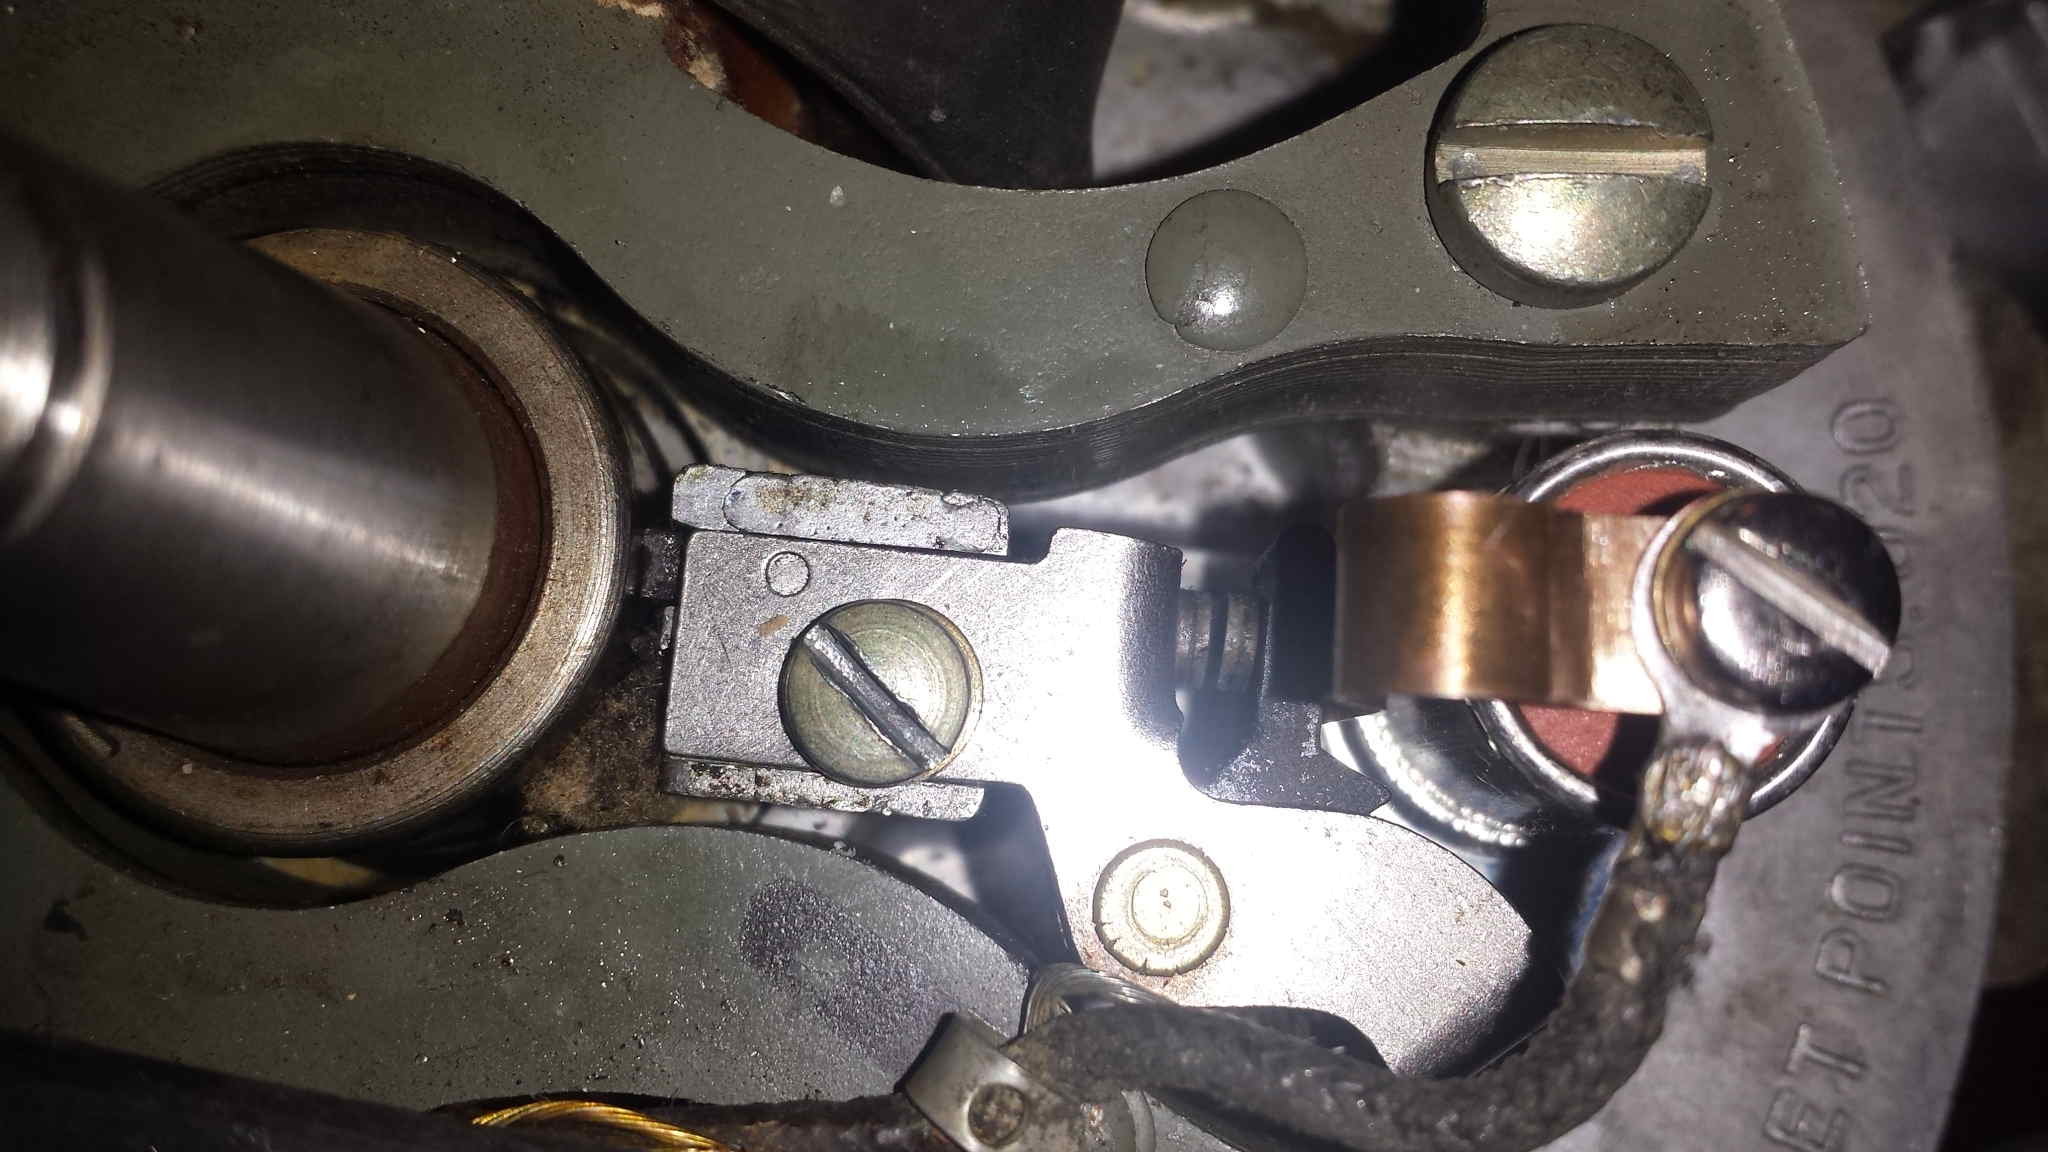
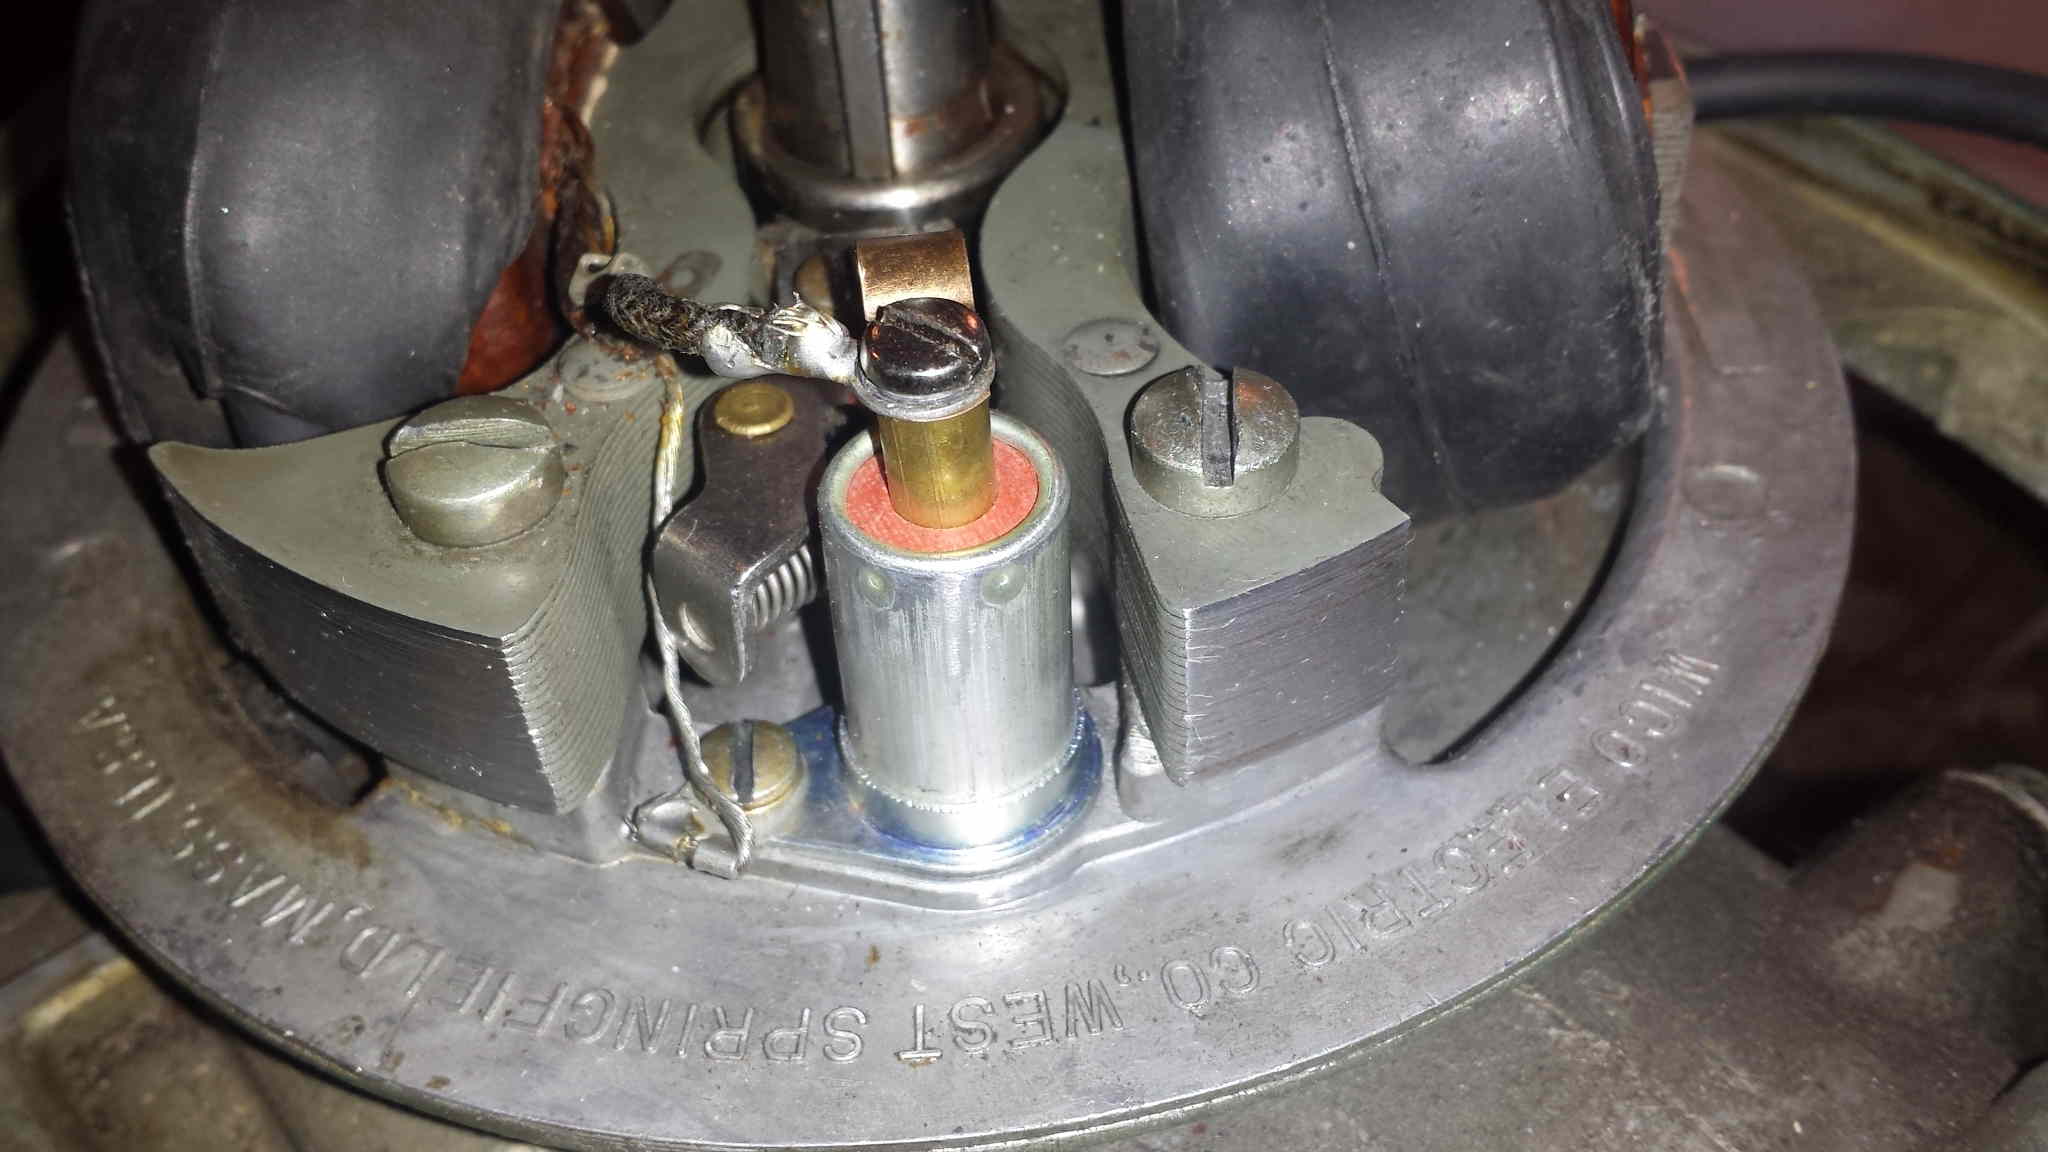
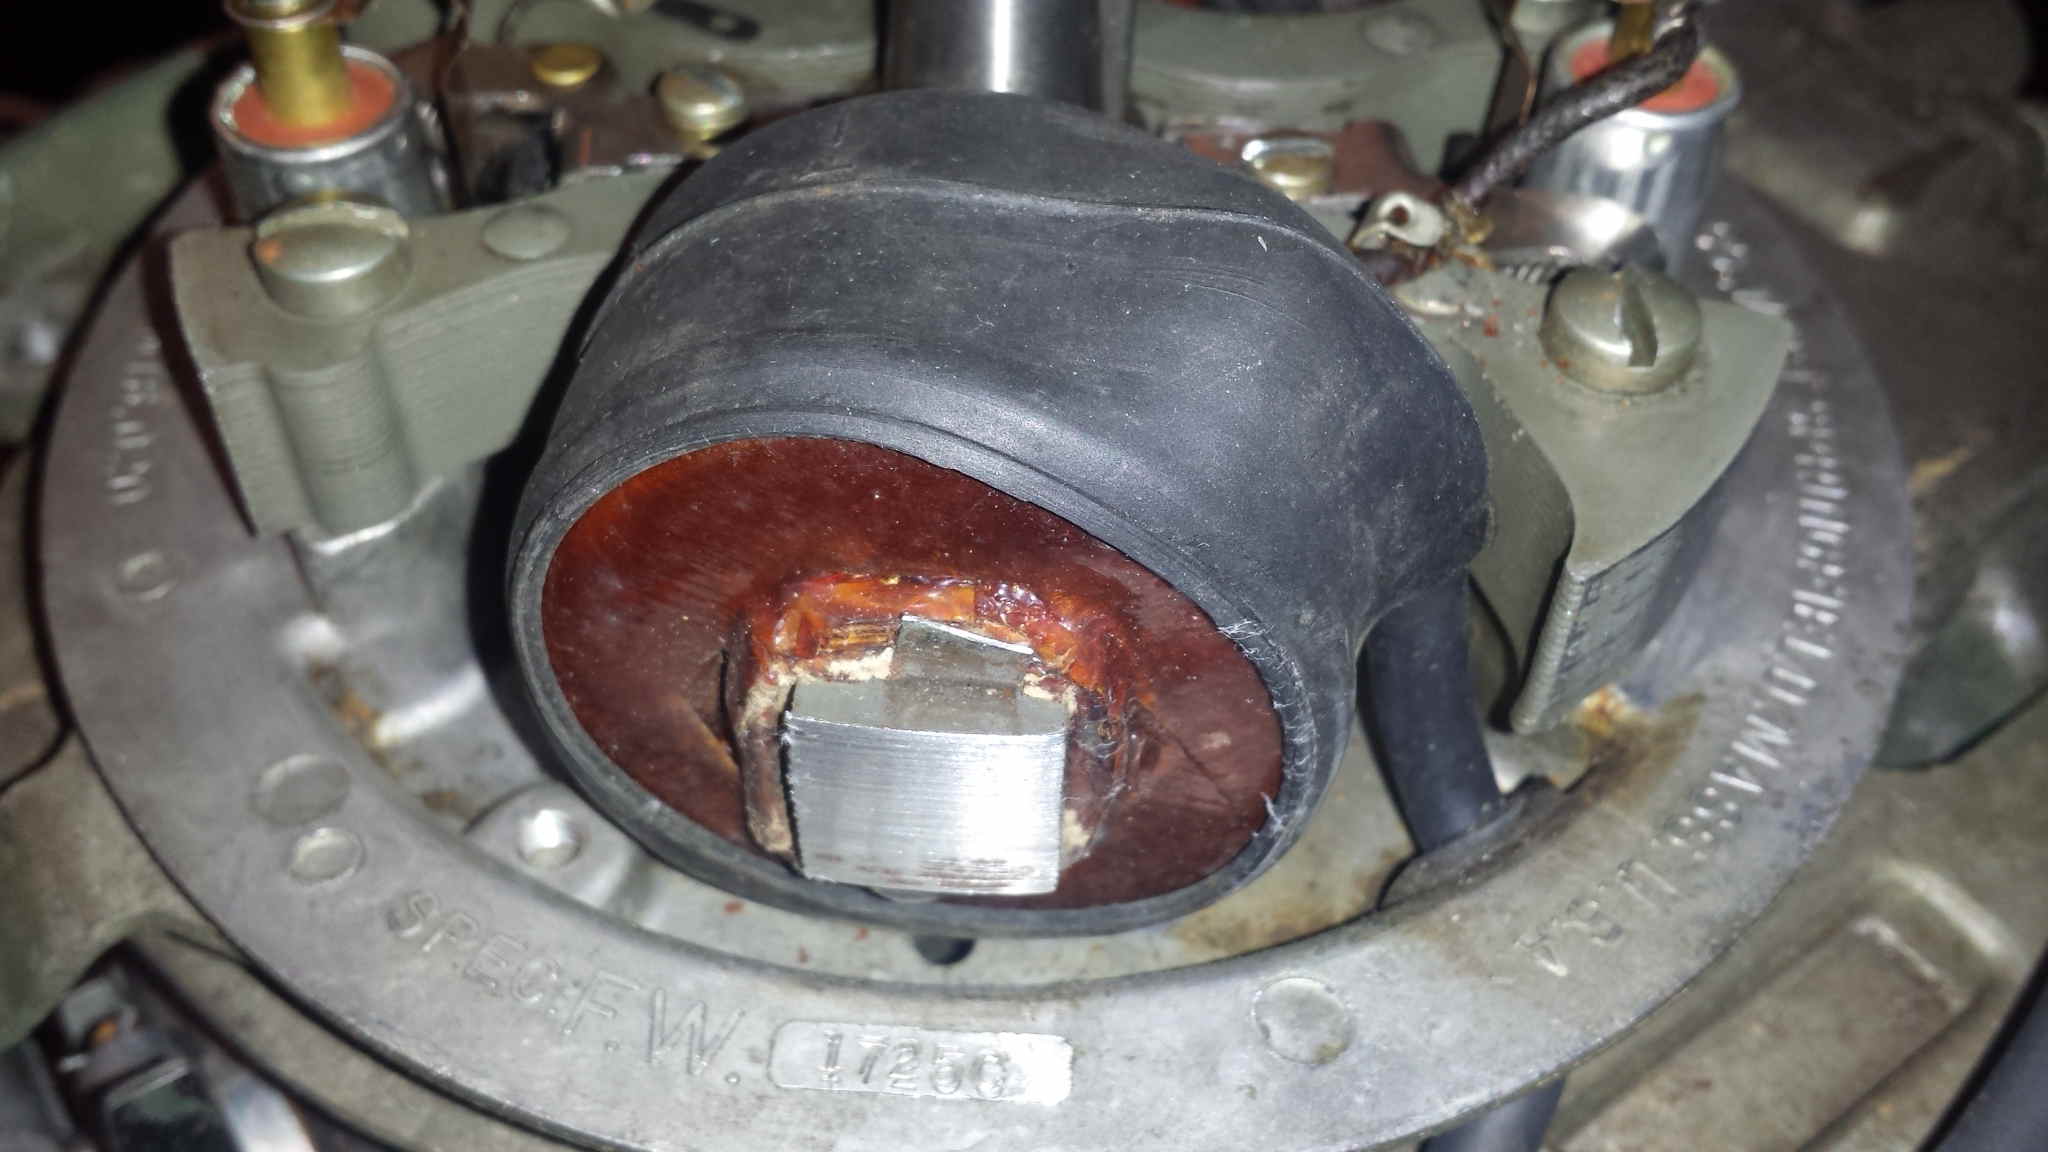
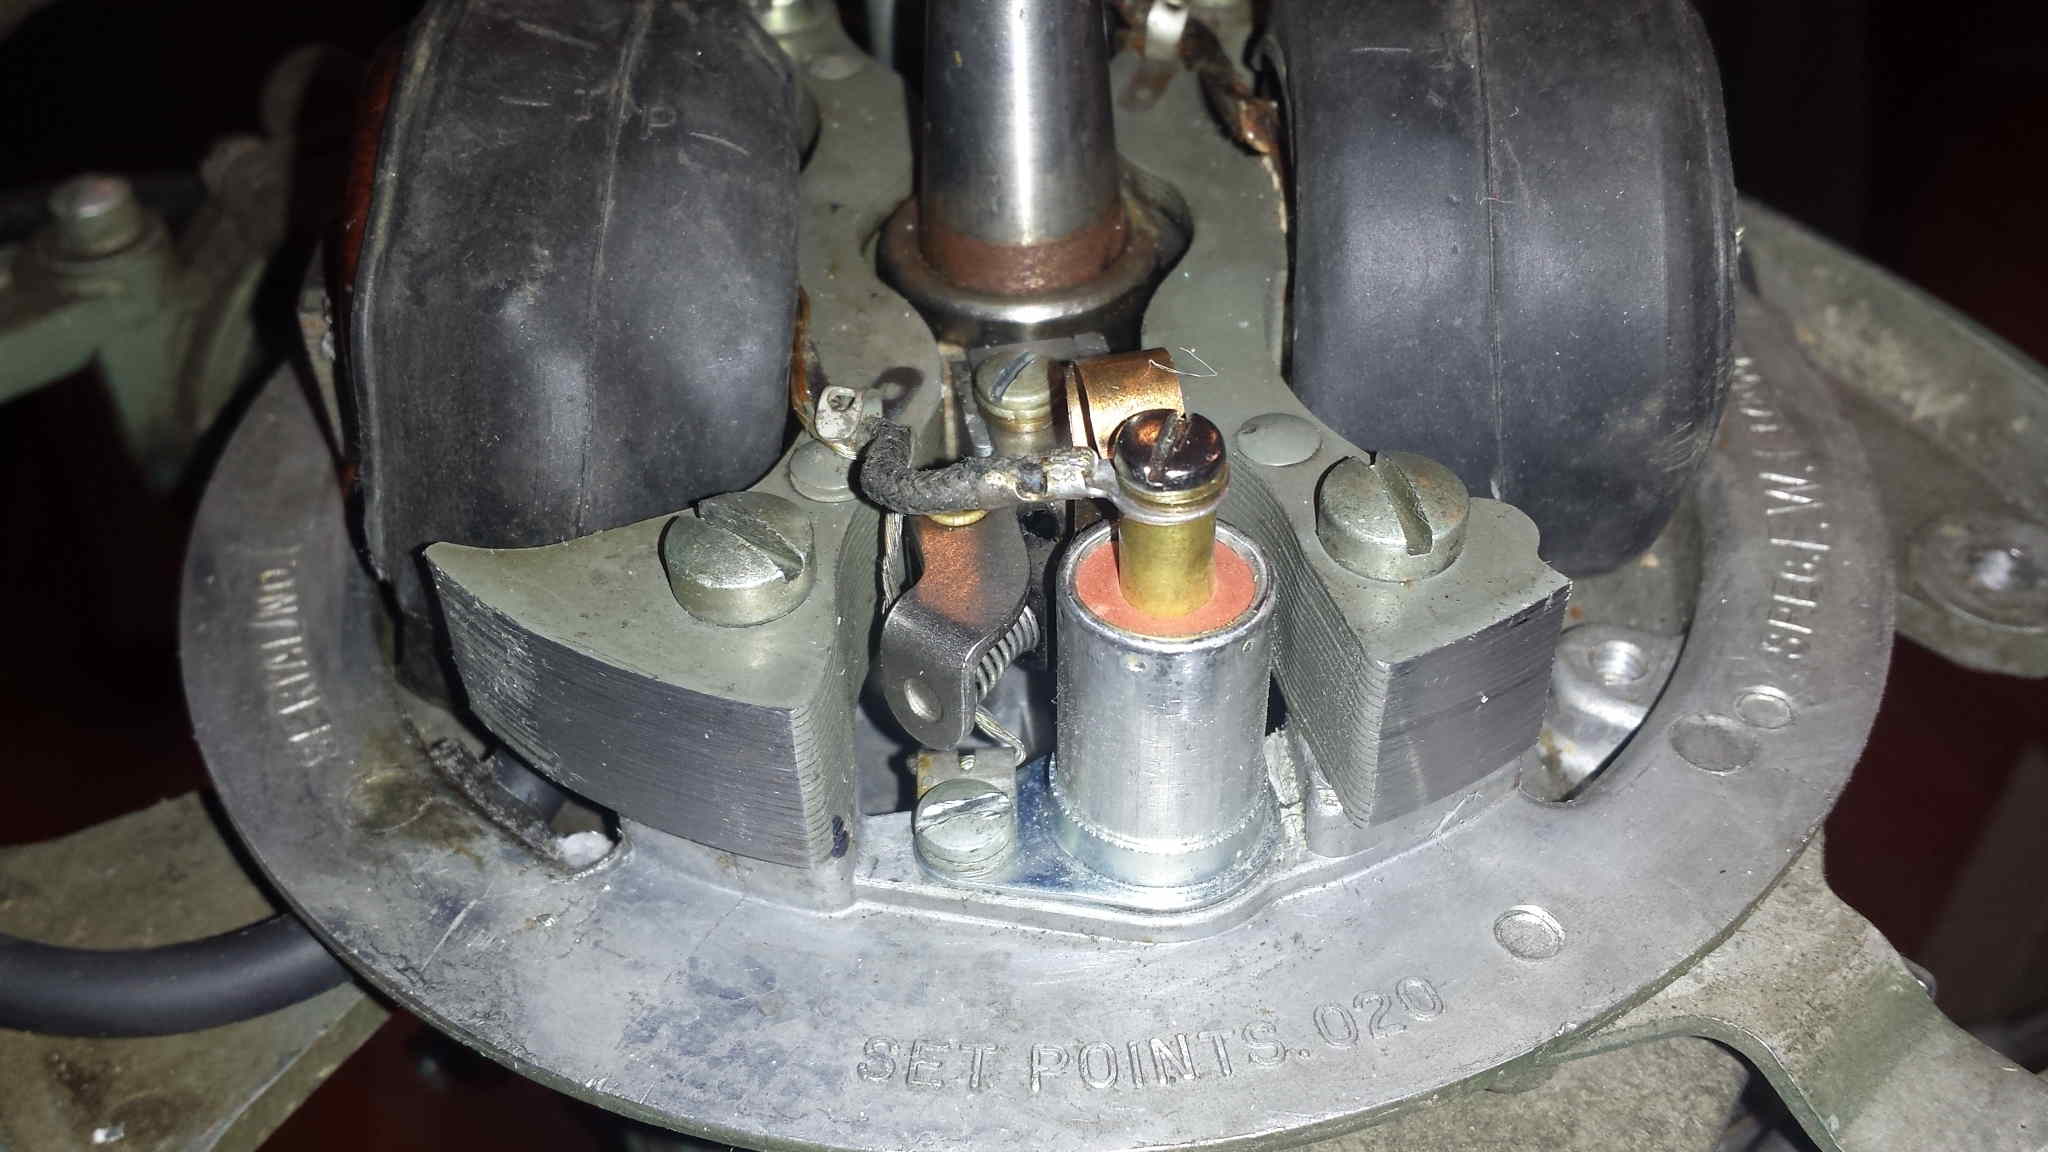
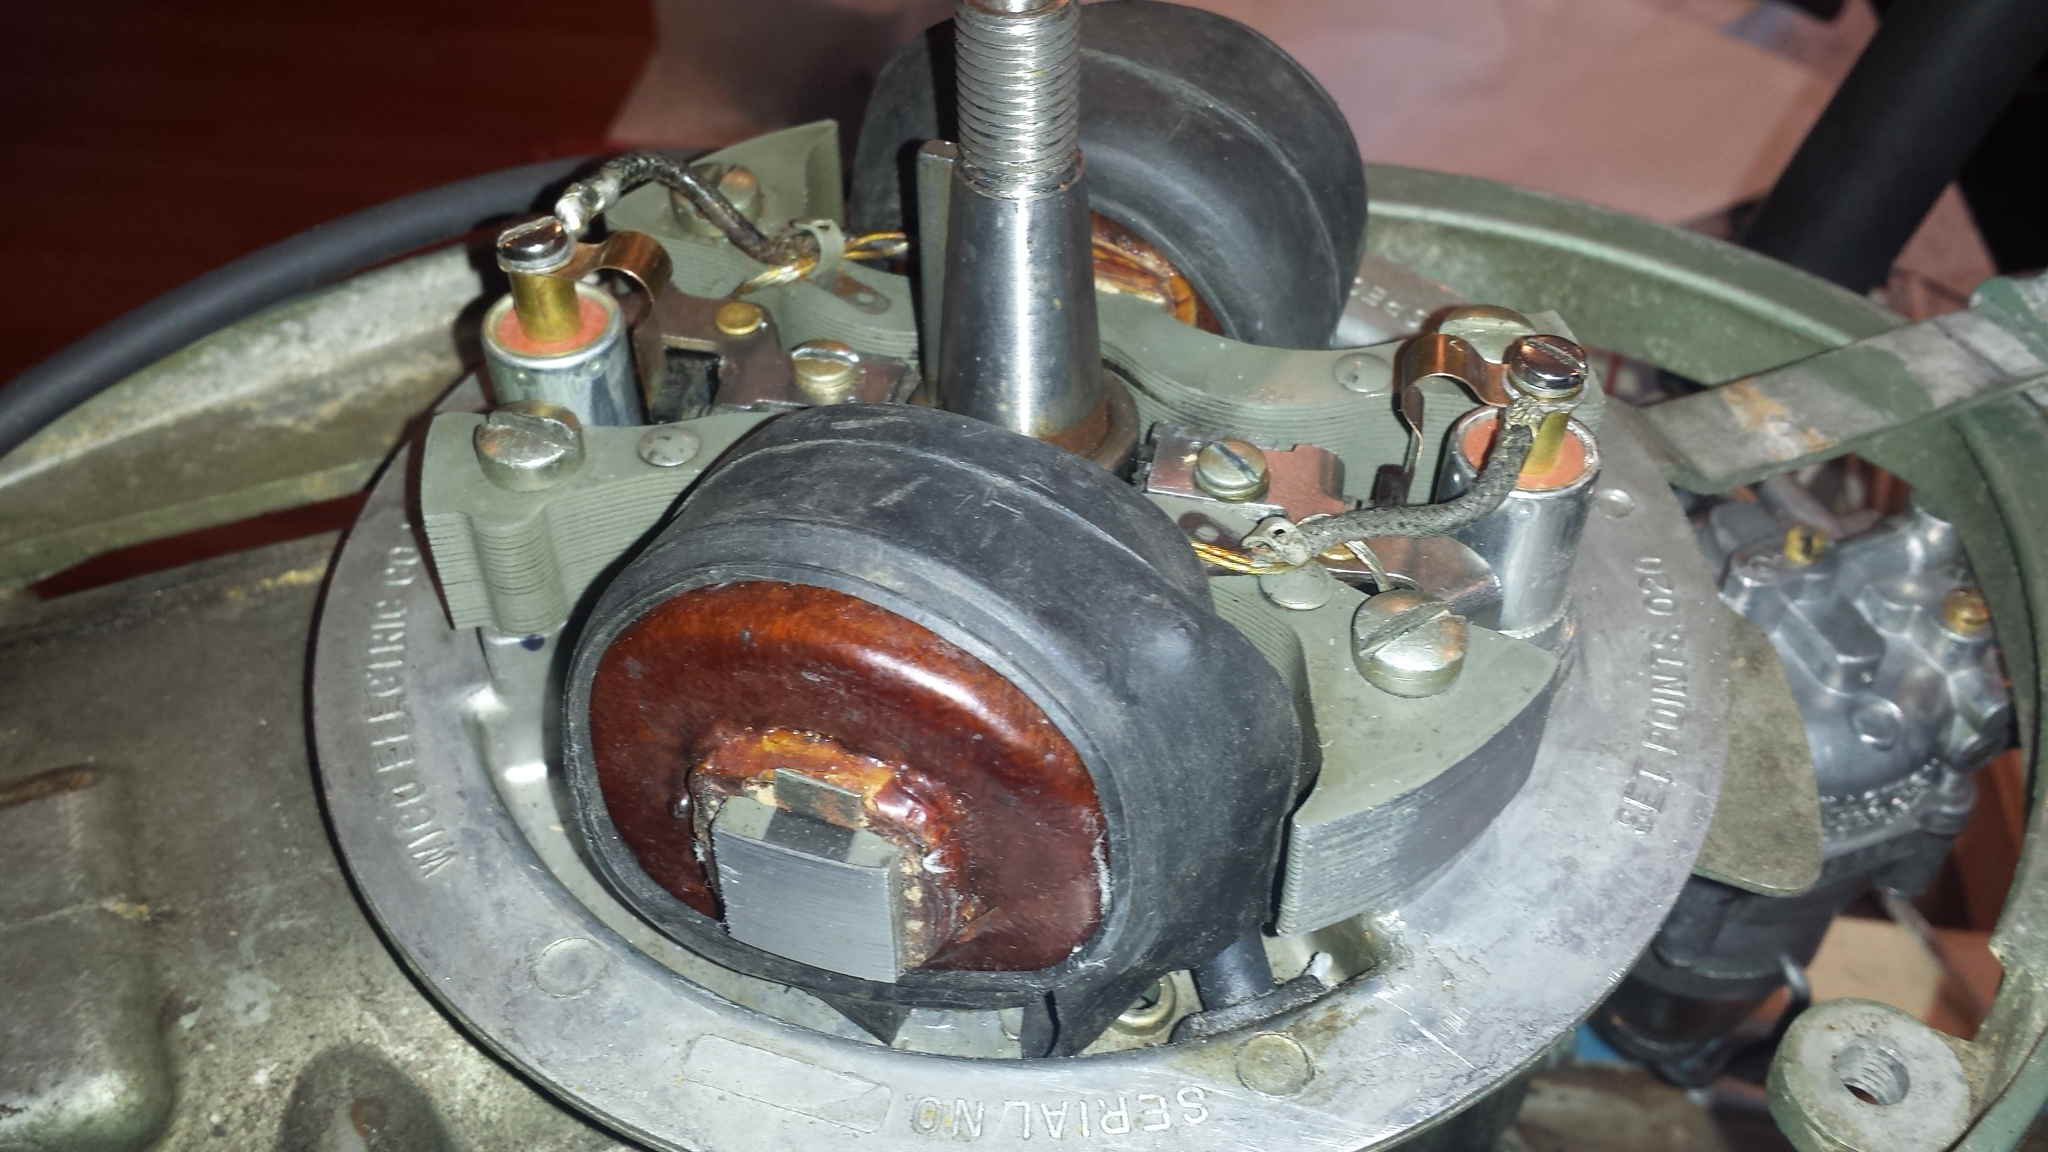
Can you post a picture if your ignition plate with the flywheel off, so we can have look see.
cheers,
cajuncook1
January 8, 2017 at 7:05 pm #50656You can remove the condensers and check for spark. They are there to save the points, but a couple cycles won’t ruin them. Just don’t run it without condensers or you will ruin the points very quickly.
January 8, 2017 at 7:10 pm #50659quote cajuncook1:In the next day or two, i will pop off the flywheel off my 1951 Elgin 5hp and review the igniton on a video for a visual. Hopefully, that will help clear things up.Can you post a picture if your ignition plate with the flywheel off, so we can have look see.
cheers,
cajuncook1
That would be awesome! Here’s a few pic’s. Let me know if there’s something specific you want a shot of.
 January 8, 2017 at 11:14 pm #50686
The capacitor is used on the primary side of the coil, with quite a low voltage, even if it’s 100 or 200 volts.
The spark plug is on the secondary side, with thousand volts.
I don’t think a capacitor enjoy 15.000 or 20.000 volts 🙂January 9, 2017 at 5:36 pm #50736I HAVE SPARK!!! Wha Hoo! 😀 😀 😀
Being totally frustrated, I decided to just disassemble the entire magneto. With all the components off the engine, I proceeded to test each one individuality. What I found was not one but two bad sets of points.
Earlier, when looking at the points on the engine, they looked good; not worn down, fairly square and not pitted. Using some emery paper, I cleaned each on. Apparently, that was not enough. With he points off the engine, I used an ohmmeter to measure the continuity across the closed points. To my amazement, they tested open. I disassembled the points and found my previous cleaning barely scratched the surface of the crud. I aggressively filed each side of the point assembly and reassembled.
While I had the ignition system apart, I took the opportunity to clean all the contact surfaces. I didn’t like the look of the insulation on the primary wire so, I placed a bit of shrink-wrap over each one.
Reassembled everything and I now have spark.
Thanks to all who responded. Your comments and suggestions help me to better understand what I was dealing with and to help me focus in on the most probable causes. Now, on to the next issue 😕
-
AuthorPosts
- You must be logged in to reply to this topic.