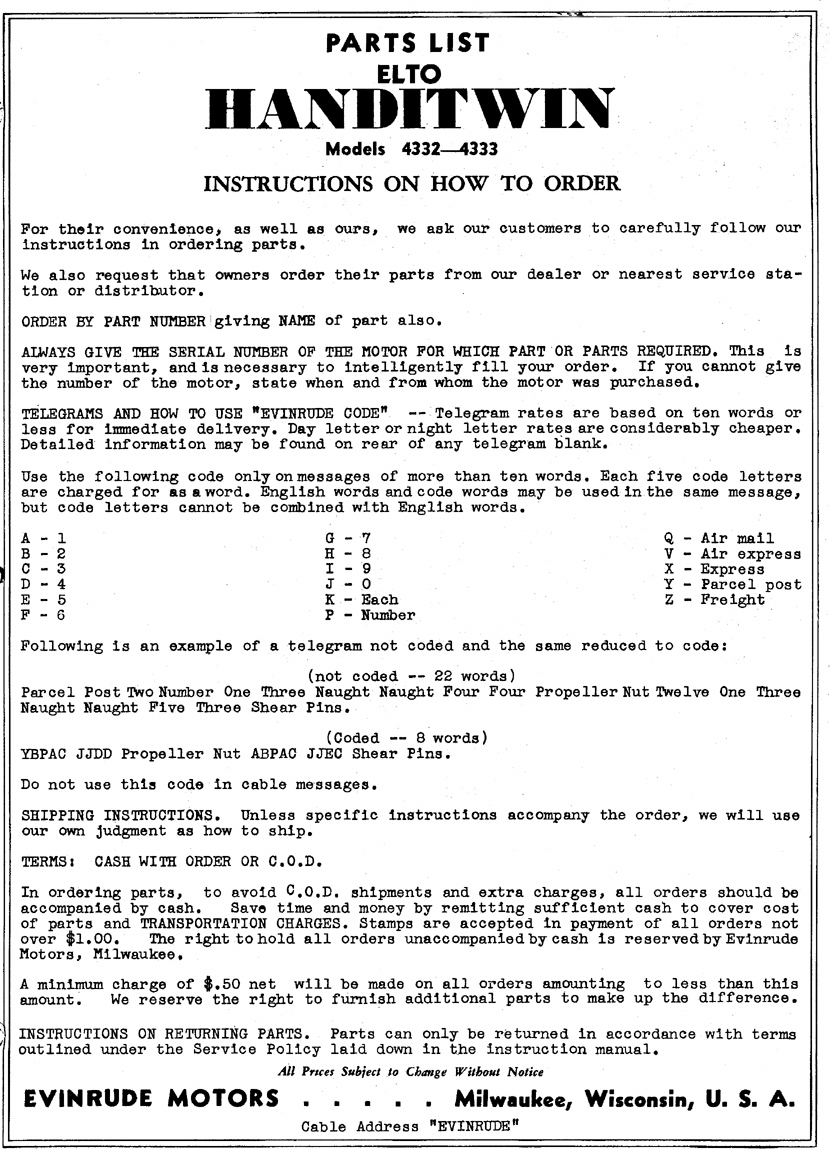
elto handitwin flywheel removal
Home › Forum › Ask A Member › elto handitwin flywheel removal
- This topic has 8 replies, 6 voices, and was last updated 8 years ago by
eviltwin.
Viewing 9 posts - 1 through 9 (of 9 total)
-
April 11, 2016 at 2:40 am #4017
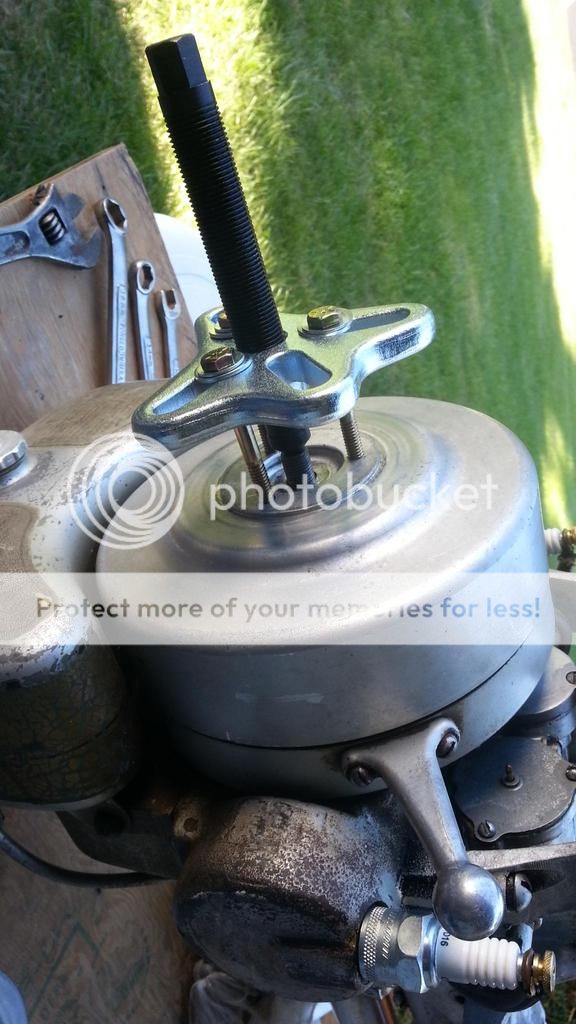
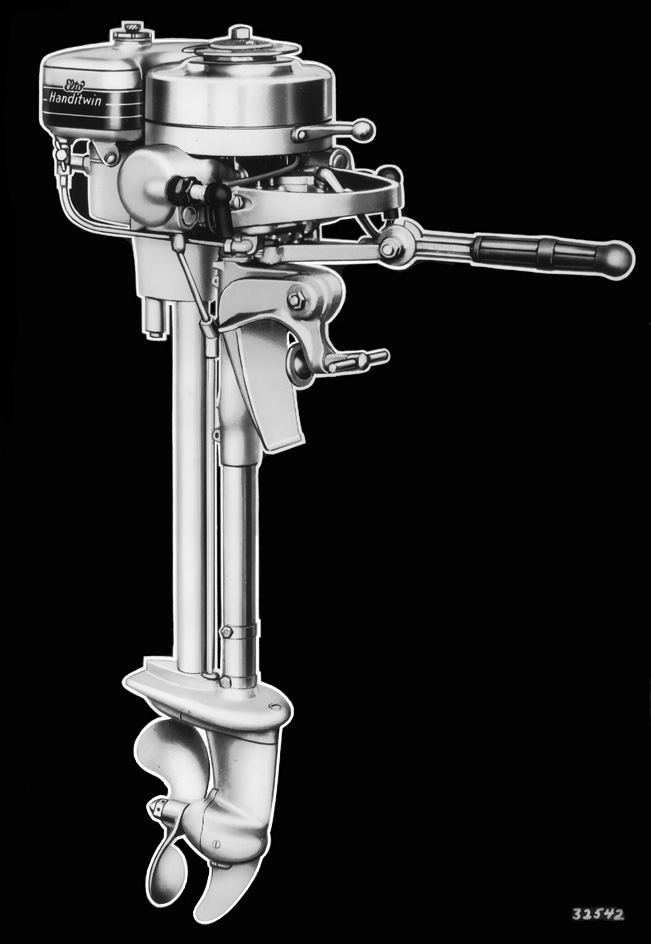
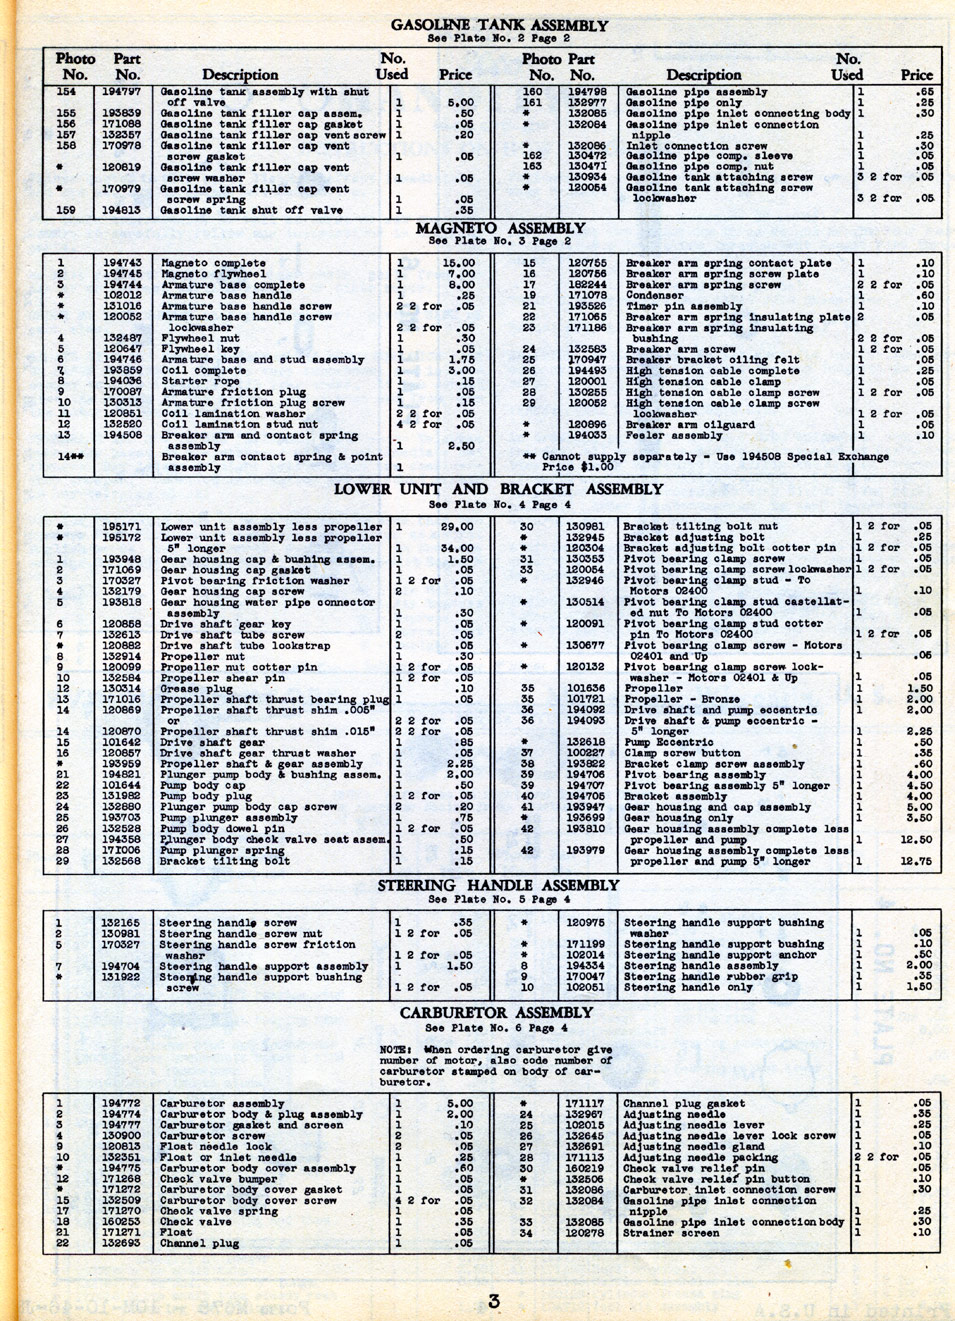
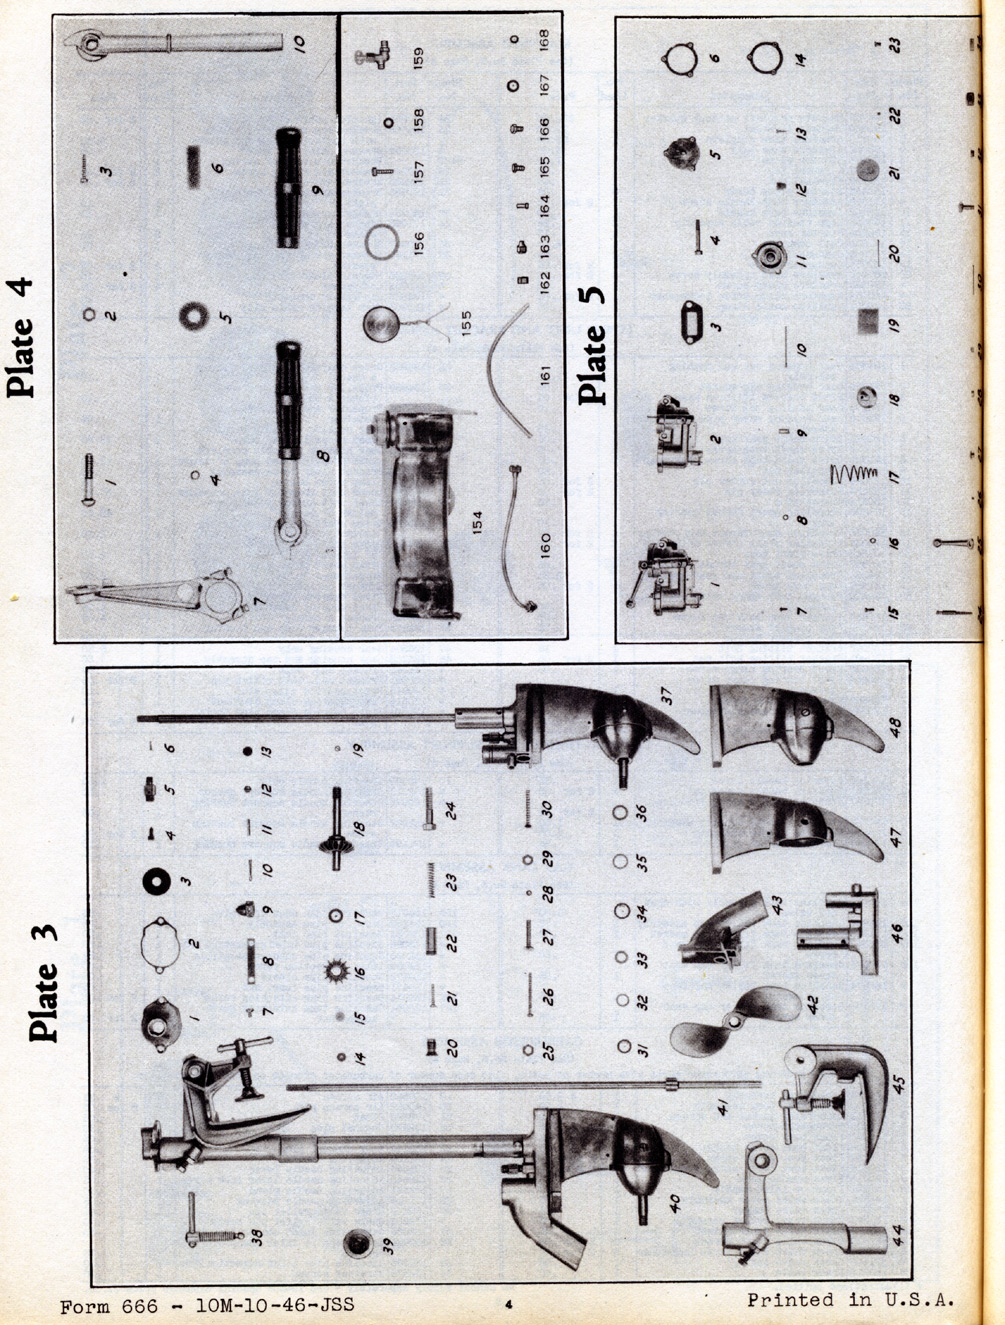
I am trying to remove the flywheel on an Elto Handitwin any suggestions? I have tried my normal fly wheel puller
as well as using the rope shieve. It will not budge soaked it with PB blaster tried taping on it with dead blow hammer while flywheel puller was attached nothing seems to be working. The rest of the motor is in pretty clean and in good shape.
DougDoug
how is it motors multiply when the garage lights get
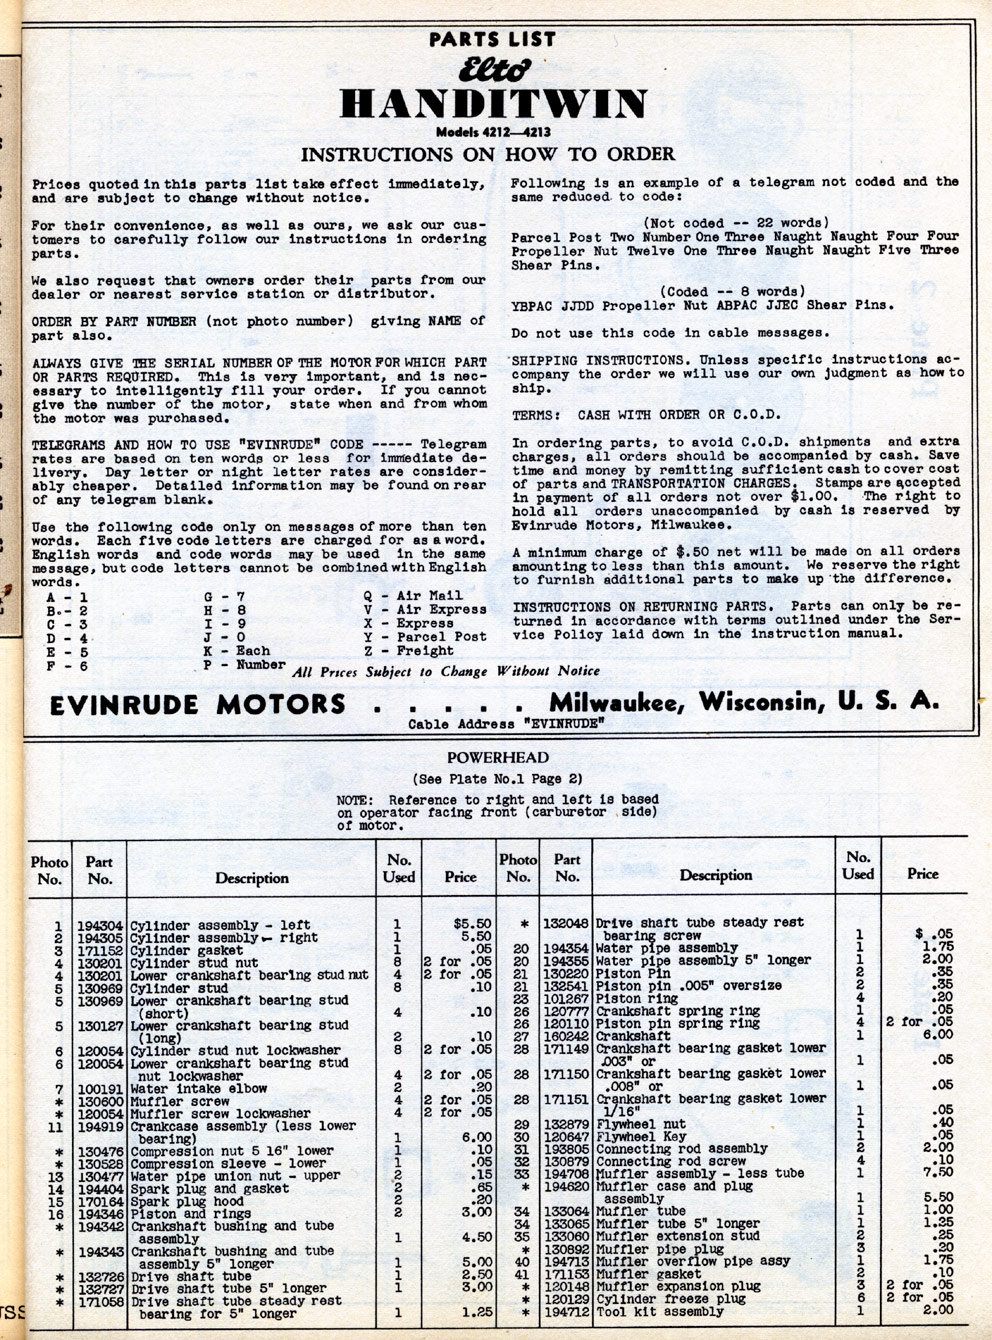
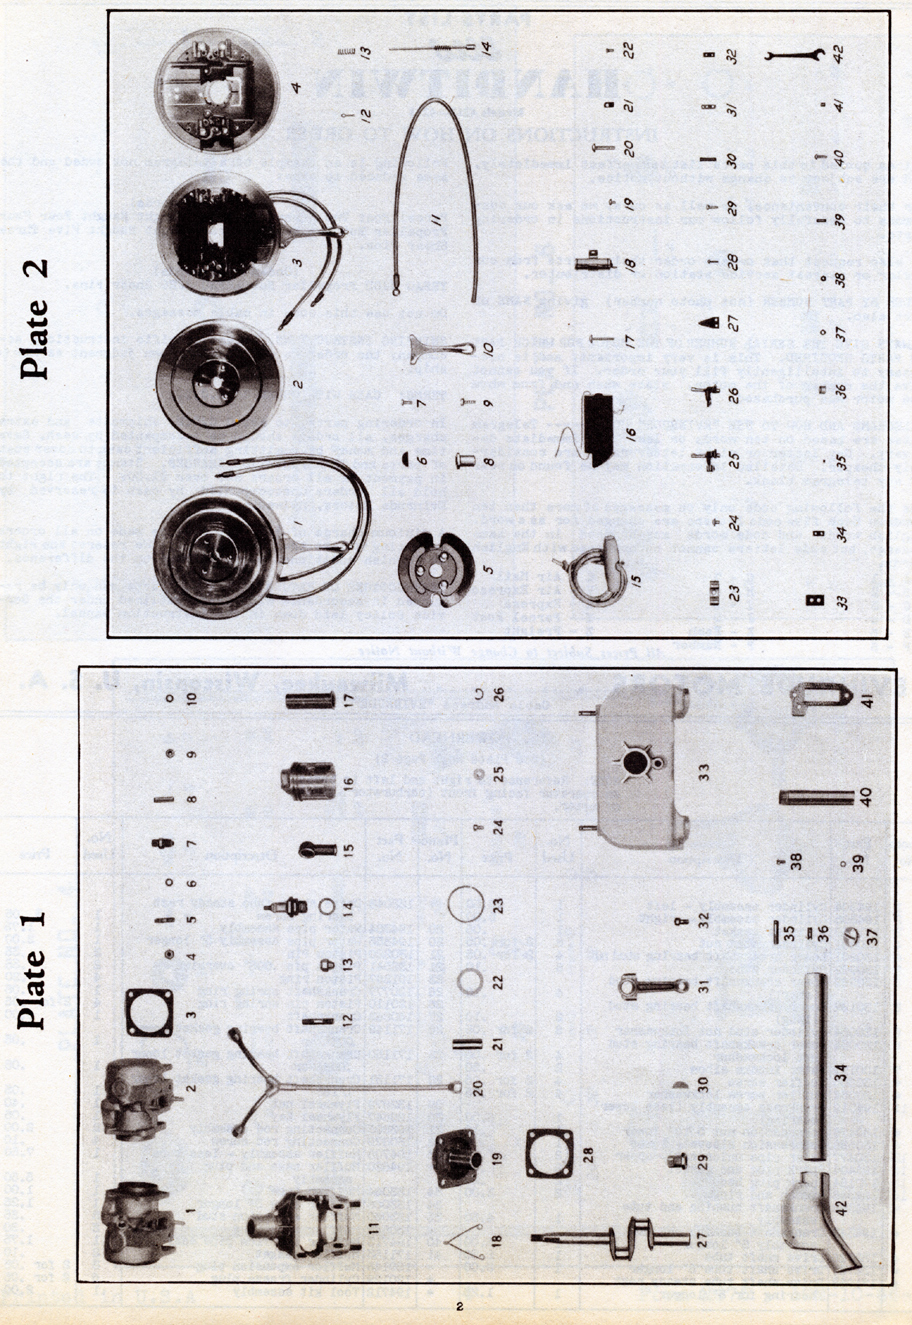
turned off?April 11, 2016 at 3:17 am #34668Can you post a picture or suply a part number?
April 11, 2016 at 10:48 am #34676Using the rope sheave as a puller on a stubborn flywheel usually results in a broken rope sheave. A three screw flywheel puller with schedule eight bolts is the way to go. The factory puller uses shoulder bolts which ensures all are in at the same depth so the pull will be centered on the crankshaft but still will not go deep enough to damage the coil. I add a locking nut to my bolts to mimic the factory bolts
There should be end play in the crankshaft. Lifting the flywheel should Allow the shock of the hammer blow loosen the flywheel without crushing the crankshaft. In extreme cases heat is used to expand the hub. It sounds like you are doing all the right things. It goes without saying that a gear puller which hooks to the outer edges of the flywheel should NEVER be used on a flywheel. All I can add is be patient . . . . . 😀

 April 11, 2016 at 1:16 pm #34680
Here’s a link to Mr Tubs’ video on removing flywheel.
https://www.youtube.com/watch?v=RWgE9XiIBnk
Good Luck.Steve A W
Member of the MOB chapter.
I live in Northwest IndianaApril 12, 2016 at 3:29 am #34716model number is 4357 when i saw how tight it was changed to gear puller with trhee bolts letting pb blaster soak on it will try again tomorrow in the mean time cleaning the carb willhave it at the mob meett at lake freeman sat. on display
Doug
how is it motors multiply when the garage lights get
turned off?April 12, 2016 at 2:07 pm #34727
-
This reply was modified 5 years, 5 months ago by
The Boat House.
-
This reply was modified 3 years, 1 month ago by
 The Boat House.
April 12, 2016 at 2:18 pm #34728the 3 bolt puller is what I am calling the gear puller would never use the jaws on the outside and risk trashing the fly wheel. Will try again tonight
Doug
how is it motors multiply when the garage lights get
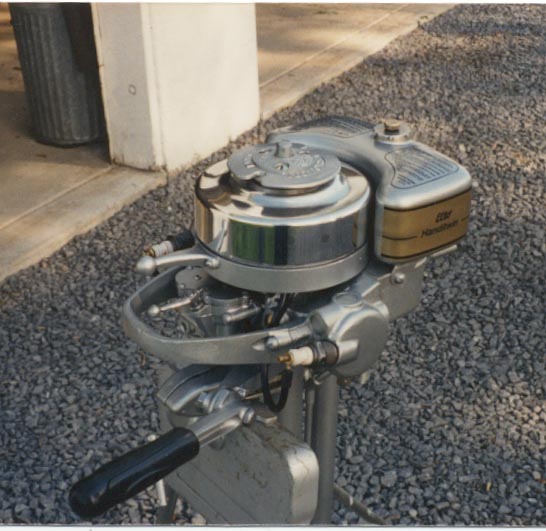
turned off?April 12, 2016 at 5:19 pm #34735Hi DD, I removed mine last summer. I removed the three screws that hold the rope sheve and got it out of the way.
Mine is held down by a flat sided nut (not sure if that is OEM) so took that off with crescent wrench. I bought a
3 hole puller at Harbor Freight and used it. Not sure if two nut method mentioned would have worked, try that
first maybe. Here is a related post on my removal &point settings to save me typing: https://aomci.org/forum/viewtopic.php?f=2&t=3278&p=17157#p17157Some good info in there from members. Couple things to pass from my experience.
1. If it is on tight, there probably is risk of damage, no matter how correctly you do it. Be prepared for that.
2. WATCH OUT FOR THE COIL when threading bolts for puller. Mark your threads so they are in enough to hold
but don’t go any deeper. They need to be threaded evenly anyway to center the puller so mark them. I was careless
and heard a little crunch when I threaded one in and realized it had contacted the paper wrapper around the coil.
Fortunately I stopped and no damage was done.
3.Do Not use never seize on shaft to make it easier next time. In link above mumbles informs that it is too slippery
and will actually shear the key off.
4.Take your time and be careful, but firm. Clamp the motor to something stable, I used a wooden guardrail (lol!).
Good luck, post pics when done. I am curious if yours looks like mine did inside.[Edit] added pic of it
-
This reply was modified 5 years, 5 months ago by


Viewing 9 posts - 1 through 9 (of 9 total)
- You must be logged in to reply to this topic.