Home › Forum › Ask A Member › Evinrude Lightwin 3012 Gear Case teardown
- This topic has 14 replies, 7 voices, and was last updated 7 years, 10 months ago by
 Buccaneer.
-
AuthorPosts
-
June 5, 2017 at 3:43 pm #7244
I’m having troubles getting the prop shaft cap / cartridge removed from
the gear case. I removed the two screws of course, but there’s really
no edge on the cap to tap on. I tried a putty knife with a sharp edge,
but really don’t want to "gouge" up the cap. Also tried heating the gasket
edge with a bottle torch to loosen the old sealer. Lastly, I put the
prop shaft in the vice, thinking maybe I could tap on the gear case
with a block of wood and hammer, but there’s really no way to
do that without putting a side force on the prop shaft.
I don’t see where there could be a hidden bolt anywhere.
Don’t want to break something, so …..
"What’s the secret?"
Thanks!
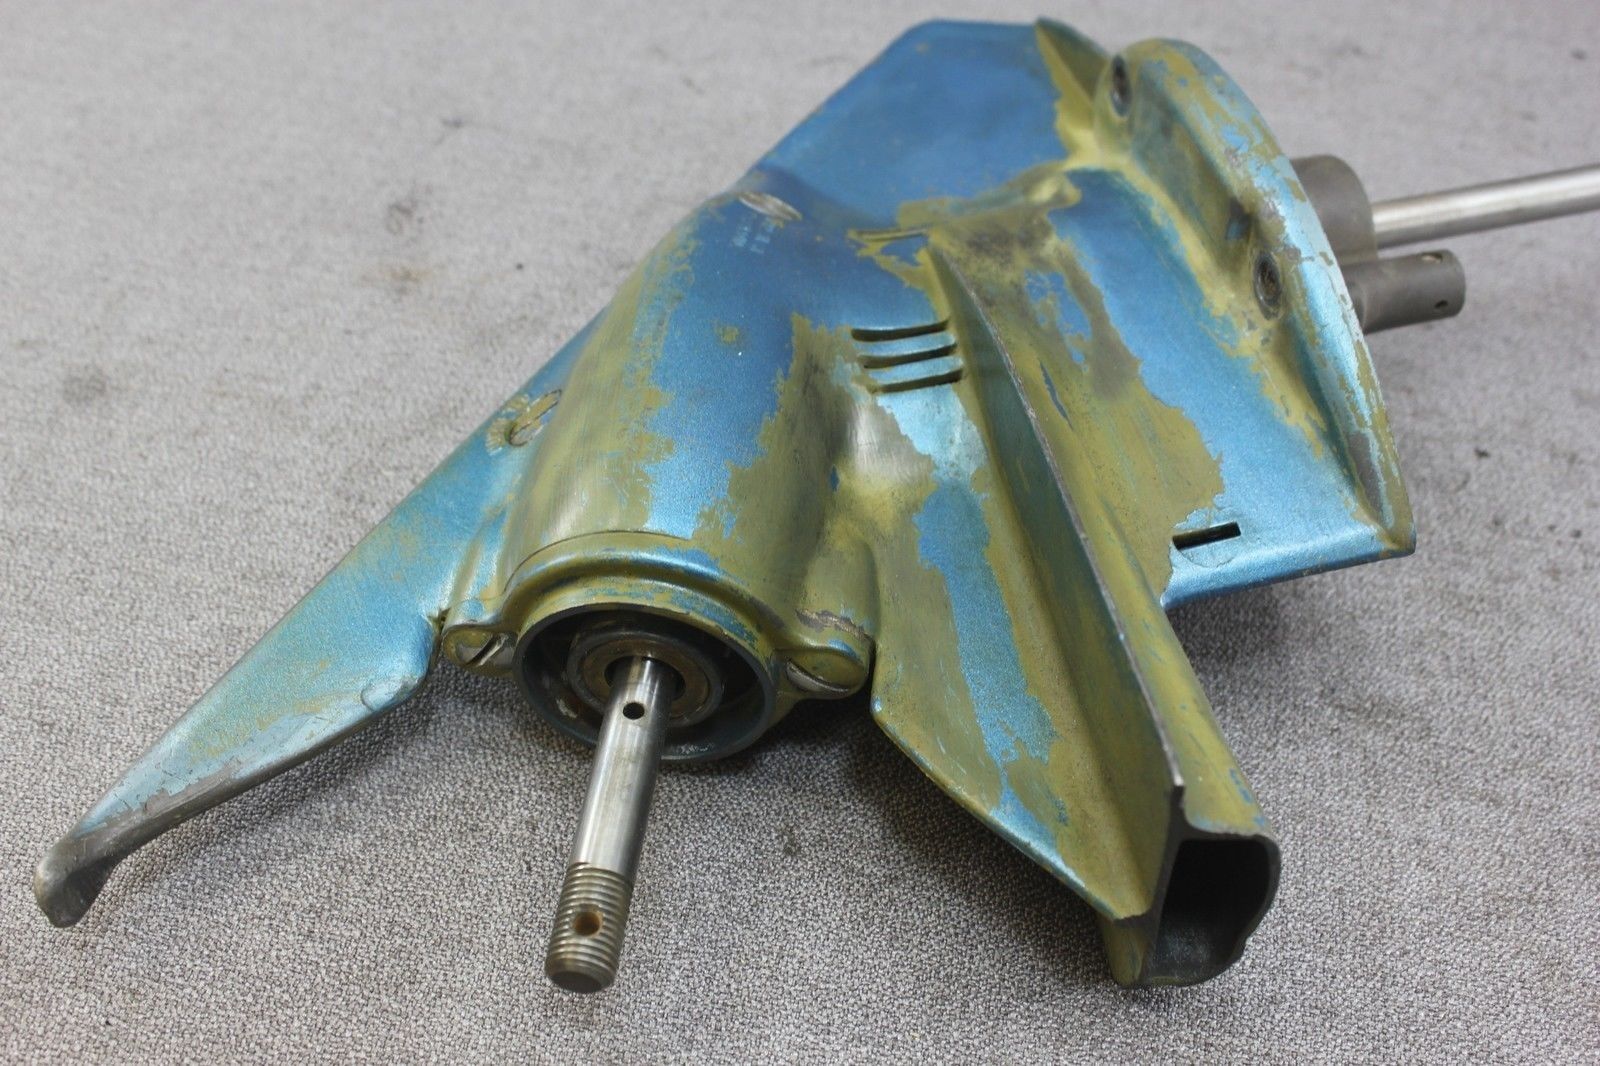
Photo of same unit, but not mine!Prepare to be boarded!
June 5, 2017 at 4:25 pm #59051First, look for match marks so you get it back in the same position. Then, and this is according to the service manual, pull put with the prop shaft. What you started to do should work. You could always rig up a slide hammer tool, but that shouldn’t be necessary.
June 5, 2017 at 5:38 pm #59058Thanks Frank! I had to plant petunias for my 90 year old mother,
but now I’m ready to take another look at the Lightwin.
I did notice what looked like an arrow stamped in the
gearcase, but I didn’t notice a matching mark on the
cap. Will look again!Prepare to be boarded!
June 5, 2017 at 6:21 pm #59059With the propshaft in a vice, I lay the gear case horizontally with the driveshaft against my hip to counteract any force I may be putting on the propshaft as I tap the housing with a rubber mallet. Go gently – they’re not terribly stout.
June 5, 2017 at 9:08 pm #59068I used Frank’s idea of a slide-hammer. Worked Great.
Had to braze two nuts together to connect the
prop shaft to the slide hammer.
Three little bumps with the slide hammer and it was apart.
Now, the next problem……. 😮
After the cartridge came out of the gear case, I looked
in and didn’t see the pinion gear. I thought that it must
have flung out on the bench or floor. Looked for 5 minutes,
then discovered that it was hiding and lodged in behind
the so called "thrust bearing". I got it un-lodged by
probing at it thru the "fill hole".
I tried to get the pinion gear out for inspection, but
there’s not enough clearance for it to slide pass the
thrust bearing.
What holds the thrust bearing in place? I tried moving it
with a screwdriver and a needle nose, and it doesn’t
even wiggle.
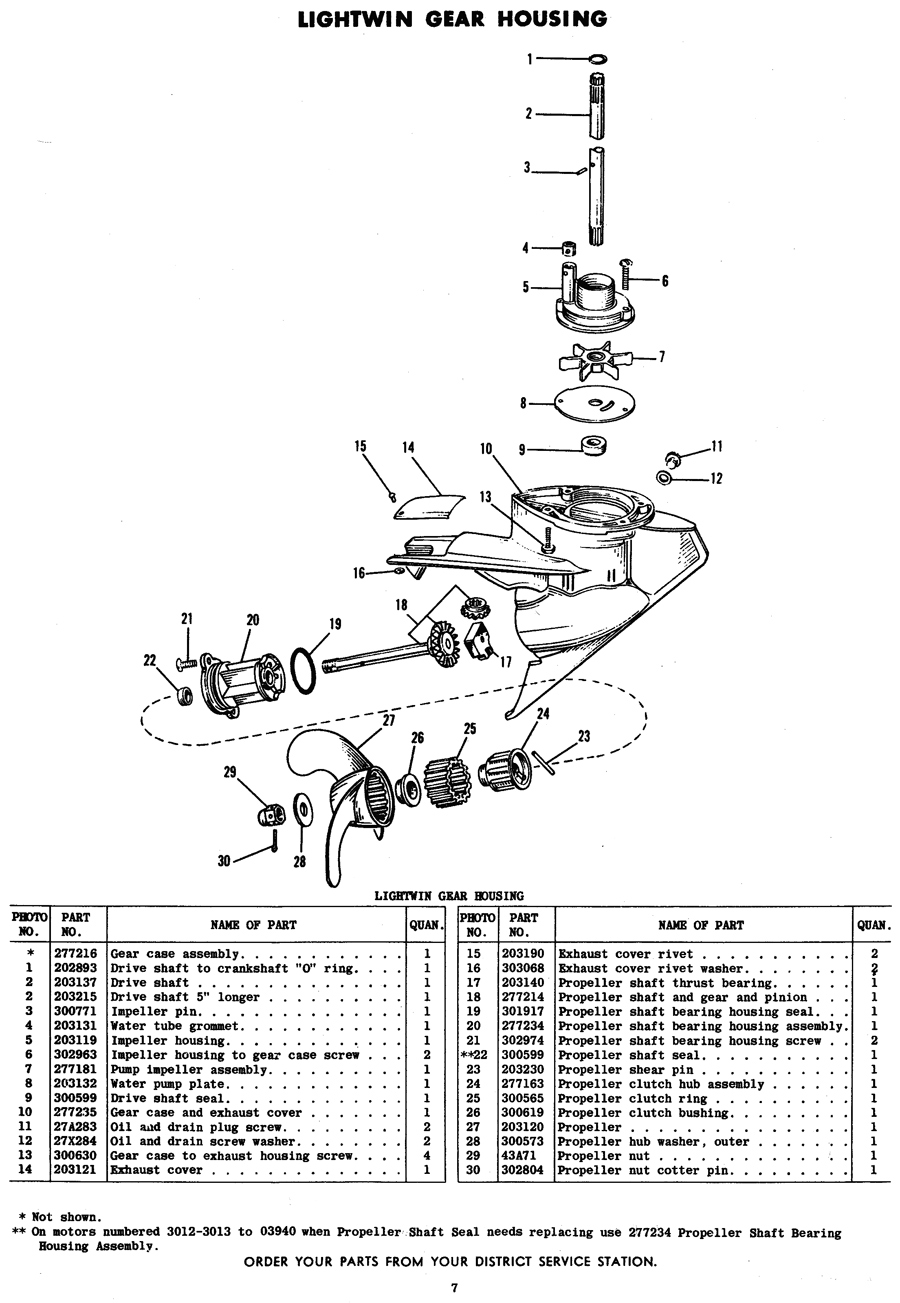
The thrust bearing is part #15.P.S.- With the excitement of wanting to try out the slide hammer,
I forgot to mark the cap for orientation. 😳
As I mentioned before, there is an arrow on the gear case,
but I see no mark on the cap. I can’t for the life of me,
see any difference regarding which way the cartridge goes
back in. My PDF manual says nothing on the subject. Thoughts?
Thanks again!Prepare to be boarded!
June 5, 2017 at 10:37 pm #59075That thrust bearing is a slip fit and only held by an oil film. Sometimes it can be dislodged with a long nozzle air gun, or by holding the gear case with the opening pointing down and tapping the keg on the edge of the workbench. . . 😀


 June 5, 2017 at 11:02 pm #59077
I honestly don’t remember the reason for the match marks
June 5, 2017 at 11:47 pm #59080Garry, that must be one tough oil film! I’ll try the compressed
air method tomorrow. Thanks!
Frank, maybe I’ll have to remove paint and look for
that mark on the cartridge cap. If not found, guess
I better get the micrometer out and look for the
reason for the marks in the first place!
Thanks for the picture!Prepare to be boarded!
June 6, 2017 at 12:01 am #59081I could be totally wrong, but I’d guess the match marks are there so when it assembled prior to machining, it will have an indicator of which way it was assembled when it was line bored / reamed. That way, when it gets disassembled and serviced, it can go back together the correct way. If it was assembled 180 degrees off it would cause a bind / premature wear if it wasn’t machined perfectly on center, which it wasn’t.
-BenOldJohnnyRude on YouTube
June 6, 2017 at 12:10 am #59082I have used a coat hanger with a sharp bend on the end to pull the bearing. Just hook the thrust bearing and pull it out. On reinsertion I use a long screw drive in the center hole and walk the bearing into place.
Ed -
AuthorPosts
- You must be logged in to reply to this topic.


