Home › Forum › Ask A Member › Johnson PO-15 Info
- This topic has 24 replies, 5 voices, and was last updated 8 years, 10 months ago by
 Mumbles.
-
AuthorPosts
-
March 31, 2016 at 2:12 am #34134
Thom,
Always best to replace the old wires in the steering handle. If you break the bakelite cap I can make a substitute. It won’t look quite like the original but it will look good. What there is under the cap is a contact plate that is round and fits into the handle. It has a recess in the center to hold a spring that puts outward pressure on the kill button. The kill button on the inside of the cap has a flat disc that mates with all three points on the contact plate when depressed and that is how you get continuity among the three wires. One of the three wires attaches to a screw (grounding screw) on the steering handle mount on the underside and the other two go to the female socket. You’ll notice there is only one wire coming from the mag plate and it attaches to the male plug. It doesn’t matter which prong of the male plug it is attached to. All this is designed so no matter how you plug the two together, connection to the mag is accomplished. When you depress the kill button it grounds out the points.
George, gemmanuel@bellsouth.et
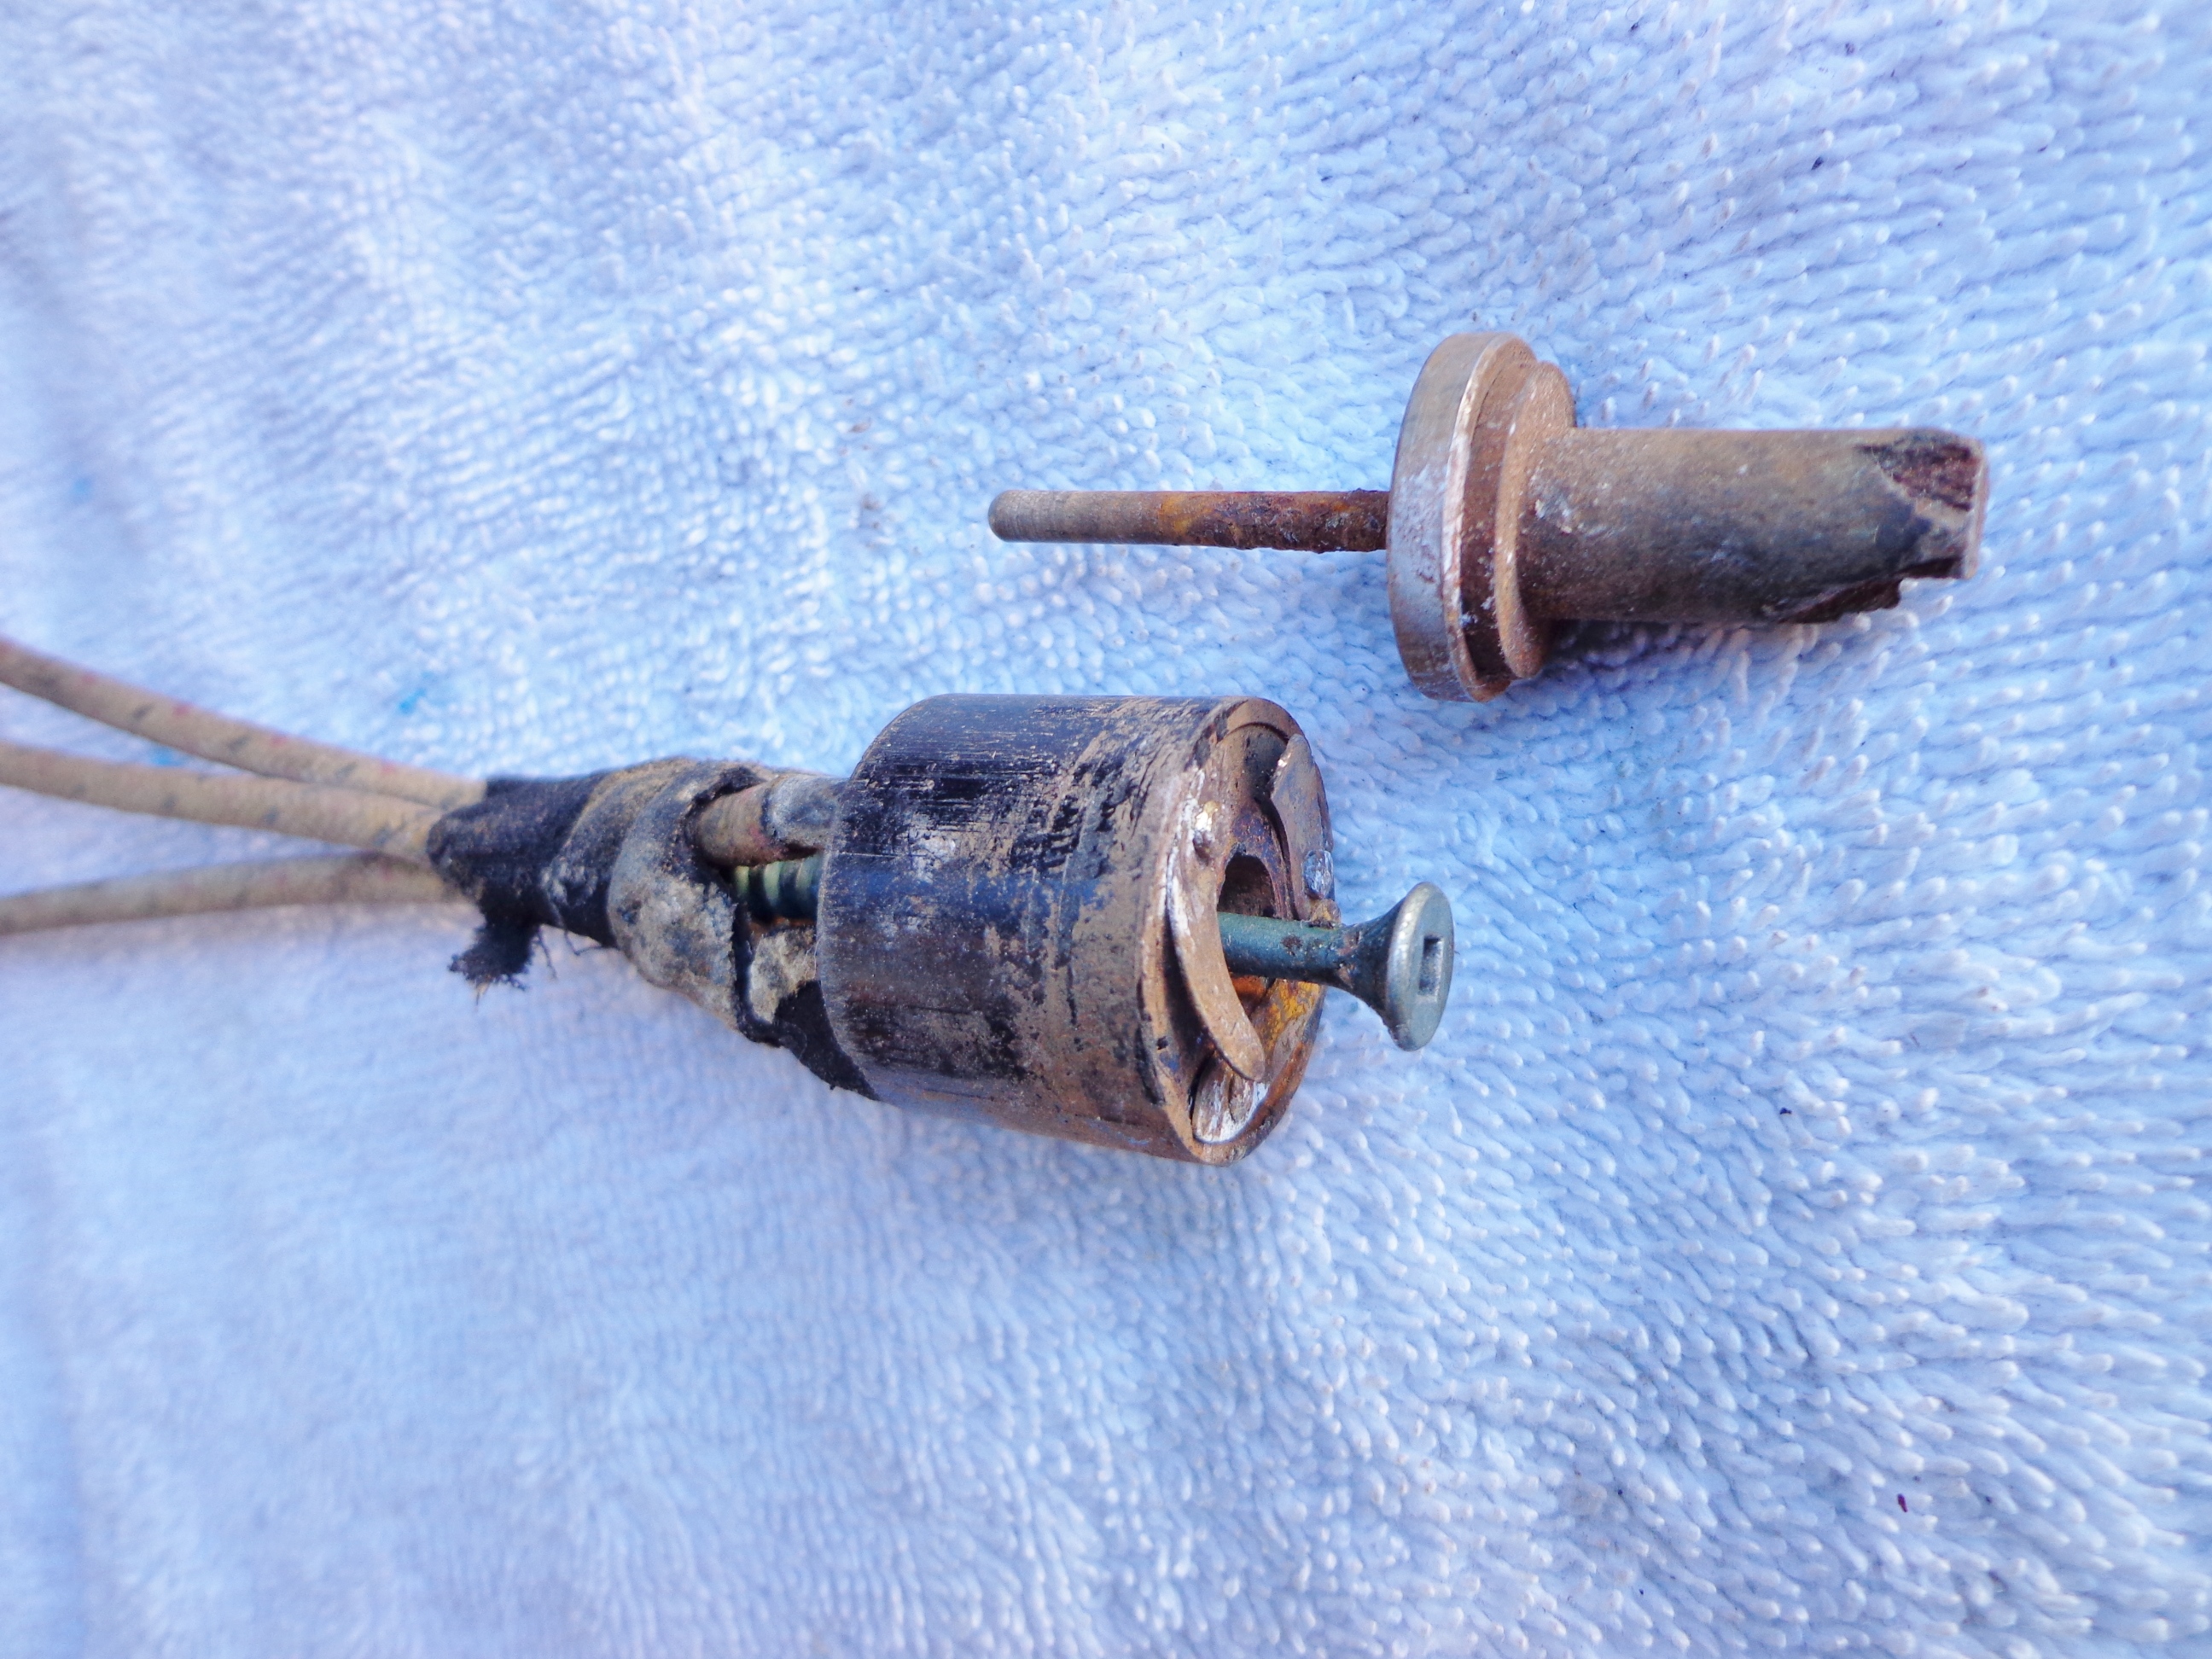
March 31, 2016 at 3:48 am #34141Here’s what’s left of my original switch. The push button was broken and the spring must have corroded away. You can make out the three contacts and the contact plate on the end of what’s left of the button. The green deck screw was used to pull the old piece out of the tiller. Out with the old and in with the new!
If you can unscrew the cap from your tiller, you might be able to clean the contact pieces so they make a good electrical circuit again!
Attachments:
 March 31, 2016 at 10:28 am #34144
George, Mumbles, Thanks so much. It is really cool to see the actual parts so a person can visualize what’s going on with theirs.
Anyways….I was trying to once again remove the end cap from mine and of course it snapped arghhh. Once it was off out poured some corrosion like sand type stuff and I mean a bunch of it.
There is no way this switch was going to work unless I had been able to get it out cleanly and then do a good clean up on it.
On to my next scouting adventure to either find or make some type of switch for use with this PO-15 because the 3 small connection tabs were pretty much corroded off and will be of no use to me. Always a fun time these old beasts…LOL
March 31, 2016 at 3:41 pm #34150If you can wait until I get that offshore tool in, I’ll make you up a new end cap and switch assembly while I’m doing mine. ☺
March 31, 2016 at 5:32 pm #34153Mumbles,
You know I can wait 😀
April 1, 2016 at 12:04 am #34163I have a couple of spare NOS switch assemblys if you’d like one. E-mail me: gemmanuel@bellsouth.net
George
April 1, 2016 at 8:34 pm #34191As I am going through this motor the more I find.
I have been wanting one of these for years, not sure why just have and I found one close so I got it. I now know I paid to much for it 😳
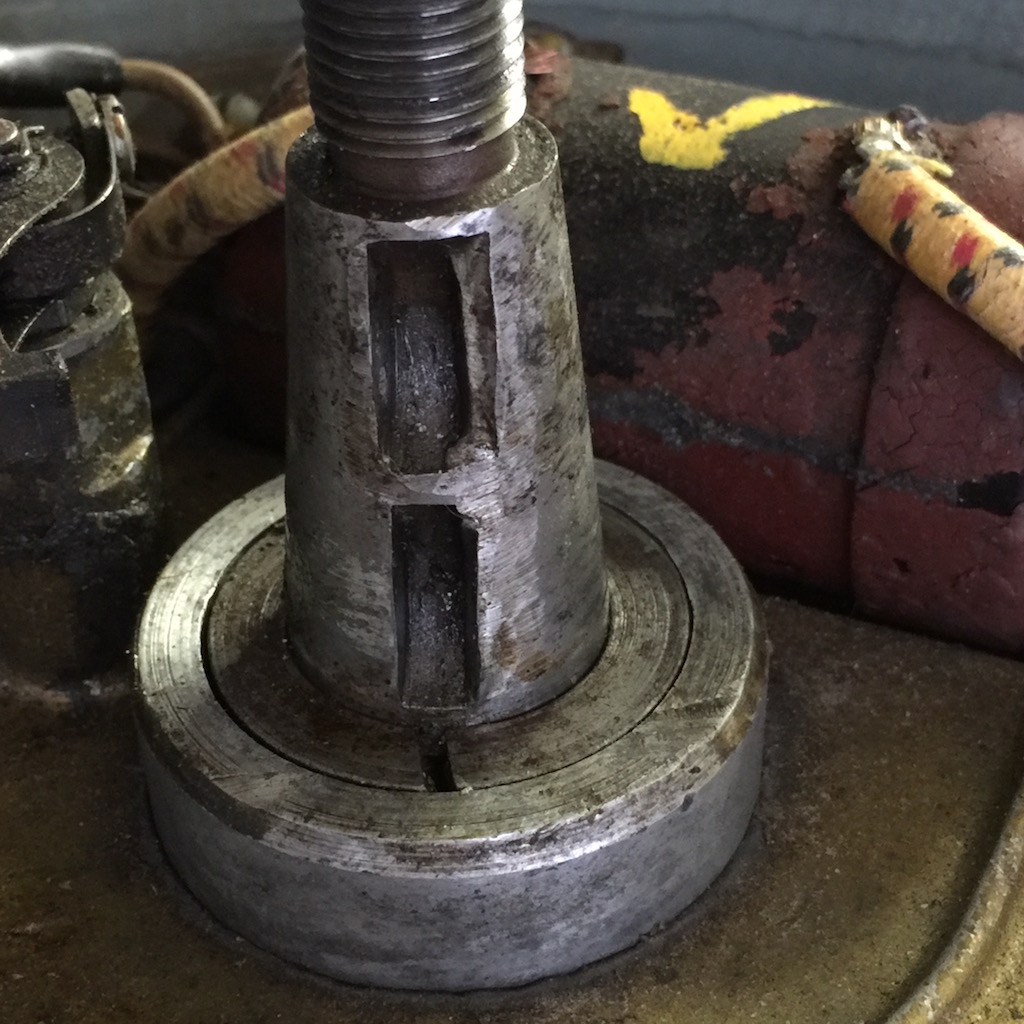
Anyways, how screwed and I with this mess? Below are pics of the Crank end and Flywheel. I have a different Flywheel so that is not a problem unless what happened to the old one will just happen to the new one. The keys seem small for the holes and pretty much slide right out when I try to place them in there.
 April 2, 2016 at 12:00 pm #34203
How is the fit of the lower woodruff key? It looks like the flywheel nut came loose, sometime in the past to cause this damage. If the lower keyway will hold the woodruff key in place while installing the flywheel, you might be ok. The woodruff keys [flywheel keys] really only position the flywheel correctly on the crankshaft. It is the crankshaft taper along with the taper in the flywheel hub that provides a friction fit to hold the two together. How does the rest of the crankshaft taper look on the other side? If all else fails, a used crankshaft for a PO shouldn’t be hard to find.
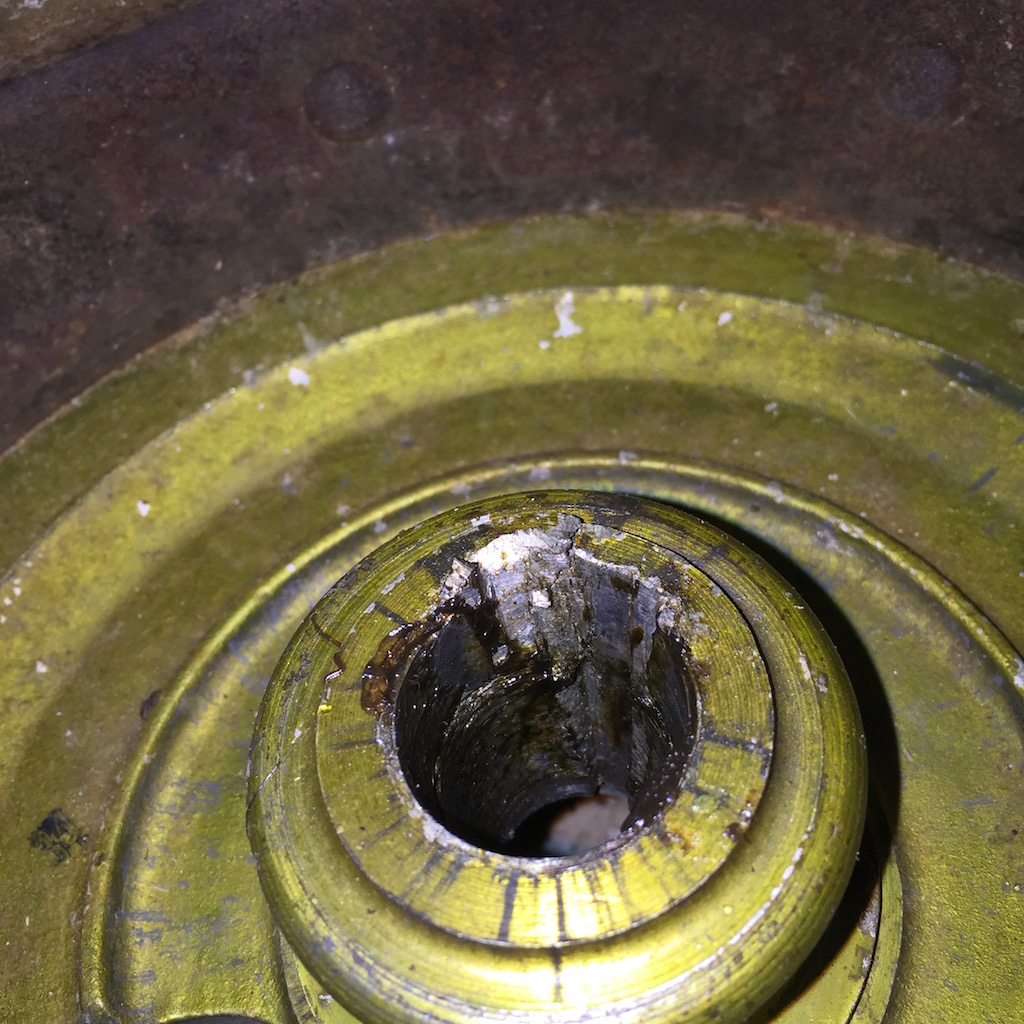
Be sure after you complete repairs, to torque the flywheel nut to 65 Ft. Lbs. Use a strap wrench and a good torque wrench. I like to check mine periodically or before a club wet meet when i plan to run the motor. I’ve seen a few of them loosen over time, so check them to make sure they stay tight.April 2, 2016 at 12:12 pm #34204I took a good look this morning and did find that the Woodruff Keys that were on the motor originally are to small. They measure only 15 thousands and have tons of slop in the groove. I got a key with the new Flywheel and it measure 18 thousands and fit snug in both the upper and lower groove.
The rest of the taper not able to be seen looks much better than the side pictured.
I will buy another key and with that I think this issue may be solved. I will give it the proper torque. I like that this motor has a nut style nut for the Flywheel. I always have to use the big rubber hammer whack whack trick on the ones that don’t, so this one can be torqued to proper specs.
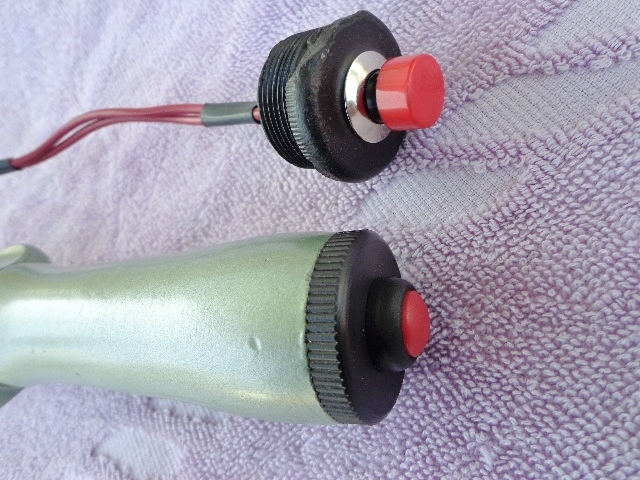
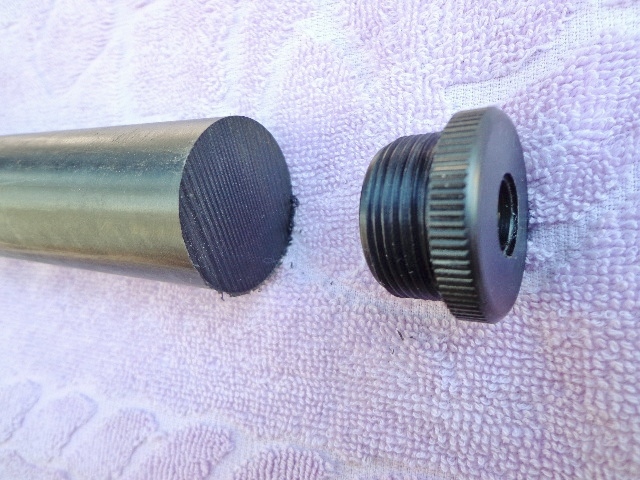
April 11, 2016 at 1:13 am #34661The knurling tool I was waiting for finally arrived so today I managed to make up a new end cap for the PO tiller out of a bar of Delrin. This one took a while as I also had to make a fixture to hold it by the threads. I have some small waterproof switches in red, black, and green but I figured the red one looked best here. The next one should go quicker as I kept notes of the dimensions as I went. That’s one more problem out of the way and a little bit closer to start up day!
Hey Viking66, if you still need one of these, let me know and I’ll get one headed your way!
Attachments:
-
AuthorPosts
- You must be logged in to reply to this topic.