Home › Forum › Ask A Member › Johnson TN-28
- This topic has 27 replies, 6 voices, and was last updated 4 years, 7 months ago by
crosbyman.
-
AuthorPosts
-
August 25, 2019 at 5:23 pm #181972
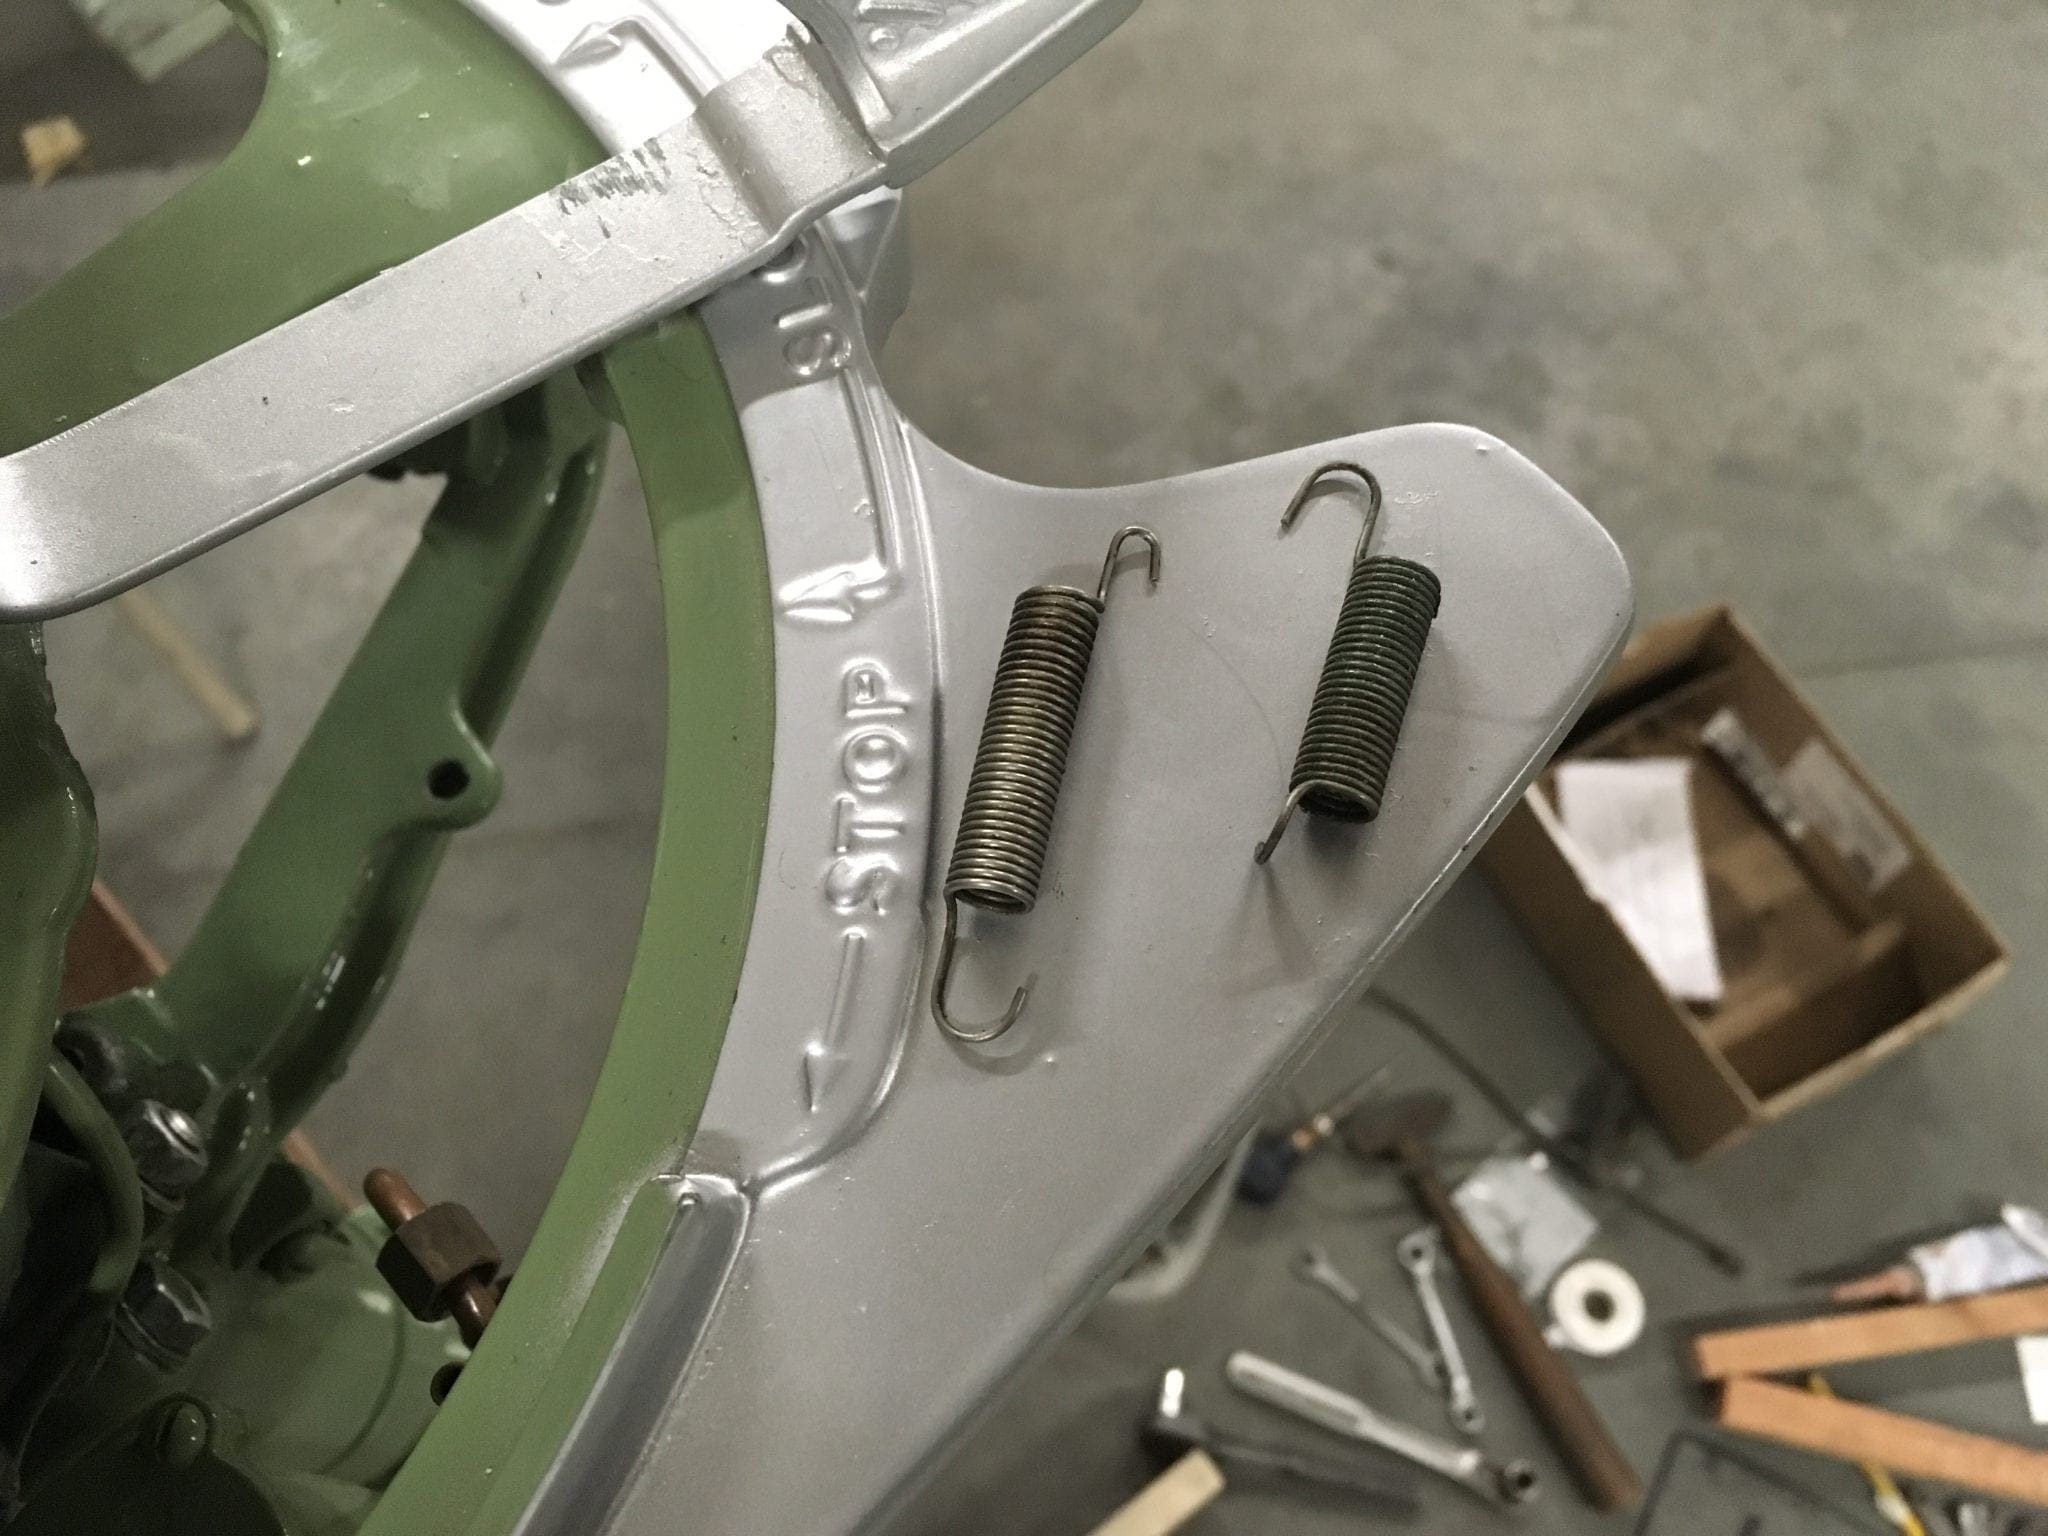
Finally got back around to putting my TN 28 back together (new pistons rings crank and gaskets) maybe I waited a little too long. I’m waiting on my coils to show up(Monday I hope) and was going thru and making sure I remembered where and how everything went. Got most of it ok but I’ve got two small springs that I’m stumped on I only see one in the carb diagram and it’s not clear where to connect both ends. Any help would be appreciated. The second one I. Not sure at all where it goes, I was thinking nutreul clutch? I’ve got it back together and it seems to be kinda spring loaded on its own. Anyway thanks for all the help
It's a jungle out there.
August 25, 2019 at 5:45 pm #181973Got pics ?
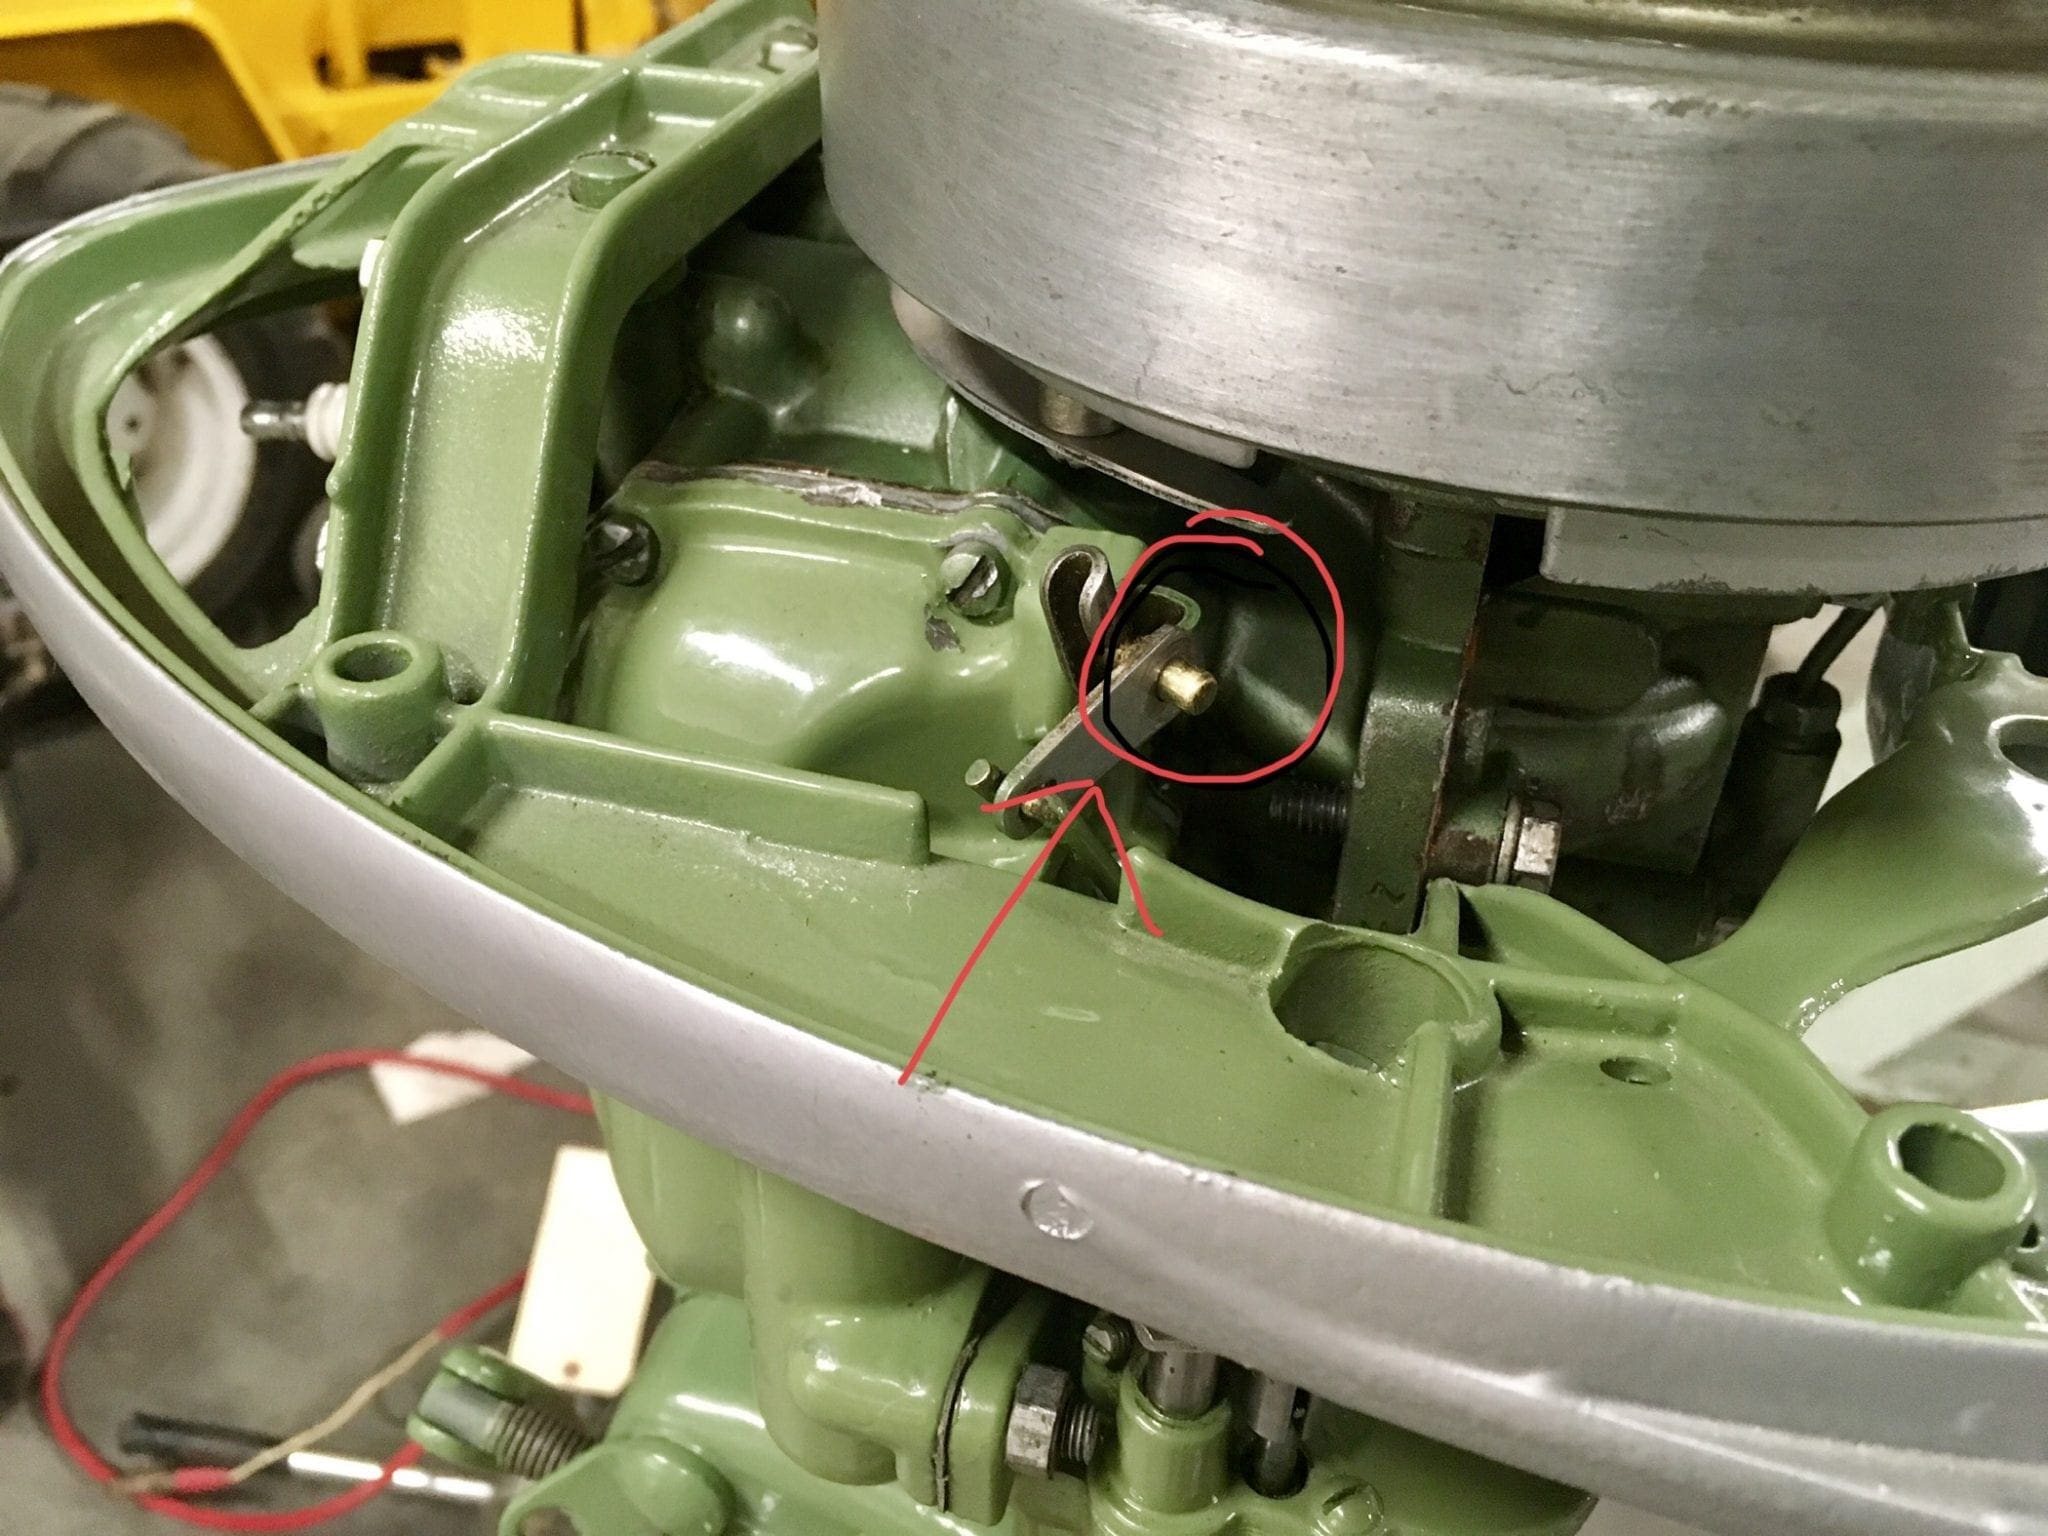
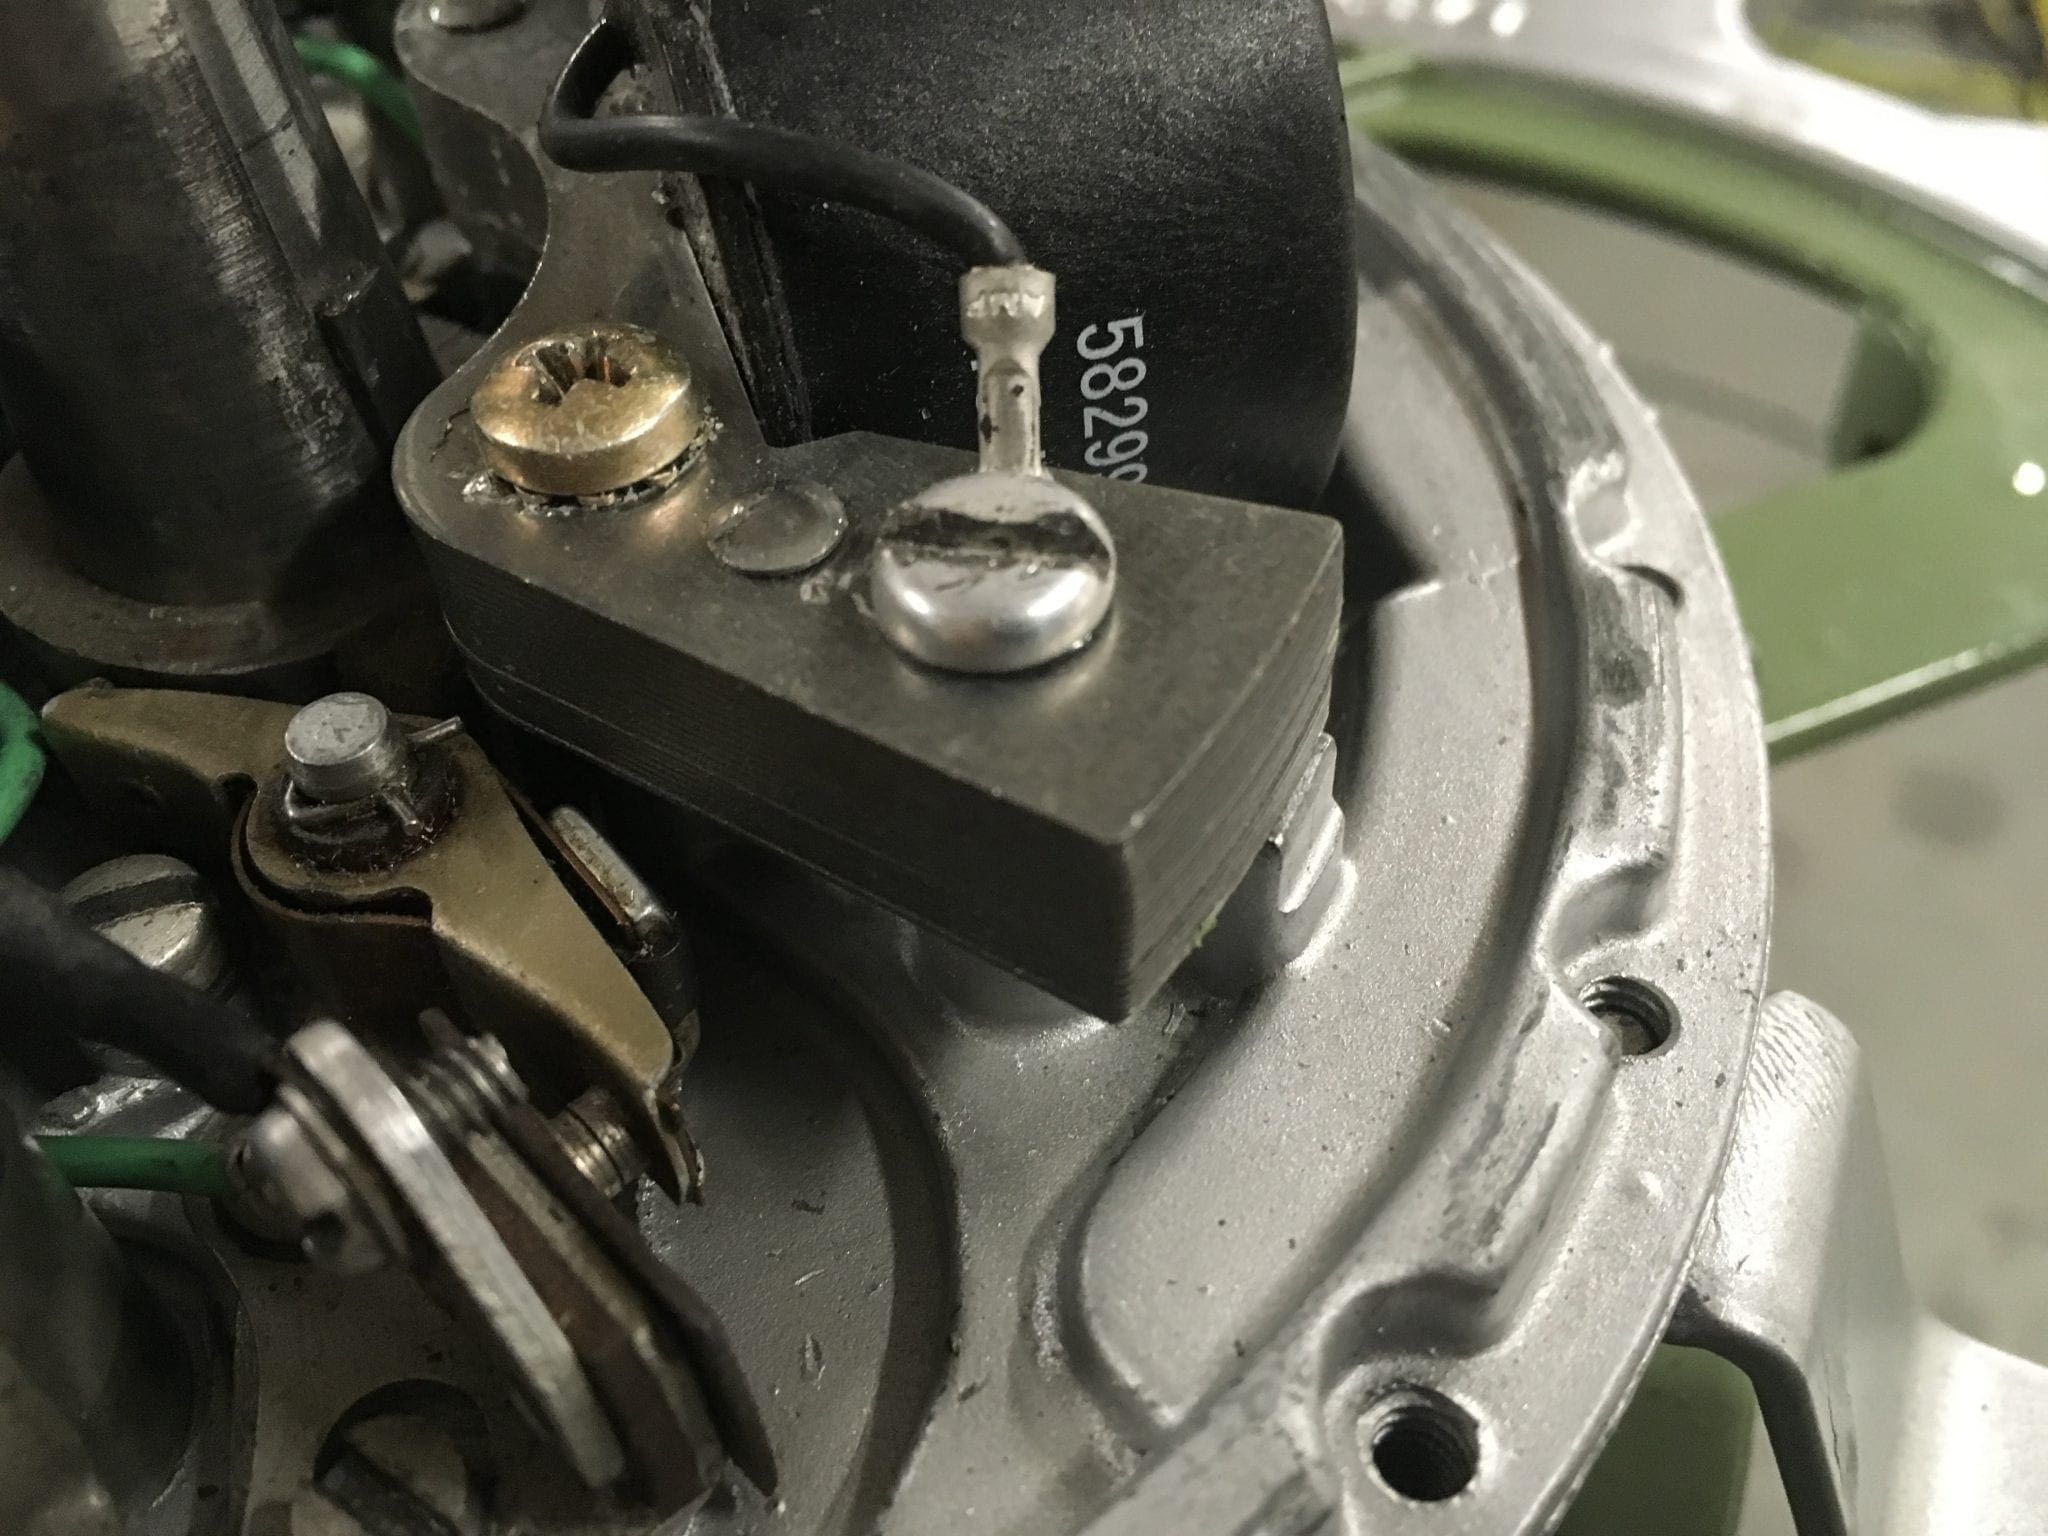
August 25, 2019 at 9:26 pm #181979I’m posting a pic of the 2 springs and also the top portion of carb linkage as it’s hooked up now. Looks like something , a pin at least should go thru the brass tip maybe one of the springs but a spring there doesn’t look like it would control the linkage in any way only serve as a keeper
It's a jungle out there.
-
This reply was modified 4 years, 7 months ago by
 Mumbles.
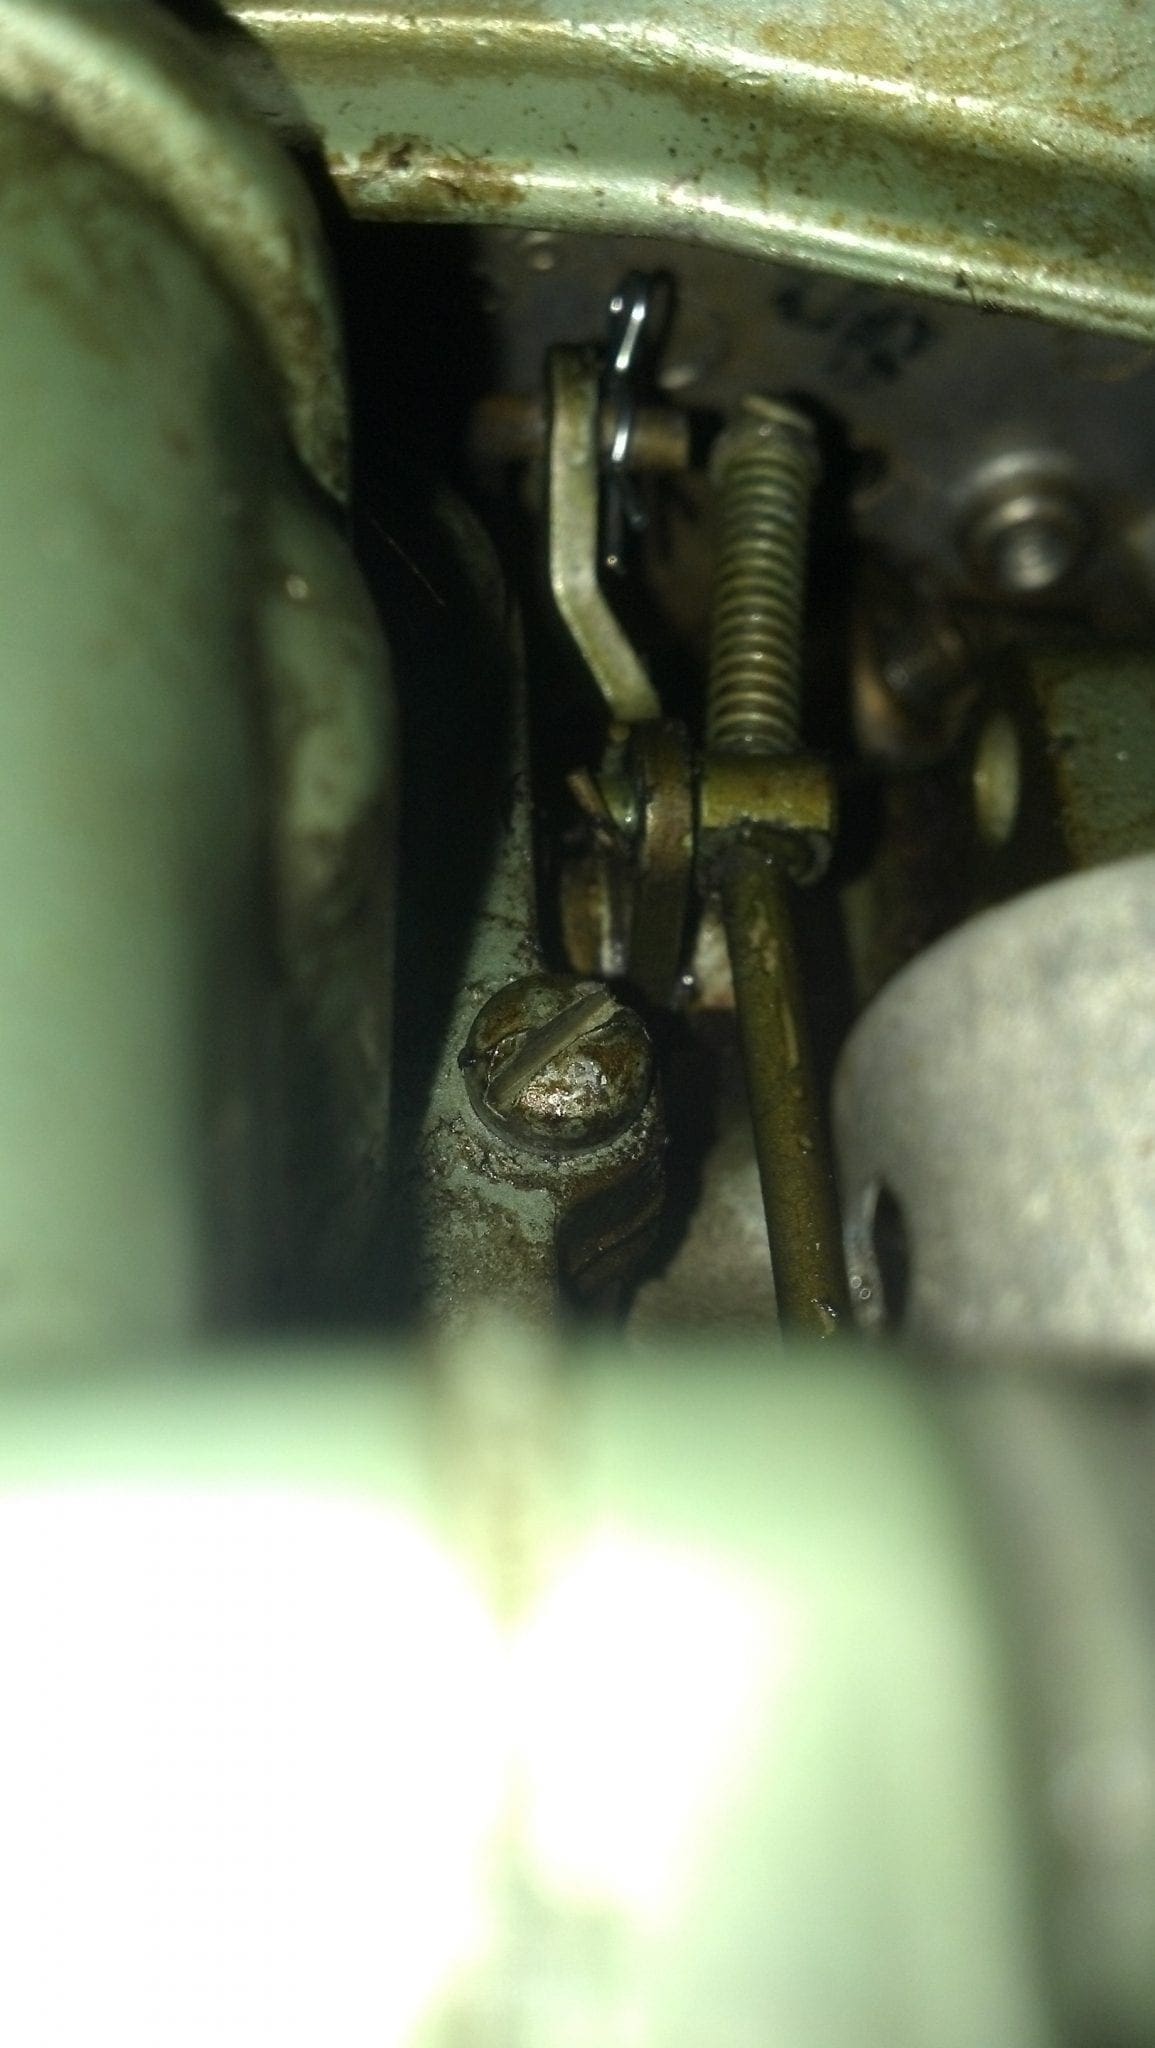
August 26, 2019 at 12:44 am #181982Here are two photos showing spring locations. You might need to zoom in on the second one a little and the actual attachment points aren’t all that clear, but I hope it helps.
-
This reply was modified 4 years, 7 months ago by Mumbles.
August 26, 2019 at 10:19 am #182003The second pic with the neutral lever spring I got figured out thanks to the pic. The first pic looks like is of the bottom portion of the linkage and that little spring is on the lower part of my linkage as I never took it off however at the top of the linkage where it attaches via a small bracket to the little brass pin….. I’m not sure if a pin holds the linkage on or a spring. The spring I have left is approximately the same as the one that went on the neutral lever
It's a jungle out there.
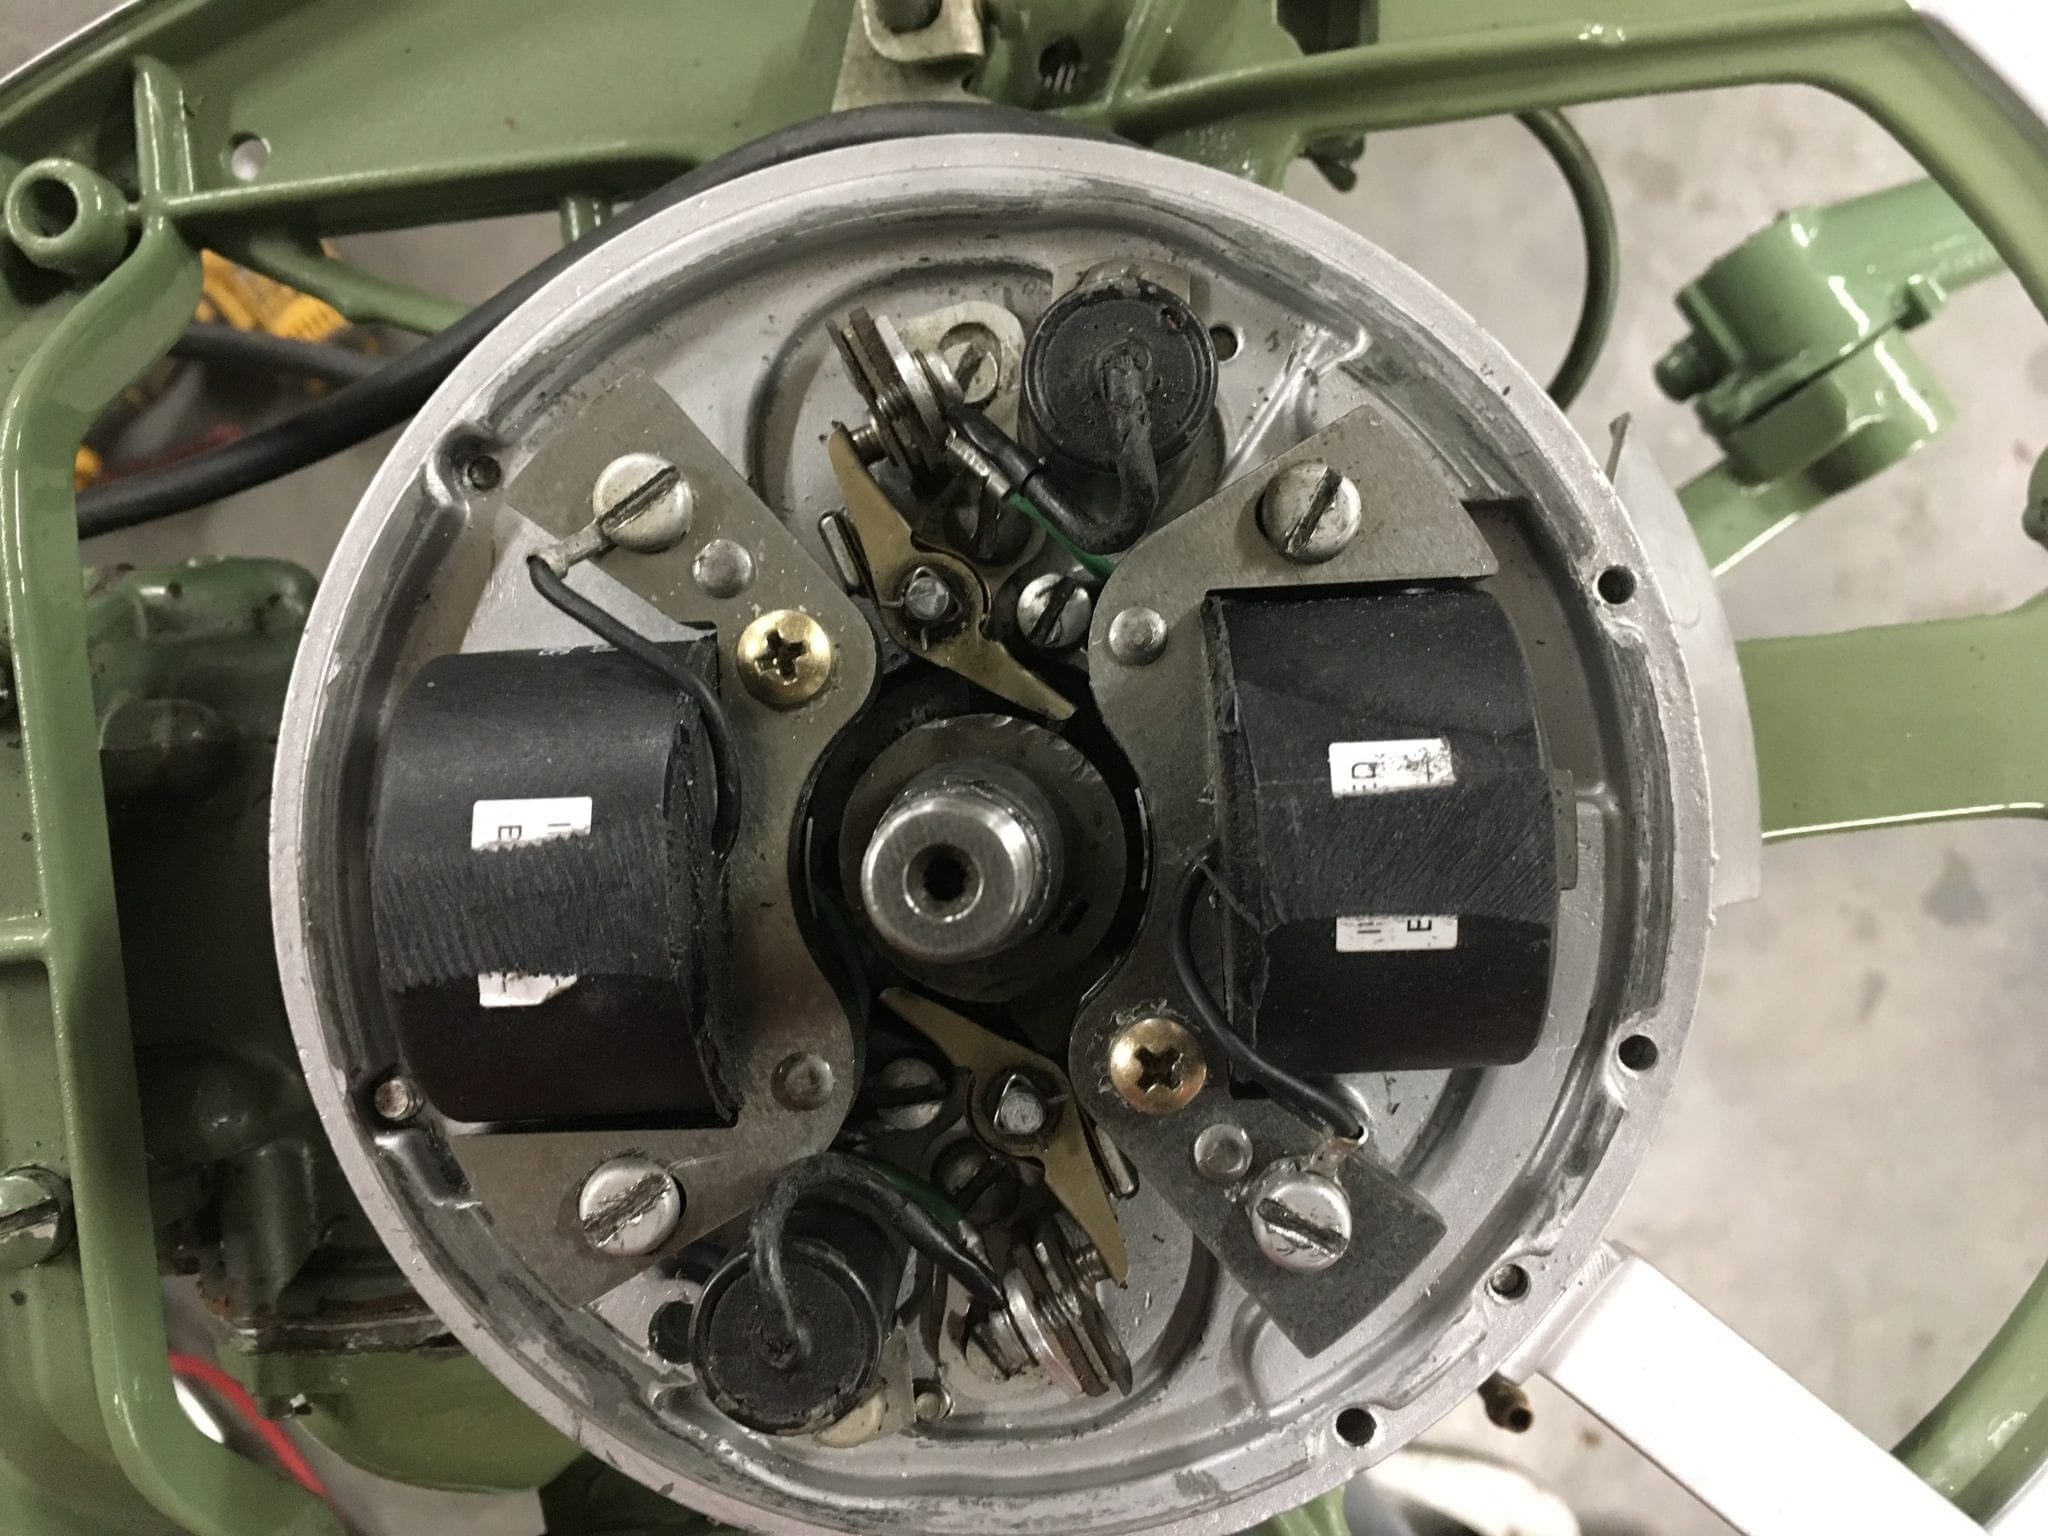
August 26, 2019 at 6:42 pm #182051One question leads to another I’m waiting on a reply about the second spring but I got the coils in set the points and when I put the flywheel on with NO tension on the flywheel nut “something” is rubbing when I move the spark advance. I’ve moved the shoes of the coil as far as I can get them to go but still rubbing. I’m posting a pic does everything look right to the trained eyes?
It's a jungle out there.
-
This reply was modified 4 years, 7 months ago by Mumbles.
August 26, 2019 at 8:30 pm #182062Looks OK to me. Try putting a piece of masking tape over the exposed ends of the coil laminations, re-install the flywheel and spin it through several revolutions. Then remove the flywheel and look for any rub marks on the masking tape.
Bob
1937 Champion D2C Deluxe Lite Twin
1954 Johnson CD-11
1957 Evinrude Fastwin 18
1958 Johnson QD-19
1958 Johnson FD-12
1959 Johnson QD-20“Every 20 minute job is only a broken bolt away from a 3-day project.”
"Every time you remove a broken or seized bolt an angel gets his wings."August 26, 2019 at 8:30 pm #182063Ok if you stay with it long enough and have patience it’ll come together. I had the wave washer installed incorrectly (on top instead of bottom) and it wasn’t allowing clearance on top of the coils. Still havnt got the final spring figured out and back to the drawing board on the carb it’s leaking fuel EVERYWHERE.
It's a jungle out there.
August 26, 2019 at 8:32 pm #182064OK, never mind my last post. Glad you found the problem. I completely overlooked the rub marks on the top of the coils!
Bob
1937 Champion D2C Deluxe Lite Twin
1954 Johnson CD-11
1957 Evinrude Fastwin 18
1958 Johnson QD-19
1958 Johnson FD-12
1959 Johnson QD-20“Every 20 minute job is only a broken bolt away from a 3-day project.”
"Every time you remove a broken or seized bolt an angel gets his wings."-
This reply was modified 4 years, 7 months ago by
 bobw.
bobw.
August 26, 2019 at 8:51 pm #182068in pic #2 is that rub marks on the plate?
-
This reply was modified 4 years, 7 months ago by
-
AuthorPosts
- You must be logged in to reply to this topic.