Home › Forum › Ask A Member › Military / Chainsaw Coil Laminate Removal
- This topic has 9 replies, 5 voices, and was last updated 2 years, 6 months ago by
jeff-register.
-
AuthorPosts
-
July 24, 2023 at 10:40 pm #278468
I got the 1946 Sea King, twin opposed, 3.3 hp, running on the bench
back in the winter a couple of years ago, using a modified Zephyr coil,
by cutting down the ends of it’s laminates. It ran great on the bench.Next spring I went to run it in the barrel,
and “Zero” spark. I put it back on the rack until today.
Found out the primary coil winding was “dead”.Looked through my box of old coils, and found the original style
coil, although it was dead too. Decided to remove it’s laminates and
try to use a “double secondary” Military / chainsaw coil.
I’ve removed laminated from two of these coils in the past, but they
were a bugger. So far, whatever I’ve tried on this coil, I haven’t
got the laminates to budge any.I thought I had a perfect plan, and I drilled a 1/4″ hole down through
the laminates, almost all the way to the other end. I then used a 1/4″
rod and tried to tap out the laminates while holding the coil in one
hand. So far no movement. I guess I could drill the hole out a little
larger, but so far the coil still has good ohm readings, and I hate to
change that.
What’s worked best for you to remove the laminates?
Thanks.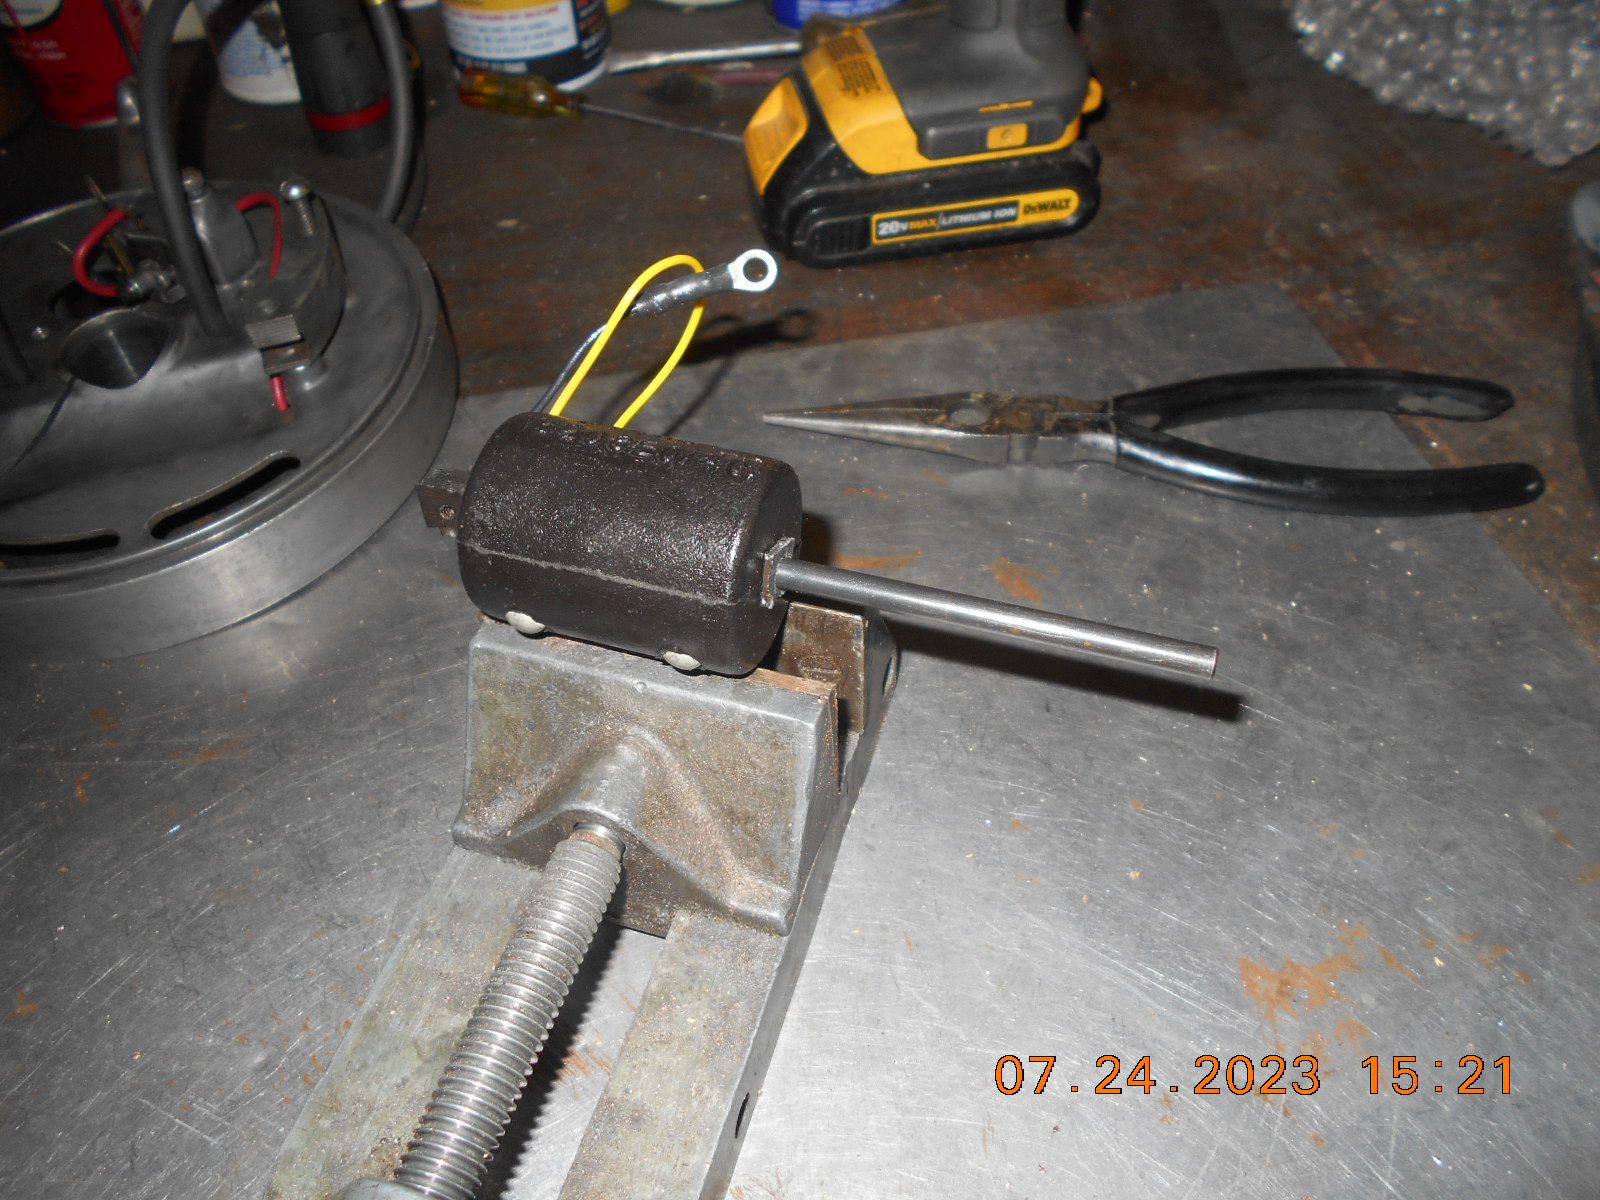
Prepare to be boarded!
July 24, 2023 at 11:03 pm #278473Bucc, we all know that you always come up with creative solutions to these sticky problems. I like your first attempt. at the risk of doing damage, consider supporting the coil on square hole plate and applying more force,, like in a press of large vice. Idea!!! support the coil aginst the jaws of your four jaw lathe chuck and press with the tail stock ram.
Anytime someone can provide good information on retro-fitting a double secondary coil, it’s valuable info.
Joe B
July 25, 2023 at 7:23 am #278474I’ve only done it twice,but I set the coil on end in my vise and used a small punch to knock out a few of the middle laminates.Then I switched to a bigger punch and worked from the middle out,a few at a time to remove the rest.
July 25, 2023 at 8:29 am #278478Bucc, we all know that you always come up with creative solutions to these sticky problems. I like your first attempt. at the risk of doing damage, consider supporting the coil on square hole plate and applying more force,, like in a press of large vice. Idea!!! support the coil aginst the jaws of your four jaw lathe chuck and press with the tail stock ram.
Anytime someone can provide good information on retro-fitting a double secondary coil, it’s valuable info.
Joe B
Joe, I was trying to avoid putting any pressure on the coil casing,
to avoid cracking the case, or worse yet, ruining the windings,
but if worse comes to worse, I’ll try it. Thanks.Prepare to be boarded!
July 25, 2023 at 8:34 am #278479I’ve only done it twice,but I set the coil on end in my vise and used a small punch to knock out a few of the middle laminates.Then I switched to a bigger punch and worked from the middle out,a few at a time to remove the rest.
Stanley, your way is what I did in the past, and started to do this time,
but I didn’t get any movement.
I cut one laminate end off close to the coil case, so as not to bend up
the laminate ends while punching.
Then drilled the hole and tried punching out the center laminated that way.
I don’t think I could have drilled the hole straight through the center though,
without the milling machine.
Will keep trying! Thanks.Prepare to be boarded!
July 25, 2023 at 5:50 pm #278496I had the laminates out of the Military coil in about 20 minutes this morning,
using the punch rod in the hole I drilled in the laminates, as before,
but this time I sprayed silicone in the hole. I used bunches of tap / drill oil
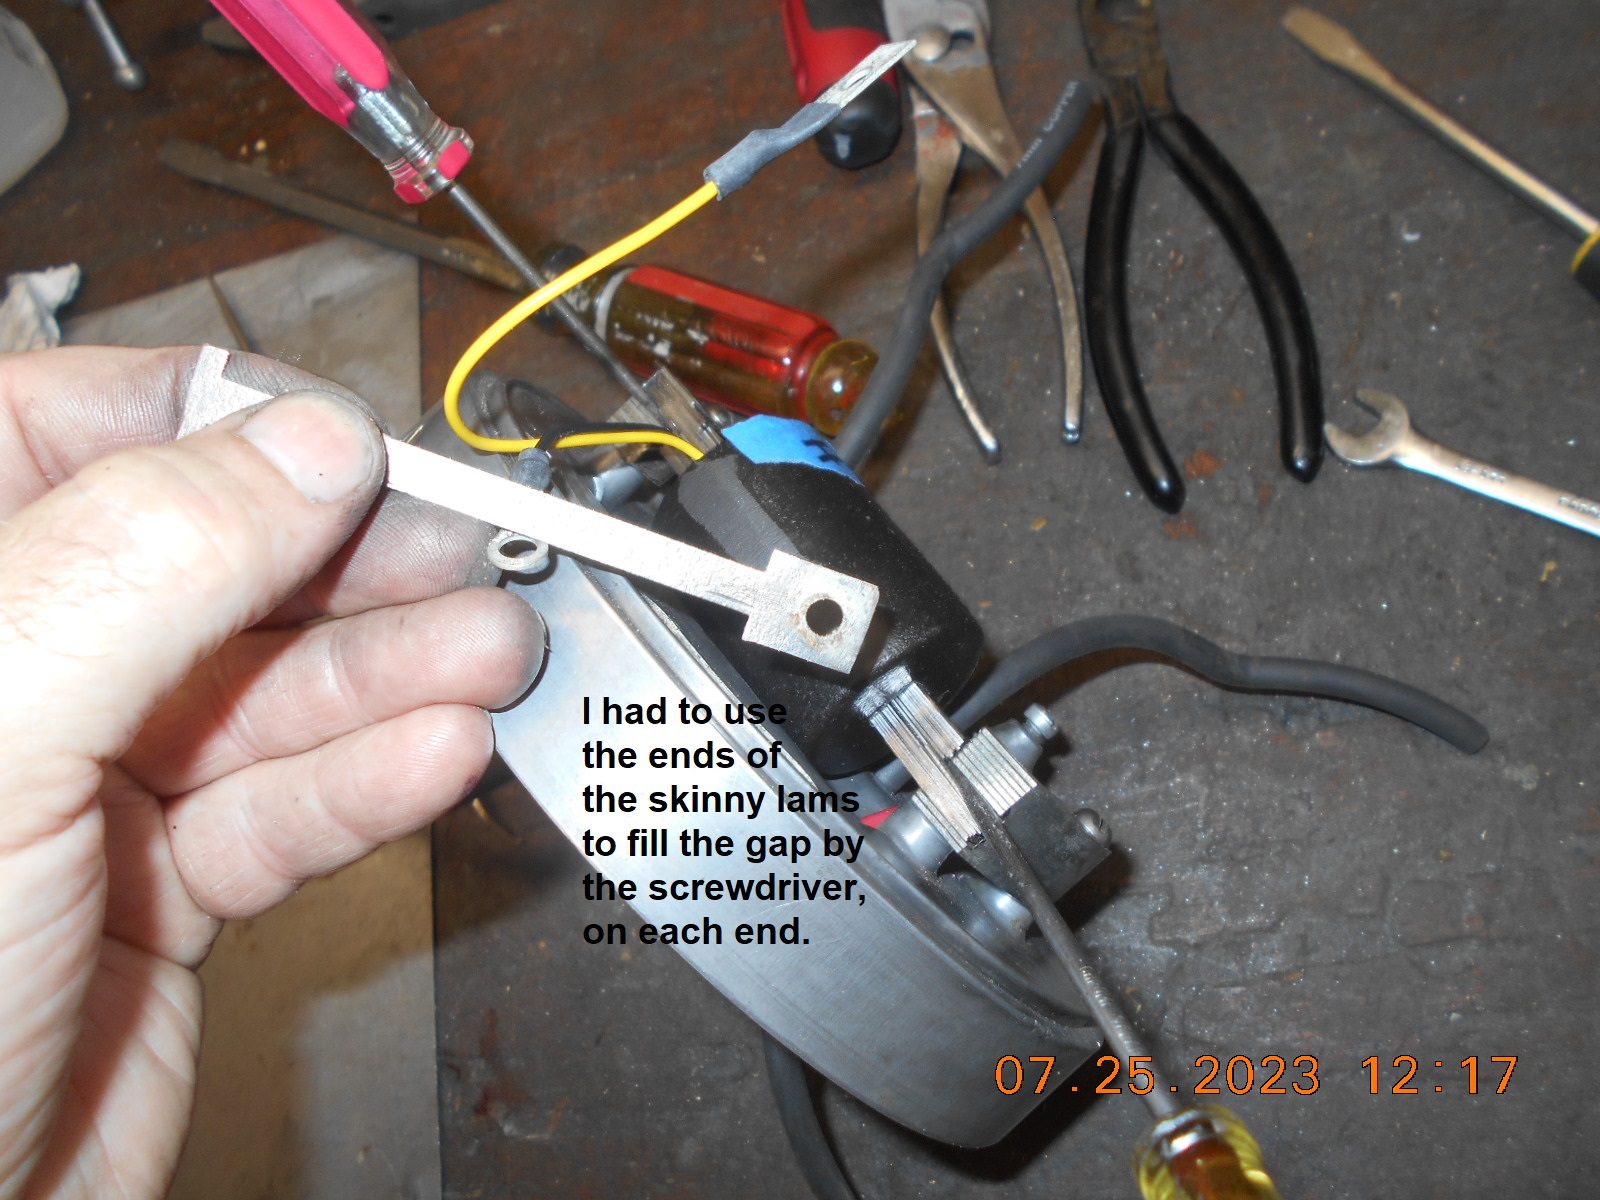
when I was drilling the hole, but the silicone seemed to work wonders.I worked all day doing the coil swap, machining the laminates from the original
style Sea King coil, de-burring each one, cleaning, polishing, and fitting.
Also made up a new “cap in the can”. The one I had rigged up for the modified
Zephyr coil was .15 mfd. I have been using .22 mfd caps when using these Military,
Scintilla type coils…….correct or not, I’m not sure. I tried researching this in the
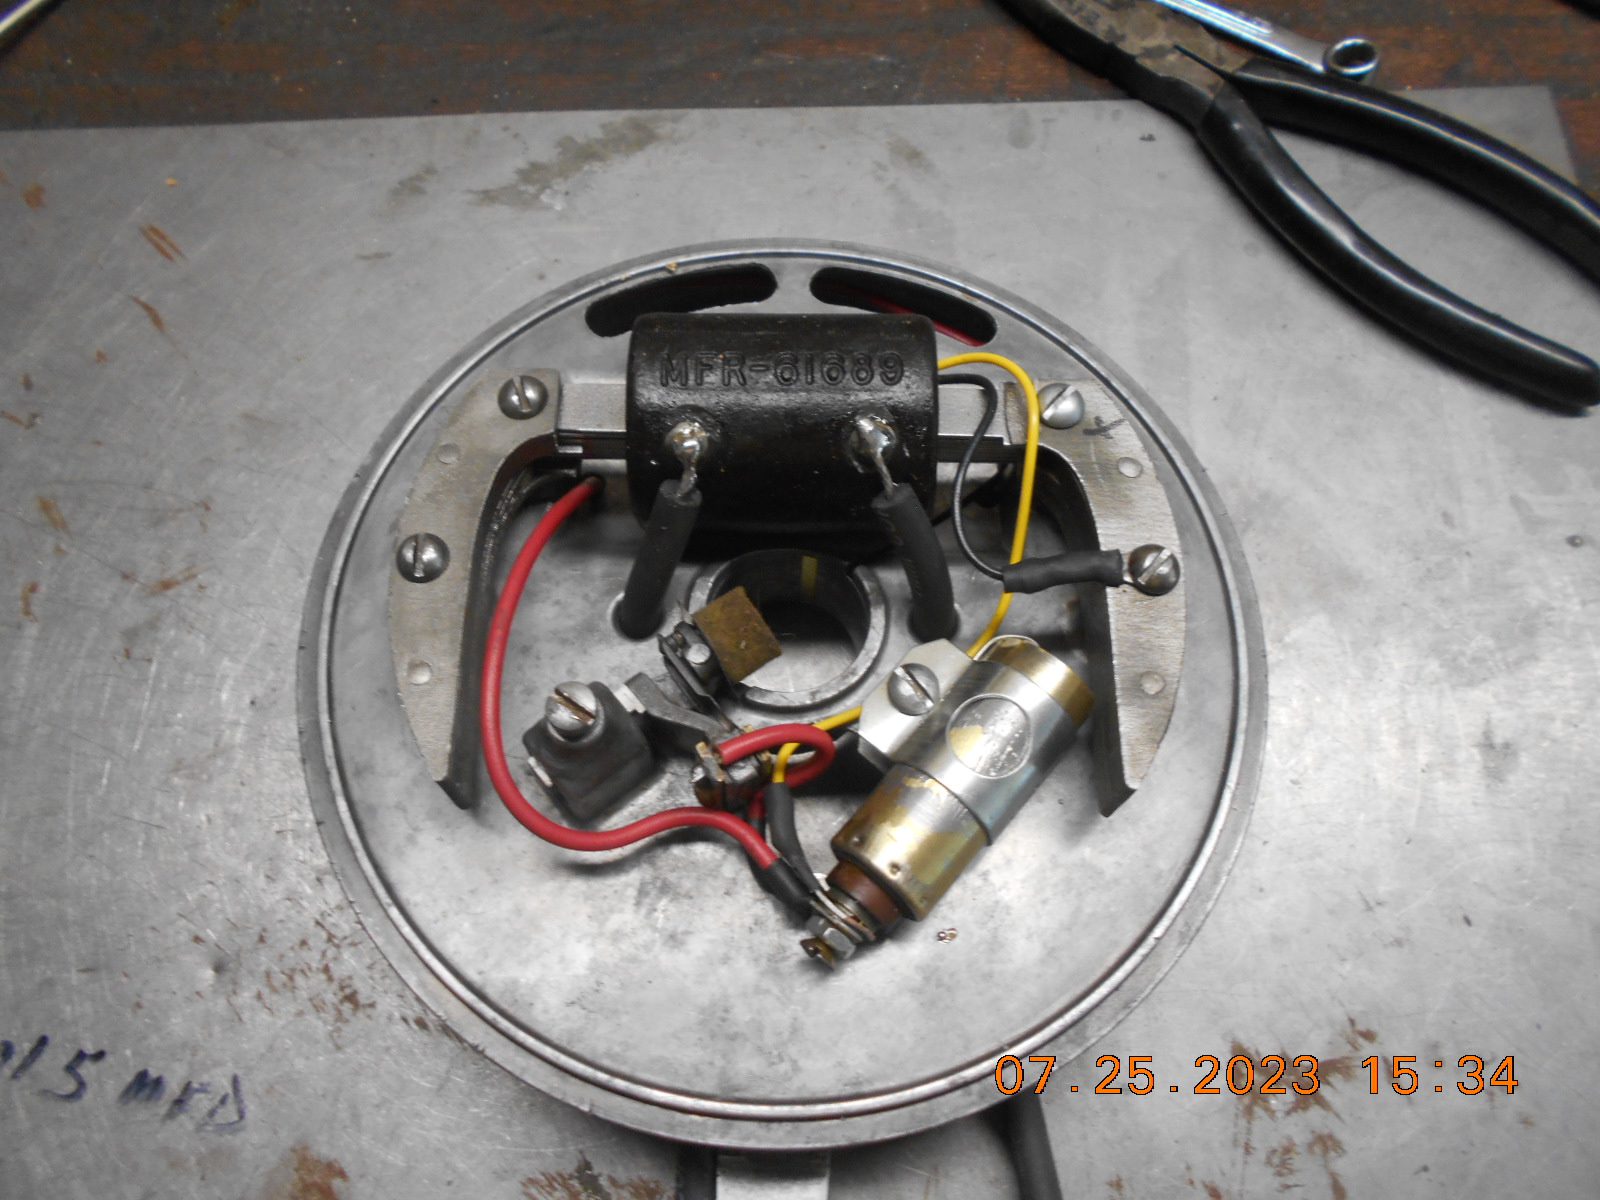
past, but never figured it out.Anyway, it appears to have / had good spark when I spun it over with the drill
for it’s film debut. When I stopped spinning the engine over with my cordless
drill, the motor kept turning, the drill did not, so it spun the flywheel loose. 🙁
No problem, I thought. I tightened it back down, and then had NO spark!!!!
I was afraid to pull the flywheel off to see what went wrong, after working on
this thing all day when it was 94 degrees out, but I did anyway.
It had the wrong flywheel key in the crankshaft, that wasn’t deep enough.
The flywheel nut starts threading on before the key and keyway line up.
It must have been “out of alignment”, and when I tightened the flywheel down,
it pushed the key flush with the crankshaft, hence the magic that makes the
spark did not happen.
Not sure if I put the wrong key in two years ago, or some other nimrod.
Hopefully I can remedy this tomorrow, and even do a test start in the barrel.VIDEO of Joy and Despair……


Prepare to be boarded!
July 25, 2023 at 6:34 pm #278501Very well done Buc……neat work!!
Thanks for the photos.
July 25, 2023 at 9:03 pm #278503The silicone addition to the process is a good discovery.
July 25, 2023 at 10:04 pm #278504Bucc, you do great work and much appreciate your sharing the knowledge and experience.
Thanks,
Joe B
PS, is that an old paper capacitor or a “retro-mod” with a modern cap inside?
September 1, 2023 at 5:34 pm #280035Very good work!! Thank you for sharing!! Anyone know the formula for thickness of laminations = gauss strength? I don’t know,but must be in a transformer book somewhere.
-
AuthorPosts
- You must be logged in to reply to this topic.