Home › Forum › Ask A Member › phelon vs scintilla magnetos
- This topic has 19 replies, 16 voices, and was last updated 8 years, 3 months ago by
 Tubs.
Tubs.
-
AuthorPosts
-
January 6, 2017 at 11:30 pm #50494January 6, 2017 at 11:39 pm #50495
Are Bendix and Scintilla magnetos the same thing?
So it sounds like I should stick with the scintilla magneto at least for the time being since the phelon conversion parts are harder to obtain and I already have all the parts I need for the scintilla type (except for good coils of course).
What type of ignition (magneto) did the KF-5 model have? some of each?
Thanks for all the help!
scottJanuary 7, 2017 at 3:41 am #50522quote opposedtwin:Are Bendix and Scintilla magnetos the same thing?So it sounds like I should stick with the scintilla magneto at least for the time being since the phelon conversion parts are harder to obtain and I already have all the parts I need for the scintilla type (except for good coils of course).
What type of ignition (magneto) did the KF-5 model have? some of each?
Thanks for all the help!
scottYes Scott, the Bendix and Scintilla magneto are different names for the same thing. As for the KF-5 motors, they also came with both styles of magneto’s. These are much easier to convert as there are plenty of parts available for them, and not nearly as costly. The Mark-5 that replaced the KF-5 were mostly Phelon as far as I have seen, but I think that some were built with the Scintilla system. The parts lists have both systems listed through Mark 5 production.
Steve
January 7, 2017 at 8:18 pm #50561I understand that phelon’s are a favorite but have proven harder to find.
I continue to have reasonable success with the Bendix ignition systems.
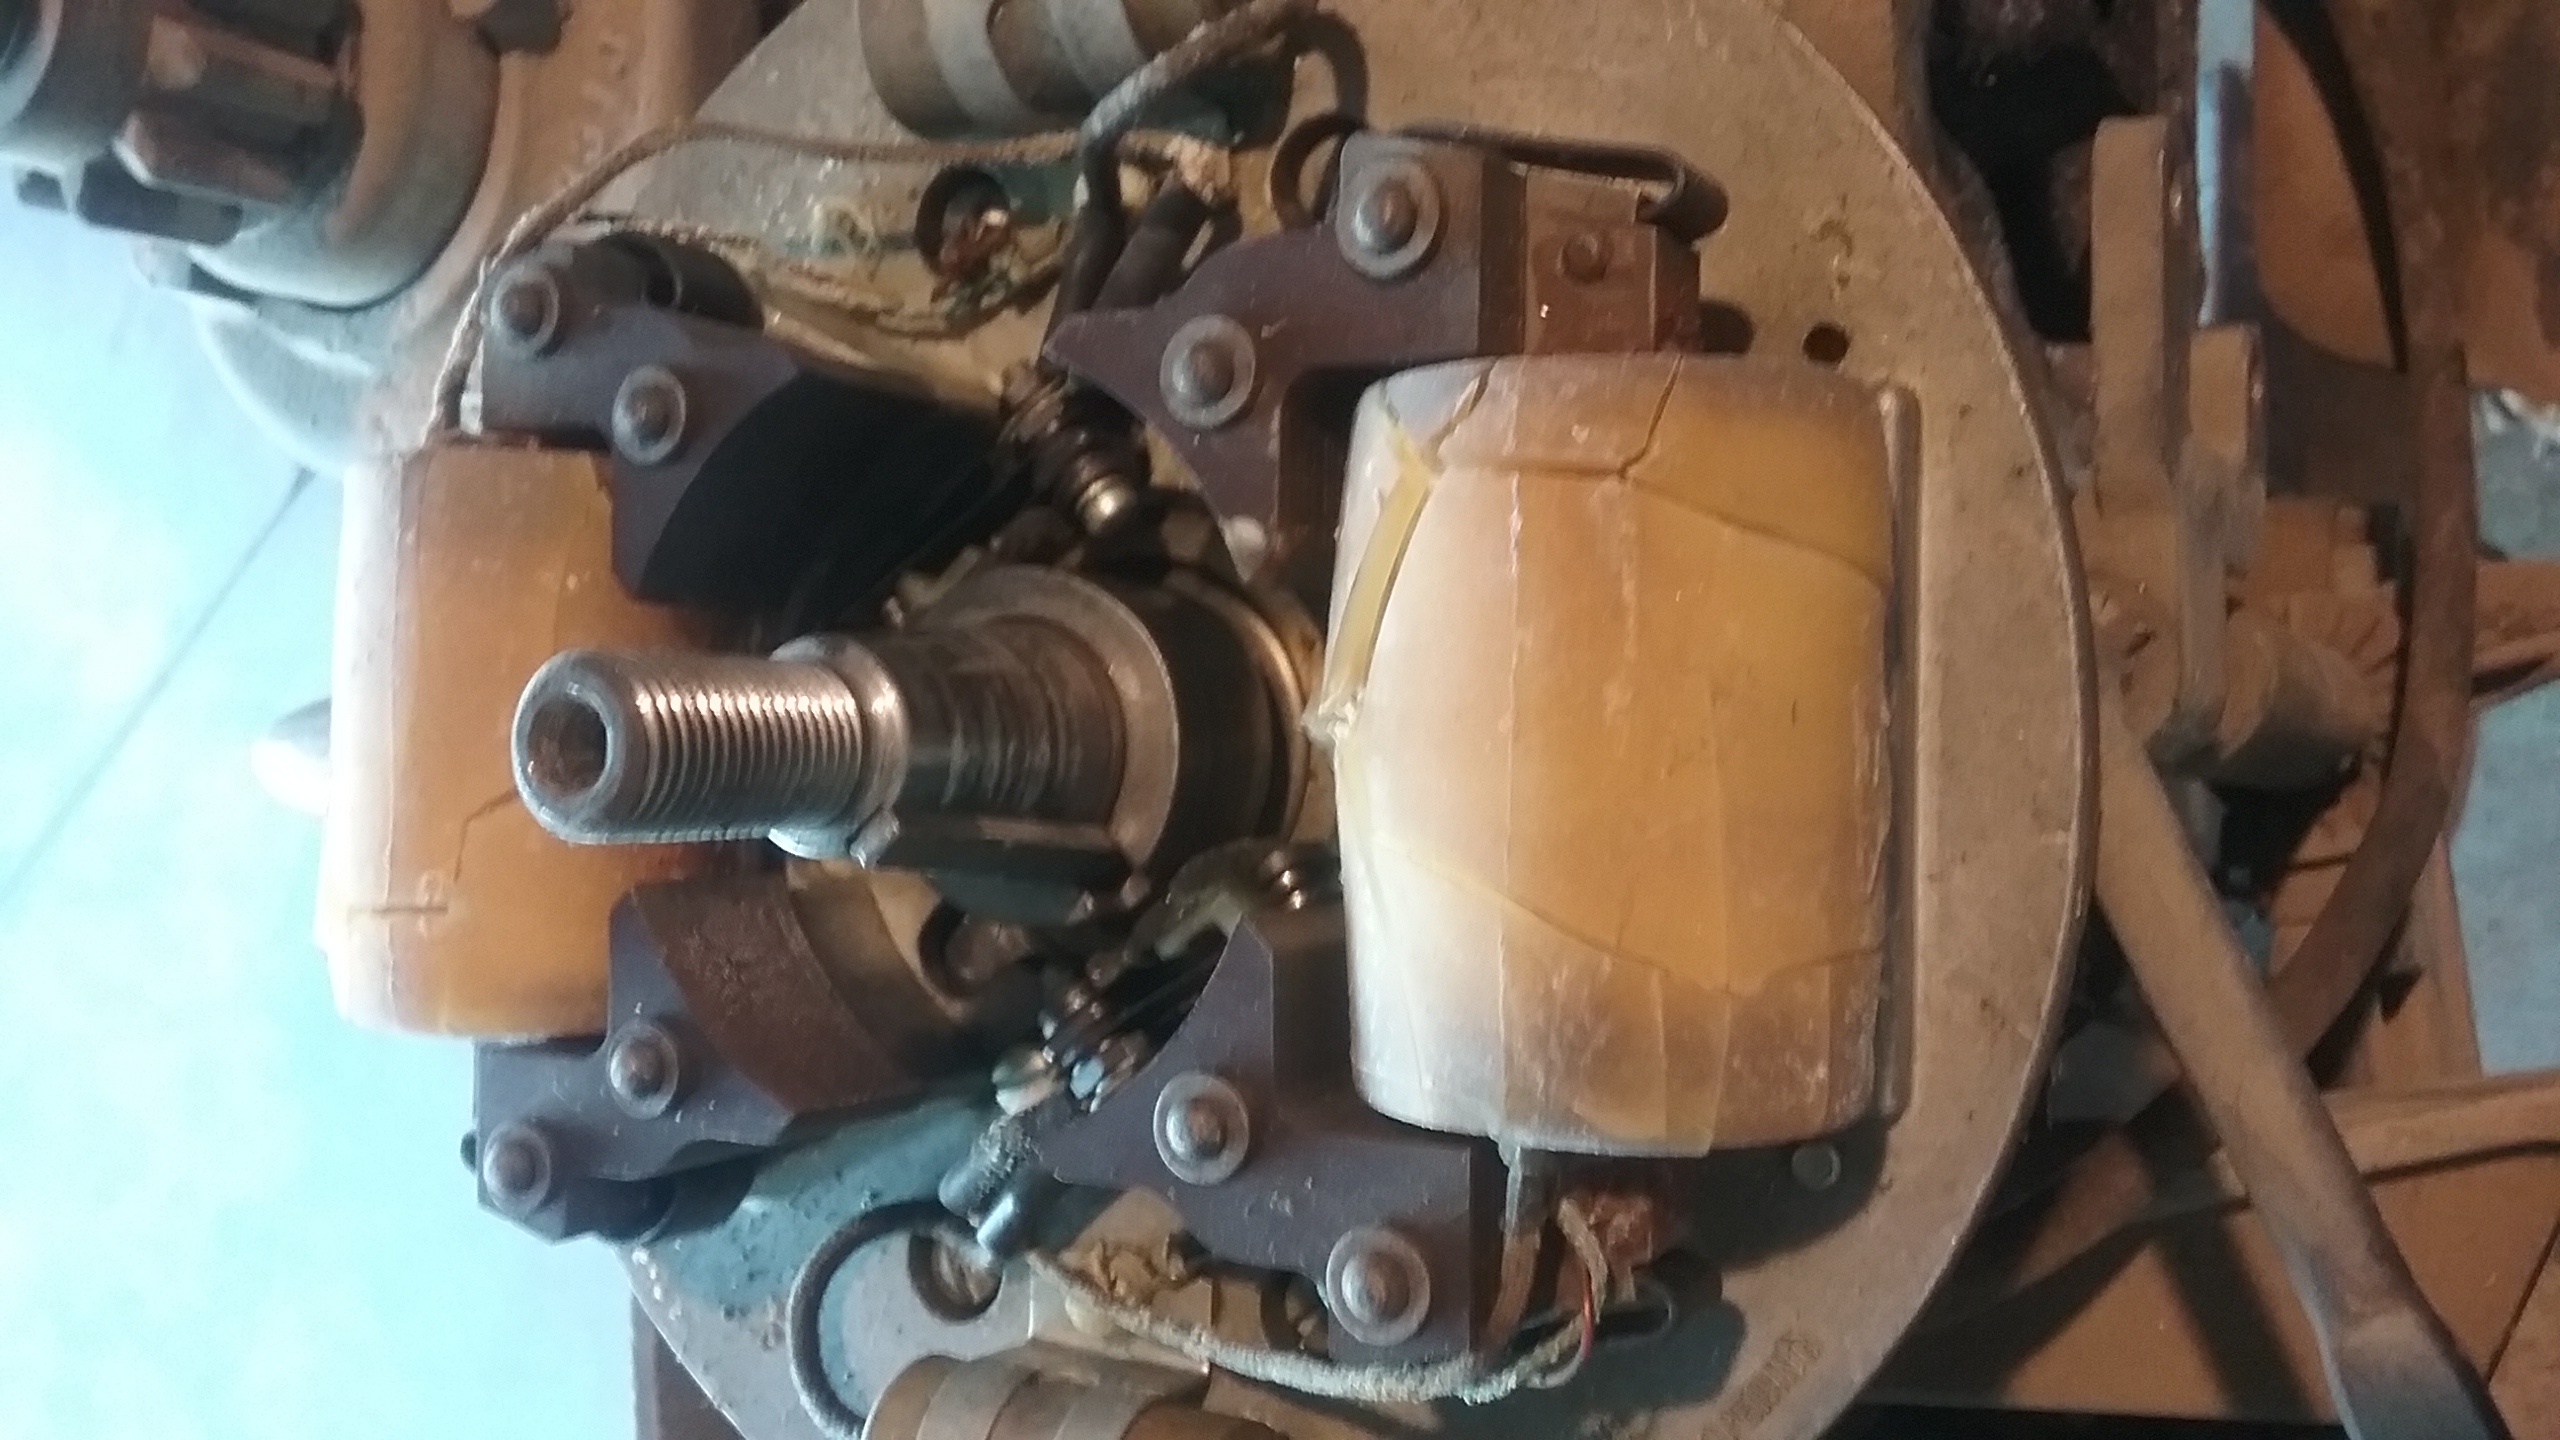
I have found a number of Bendix coils that have survived without cracking or with minimal cracks that I filled with plastic tape and then covered with heat shrink. Do not try and solder the ignition wire to the high voltage terminal. Just bend it through and around tightly.
I have also been using tune up grease in the rubber boot under the coil.
Make sure the condensors are good.
One person told me the problem is often in the magnet strength and not the coil/condensors so that might be worth a try swapping the magnet.
January 7, 2017 at 8:43 pm #50566When Bendix went to the bakelite cover they also put two spring loaded tensioners together on one side in a short period of running the crankcase would get out of round and the .003 clearance would be exceeded and no spark you could have it at WOT and idle but not I’n between or vise versa If you read the set up in the repair manual it discusses the requirement for the clearance and if you have one like this you can measure the clearance and change the throttle setting and if its worn the setting will change also. The points were supposedly platinum so unless rusted springs or worn out clean them and good to go The phelon mag plate flywheel and breaker cam will fix the problem as its tolerance is much greater
January 7, 2017 at 10:44 pm #50578If you are going to make a habit of working on outboards with Bendix Scintilla magnetos
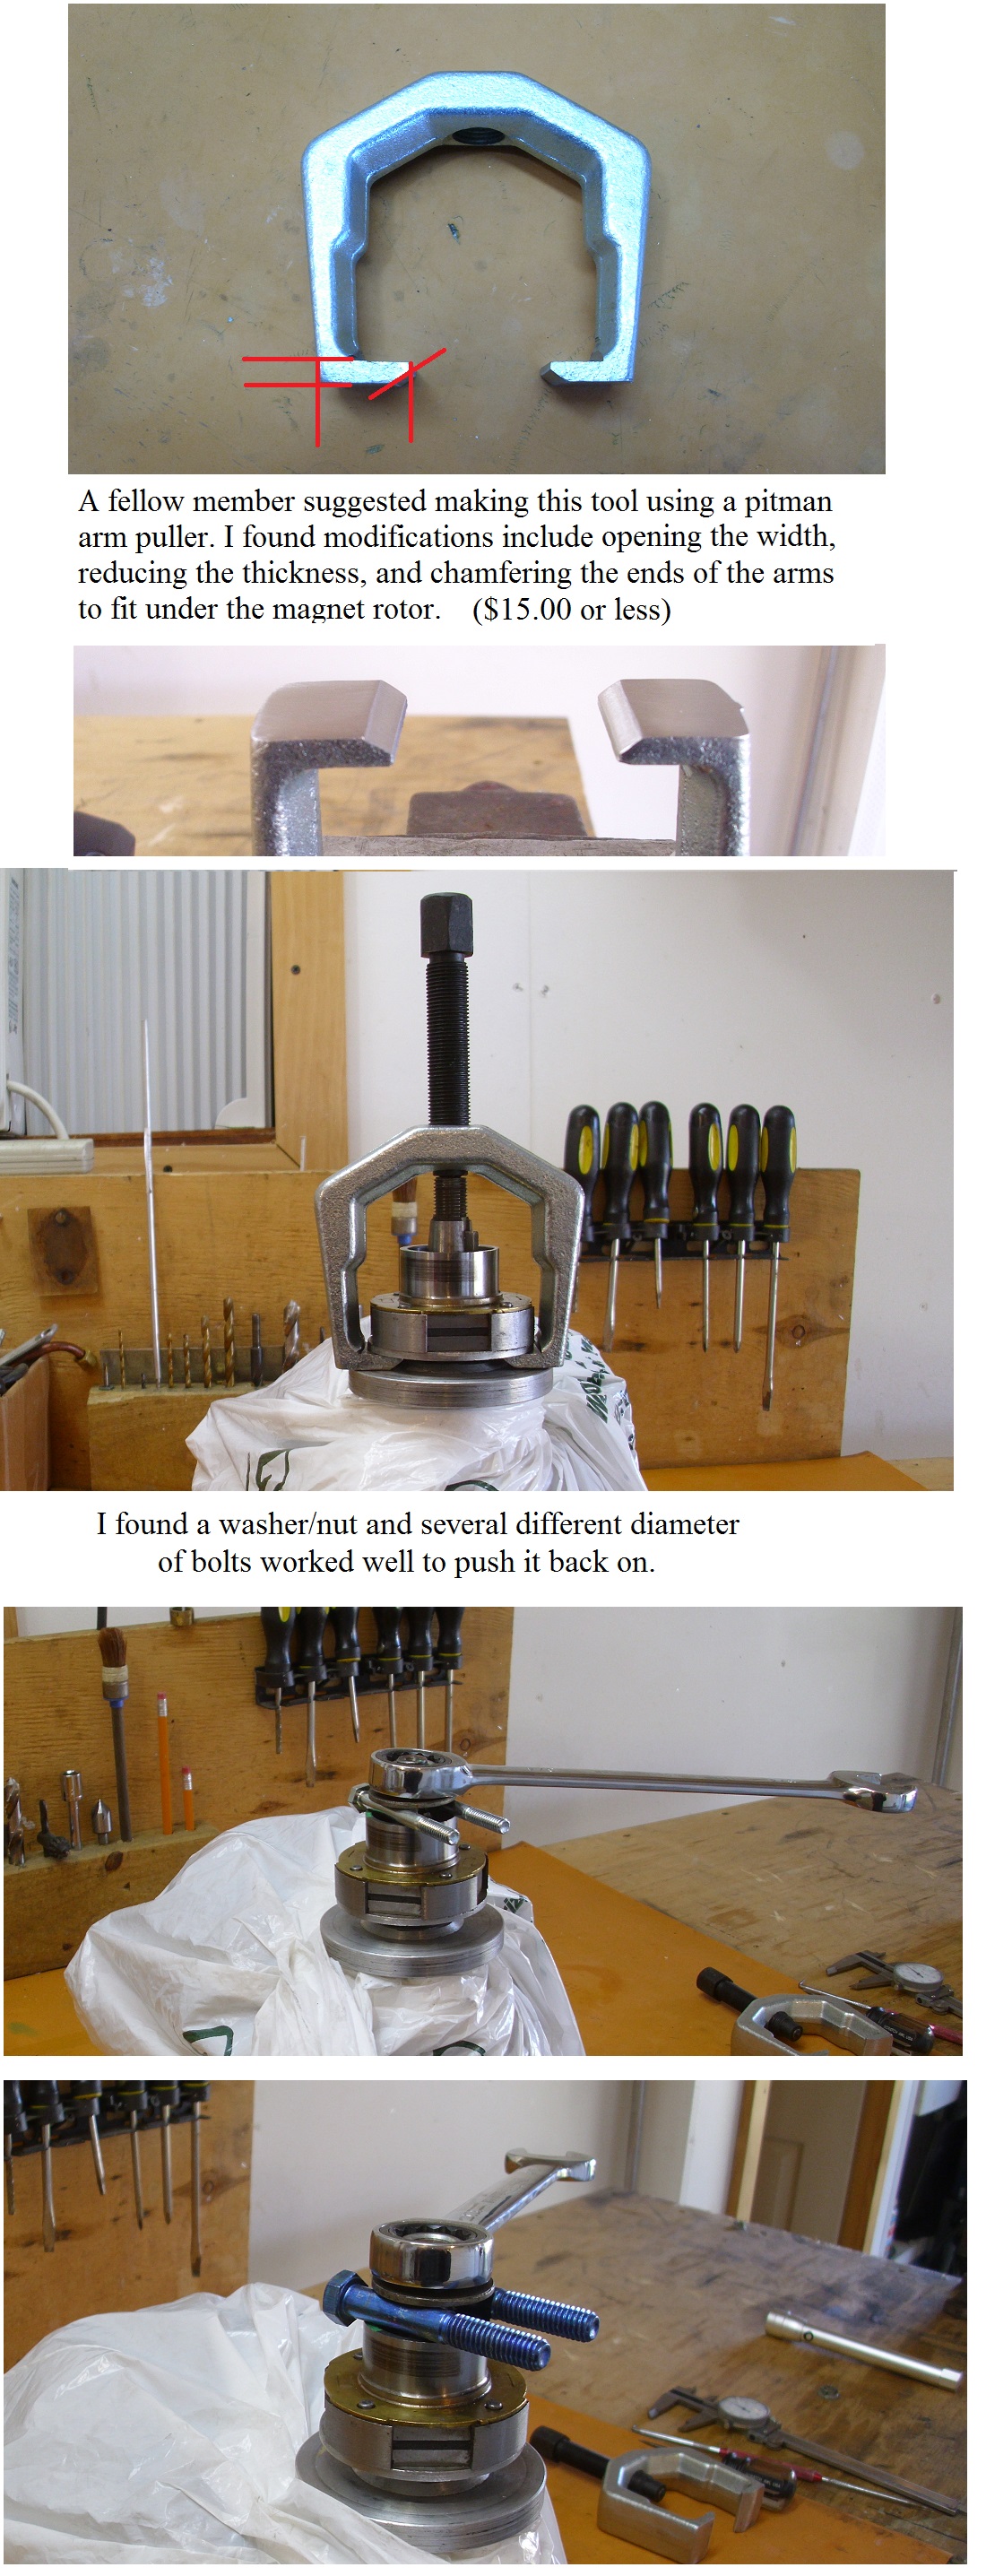
do yourself and the motor a great favor…get the correct Mercury Service Tools to remove and reinstall the magnet rotor. The rotors are a tight fit on crankshaft. Rotor can be cracked or broken by prying to remove or hammering to install. Phelon magnetos require no special tools so that may be part or reason for their popularity.
Replacement of upper crankshaft seal or removal of crankshaft first requires removal of Bendix magnet rotor. Often the upper seal is the same one the motor left the factory with. Bad upper seal contributes nothing good to performance of magneto or motor.Louis
January 8, 2017 at 5:11 am #50611January 8, 2017 at 5:40 pm #50639Anonymous
Excellent job on the tools Tubs!
January 8, 2017 at 8:25 pm #50669I would caution against using a nut directly on crankshaft threads. I did that ONCE installing rotor on a KE3 (after removing a broken rotor…) It was a tight fit and required force…got the rotor on but stretched the threads. Doctoring up the threads took longer than making a workable set of installing tools from 3/4" half threaded studs. Nothing fancy just face end of stud, drill hole and tap for either 7/16" fine or 1/2" fine. SOFT metal was easy to machine and already threaded for 3/4". Needed only a nut,washer and piece of pipe to complete. Later improved by milling a flat on threaded end so wrench could be used to hold crankshaft steady while nut pressed rotor into place. A hole drilled thru to accept a drift pin would work as well.
"Tools" can be made "good enough for present purposes" or they can be made to very high standard and finish. All that really matter are results.
LouisJanuary 8, 2017 at 9:51 pm #50677
In my case the rotary magnet went on with a minimal amount
of pressure. I believe the factory tool also uses the crankshaft
threads to push the rotor back on? I’ve only seen pictures and
that was a while ago. I cant seem to find a picture now.
The reason for larger and larger bolts is to make contact with the
rotor as the washer nut is all the way down on the crank shaft
threads.A "Boathouse Repair" is one that done without having tools or the skills to do it properly.
-
AuthorPosts
- You must be logged in to reply to this topic.


