Home › Forum › Ask A Member › RDE-18 powerhead to exhaust plate/gaskets
- This topic has 62 replies, 13 voices, and was last updated 5 years, 10 months ago by
 outboardnut.
-
AuthorPosts
-
February 5, 2017 at 5:16 pm #52439
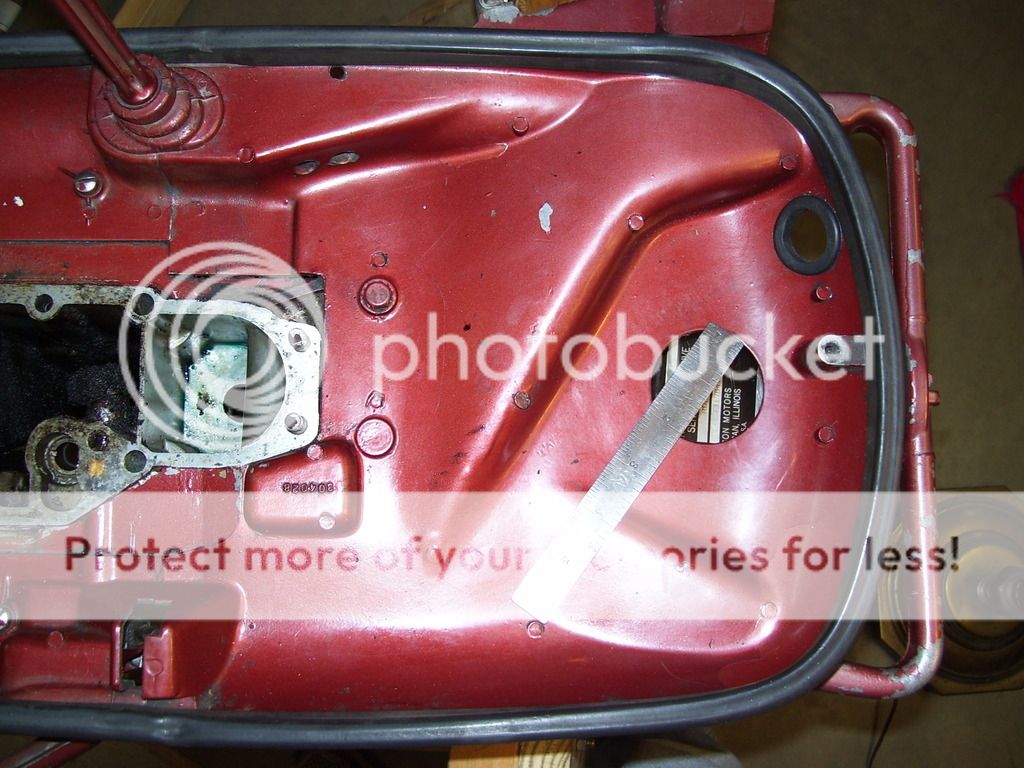
Richard here is a photo of my RDE-18 base plate. The hole is indeed 2 inches dia.
 February 5, 2017 at 5:27 pm #52441
Mine is from an RDE_17, and clearly is not that size, so I am thinking I should cut that out…
http://www.richardsoutboardtools.com
classicomctools@gmail.comFebruary 5, 2017 at 5:39 pm #52442Hoping that Garry in Tampa or FrankR will set us straight.
For RDE-18:
Baffle plate in or out?
Small plate blank or with two tubes?For RDE-17:
Open bottom pan hole to 2 inches?Thank you Billy J for bringing this up!
February 5, 2017 at 6:43 pm #52447Sorry, I just don’t remember the details of the plate. I’d say toss it. It really isn’t doing any good in there. Yes, open the pan to 2 inches.
February 5, 2017 at 7:13 pm #52450Top
User avatar
Richard A. White
MOB Chapter President
Posts: 846
Joined: Mon Mar 09, 2015 3:43 pm
Location: Kendallville Indiana
Contact: Contact Richard A. WhiteRe: RDE-18 powerhead to exhaust plate/gaskets
Report this post
QuoteUnread postby Richard A. White » Sun Feb 05, 2017 9:45 am
You mean open this hole up to 2 inches???
Anyone got a copy of tat service bulletin?55 Bigtwin.jpg
55 Bigtwin.jpg (314.56 KiB) Viewed 16 timesRichard A. White
AOMCI Member
MOB Chapter President
Yes I mean that hole you marked in your picture. I would just take a 2” hole saw and use the existing 1/4” hole as the guide and make the hole 2”. Nice green paint job ! My father bought my 1955 Johnson 25 HP. brand new and although I thought it was a good running engine it never had close to the top end the 1956 30 HP. had. I thought that was just the way it was until one of my relatives mentioned to me that the engine used to be pretty fast but it seemed that over time it got slower but still ran good. What I think happened was the new design cowl when new did not seat as tight on the rubber seal as it did when everything sat together in place for a long period of time and then the engine was starved air to the carburetor when it ran wide open. Then it just ran as fast as the air it got would let it never reaching it’s full speed potential. You can see the 2” hole in the picture of the 1956 pan author posted. Bill,February 5, 2017 at 7:59 pm #52456OLCAH, maybe I can shed some light on the little plate with no tubes on it as compared to the plate with the 2 water tubes on it. First of all my 1956 Johnson was my first attempt to bring a old outboard back to life. The man who helped me was John Dodge He lived on one of the Bass islands in Sandusky Bay Ohio. He was was giving a short seminar about 1950’s OMC engines at a wood boat festival in Huron boat basin. He inspired me to revive my 1956 Johnson 30 HP. which did not run for years and was seized up. He spent many hours on the phone with me and taught me how to properly go over a 50+ year old engine and make it reliable again. Every time I use this engine( and it does runs sweet) I always think kindly of him and how as a stranger he took the time to help me. But getting to the little plate. My engine when I took it apart had the plate with the 2 water tubes but the tubes were corroded short so at the time the part number was still good at the Bombardier ( Evinrude ) dealer where I was buying my parts so I ordered it. When I got the part it was the plate with no holes in it and it had instructions that the part with the 2 Tubes was superseded by this block off plate and the instructions said to install this plate and take a drill bit I think it said 1/4 inch diameter and drill about three or four holes inside of the above water exhaust outlet hole to the inside of the lower leg to let the exhaust gas out. I did not want to do this modification on my engine so I just got another used plate with the 2 water tubes in good shape and installed it in my motor. If you could look in the above exhaust outlet in the leg that the plate with no holes came off of if the exhaust I would be curious if this modification was done. Let me know. Hope this helps. Bill,
February 5, 2017 at 8:04 pm #52458Looking for my 2 inch hole saw now…LOL
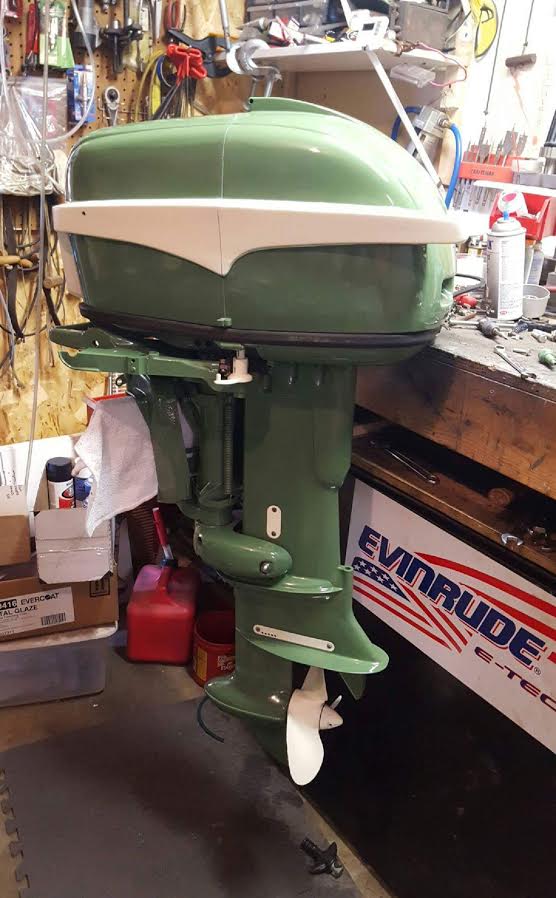
I am cosmetically as well as mechanically restoring this motor, new seals, pistons, rings, bearings, rebuilt gear case, rebuilt carb, and converted to 12 volt electric start…. It is close to being complete, except I am getting anal in my old age on paint quality.
http://www.richardsoutboardtools.com
classicomctools@gmail.comFebruary 5, 2017 at 9:00 pm #52460Re: RDE-18 powerhead to exhaust plate/gaskets
Report this post
QuotePostby Richard A. White » Sun Feb 05, 2017 3:04 pm
Looking for my 2 inch hole saw now…LOLI am cosmetically as well as mechanically restoring this motor, new seals, pistons, rings, bearings, rebuilt gear case, rebuilt carb, and converted to 12 volt electric start…. It is close to being complete, except I am getting anal in my old age on paint quality Nice detailed looking 25 HP. engine you have there. 1955 and 1956 are my all time favorite big twins. My 25 is electric start excellent original condition. I think the last time I used it was in 1984 and it needed to be gone over at that time. I never really gravitated to it as the 1956 30 HP. was faster so it was used more and took the beating over the years and the 25 was preserved indirectly from the 1/4 ” hole not being enlarged to 2”. It will probably be one of my next engines to do.I think I am lucky and it should have the carbon bottom seal but we shall see. I know this topic is about the 1956 30 HP. but the 1955 25 is so closely related in design I am sure a lot of parts get swapped between them. One thing my friend taught me was do not assume because parts from different years look the same that they are the same. If they have different part numbers for the year of engine they are listed for there is some kind of change that occurred. So you have to do your research.
February 5, 2017 at 9:30 pm #52462Richard I am drooling over the paint on your 25 HP. I just love the green as I remember when they were new.
February 5, 2017 at 9:35 pm #52464Bill,
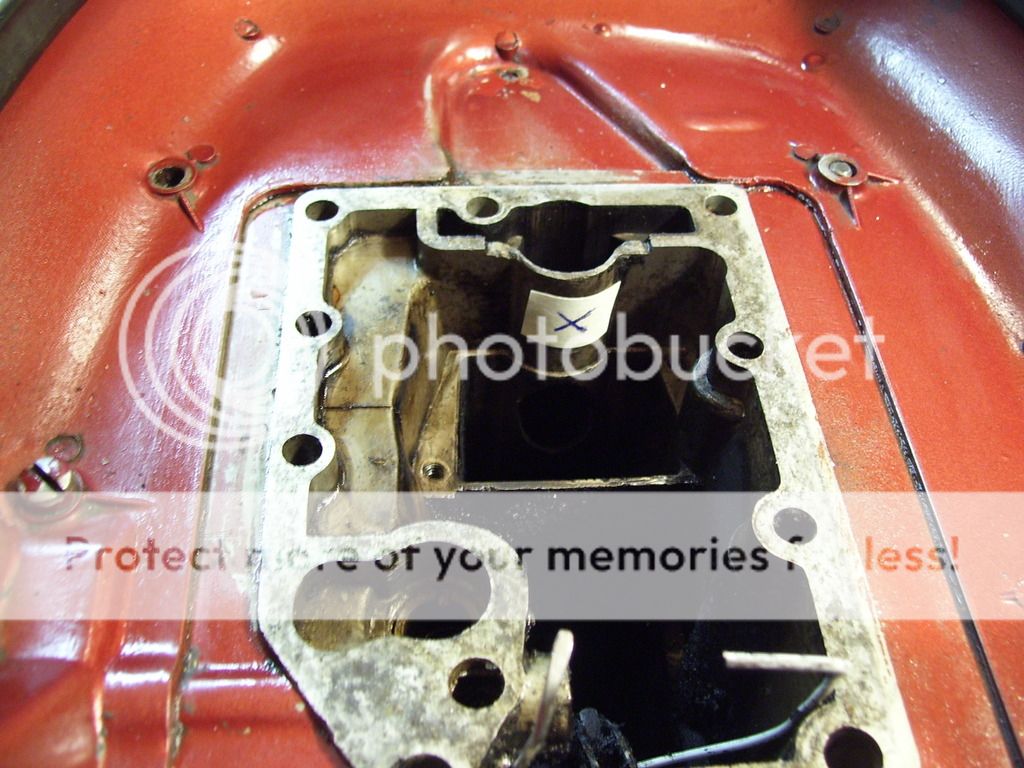
I assume that the drilled holes would be on the surface marked "X" in this photo or maybe a little to left and right of the "X". Is that correct? As you can see from the photo no drilling was done there even though that motor had the small blanking plate. I would be reluctant to drill also and I could use the plate with the tubes as you did. Thank you.
-
AuthorPosts


- You must be logged in to reply to this topic.