Home › Forum › Ask A Member › Replace Lower Crank Seal on 1957 Johnson 35HP?
- This topic has 22 replies, 9 voices, and was last updated 3 years, 5 months ago by
 olcah.
-
AuthorPosts
-
October 21, 2018 at 9:59 am #11622
Hi All,
I needed to remove the powerhead on my 1957 Javelin because the gasket between the powerhead and the lower unit was leaking… but that’s not my question.
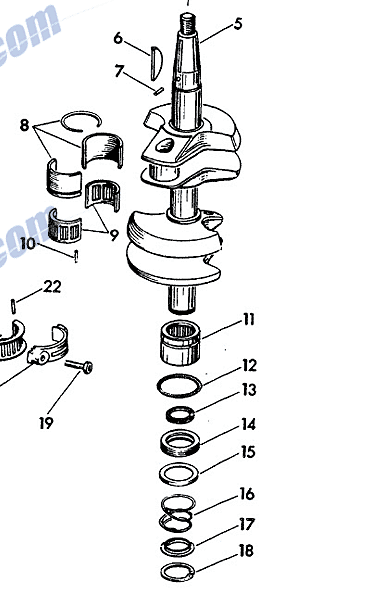
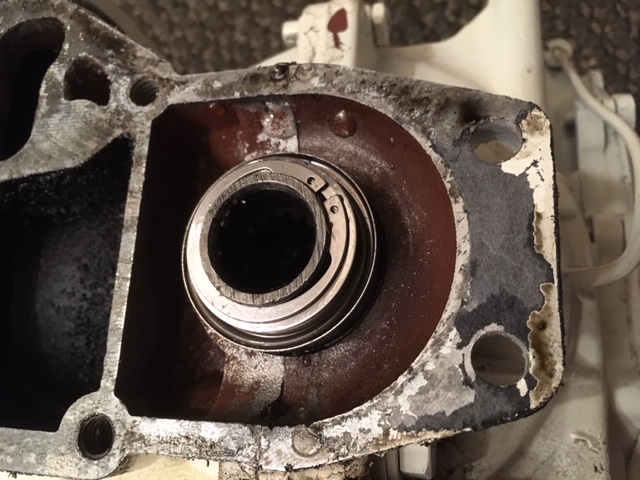
Here is my question: Since I have the powerhead off, should I be thinking about trying to replace the lower crankshaft seal? I don’t seem to find much mention of doing this replacement either in manuals or on youtube. I’ve attached a photo of the lower end of the crank and it doesn’t look to be leaking… but since I’m here and the powerhead is off should I think about doing some preventative maintenance? It looks like I’d need parts 12, possibly 13, and 14 from the crank diagram I’ve attached if I did replace it. Marine Engine has 12 and 14 but not 13. #14 is $27.50… so it’s on the edge of "might as well". Any thoughts from people that have been down this road before would be appreciated.
Attachments:
 October 21, 2018 at 11:44 am #84722
I just completed a similar job on a 1956 Johnson 30 HP. I believe the parts for 1957 are the same as for 1956. You have a carbon lower seal (good). #12 oring goes around the outside of the bearing. The only way to replace it is to open the crankcase halves. Since it is stationary (and probably sealed by congealed oil/gas anyway) I would not replace it. The carbon ring, #14 when new has a portion of the top surface raised up. That surface touches against to smooth bottom of bearing #11 and makes a seal. As the carbon wears that surface is worn down so you should replace depending on wear. The carbon is very brittle and thin wall. Don’t be surprised if you break it removing/installing it. You can find the carbon available NOS on fleabay/other suppliers at much lower price. You really need to replace #13 oring. It fits in the inner groove of the carbon. It too is available from others. For #13 experienced people recommend instead of using the 302540 oring with round cross section, that an oring with a square cross section #305098 be used. I have done that on a several seals but on one motor found that the square ring fitted too tight to get the carbon onto the crankshaft so used the oring on that one. The square ring is supposed to be able so slide without rolling as the crankshaft moves up and down.
When you remove the circlip notice which side is outward. I think you want the rounded edges to face outward but am not sure. Maybe others more experienced can shed some light on that.
Hope this helps.October 21, 2018 at 11:51 am #84723Nope, the sharp edges face outward (toward the end of the shaft). Agreed on everything else though.
October 21, 2018 at 11:55 am #84724I’ts been awhile, but I believe you can remove the snap ring, spring and cup washer, then remove the carbon ring. The big O-ring inside the carbon carrier can then be replaced. The carbon ring is brittle, and easily broken. Use a bent pick tool to gently remove the old O-ring. It will be hard as a rock. #11 and #12 will remain between the crankcase halves. I don’t think there is any reason to split the halves. You can just replace the big O-ring inside the carbon ring and be done.
October 21, 2018 at 11:59 am #84725Thinking about this some more, maybe I’m thinking of working on a different model motor? Maybe the carbon ring can’t come out without opening up the halves??
October 21, 2018 at 12:46 pm #84727Remove the snap ring and all the seal parts just slide or fall off.
October 21, 2018 at 12:55 pm #84728There is no need to open the crankcase unless for some odd reason you must replace #12.
October 21, 2018 at 3:28 pm #84739As stated, FOR SURE replace o ring #13 since you have the powerhead off!
Removing that circlip will allow everything to drop down. Inspect the carbon seal, if it is still good and not broken, it can be re used. Be gentle with it though. A lot of guys on here have hundreds of the square cross section #13 o ring, and Im sure would be glad to send you one. I am up in the Great White North, but if no one else offers, Ill send you a few o rings in the mail. I buy them in bags of 100.
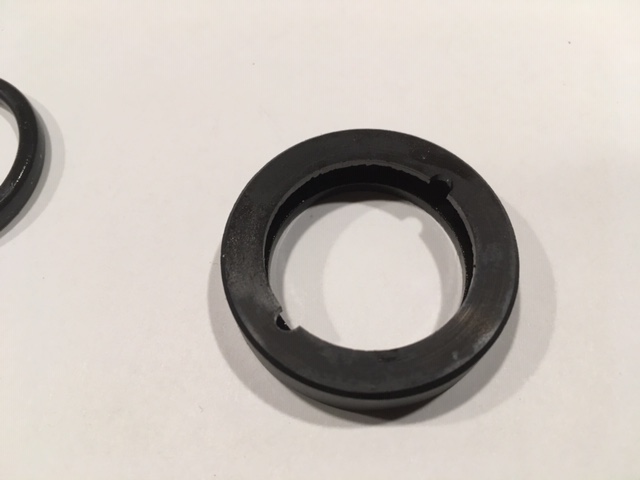
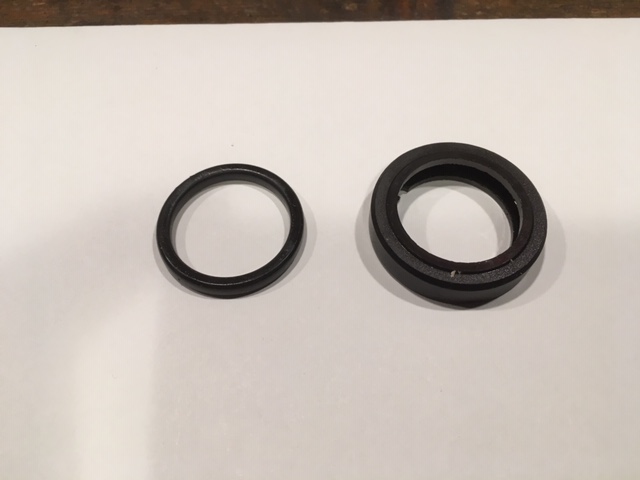
October 21, 2018 at 10:32 pm #84769OK… so I pulled the c-clip and was able to extract the carbon carrier intact and also remove the o-ring – #13 in the diagram. I didn’t pay close attention when I pulled the carbon carrier but I believe the ridge on the carbon carrier wants to ride against the crank as it spins and the face with the two notches points down towards the prop…. is that correct? I did find at least one source that had the o-ring #13 (http://www.myoldboatmotor.com/oil-seals-individual.html). After pulling #13 through #18 it’s clear that #12 fits around the notch in #11 and those aren’t going anywhere without splitting the case.
Attachments:
 October 21, 2018 at 10:39 pm #84770
That is correct
-
AuthorPosts
- You must be logged in to reply to this topic.