Home › Forum › Ask A Member › Two Line Gas Tank Seal and Gasket Replacement
- This topic has 14 replies, 7 voices, and was last updated 4 years, 12 months ago by
 Mumbles.
-
AuthorPosts
-
March 18, 2021 at 1:12 pm #234148
Recently purchased a two line gas tank along with my 1958 Evinrude 10 hp Sportwin. Couple of questions on the gas tank rebuild.
I purchased new gaskets and o-rings on Ebay.
1. Replacing the o-rings in the connector – – The new o-rings were very very tight and I could not put the connector back together. Used the old o rings which were still smooth and pliable. The new o-rings were quite a bit larger than the old. Did not want to force it. Please advise.
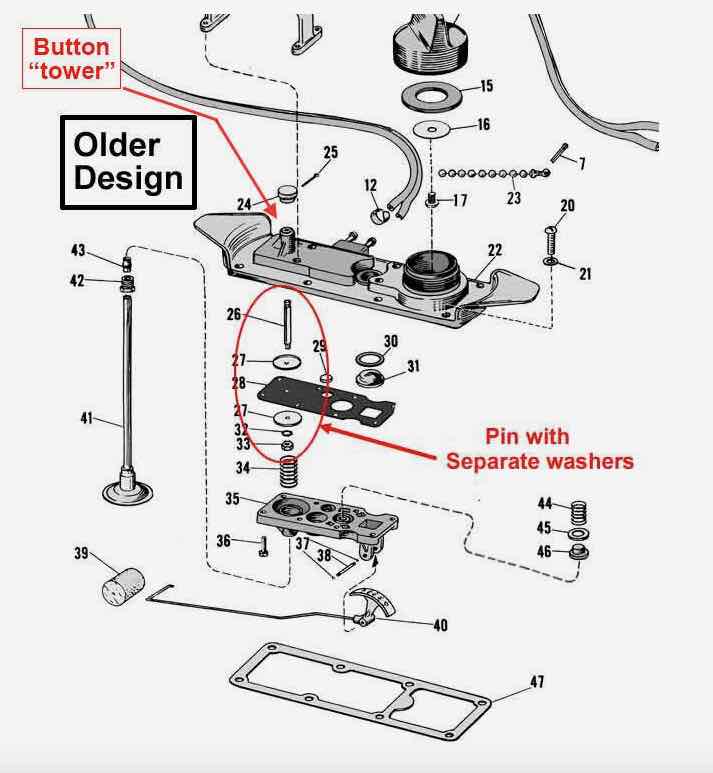
2. In the valve assembly – – from the diagram for the older design attached below.
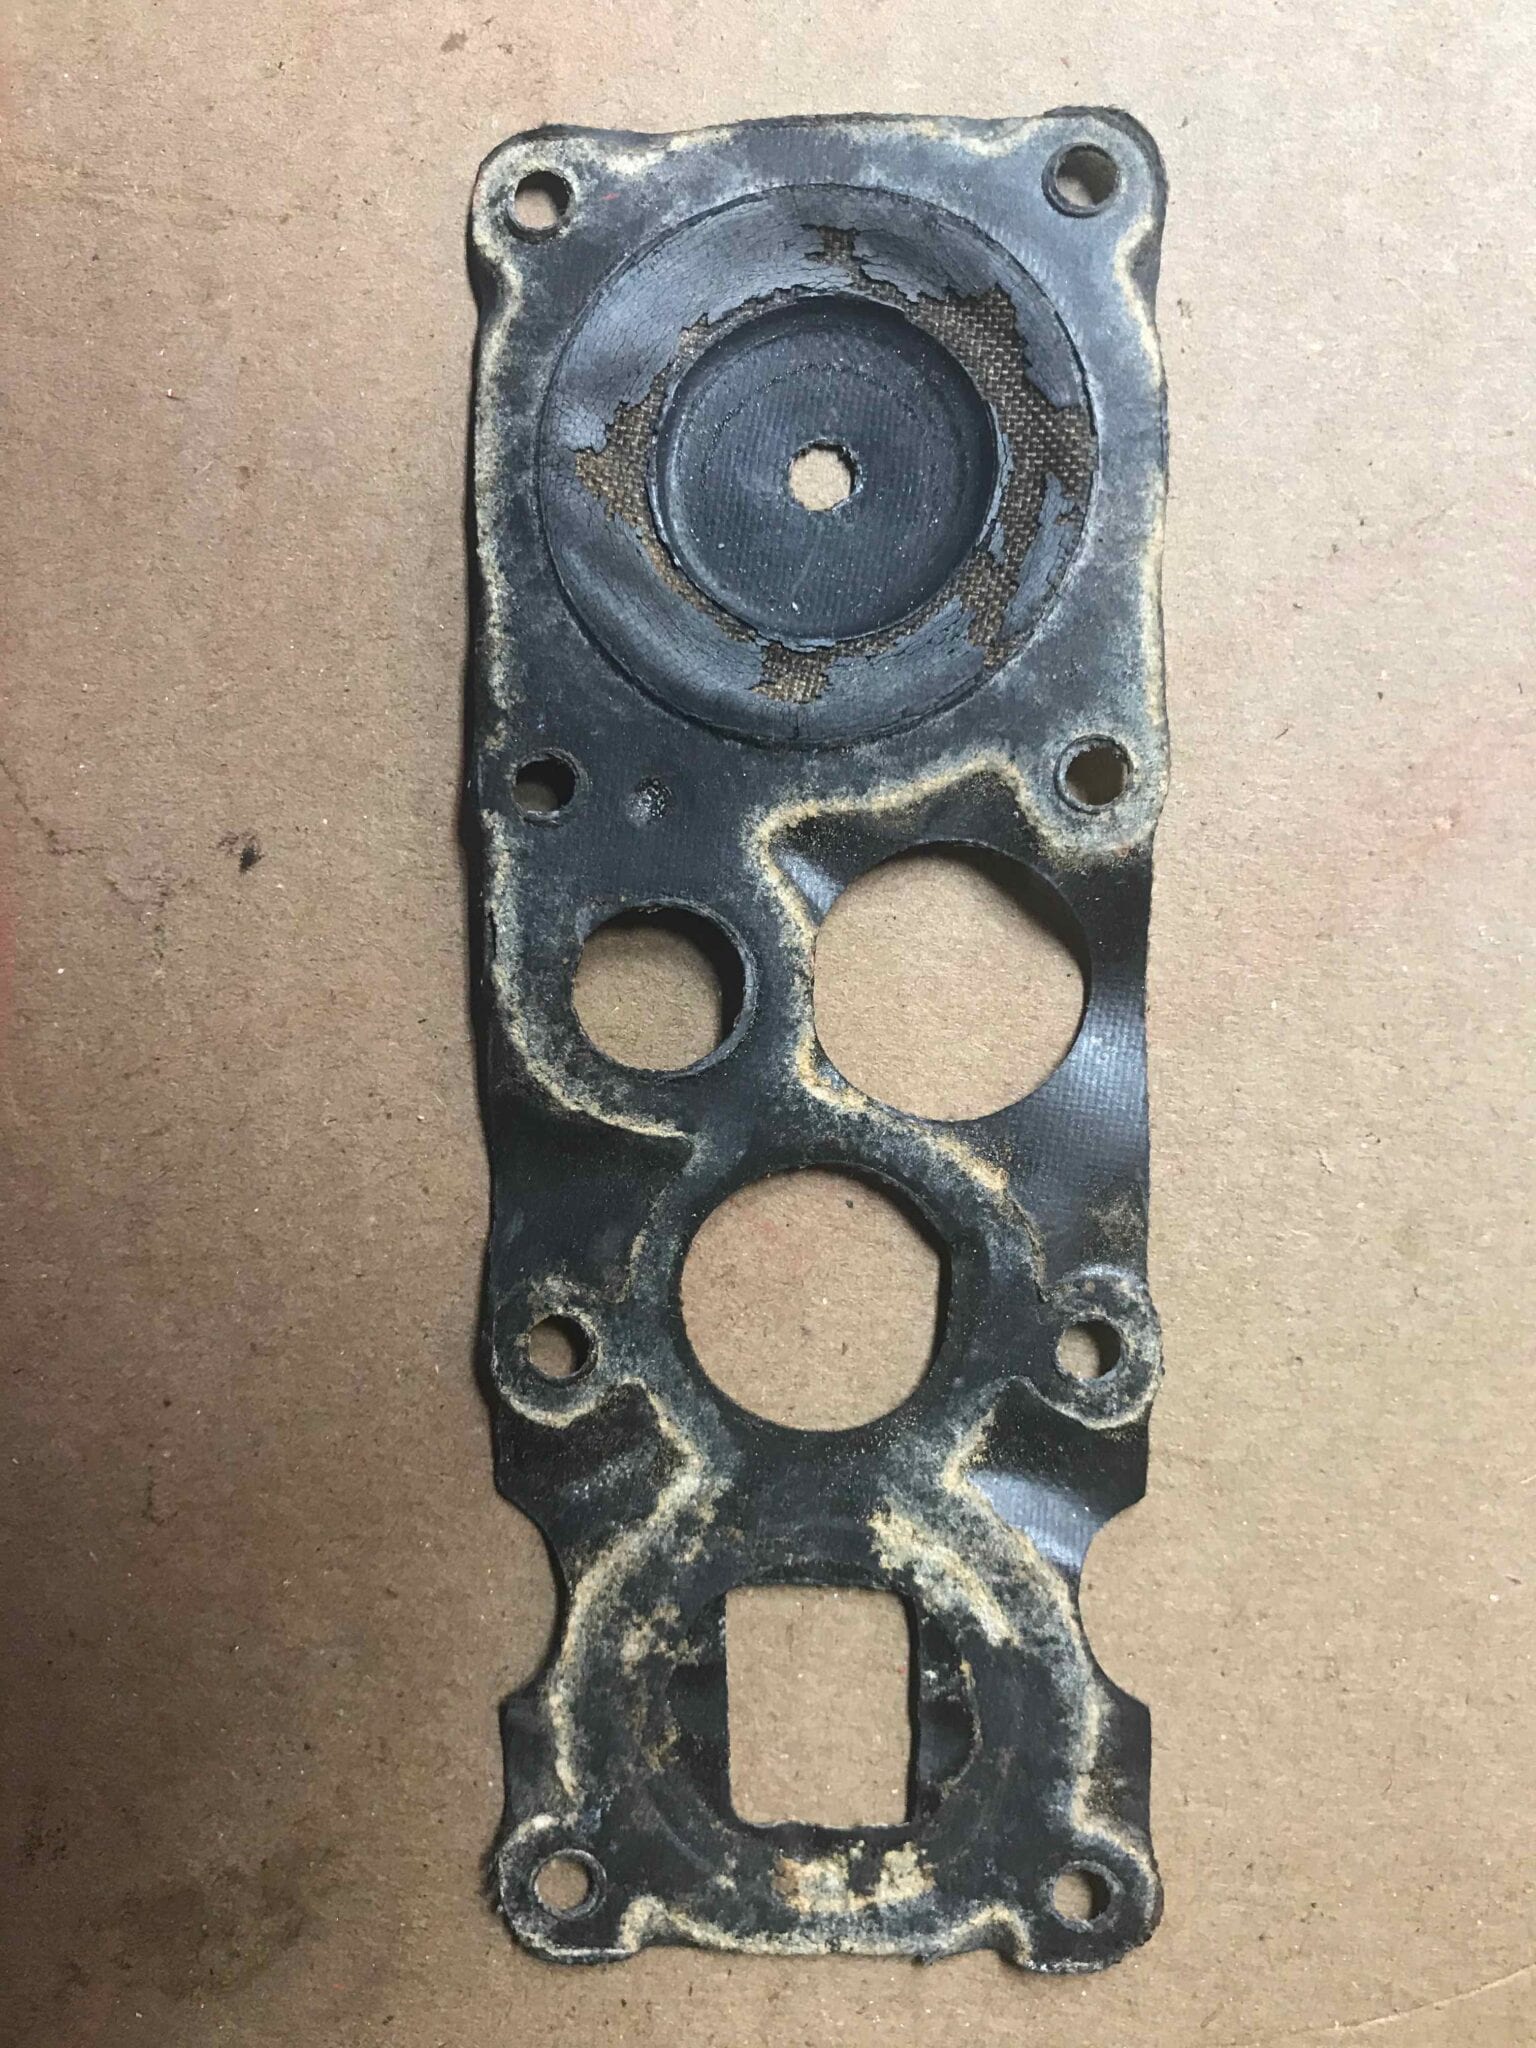
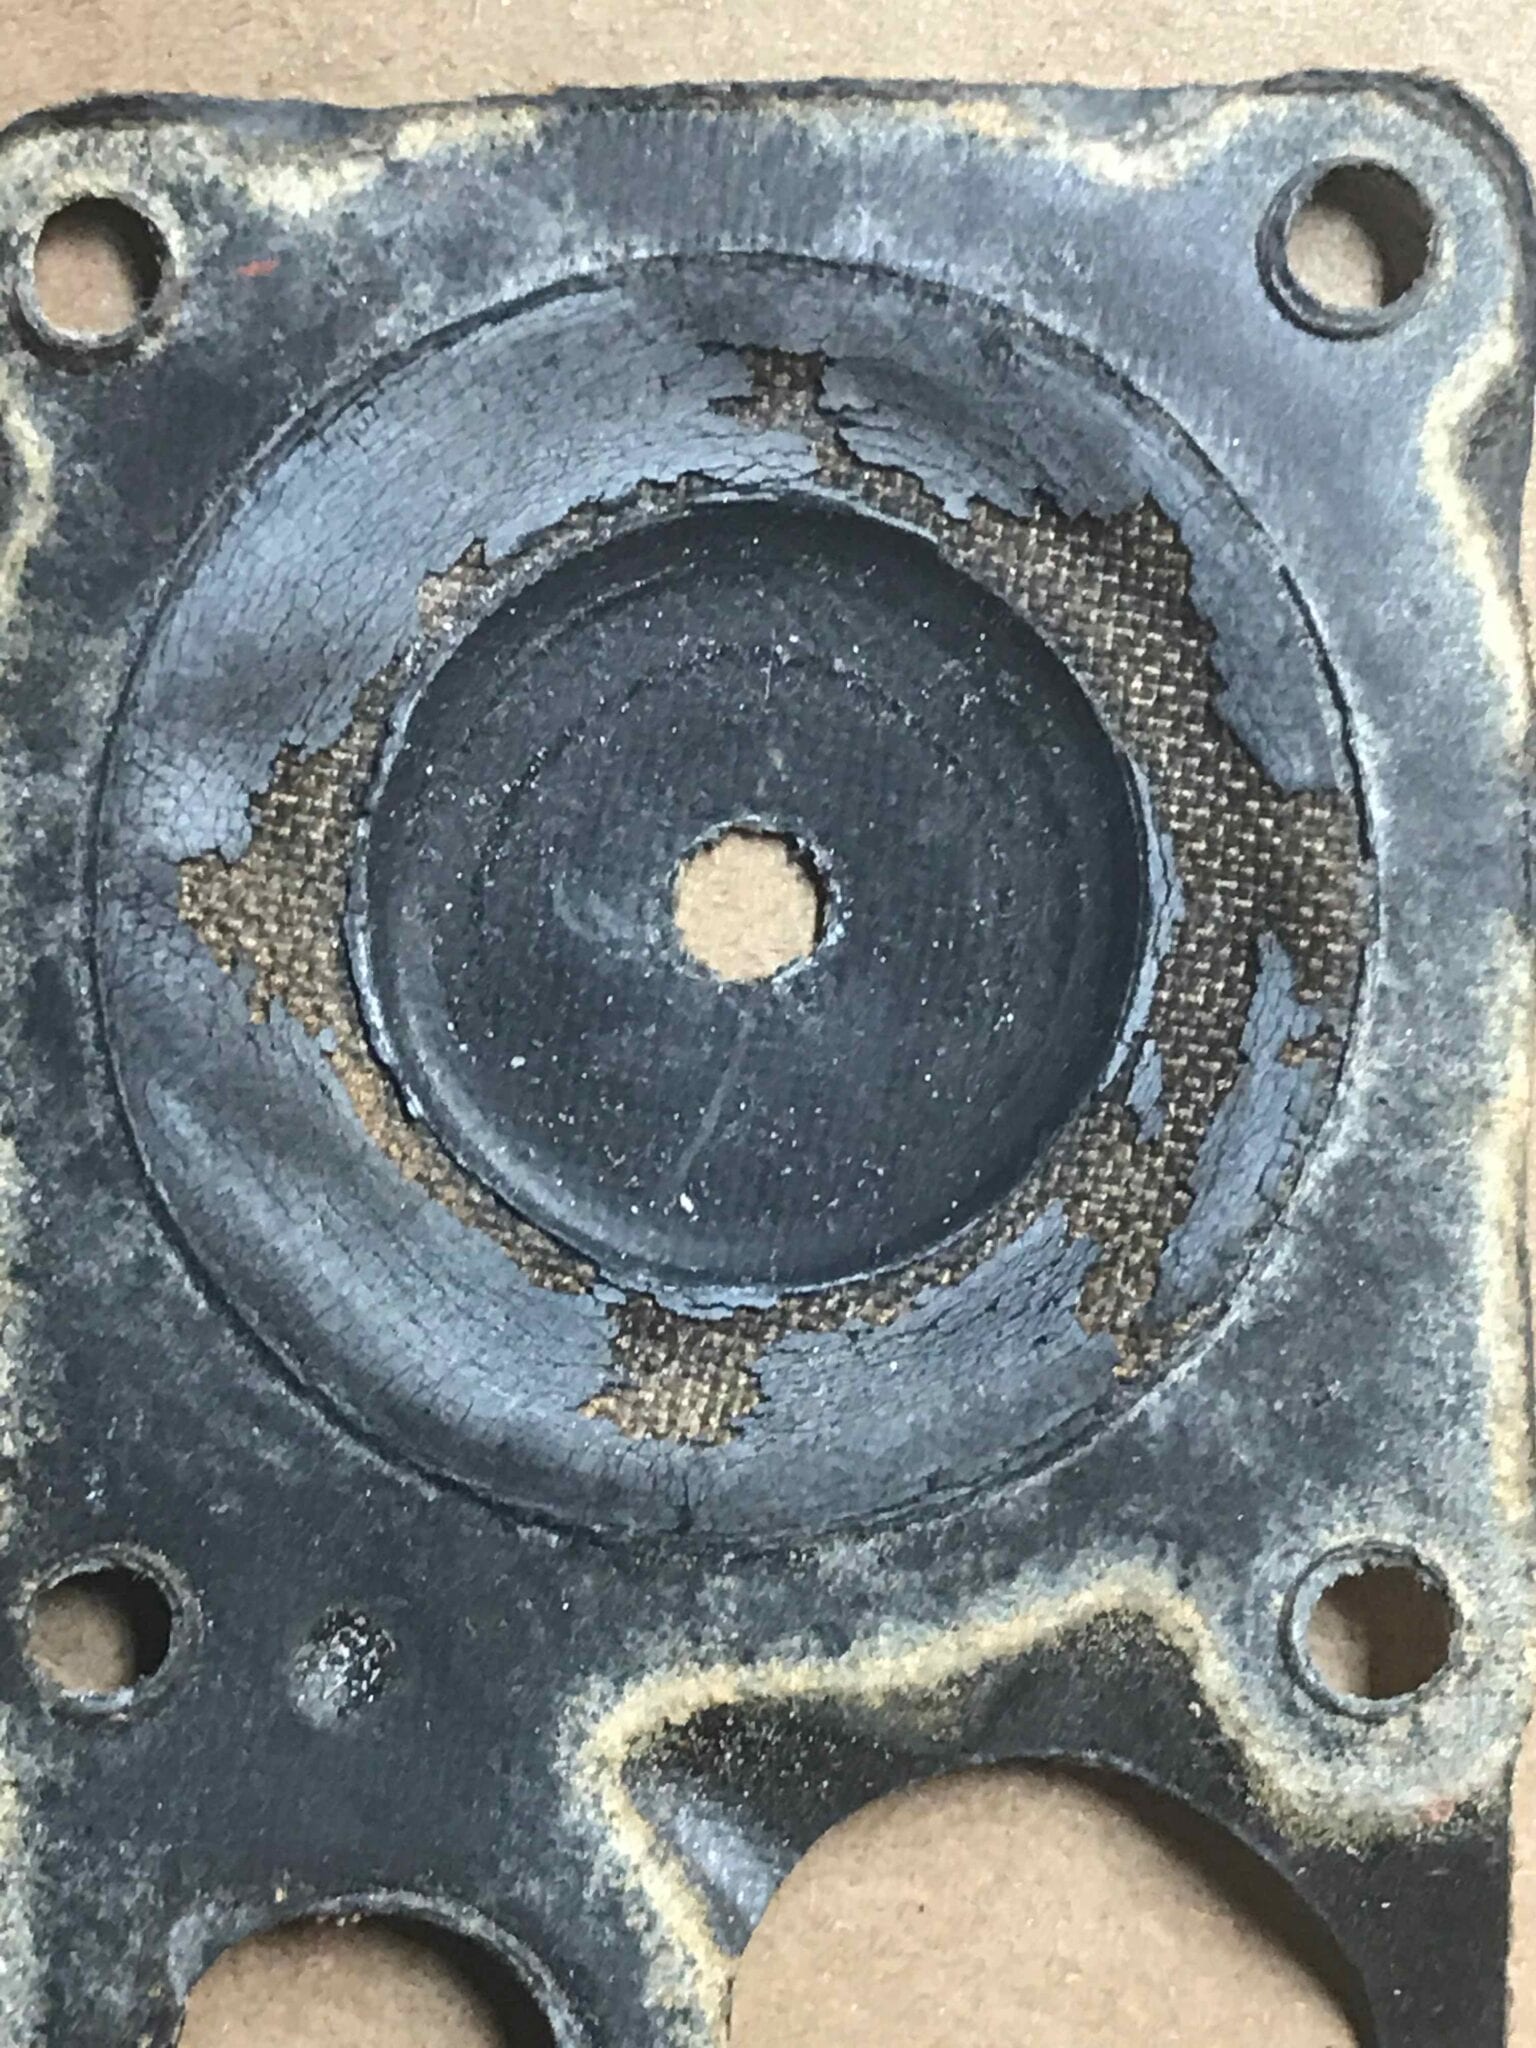
There was only one spring in my assembly Spring part #34 which looks like it provides the resistance and rebound for the plunger was missing, there was no spring #34 in my unit. It seems that the original gasket part #28 had spring mesh in it but to me it just looks like the foundation for the gasket was too weak to provide this function to provide rebound of the plunger.
I have not used this tank for my outboard which I recently purchased. Is it possible the previous owner just manually returned the plunger up and down to make it work?
3. In the valve assembly – – the spring in my unit came from parts 44, 45 and 46. What function does this perform.
4. The coating to the cork is gone so the indicator is not working, can I dry it out and re coat it, if so with what. The new cork is around $18. Will purchase if necessary.
Thank you.
-
This topic was modified 5 years ago by Mumbles.
March 18, 2021 at 2:14 pm #234160Spring 34 returns the diaphragm to its upper position so you can continue to prime the carb. Without it, you would have to lift the primer button manually each time it was pushed. Parts 44, 45, and 46 make up the pressure relief valve which starts to open if too much pressure builds up inside the tank.
March 18, 2021 at 4:49 pm #234216Because you have the older style tank with the aluminum button, it would be possible to pull the button up to reposition it for the next prime, but what a pain that would be. If the tank was the newer style with the bakelite button, there is no knob to grab onto, so pulling the primer upward would be nearly impossible by hand.
Regarding the o-ring fit problem, there should be no issue here. I have rebuilt many of these connectors with both OMC o-rings, as well as replacement o-rings bought in bulk. There are a ton of vendors selling replacement o-rings on Ebay, and the vendor may have sold you the wrong size. Bags of 50 to 100 can be bought from Grainger, McMaster Carr, etc. Send me a personal message, and I would be happy to send you a half dozen replacement o-rings if you send me a SASE.
It sounds like the cork float is degraded to the point of no longer floating, so recoating it will probably not work. The solution is to obtain either a new cork float, or find another float/arm from another tank that is in better condition. I have always done the latter, but have many times thought about replacement with a new homemade cork float. The bend in the wire float arm is definitely an obstacle to overcome. Do you heat it up, bend it straight, then install the float and bend it back hoping the wire doesn’t break? It really wasn’t designed to be replaced easily, but someone may have a “trick” for replacement. My only other idea is drill the cork to accommodate the wire, cut it in two halves lengthwise, then super glue the two halves together around the wire.
Improvise-Adapt-Overcome
-
This reply was modified 5 years ago by
aquasonic.
March 18, 2021 at 6:07 pm #234218Ethanol in the gas seems to be the main culprit that takes the coating off the cork. I’ve recoated with clear hot fuel proof model airplane “Dope” successfully, but some have had trouble making this stay on long term. Some have coated with superglue with good results.
I replaced a cork float once with one from a wine bottle, and that went on fairly easy, but someone told me I didn’t need to coat it so I didn’t and after a while it sunk. We had a discussion here a while back and found not all wine corks are created equal – some are open-cell cork and some are closed cell cork, which is preferred, but how do you know which you have?….and some that look a lot like cork are actually a manmade polymer, and I would not trust that to hold up in gasoline.
There may be an opportunity here for someone to start manufacturing sealed cylindrical brass floats like were used for gas gauges in cars back in the 1950’s. Maybe someone can 3D print a sealed float with a material that holds up in gas. Maybe an ABS plastic? I know Polycarbonate plastic will breakdown in gas. My son got a 3D printer recently – I’ll have to take a tank apart when the weather warms up and see if he can make a float that works. Would have to figure out how to attach it to the wire – maybe some detail could be molded onto the float for the wire to snap into.
DaveMarch 18, 2021 at 6:13 pm #234220use a new merc carb cork replacement.
March 18, 2021 at 9:28 pm #234230Neoprene works great. Carefully bend the end of the rod.
March 19, 2021 at 5:46 am #234247Neoprene works great. Carefully bend the end of the rod.
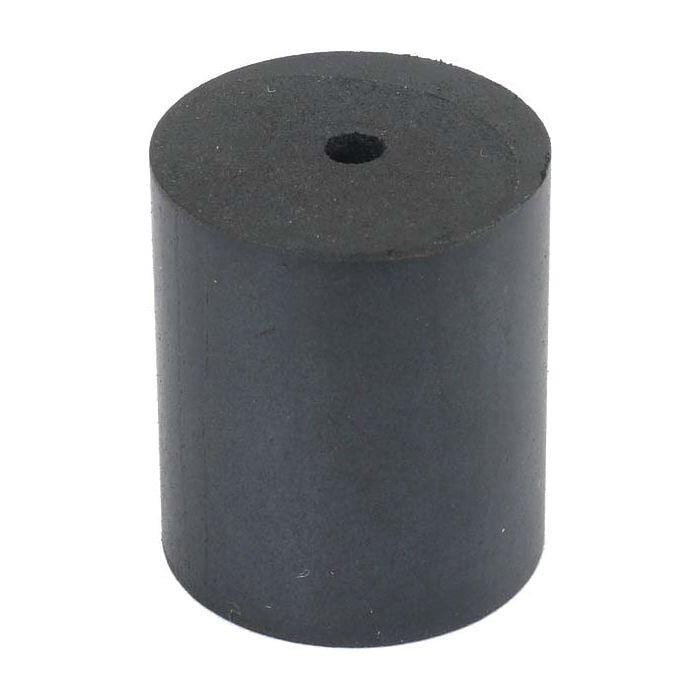
Looks like a good idea. Any specifications on the size?
Improvise-Adapt-Overcome
March 19, 2021 at 7:23 am #234252Mike, here is a link to the Grainger site showing the information that you asked me for. The nominal specs are 3/32″ x 7/32″ x 13/32″, indicating cross section, ID, and OD. The actual sizes are slightly different, see the specs. The composition is buna-n rubber with the durometer (hardness) of 70.
https://www.grainger.com/product/FABORY-O-Ring-41UK05
Improvise-Adapt-Overcome
-
This reply was modified 5 years ago by
March 19, 2021 at 7:45 am #234260JB weld epoxy seems pretty fuel resistant has anyone tried a thin coat of JB over a cork float ?
Joining AOMCI has priviledges 🙂
March 19, 2021 at 9:01 am #234269Thank you. Grainger has a branch about 30 minutes from my home.
The o-rings received from EBay are larger on both the thickness (9/64 vs 3/32) and outside diameter (7/16 vs 13/32) which would make them more difficult to install.
-
This topic was modified 5 years ago by
-
AuthorPosts
- You must be logged in to reply to this topic.