Home › Forum › Ask A Member › Wisconsin M RBM poppet valve carb
- This topic has 23 replies, 7 voices, and was last updated 3 years, 5 months ago by
 Buccaneer.
-
AuthorPosts
-
September 5, 2021 at 10:31 pm #246221
I’ve reviewed your 2 minute video and have come to the conclusion that its your choice of radio station that is screwing up your motor. Seriously. Play some classic rock before your motor barfs on you…..
I’ll repeat that I agree with Harry that it sounds like a fuel supply issue but add that I do not believe it is poppet valve related. Continue with the valve stem refurb, but even as sloppy as you describe it (and 15 thou clearance is not out of the ordinary for something that old) it shouldn’t cause your engine to start, run briefly, then lean out and quit. Dunno where your needle is being set at and what condition it is in, so maybe fill us in on that part and I may have further opinions to add/subtract. The needle profile and fit in the orifice is as important as any other factor in getting a motor to run its best.
Like I wrote earlier, I made a new poppet for a Blakely gearless because the old one was so sloppy. The new one didn’t solve my non-start issue that was compression-related, but once the compression leakage issue was rectified, the new one didn’t make the motor run any better or worse than the old one. I’ve reverted to running the old one with its 0.030″ clearance between the stem and casting and the motor runs fabulously well.
Hope it helps.
Best,
PM T2He's livin' in his own private Idaho..... I hope to go out quietly in my sleep, like my grand-dad did..... and not screaming, like the passengers in his car...
September 5, 2021 at 10:51 pm #246224Guess I need to figure out how to get Sirrus radio in the garage, but
presumed the Wisconsin would run better listening to something
from the roaring 20’s? My tin garage and radio’s don’t seem
to get along, and most days only get the station 30 miles away.I got the best results in starting, and longest run, with the
needle a quarter turn open, maybe a little more.
I actually took the poppet valve out once, and had no
flow out of the little valve seat passage, with the needle shut off.
At 1/4 turn open, I had a slow, but steady drip.
I believe I’ve flooded the engine more times than not in trying
to get it started, but part of the problem may have been the buzz coil.
The needle’s seat looked kind of “iffy”, and I actually took the
nut off the needle and tapped it gently with a brass hammer into the seat,
to see if I could improve the looks, and operation of the seat.
Best I can say, is that it does stop flow when the needle is seated.After forgetting the tank fuel valve open the other night, and ending
up with gas all over the floor, and in every orifice of the motor,
I came to the conclusion that the poppet valve and seat could
use some improvement, but expect things would have to be
perfect on the seat to not let any gas leak by overnight.All I know, I’m tired of doing the same thing over and over and getting
the same results, so nothing ventured, nothing gained.
Thanks for the tips!Prepare to be boarded!
September 6, 2021 at 9:03 am #246226
A "Boat House Repair" is one that done without having tools or the skills to do it properly.
September 6, 2021 at 11:18 am #246231Thanks for the advertisement Tubs, I didn’t have that one.
That ad is circa 1925, going by the article below.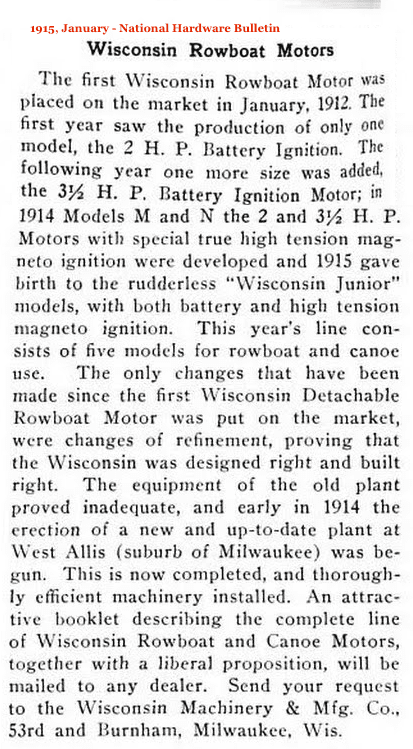
Prepare to be boarded!
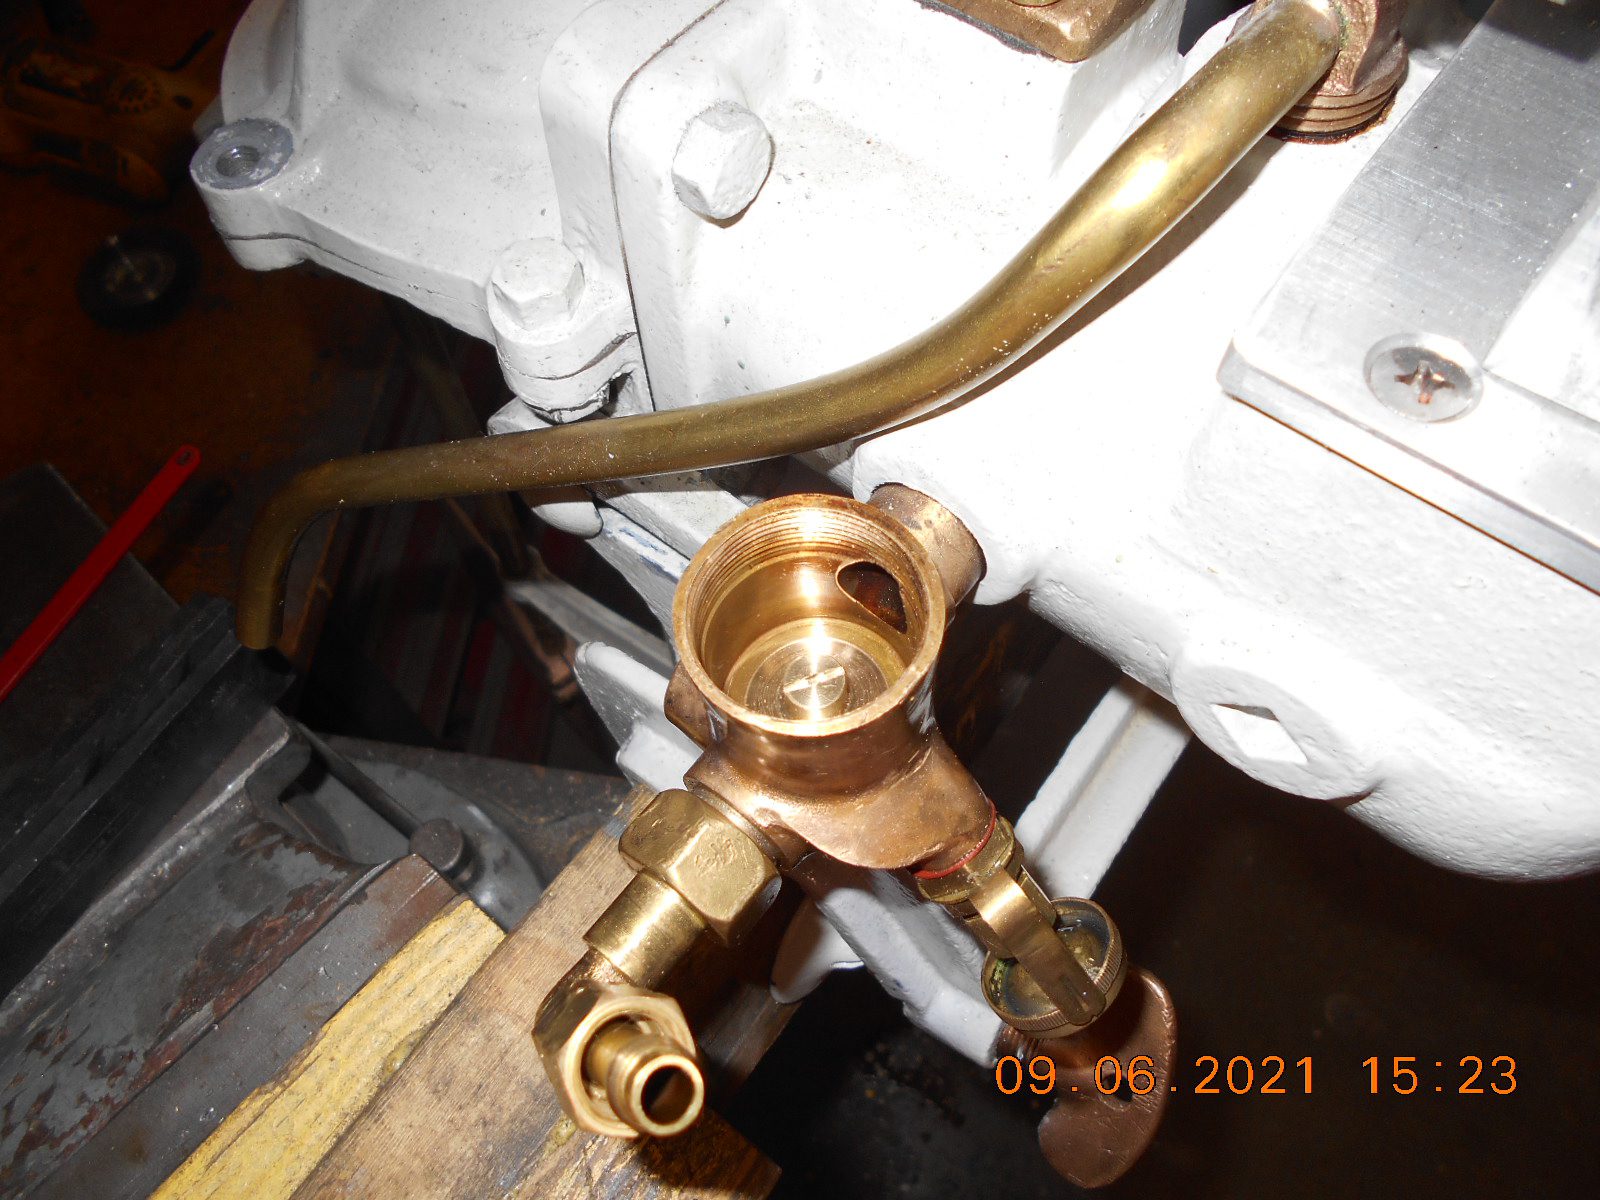
September 6, 2021 at 7:05 pm #246268My guide for drilling and reaming out the poppet valve guide worked okay, as far as I know.
I installed the guide with a drill bit installed that was the largest that would go in the worn
out guide bore, and tightened down the plug on top of the guide, assuring I was in
close alignment and square to the world.
I then successively hand drilled the guide and worn out valve guide with a couple
of drill bits, and reaming out the rest of the way with a .209 reamerI worked a good of the rest of the day on making the new poppet valve…….. not going into business
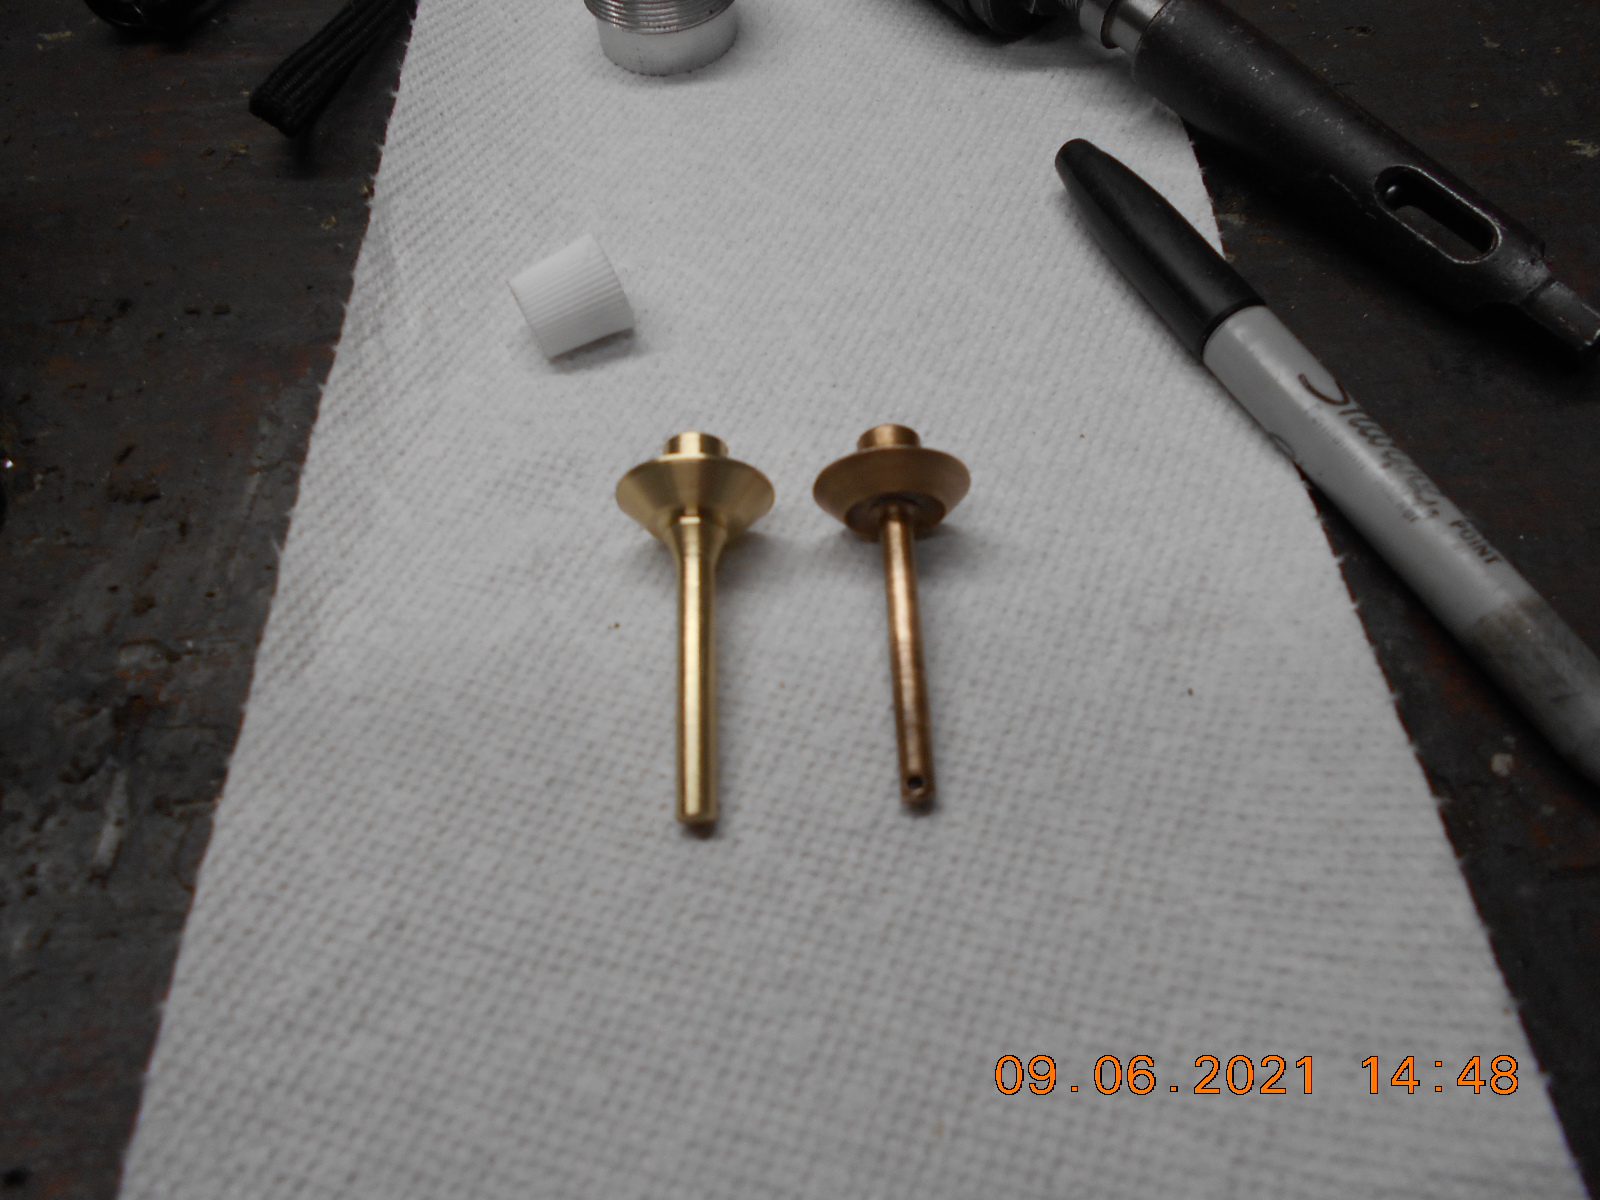
making those…….. I’d have to charge $200 bucks a piece or learn to make one faster!I just have the cotter key hole to drill in the valve stem, and it should be done.
I lapped the valve in, and it looked like the valve was sealing over the fuel
inlet orifice in the middle of the seat.
I also gave it a “blow test”, blowing in the fuel line (with the adjustment needle open!)
with the poppet valve closed, and being I almost passed out, I think it passed.
Prior to the “blow test” I made sure the orifice wasn’t plugged with lapping compound.Don’t know that I’ll get any “garage time” in tomorrow….. other pressing matters….
I hate when that happens.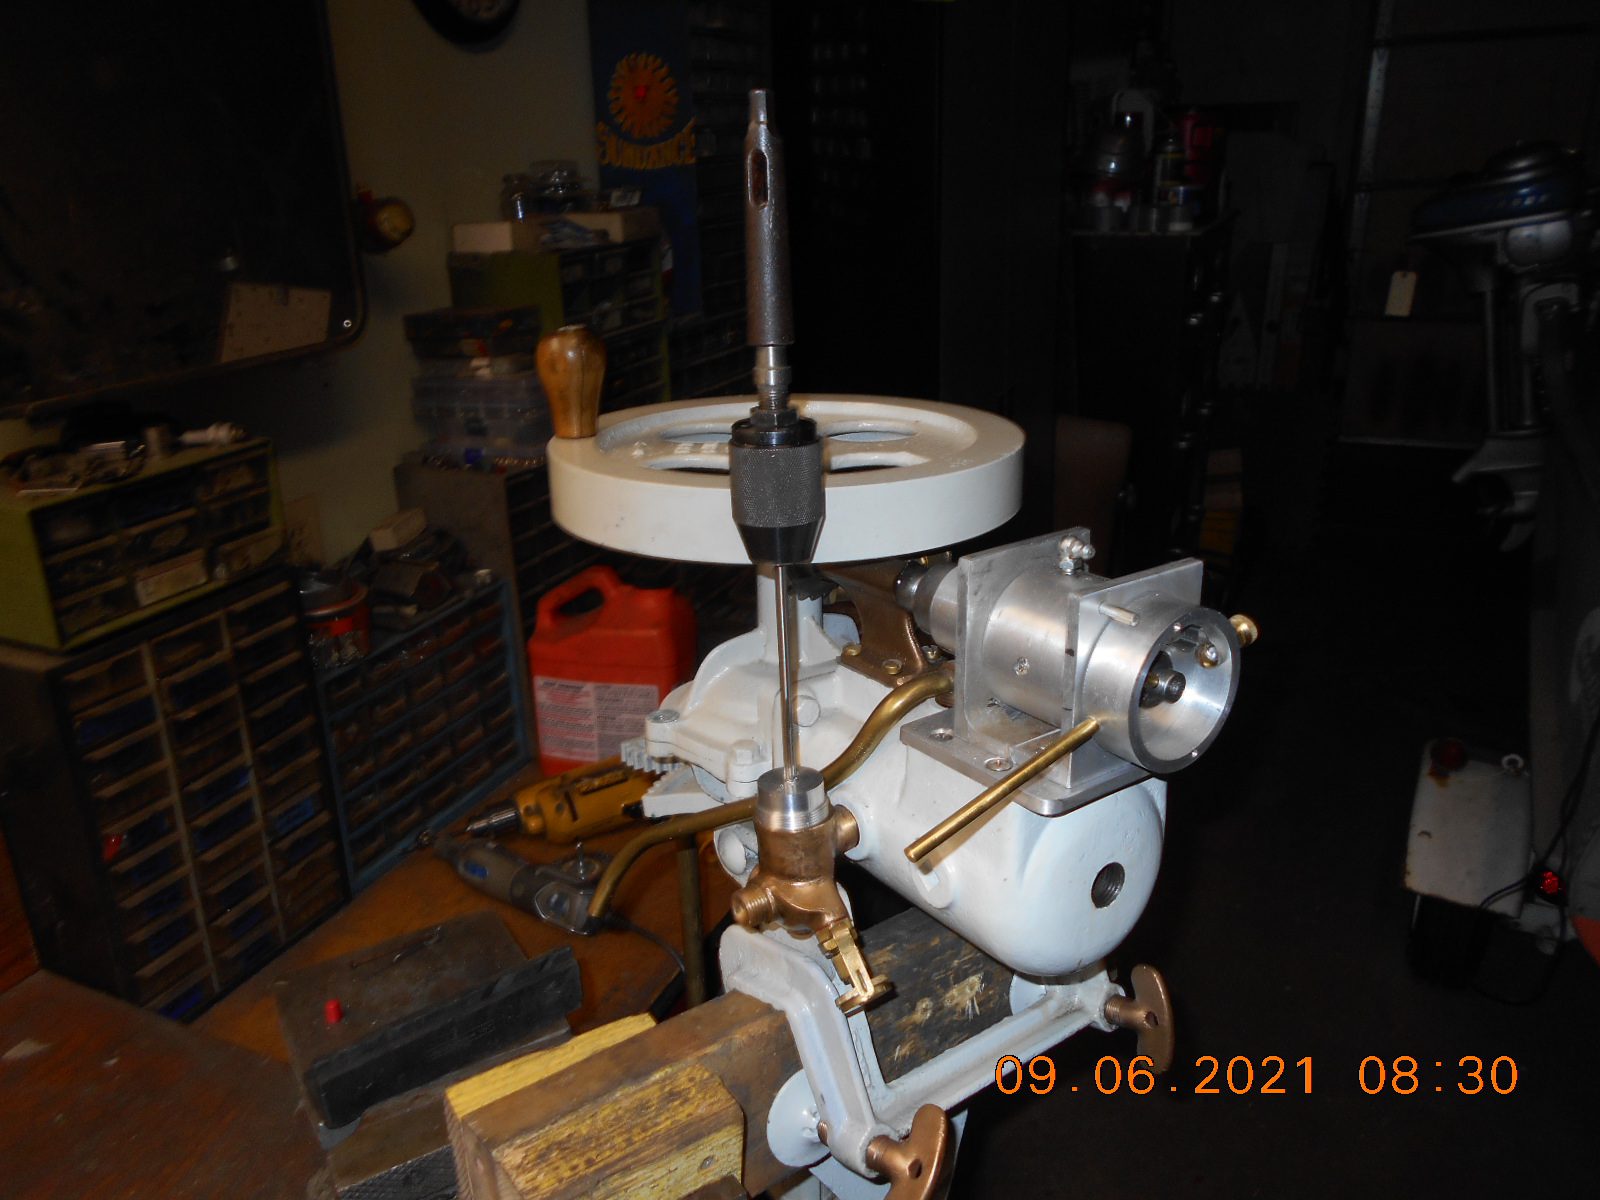
Prepare to be boarded!
September 6, 2021 at 8:44 pm #246276Great piece of work. Hope that helps turning it into a runner.
Bob
1937 Champion D2C Deluxe Lite Twin
1954 Johnson CD-11
1955 Johnson QD-16
1957 Evinrude Fastwin 18
1958 Johnson QD-19
1958 Johnson FD-12
1959 Johnson QD-20“Every 20 minute job is only a broken bolt away from a 3-day project.”
"Every time you remove a broken or seized bolt an angel gets his wings."September 6, 2021 at 9:01 pm #246278
What Bob said. The pictures really add to
your description as you go through each step.
TubsA "Boat House Repair" is one that done without having tools or the skills to do it properly.
September 6, 2021 at 9:48 pm #246280Thanks. Hopefully I can drill that little hole in the valve stem without
incident and perfectly centered. Some days that’s the hardest part
on the job.Prepare to be boarded!
September 7, 2021 at 12:05 am #246282If your new valve is heavier than an original valve, it may cause trouble. If there is a spring that holds the valve down on its seat, like in ruddertwins, it may be a replacement, try leaving the spring out.
September 7, 2021 at 8:53 am #246286If your new valve is heavier than an original valve, it may cause trouble. If there is a spring that holds the valve down on its seat, like in ruddertwins, it may be a replacement, try leaving the spring out.
Harry, thanks for the tip. I had a passing thought the other day about
the weight of the new poppet valve. There’s a digital food scale around
(last used for weighing grout to mix up!) that I could check for kicks.
The spring on the old poppet valve is from an Elto Ace, I used to
replace the non – original, sad looking spring that was in it.One can observe the bottom of the valve stem to see if it “bounces”
when the flywheel is rocked, so when I get it back together, that
will be my first test.Prepare to be boarded!
-
AuthorPosts
- You must be logged in to reply to this topic.